Softaculous is an installation program available to you when you sign up for the InMotion Hosting web hosting service. It allows you to save a lot of time by providing a quick installation process as well as update and backup services. The following tutorial will walk you through the process of using Softaculous to install PrestaShop on to your webserver. Visit our page on PrestaShop hosting for more information.
Setting up PrestaShop With Softaculous
- Login to your cPanel then look for the Softaculous icon in the Software/Services section.
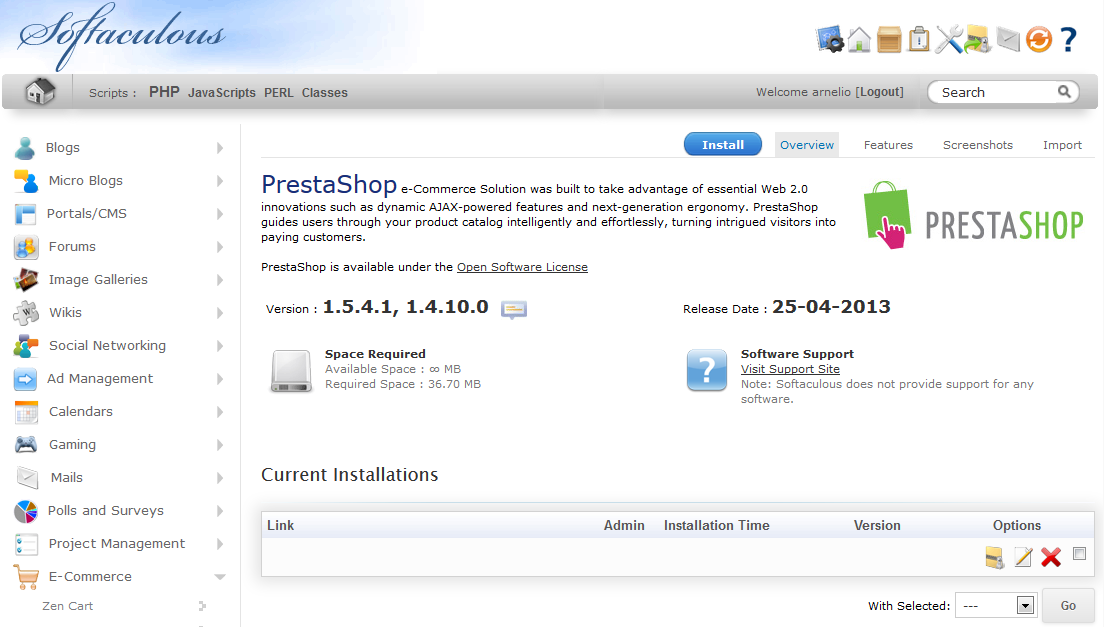
- Click on the Softaculous icon to open it, then select E-commerce in the menu in the left hand side of the screen. When the drop-down list opens for the e-commerce programs scroll down until you find PrestaShop and click on it to select it. You can also click on the icon for PrestaShop that appears in the right hand side of the screen if you see it first.

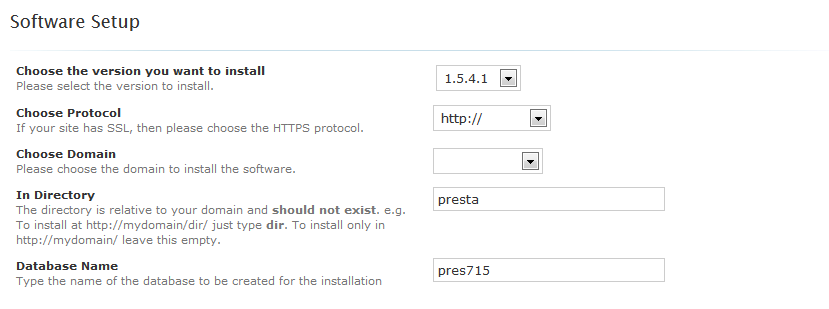
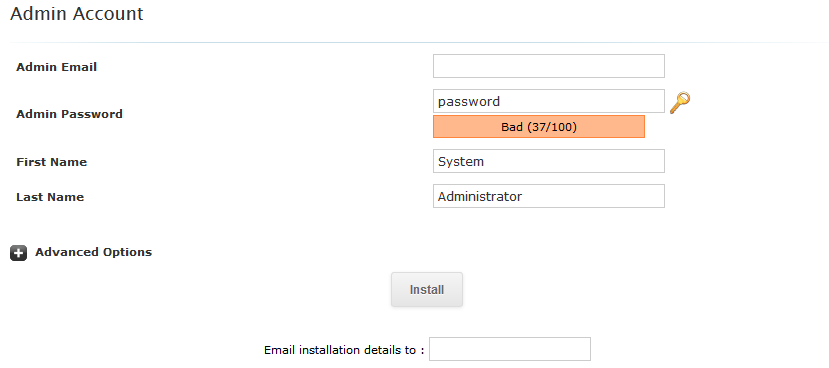
- The next screen that appears is the Install screen. The table below will break up each section and describe the settings in detail:
- After you have finished filling all of the fields, click on the INSTALL button at the bottom of the screen.
This will complete the installation process. You will see a Softaculous-generated screen similar to the following after the install has finished.
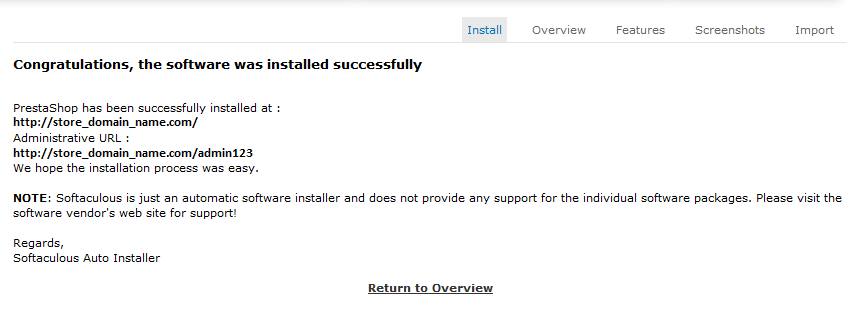
The links given in this final screen will go to the PrestaShop storefront and to the administrator dashboard as per the settings that you selected in the install process.
The next step is to log into the PrestaShop 1.5 dashboard.



Hi, how set PrestaShop (1.7.6.2) from localhost (XAMPP) to our serwer InMotionHosting? How do I check the database address? I don’t see in panels. I set on app/config/parameters.php but i dont know what is host, port, database, login and password. Thx for answer.
Thanks for the question, Michal. If you set up a PrestaShop installation on your personal computer using XAMPP, you’re going to need to upload the files to the InMotion server.
It may be easier to just install PrestaShop on your account using Softaculous, then upload a ‘backup’ you made from the local-hosted version. This way you won’t have to manually configure different parts of the database.
If that does not work, you will need to upload the files directly via FTP. We recommend that you use the FileZilla client. Please note that if you do this, you may have to adjust the configuration files for PrestaShop to get the database connected! Reach out to our live 24/7 Technical Support team if you run into any trouble. They can assist you with any issues in the scope of our support and let you know if the situation will require you reaching out to our Managed Hosting team.
Where do i find permanet links in prestashop 1.6.1.1?
Where do i find permanetlinks in prestashop 1.6.1.1? Because i would like to edit the Sign in menu link to make it change to Sign in/Register as many people get confused about where to create an account from on my website
Your help will be highly appreciated
Thank you
Ronnie
I installed Prestashop on my server (hosted on HostPapa) using Softaculous. I can access the ‘Back end’ (admin) but I can’t access the store. The message that appears is: ERR_TOO_MANY_REDIRECTS.
Hello Marcia,
Thank you for contacting us. I recommend trounleshooting your .htaccess file, since it handles redirects.
Also, check any other redirects that you may have setup.
Thank you,
John-Paul
Hello Ronnie,
Thank you for contacting us. I found a post in the official PrestaShop forums, where they discuss how to change the Sign in text in the top header menu.
Thank you,
John-Paul
We want to switch over from OpenCart to PrestaShop. What is the best method to make the switch without having my site down for hours/days?
Hello CJ Maxey.
There are several factors that you need to consider when you say that you are transferring from one type of software-based site to another with minimal downtime. Are you using the same domain name? Would you be using the same hosting? If you’re using the same domain name and you’re keeping all of the files in one place, then you need to think about what information you need to transfer. Do you need to import any data from the old store to the new? The installation is actually very quick, but then you would need to determine how you want the store to look. Here’s a quick list:
Those would be my main concerns in switching from one software to the other. I hope this helps to answer your question in regards to the transfer- there not really a method. Please let us know if you require any further assistance.
Regards,
Arnel C.
Do you have spanish support?
Regards,
Hello Deegital,
No, we do not have Spanish support, we only provide English support at this time.
Kindest Regards,
Scott M
Hi.
I just found out that Prestashop was installed already during my in motion hosting account set up.
The trouble is that, i went to the admin to access my prestashop dashboard and it requires logging, i have used my email and password but prestashop does not recognised it.
I would like to know which password in motion hosting used to set up the installation?
Hello,
When PrestaShop is automatically setup, it uses your hosting account’s primary email address and sets a random password. You will simply need to use the reset password link on the login page. (The link leads to the 1.5 instructions, but they are the same for 1.6)
Kindest Regards,
Scott M
Hi there,
“Note that you can select version 1.5.4.1 or 1.4 of PrestaShop.”
Does this means i can’t use my prestashop 1.6 theme with your hosting?
Regards,
Hello, T. Pereira,
No, it means that the article you’re viewing is old. You can find the updated article by going to Installing PrestaShop 1.6.
Regards,
Arnel C.
I am using prestashop 1.6.0.6 I am using loopia.se is as host, the site is not fast
please vist my webshop www.hbgteknik.se
I am looking for better service, if I move my website to yours server, will the site be faster?
best regards
Wisam Mustafa
Hello Wisam,
That question is very ambiguous as we do not know the details of your server and site. You will first want to ensure your site is optimized and running the bast it can on its current server.
You can also use online tools such as GTMetrix.com to give further advice. Once you have that done, if the server is still slow, it is possible a move would increase your speed.
Kindest Regards,
Scott M