One of the primary tasks you will face when managing your dedicated server is creating and managing accounts. WHM (Web Host Manager) creates cPanel accounts based on a primary domain. Each cPanel account can be configured after the completion of the setup using the Modify an Account option within the cPanel. The following tutorial displays the sections that you can use to configure each cPanel account.
How to Configure a cPanel Account
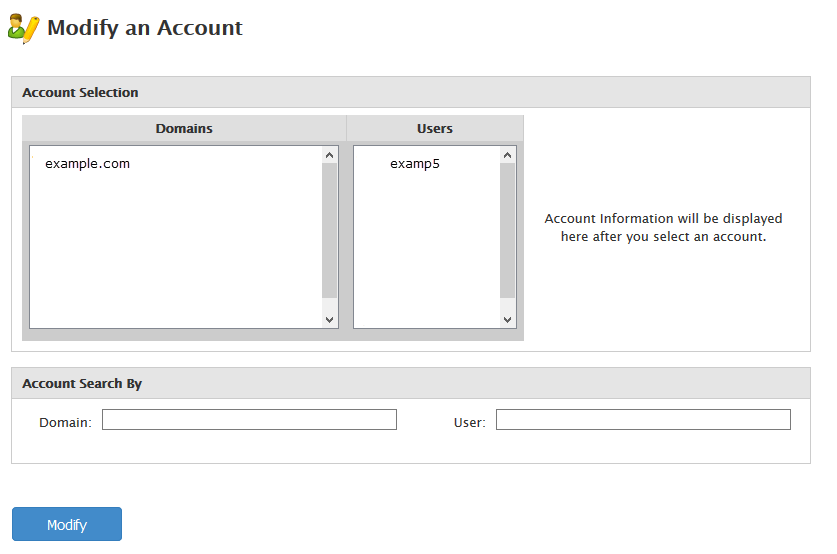
The configuration of an account can occur during the initial creation of the account or after it has been created. In order to create a new cPanel account, you start with Create New Account. You can also change the settings used by going into the Modify an Account section. These instructions are based on modifying an account.
- Login to WHM.
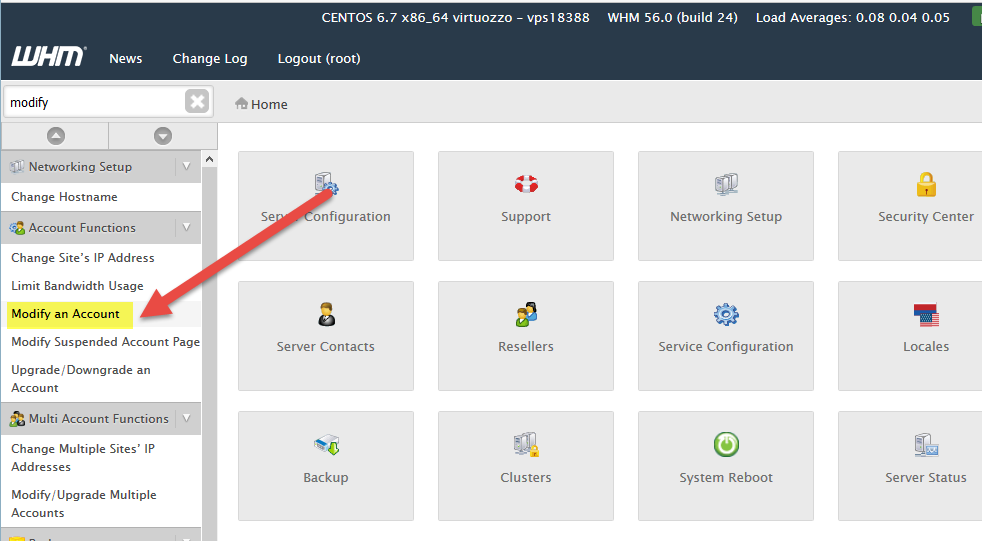
- In the search bar in the top left corner of WHM, type in “Modify an Account.” Click on the menu item when it appears in order to launch it.

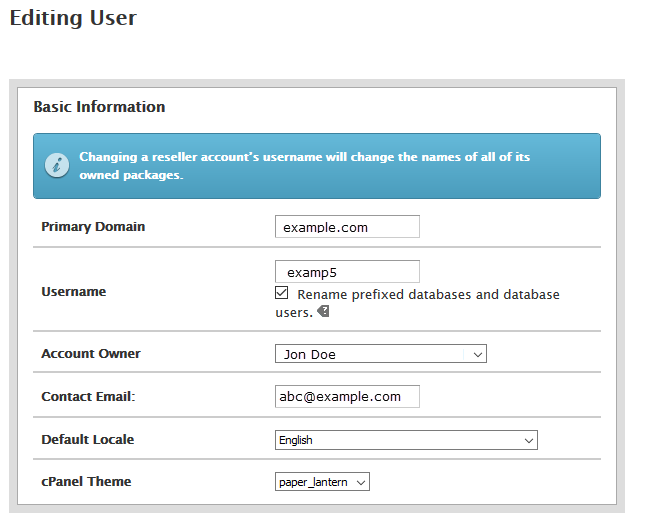
The first section is titled Basic Information. Each section will be listed in a table below and a graphic will show how it appears within WHM. Click on an item in order to modify it.

Primary domain Primary domain used to create the cPanel account Username Username assigned to the cPanel account Account Owner Name of the Account Owner Contact Email Contact email for the account owner Default Locale Determines the language used in cPanel cPanel Theme Theme for the cPanel appearance 
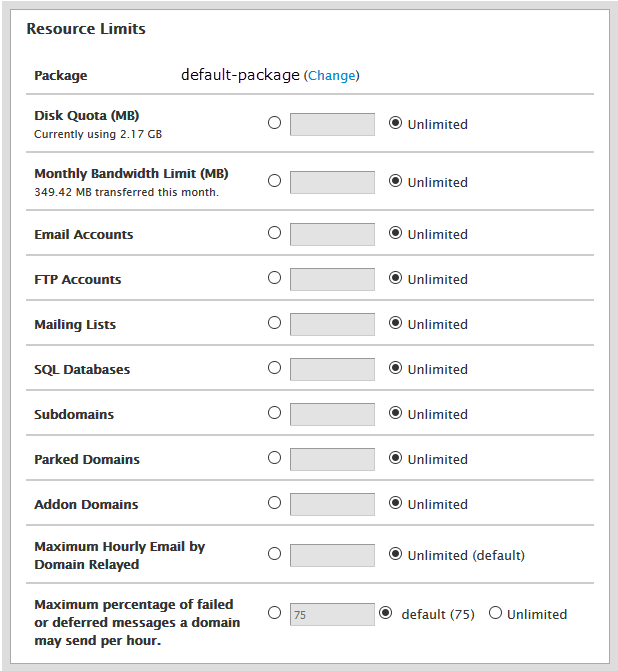
After the Basic Information, you will see Resource Limits
Package Name of the package used to create the cPanel account Disk Quota (MB) Hard drive quota assigned to the account Monthly Bandwidth Limit (MB) Bandwidth limit (by month) assigned to the account Email Accounts Maximum number of email accounts FTP Accounts Maximum number of FTP accounts Mailing Lists Maximum number of mailing lists SQL Databases Maximum number of databases Subdomains Maximum number of Subdomains Parked Domains Maximum number of Parked domains Addon domains Maximum number of Addon domains Maximum Hourly Email by Domain Relayed Maximum number emails relayed per hour Maximum percentage of failed or deferred messages A domain may send per hour Maximum number of failed email message The next section is called Privileges
Reseller Privileges Allows Reseller privileges CGI Privileges Allows CGI privileges Shell Access Allows Shell access 
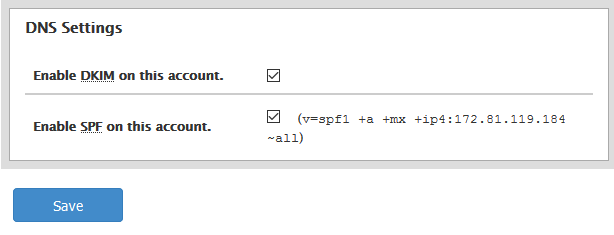
The last section allows you to modify the DNS settings for email. You can set the DKIM and SPF settings to combat spam.
Enable DKIM on this account Allows you to enable DKIM settings for email accounts Enable SPF on this account Allows you to enable SPF settings for email accounts - One you have finished modifying these settings, click on the blue Save button at the bottom of the page in order to save any change.
How to Manbage Bandwidth Limits
This completes the tutorial for configuring a cPanel account using the Modify an Account option within WHM. For more information on account creation, make sure to review Create cPanel Accounts in WHM.

