After purchasing and configuring email with Platform i, you will gain access to the email management tool powered by cPanel. From there you can check/send email and perform other email-related tasks such as setting up forwarders, autoresponders, or spam filters. In this guide, we’ll show you how to use the email service with Platform i.
- Accessing the cPanel Email Management Tool
- Change Email Account Usage Limit
- Check/Fix Email DNS Status
Accessing the cPanel Email Management Tool
- Login to Platform i.
- Click the Emails link in the main menu.
- You will then see your email subscriptions listed, click the Manage Email Accounts button.

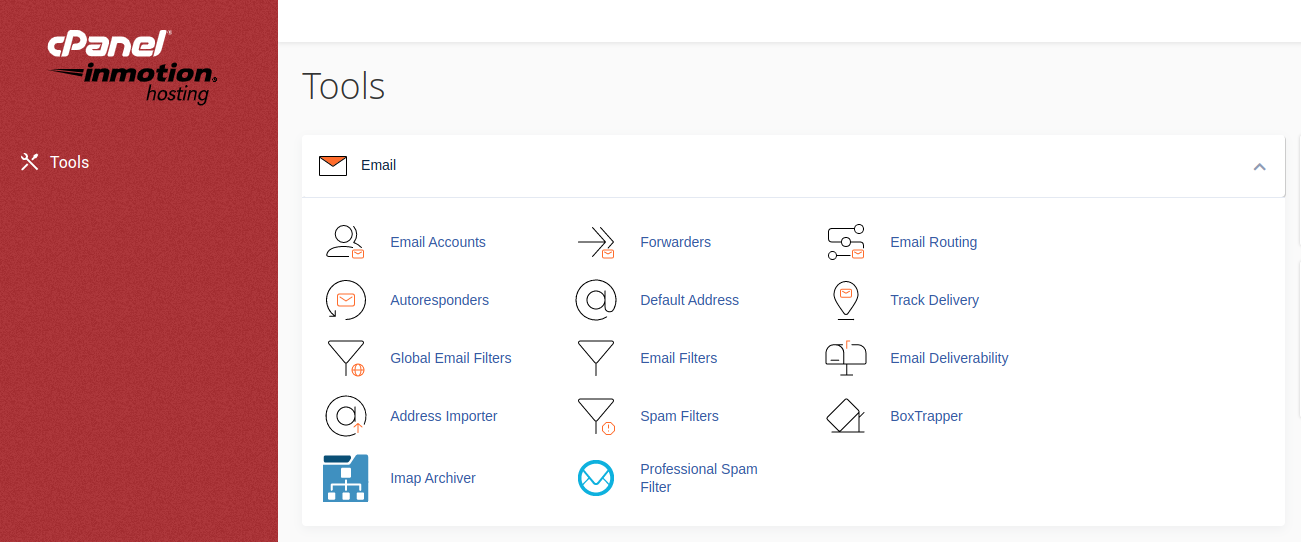
You will then be redirected to the email management tool powered by cPanel.
Now that you know how to access the cPanel email management tool, you can view your email settings and setup a client such as Outlook, Mac Mail, Windows Live Mail, or Thunderbird.
Check/Send Email With Webmail
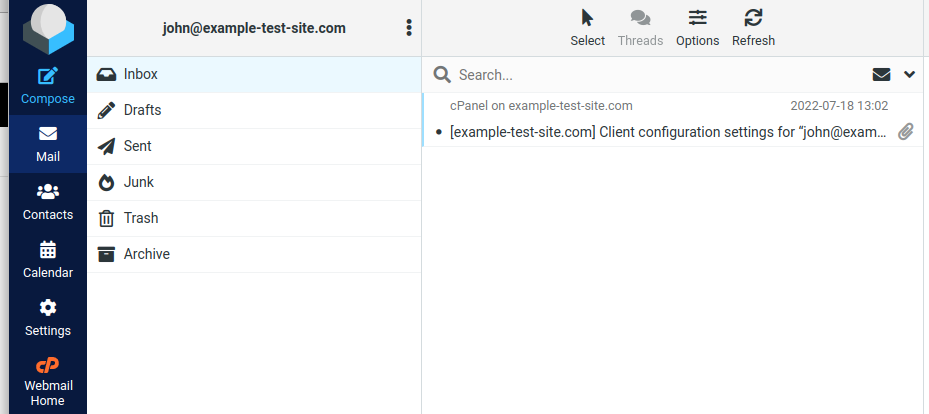
An easy way to check or send email is to use the Webmail option. Since it is browser-based you can access it from any browser without having to setup any apps.
- Access the Email Management Tool.
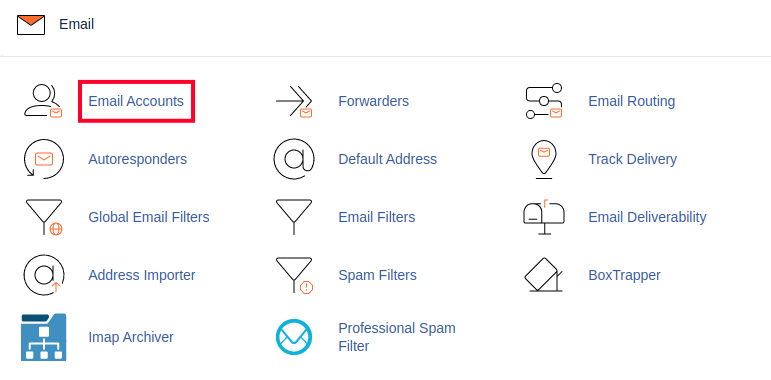
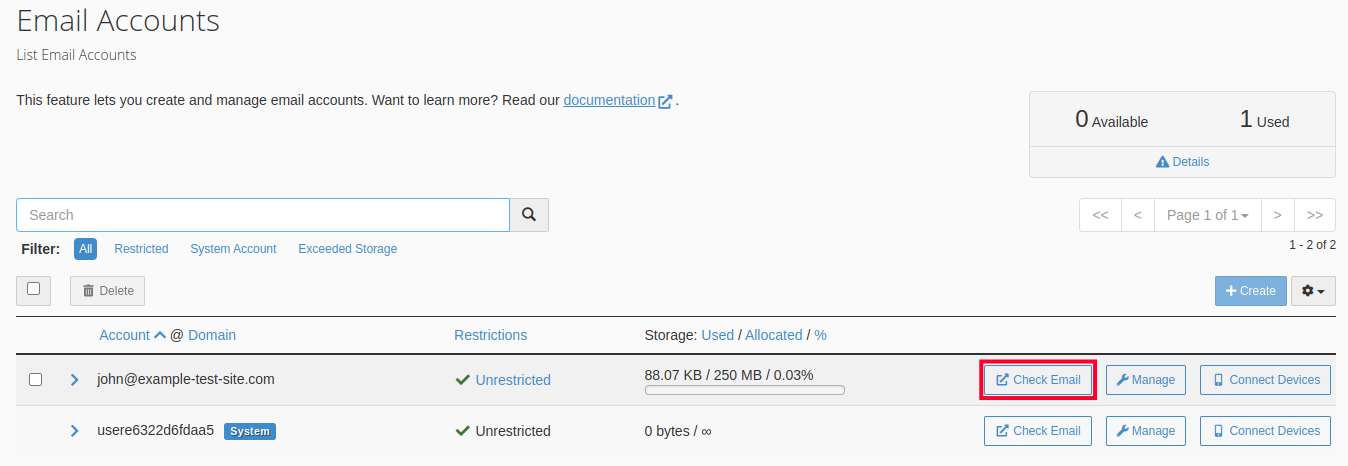
- Click the Email Accounts link in the Email section. You will then see all of your email accounts listed.

- Click the Check Email button next to the one you want to access.

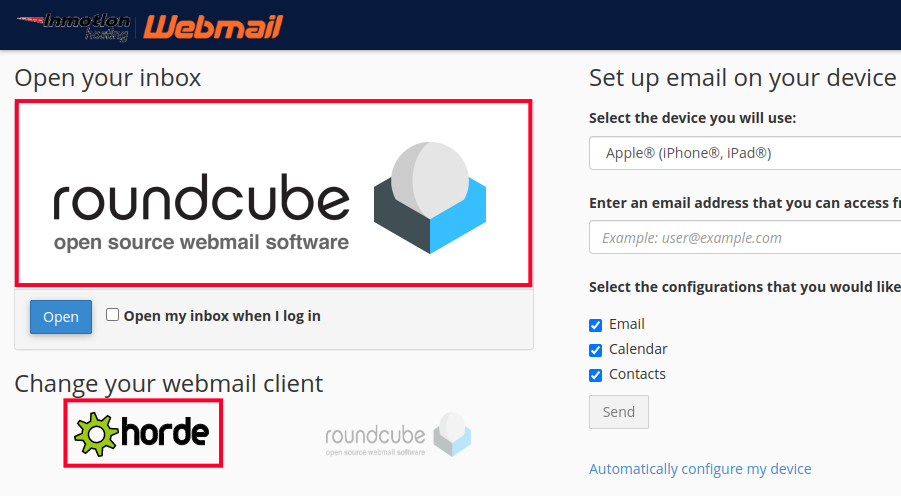
- You can then click the webmail app you want to use for email, options are roundcube and horde.

You will then be able to view your Inbox, or Compose a new message to send.
Change Email Account Usage Limit
If you need to create more email accounts you can increase the limit at any time with the following steps.
- Click the Emails link in the main menu of Platform i.
- You will then see your email subscriptions listed, click change limit under the one you want to add an account to.

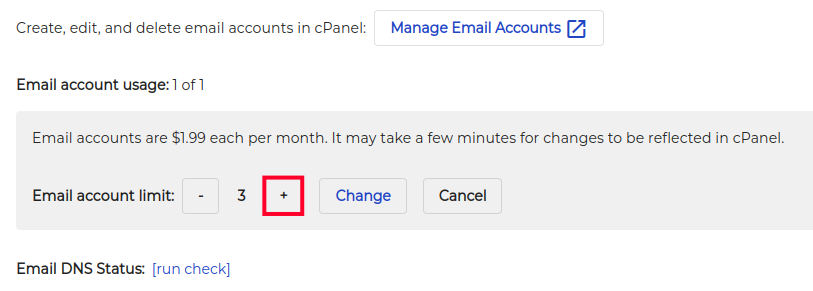
- Click the plus + button to increase the limit to the amount you need.

- Click the Change button. You are finished when you see a “Success!” message.
- You can now create the new email accounts as needed.
Check/Fix Email DNS Status
This tool ensures your DNS is setup in a way that increases the chances of your outgoing email being delivered successfully to recipient inboxes.
- Click the Emails link in the main menu of Platform i.
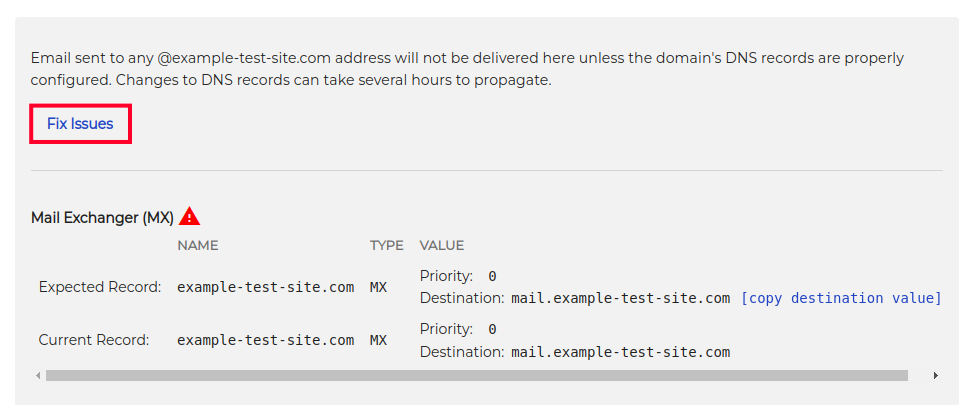
- You will then see your email subscriptions listed. Next to the Email DNS Status option click the run check link.

- You will then see the results of your DNS Status check and any issues will be listed. Click the Fix Issues button to repair any problems.

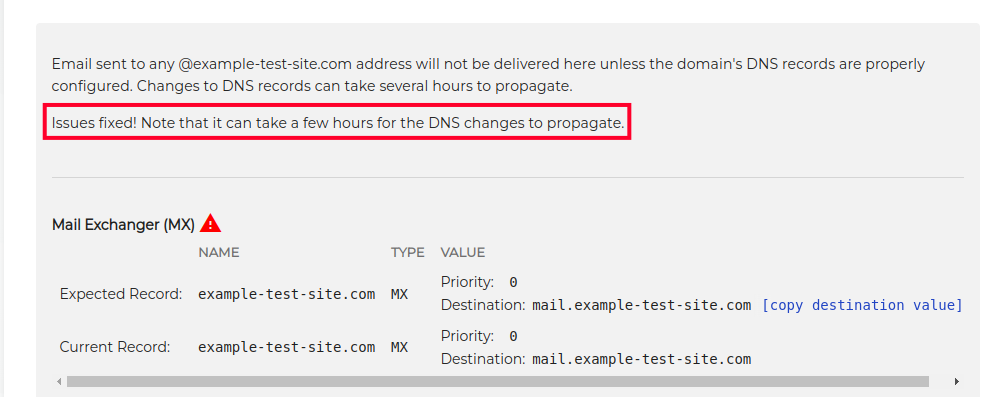
You are finished when you see a message stating “Issues fixed! Note that it can take a few hours for the DNS changes to propagate.“
Congratulations, now you know how to use email with Platform i! Check out our Platform i section for more helpful tutorials.

