In this guide, we’ll show you how to create a new project with Platform InMotion. A project is where you can manage a live or staged instance of a WordPress website. Platform InMotion makes it easy to manage and develop multiple sites in separate projects.
You can build a site and do not have to pay for hosting until your clients are ready to go live. Save time and money by testing and building separate instances in staging environments without disturbing your live sites.
Some of the other benefits of creating a project with Platform InMotion are the ability to perform free backups of your projects using the Total Upkeep plugin and create “Snaps” that include a group of pre-built plugins that you can quickly implement on any project site. You can also save time by moving a copy of existing sites to InMotion’s Managed WordPress platform in minutes and deploying updates right from Platform InMotion without having to login to the WordPress Dashboard.
Create a New WordPress Project
- Login to Platform InMotion.
- Click the +New Project button.
- Select a Team or person to own the project then click the Create Project button.
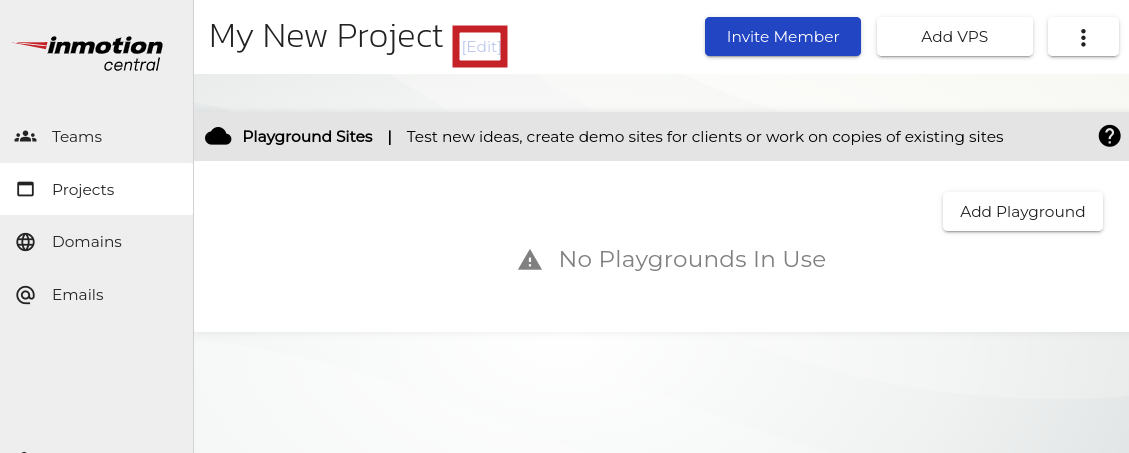
- Once you’ve created your project, you’ll be brought to the project’s main screen. Here, you can name your project by clicking the Edit button next to the name.

Adding a VPS Server to a Project
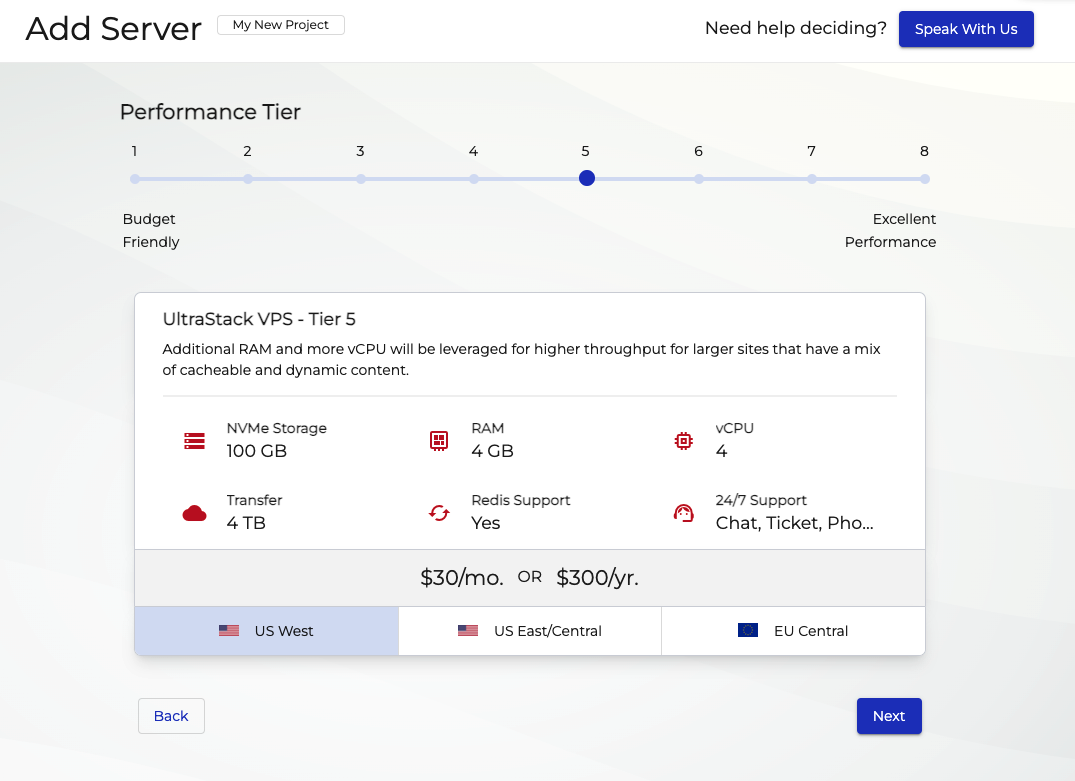
- Click the + Add Server button.
- Choose your server’s performance tier, and choose a datacenter location

- Click Next, then input your payment information and choose between a monthly or annual subscription.
- Click Submit Order, and your VPS will begin provisioning. This process takes a few minutes, but you can leave the page safely.
- Click on Get Started to begin using your new VPS. Learn more about getting started with your Platform i VPS.
Add a Playground to your Project
A Playground is a WordPress site you can use to try out new plugins or themes, or test new functionality for your website. Click + New Playground to create a new site. Learn more about getting started with a Playground site.
Congratulations, now you know how to create a project with Platform InMotion! You can now begin building and managing multiple websites from a single location.