When you want a user to add the date or time to your form then you will need to use the date/time field. The date and time can provide the information needed for a past event, or help to set the deadline for an upcoming event. You can also use it to mark your present time.
This article will walk you through adding the date/time field and its options when creating a form with weForms. We will also provide examples to show how the field can appear in a form.
Using the Date/Time Field
In order to add the date/time field in weForms you will need to be logged in to the WordPress Administrator dashboard. You can be working with a blank new form or editing an existing form.
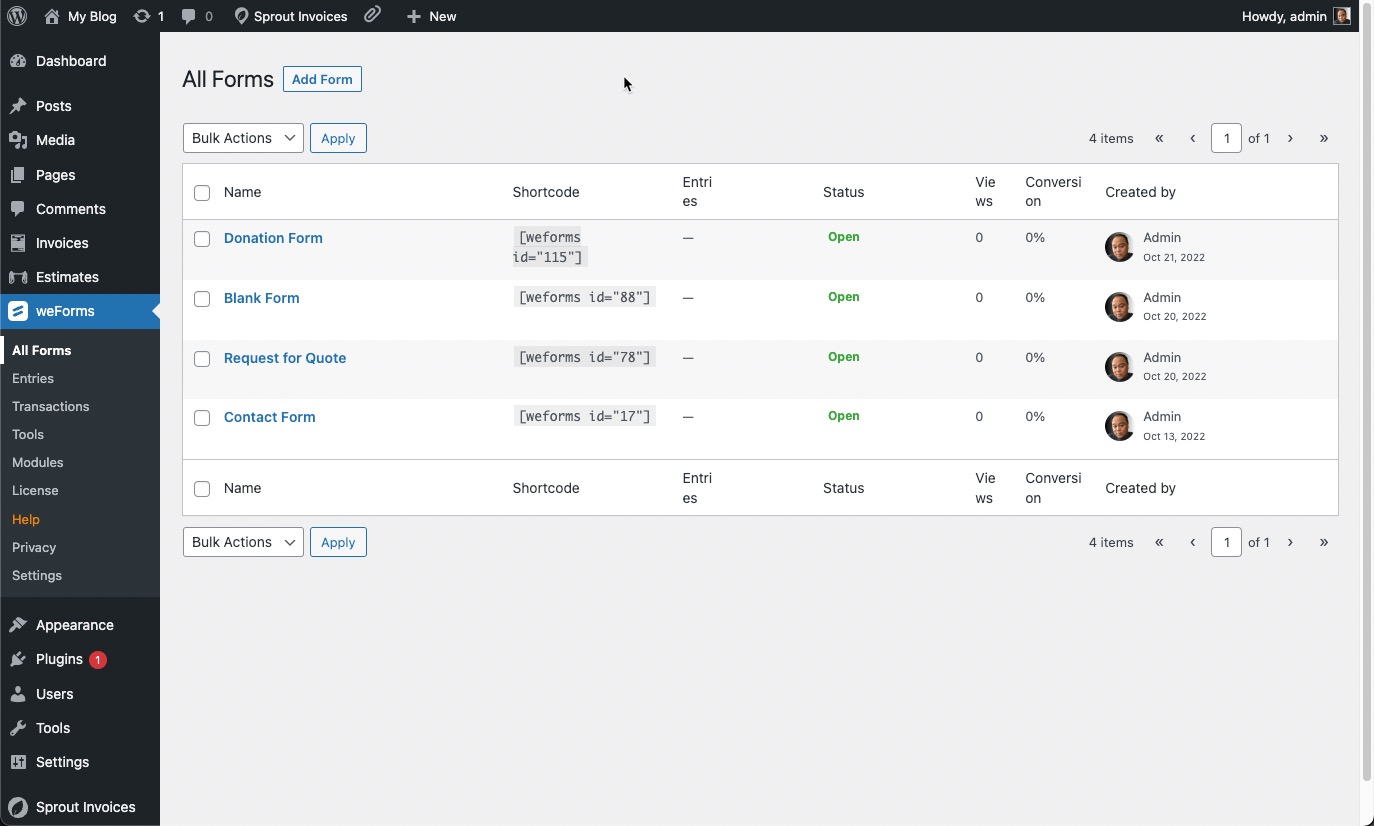
- In the WordPress Dashboard, click on weForms, then click on All Forms.
- This will bring up a table showing the existing forms that have been created within your WordPress installation. If you just loaded the weForms plugin, then you may only see the Contact Form that comes with the installation. Click on Add Form, or select an existing form to edit.

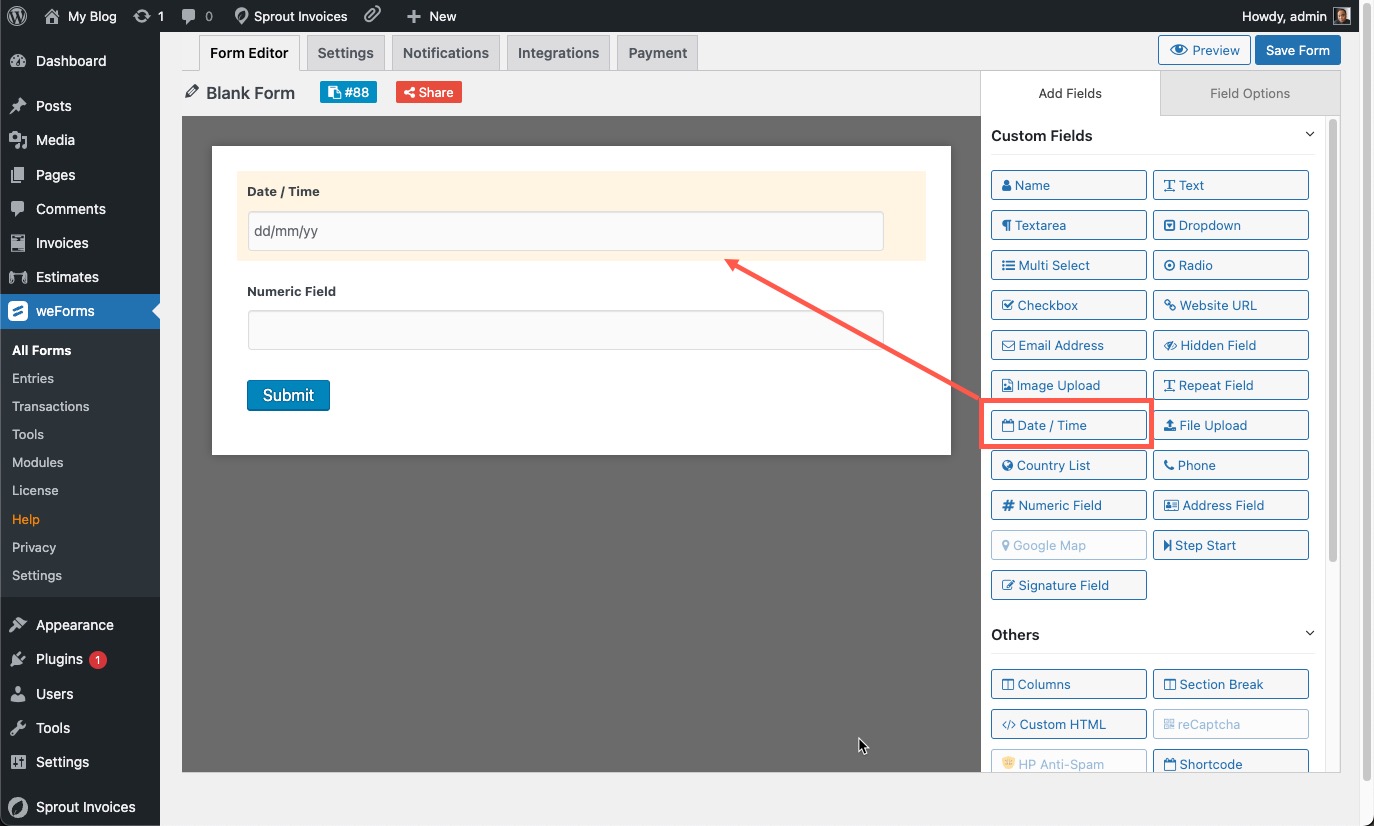
- When you have the form open, you can click on the Custom Fields in the right column to add a field to the form. Look through the fields and find the Date/Time field. Click on it to add it to the form.

- When you add the field, it will be added to the bottom of the fields that exist on the form already. However, you can immediately move the field using your mouse to move the field where you want it to be. Left-click on the field with your mouse to select it. You will see a black toolbar appear.

- The black toolbar has 4 icons that allow you to do the following (from left to right): Move the field, Edit the field options, Duplicate the field or Delete the field. Click on the pencil icon in order to edit the field options.

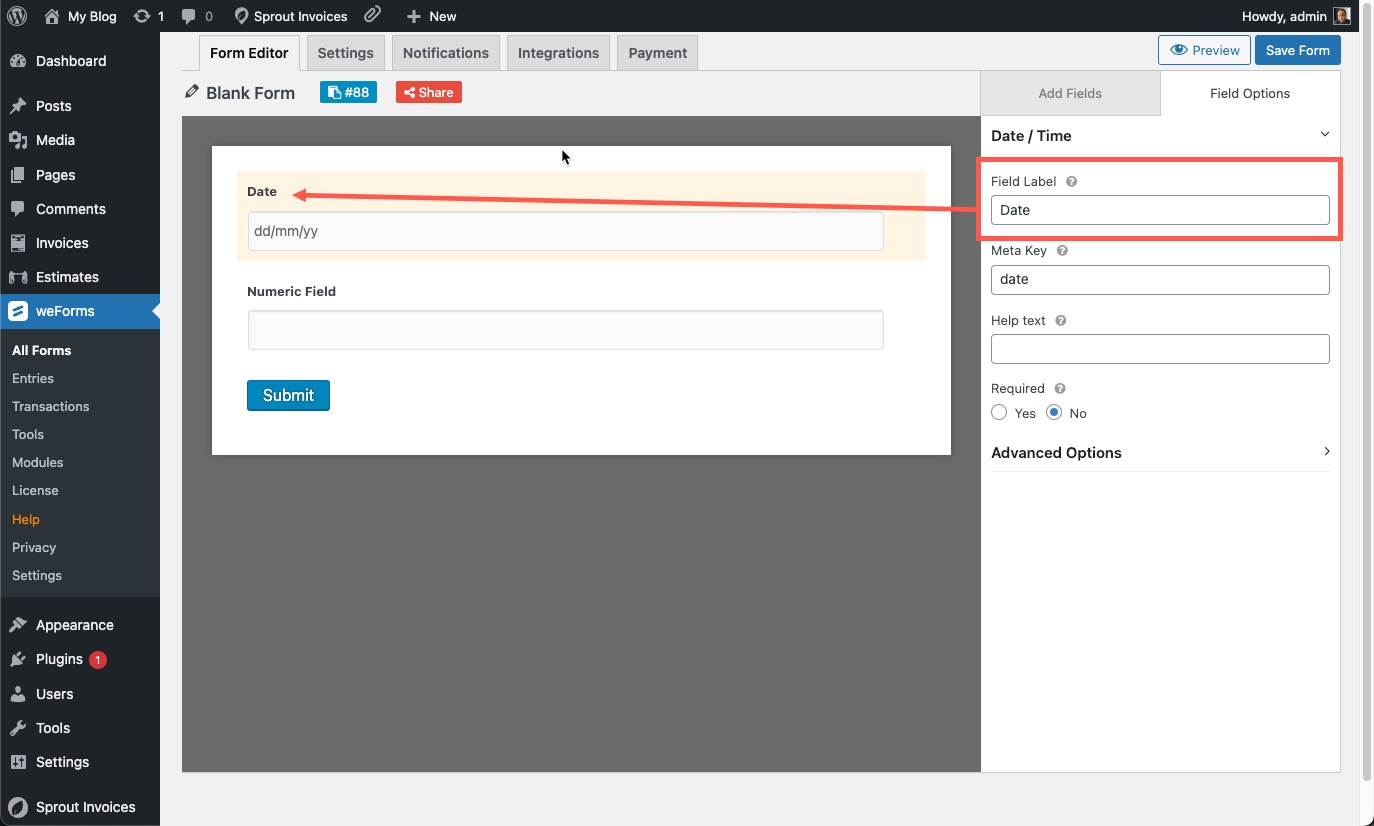
- The field options will appear on the right side of the screen. Click on the Field Label and type in “Date” to replace “Date/Time.” You will see the change occur on the form and in the field options.

- When you’re done making changes to the Field Options, you can click on Save Form in the top right corner in order to save your form.
This is a list of all the Field options and Advanced options that apply to the Date/Time Field:
- Field Label – label used to name the field in the form
- Meta key – name of the meta key that this field stores to
- Help text – text that appears under the field to provide information or instruction
- Required – (Yes/No) – requires that you provide input for the field (you can’t skip it)
Advanced Options
The advanced options section may be collapsed by default. In order to see the options, click on the arrow (>) to the right of the options label.
- Field Size – changes the appearance of the field so that it is small, medium, or large
- CSS Class Name – container class name for this field. They include: wpuf-col-half, wpuf-col-half-last, wpuf-col-one-third, wpuf-col-one-third-last
- Dynamic value population (Allow field to be populated dynamically) – allows the field value or options to be populated dynamically through a filter hook or query string. (Please see How to Use Dynamic Value for specific details)
- Date Format – this determines the format of the date within the field.
The default format is: dd/mm/yy
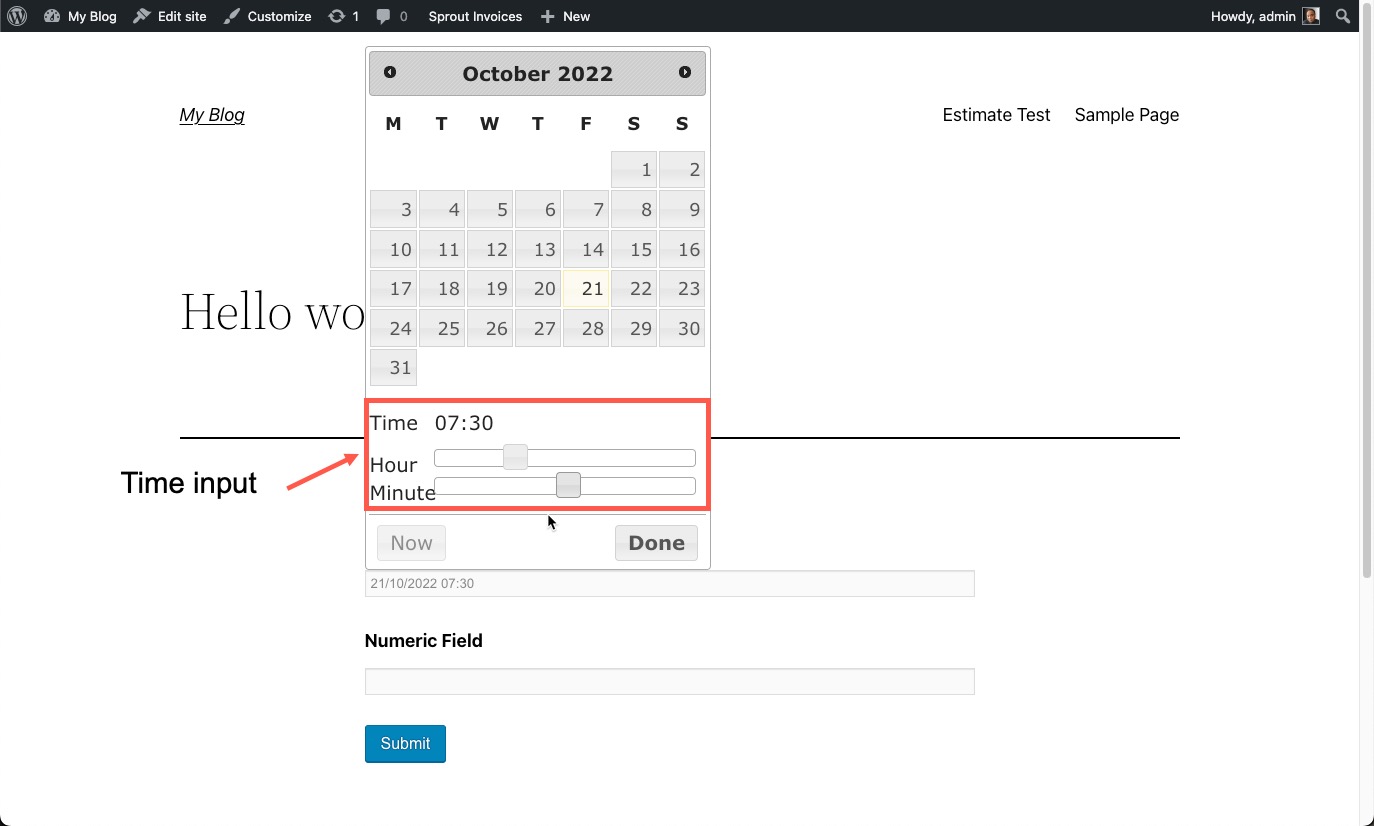
You can change this format by simply clicking into the field and re-arranging the letters representing the date (d = day, m= month, y = year). For example, the date could be: mm/dd/yyyy - Enable time input – enables time input into the date/time field. When this option is enabled, you can see the time input options under the calendar

- Set this as publish time input – allows the publishing input time to be set with this option
- Toggle Keyboard input for Date (Force Datepicker Input) – allows you to select if the user can add the date through a keyboard or using the date picker interface. The date picker interface appears in the screenshot above.
- Conditional Logic – allows you to make a query (with conditions) that provides the viewer with a selection. For more detail, please see How to Use Conditional Logic
Examples of Using the Date/Time Field
The date/time field can be used in many ways within weForms. These two examples show how it is set in the form editor and how it appears during the preview.


You can also request that the user add the time so that you can provide priority for requests. In this case, the form is a request for a quote.


Using the date/time field in weForms is a commonly used field to help provide important information. For example, it allows you to get date/time information that you can use for determining deadlines, remembering birthdays, setting priorities, etc. weForms makes it possible quickly add the field to its forms while providing the flexibility to add custom formatting through CSS or changing the way in which the date/time info is added.
