Providing timely notifications for business invoices helps the business owner and the customer. One of the quickest ways to send notifications is to use a message. Twilio is an add-on for Sprout Invoices that allows you to send an SMS notification message to your clients.
This article will walk you through the necessary steps to get Twilio working with Sprout Invoices.
- What do you need to use Twilio?
- Setting Up Sprout Invoices to Use Twilio
- Sending SMS Notifications in Sprout Invoices
What do you need to use Twilio?
If you have the latest version of Sprout Invoices loaded, then you’re halfway there as there is no plugin to load. The other requirement is that you have a Twilio account set up.
Here are the steps to setting up your Twilio account:
- Go to https://twilio.com and click on the Sign up button in the top right corner.
- You will need to provide a first name, last name, and password.
- Submit your information and your free trial account will be created. You will then be prompted to verify your email.
- Upon verifying your email, you will be prompted to verify a phone number. Verification is done by sending an SMS message to the phone number.
While you are on a trial account, you will only be able to send messages to verified phone numbers. - Once you have verified the phone number the console page for Twilio will open.

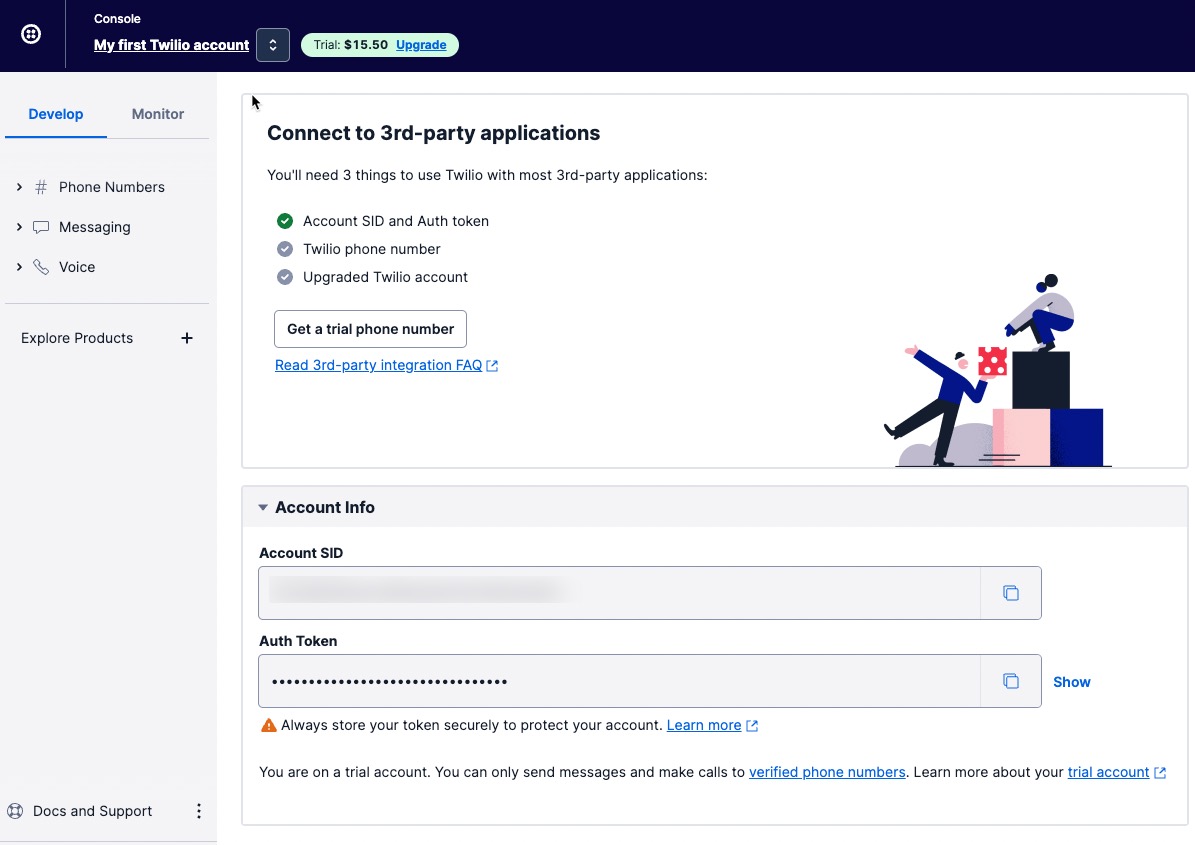
You will need three things from this page in order to use Twilio with Sprout Invoices: a Twilio phone number, Account SID, and Auth Token.
If you are still experimenting with Twilio you can simply click on Get a trial phone number.
If you are ready to move forward with the application and use it with Sprout Invoices, then you will need to upgrade your account. Click on the Upgrade link at the top of the screen to update your account. Provide the necessary information and then make sure that you have a Twilio phone number set up.
Leave this page open so that you can copy the phone number and its credentials into Sprout Invoices.
Setting Up Sprout Invoices to Use Twilio
In a separate tab, open up WordPress and log in to the dashboard as an Administrator.
- In the main menu in the WordPress Dashboard, click on Sprout Invoices.
- This should open its submenus. Scroll down until you see Add-ons and click on them.
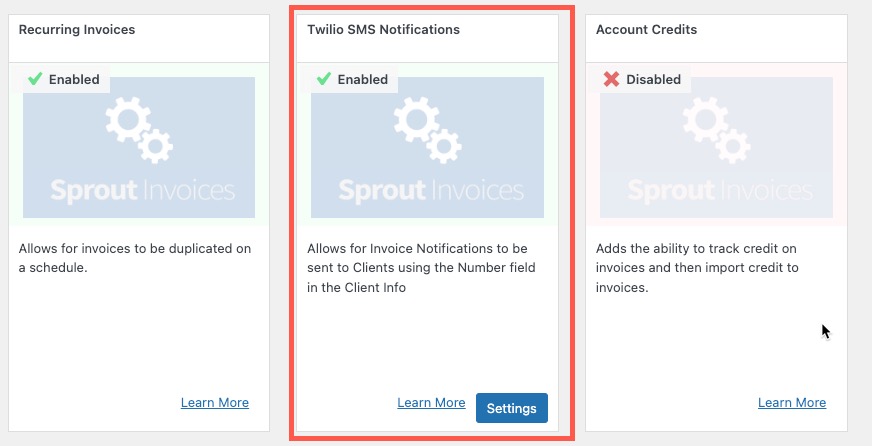
- The first item highlighted will be Managed Bundled Add-ons. Scroll down until you find the one labeled Twilio SMS Notifications. Click on the red X to enable it.

- After it has been enabled, you should see the Setting button appear in the bottom right-hand corner. If you do not see a Settings button appear, log out and then log back into WordPress and you should see it.
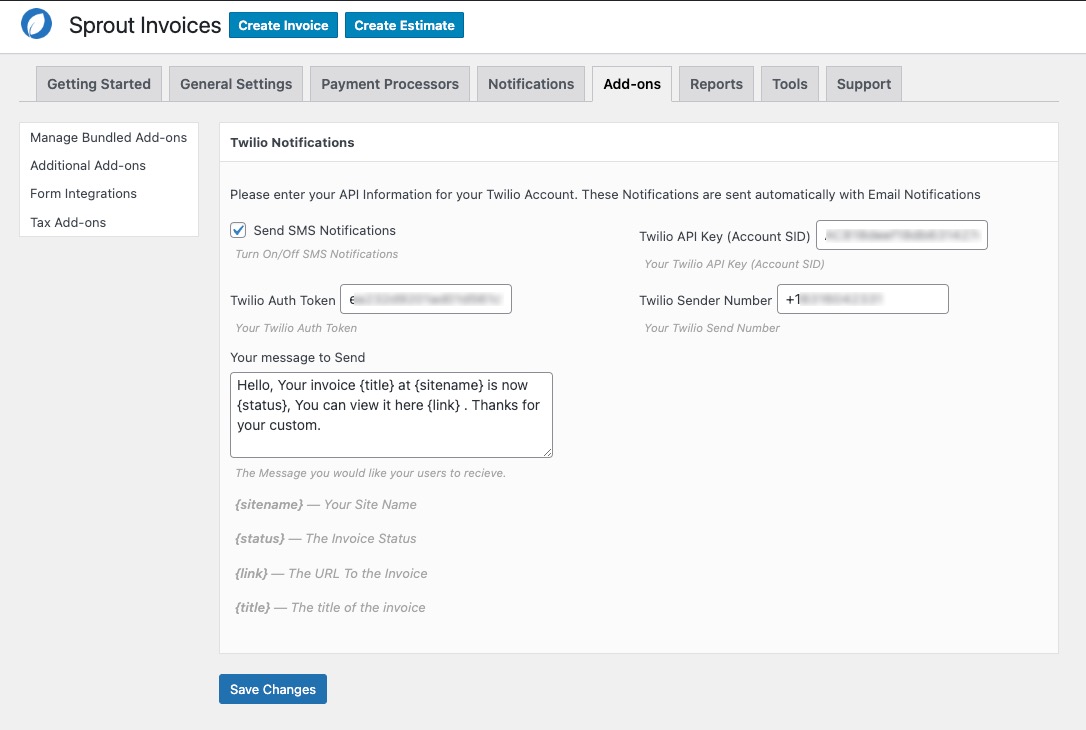
- Click on the Settings button and you will be taken to the Twilio Notifications window. This is when you will need your Twilio phone number, account SID, and the Auth token.
- Click on the check box labeled Send SMS Notifications. This will turn on notifications for Sprout.
- Next, copy the Auth Token, the Account SID, and the Twilio phone number (Twilio Sender Number) then paste them into their respective fields.

- You can then modify your SMS message or you can leave it to the default message. Click on Save Changes in order to save your entries.
Sending SMS Notifications in Sprout Invoices
Now that you have Twilio and Sprout configured, your last step is to use the option to send a notification to your customer. In order to do that, you will need to make sure that all of the following have been saved in Sprout Invoices:
- An invoice must have been created in Sprout Invoices.
- The invoice must be assigned to a client.
- The client information must include a phone number that can receive SMS messages.
Although many people have smartphones, you will still need to confirm that the phone number that you have for the client can receive SMS messages. You should also let them know that you will be sending notifications through SMS on updates for the invoice.
To send an SMS Notification using Twilio, follow the steps below:
- In the WordPress Dashboard, click on Invoices.
- Select and open the invoice that you wish to notify the client about.
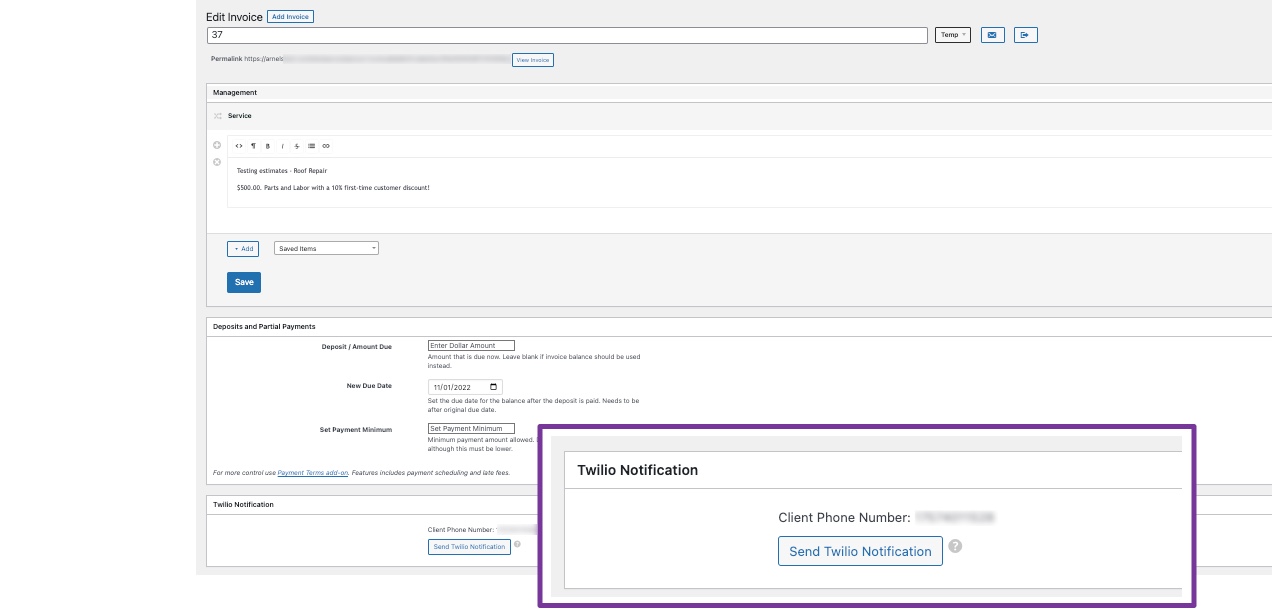
- Scroll down to the Twilio Notification section.

- Click on Send Twilio Notification.
Sending a message through Twilio to update a client about their invoice is another way that you can maintain communications with your clients. This helps to provide clear and up-to-date information to your customer showing that you care about their business with you. It will also help to maintain your business records and the profits that are the result of your efforts.
