One of the problems that a website form will have is how to prevent automatic entries from a robot. These spam entries may often cause issues with the actual data being collected by the form. To prevent this from happening weForms is able to use Google’s reCaptcha. Follow the instructions below to learn how to enable reCaptcha in weForms.
In order to use reCaptcha you will need an account with Google in order to obtain the required API keys. See the Google reCaptcha home page for more information.
Looking for a home for your WordPress site? Check out InMotion’s WordPress Hosting solutions for servers that are secure and scaled to meet your budget needs.
Get the API Keys for reCaptcha
In order to get the API keys for reCaptcha, you will need to have an account with Google. Go to the Google reCaptcha home page. Click on the Admin console button in order to start the process.

If you don’t have any existing reCaptcha entries, then click on the “+” sign in the top right corner. Otherwise, you will see a screen to register a new site.
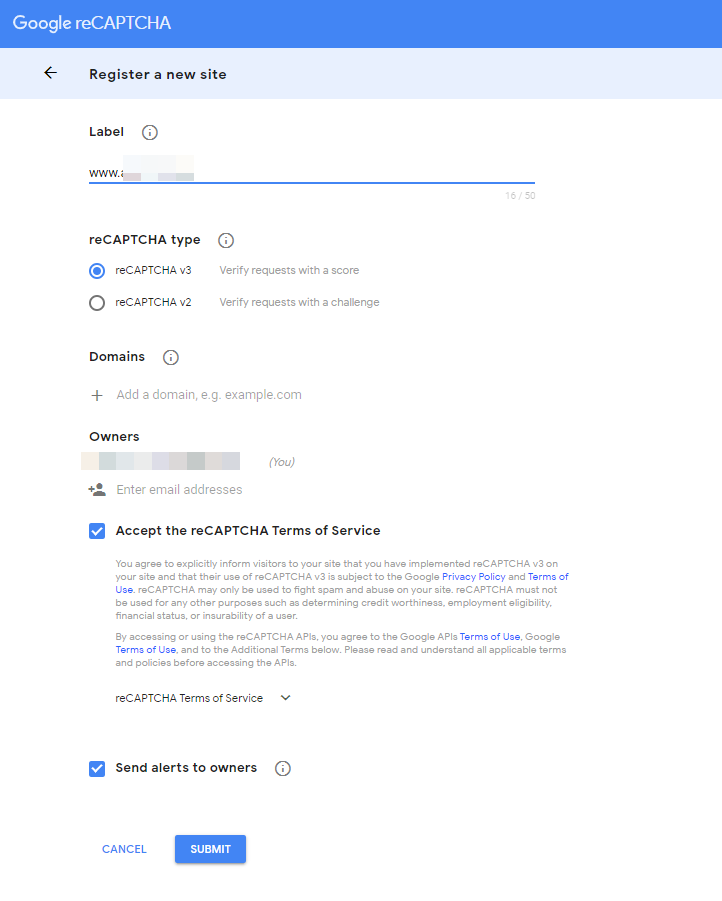
Title your reCaptcha, select the type of reCaptcha you wish to use, add your domain name, then add the email address for the owner of the reCaptcha. This is typically the owner or administrator of the website that will get alerts when there are issues detected by the reCaptcha. Accept the terms of service, then click on the Submit button to get your API keys.
Note that some problems have occurred with the v3 version of reCaptcha. Always test your reCaptcha. If you find that the v3 version doesn’t work, then change the keys and use the v2 version. The reCaptcha v3 option is relatively new, but you can find more information in Google’s documentation.
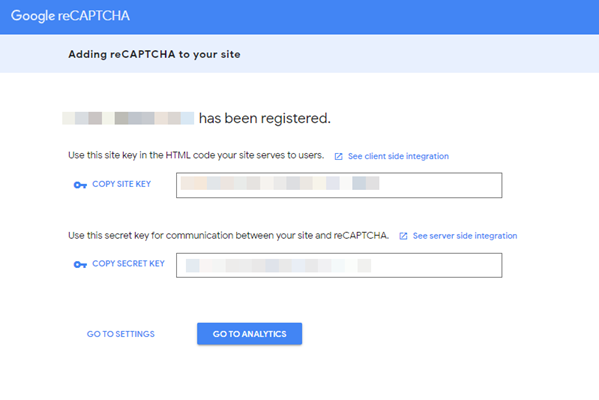
You will then see the reCaptcha API keys. Copy the keys and make sure you can access them to place them in weForms.
Configure weForms to use reCaptcha
Once you have your API keys, you can add them to the settings in weForms. This will complete the process to enable reCaptcha. You will need to be logged into your WordPress Administrator Dashboard to add the keys. In the main menu click on weForms, then click on Settings.
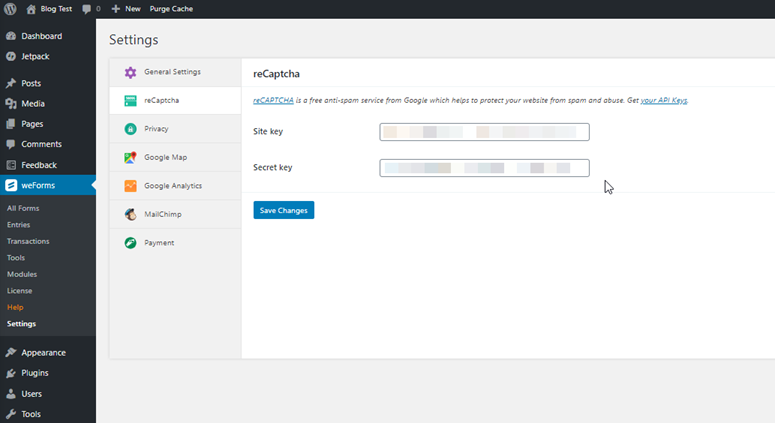
Paste in the corresponding API keys from the Google reCaptcha site. Click on Save Changes to save your keys. The next part is to add reCaptcha to your forms.
Add reCaptcha into a weForms Form
After you have reCaptcha configured within weForms, you can then create forms with it. Go to an existing form or create a new one. The editing screen for the form will now include the option for reCaptcha.
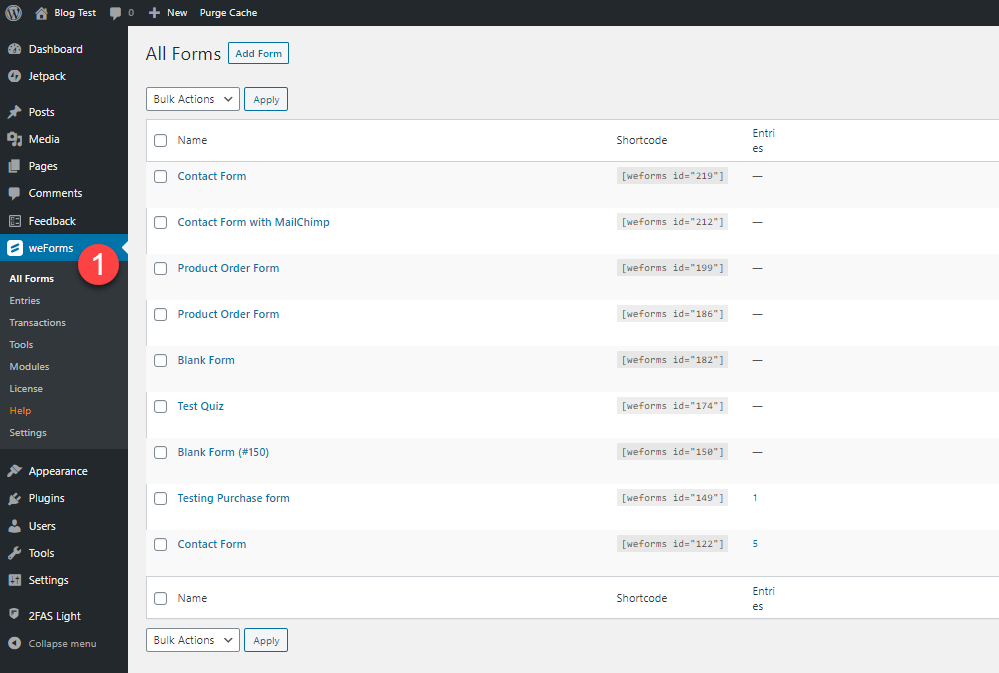
- In the WordPress Administrator Dashboard, click on weForms, then select All Forms.
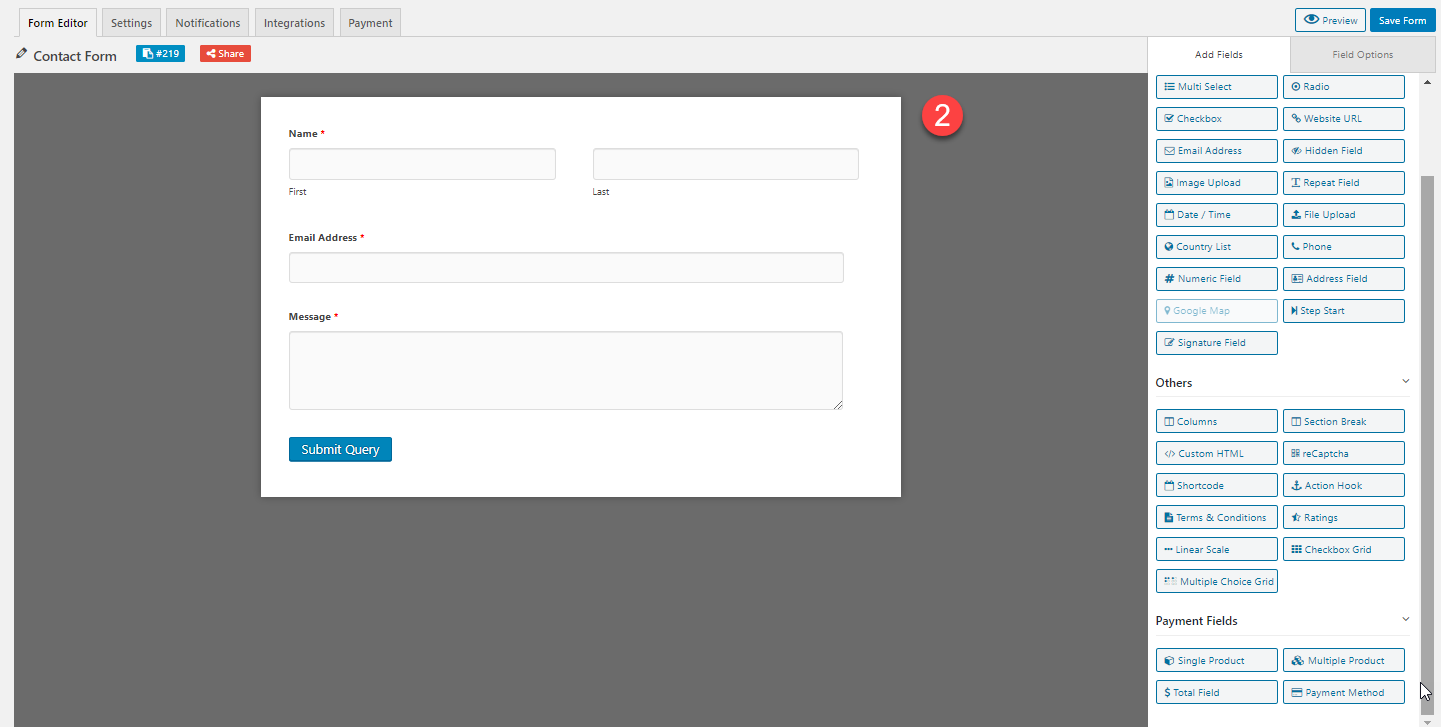
- Create a new form (by clicking on Add Form) or select an existing one click to edit it.
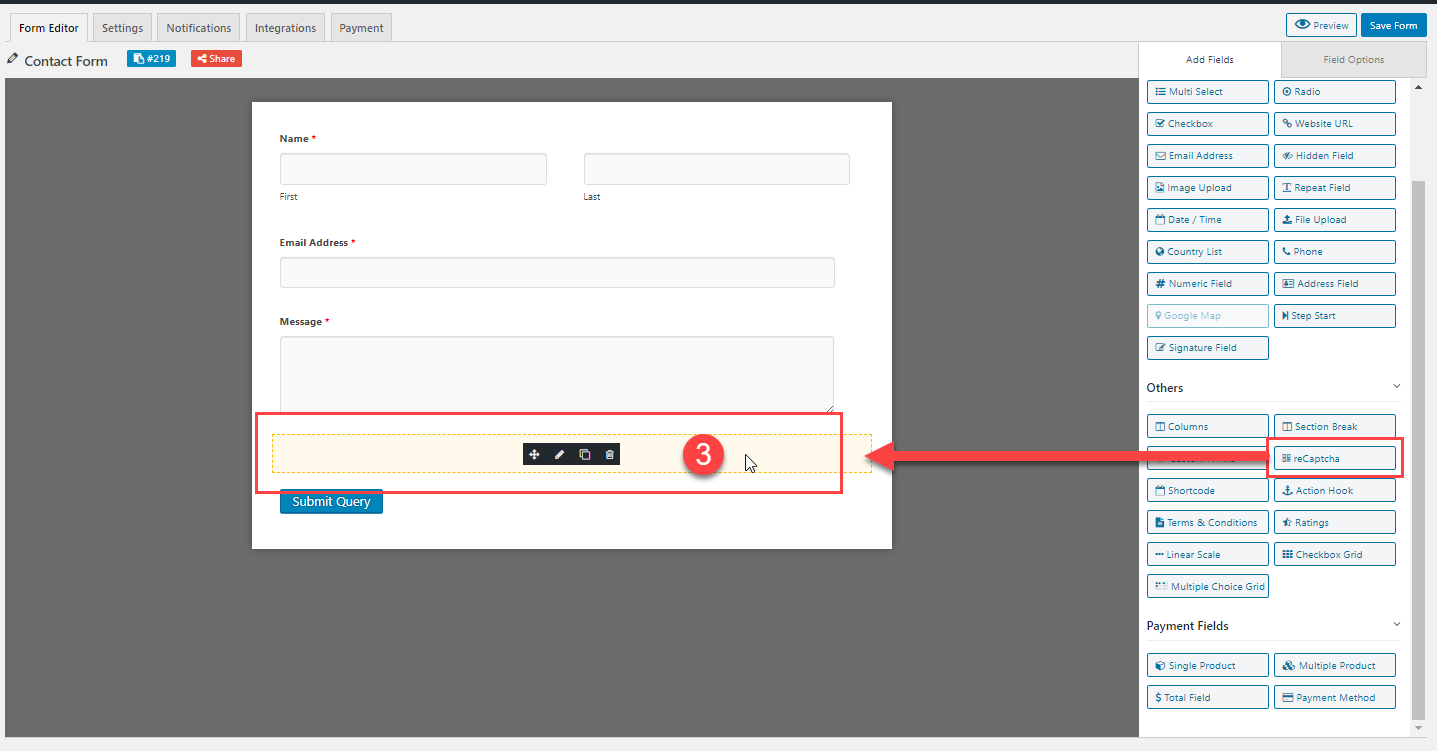
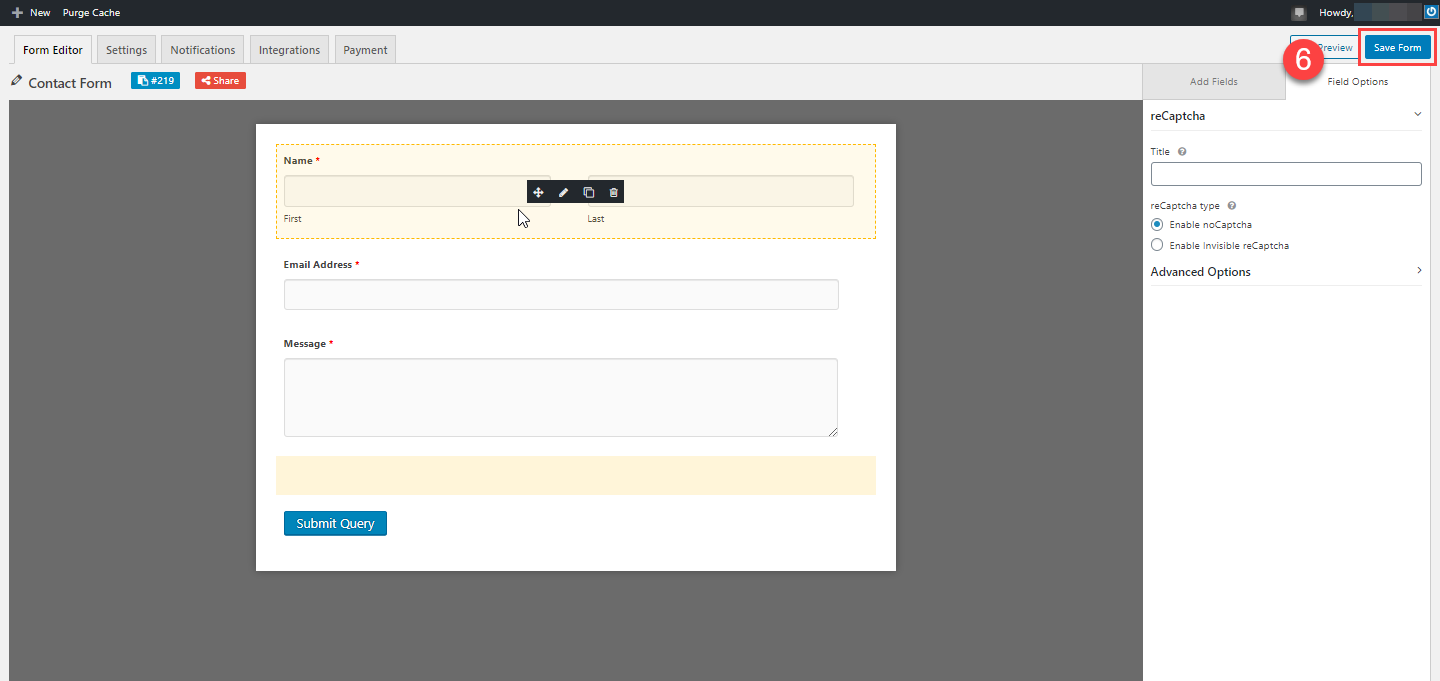
- In the Add Fields option in the right column, scroll down and click on reCaptcha. This will add reCaptcha to the form. When the field is added, it will not be visible until you roll your mouse pointer over it.
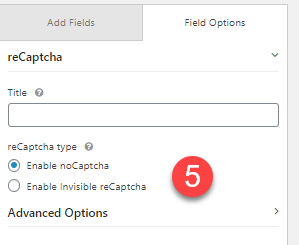
- Click on the added reCaptcha field, then click on the pencil icon to edit the field.
- You can title the reCaptcha and then select the option you wish to use for the form.
- Click on Save Form in the top right corner.
Make sure to check out your form and test the reCaptcha. It will help prevent spam from affecting your form results. The images in the slideshow below match with each step above.
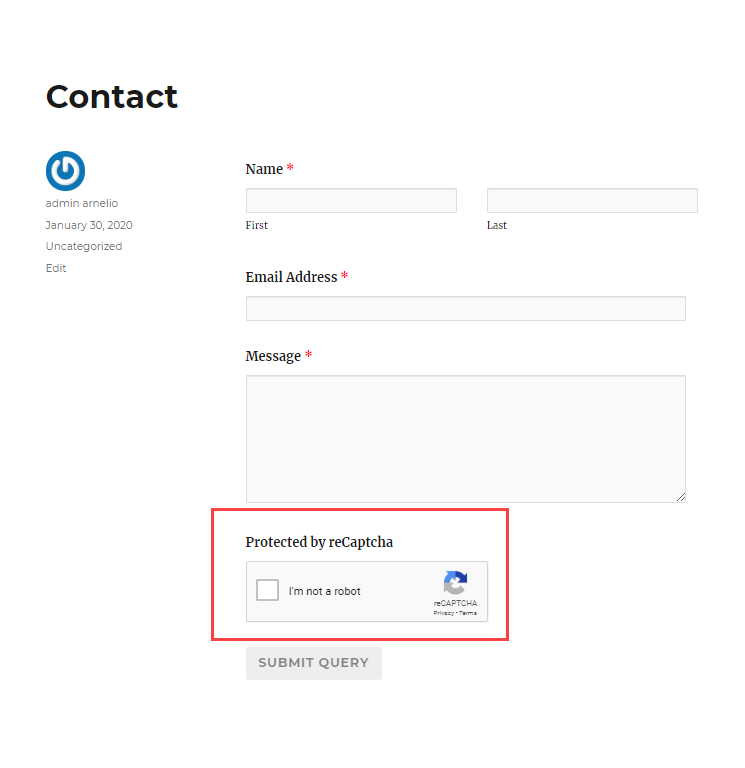
The saved form will now be protected by reCaptcha. The screenshot below shows the option as it was configured in the example above.
Congratulations! You now know how to enable reCaptcha for your forms. For more information, please see our Product Guide for reCaptcha.
