Adding custom fields is a simple task when you’re using the full site editing system (FSE) in WordPress. You need to know where the option is hidden and the data that you’re adding. Custom fields are used in WordPress pages and posts. They can provide valuable data for your post/page and help search engines with your content.
We will first show you where to find the Custom Fields when using WordPress, then explain the composition of the added metadata.
Note that I am using WordPress 6.0 and the Twenty Twenty-two theme for this tutorial.
Adding Custom Fields to a Page or Post
In order to add custom fields to a page or post, you will need to be logged into the WordPress Administrator Dashboard.
- Open or create a post or page.
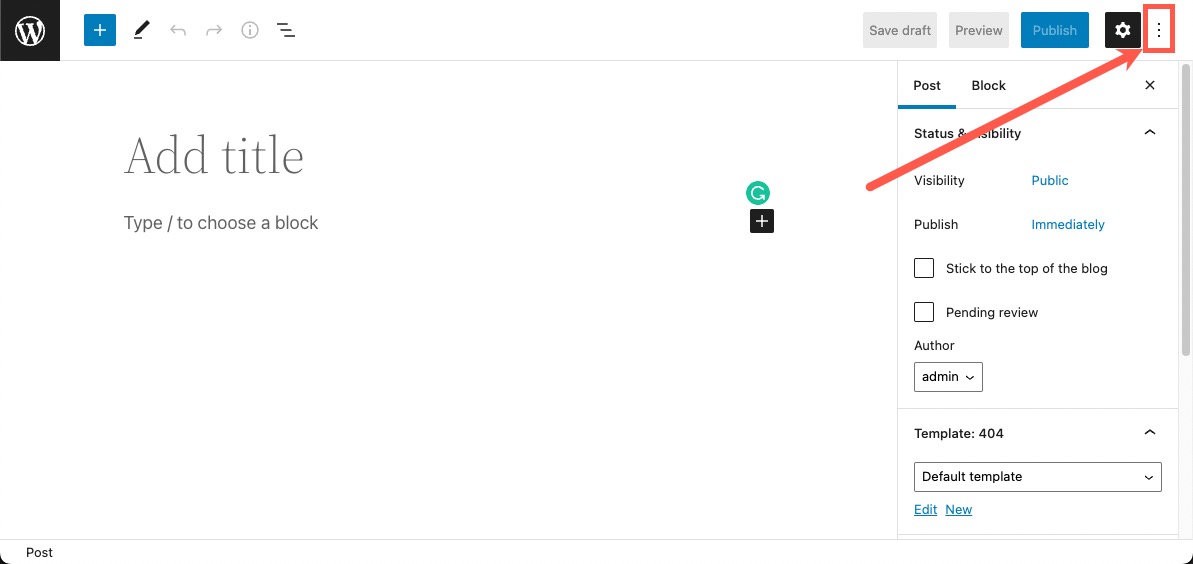
- In the top right corner, click on the vertical 3-dot menu.

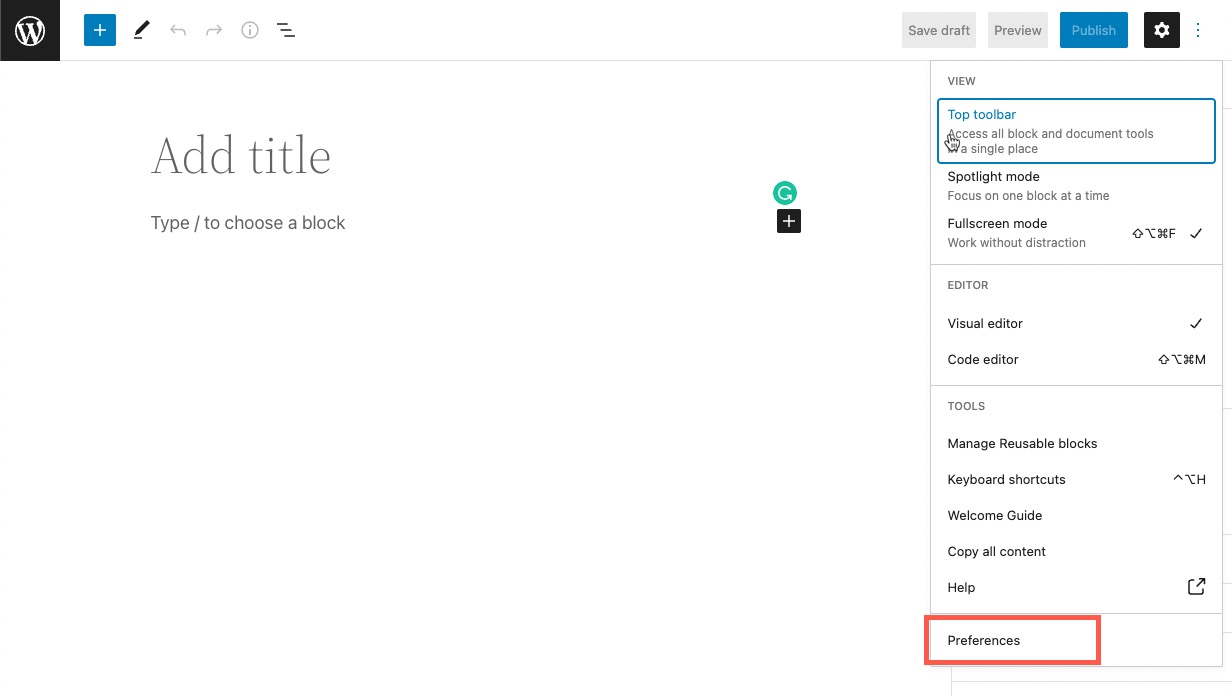
- A vertical menu will pop up. Click on Preferences.

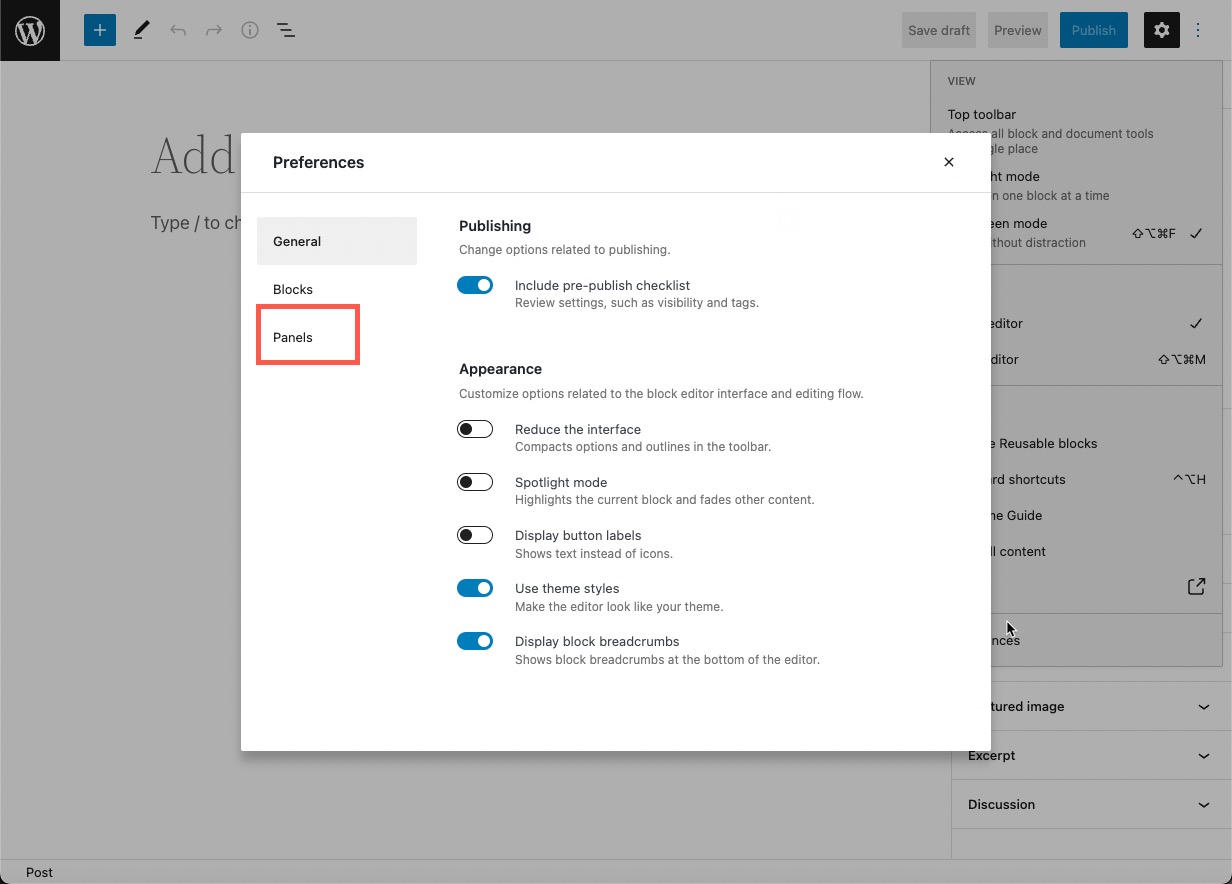
- Next, click on Panels.

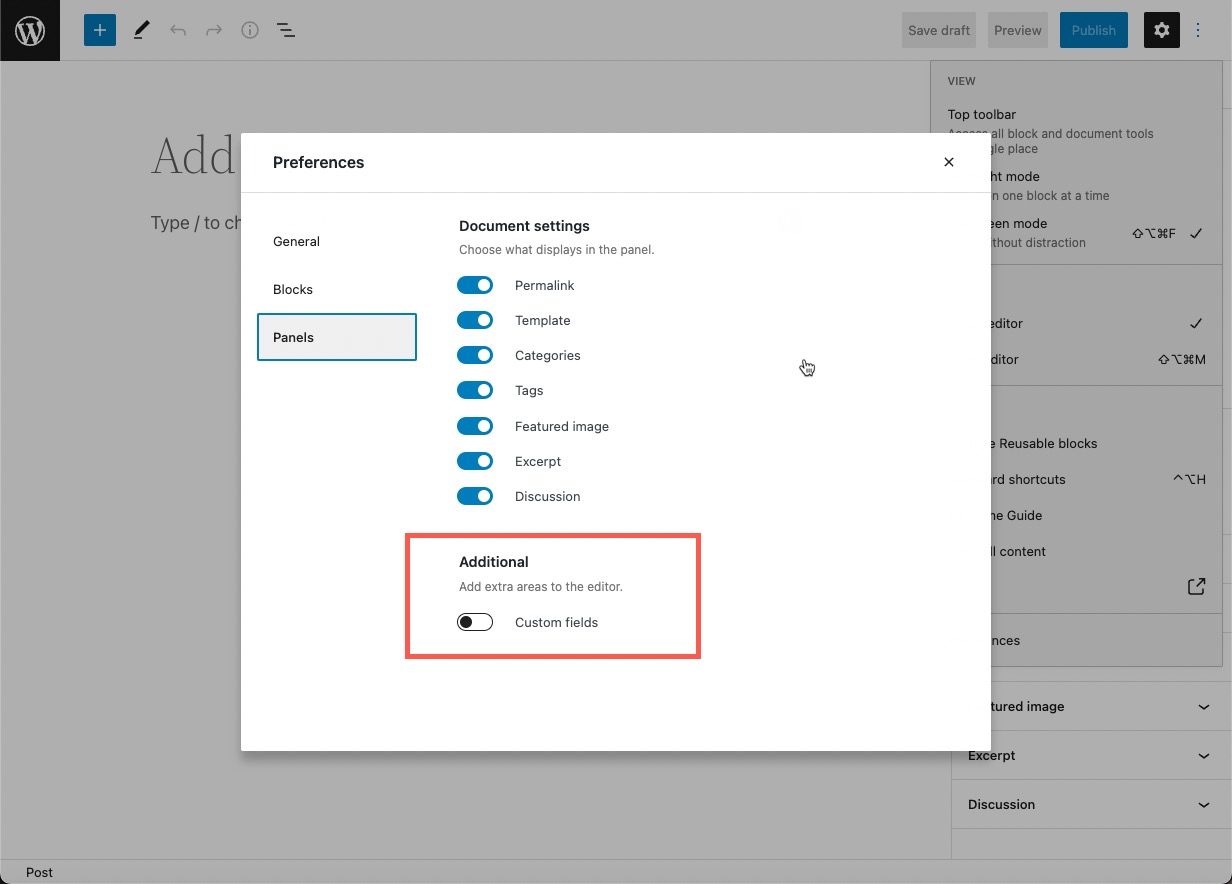
- Click on the slider to enable Custom Fields under Additional. Note that you should save the content page before you enable the custom field.

- Once the slider is enabled, you will need to click on the Enable and Reload button at the bottom.

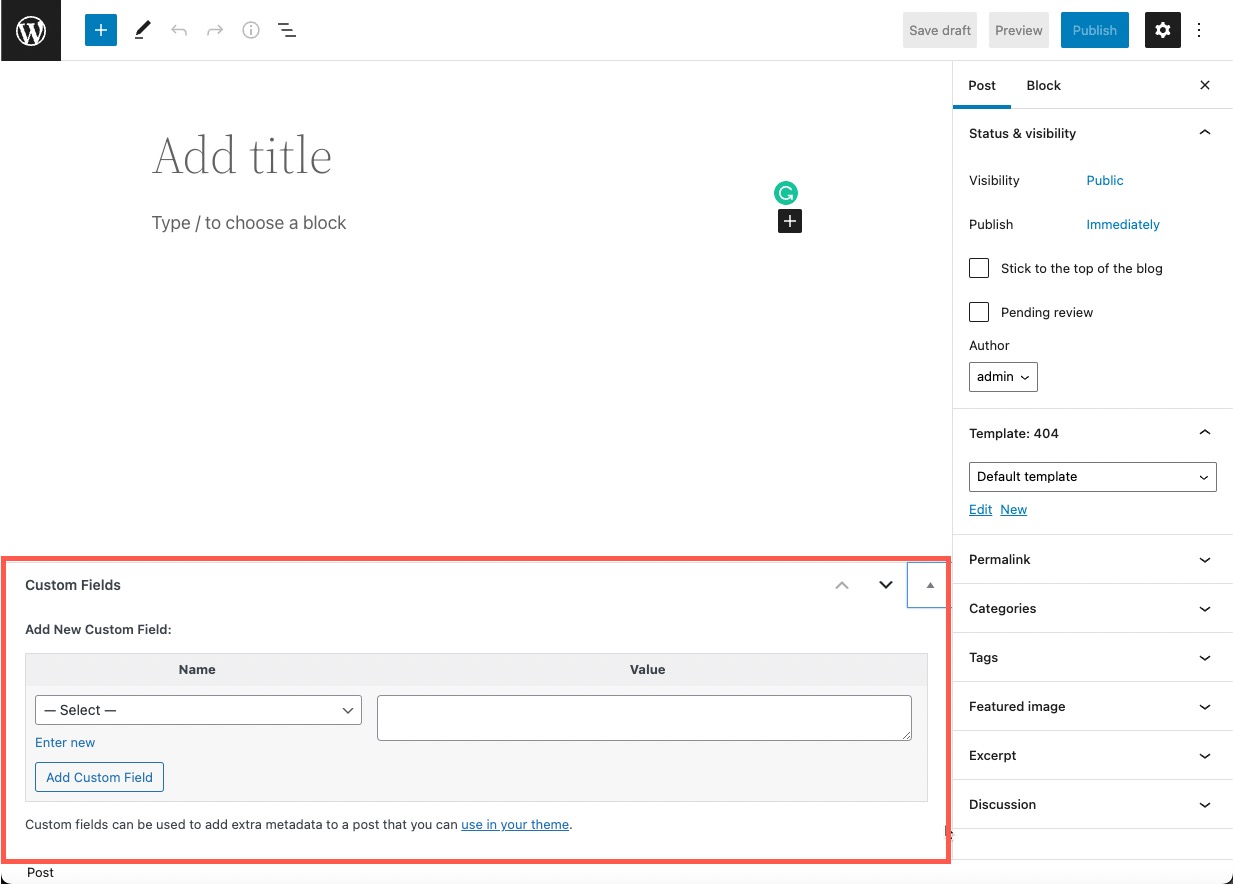
- When the page or post has been reloaded, the Custom Fields section will appear at the bottom of the editor.

How is the Custom Field Used?
A custom field can be used to provide metadata on the page or post that you are publishing. This data provides more information on the content of the page. This data is not displayed unless custom code or a plug-in is added.
Using custom fields for metadata can help with search engine optimization making the content of your post or page more identifiable to a search engine.
The metadata can also store useful information about the post being displayed. For example, the metadata can store classification data that you don’t want to be used as a tag but can be used to identify the image in a search. Code can then be added to read the data and then displayed on the post or page.
Custom fields consist of pairs for the metadata: keys and values.
A key is the name of the metadata element. Each key is also assigned a value. You can use the same key multiple times in a post or page.
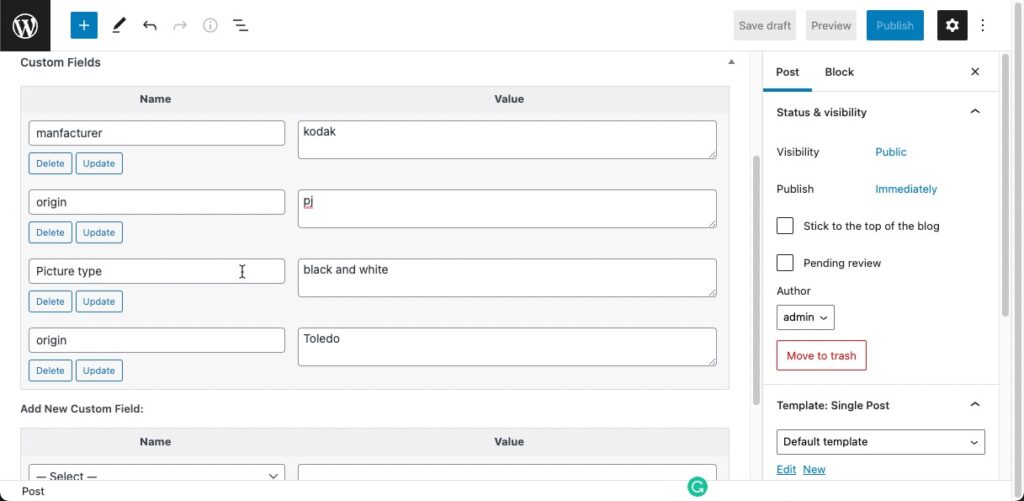
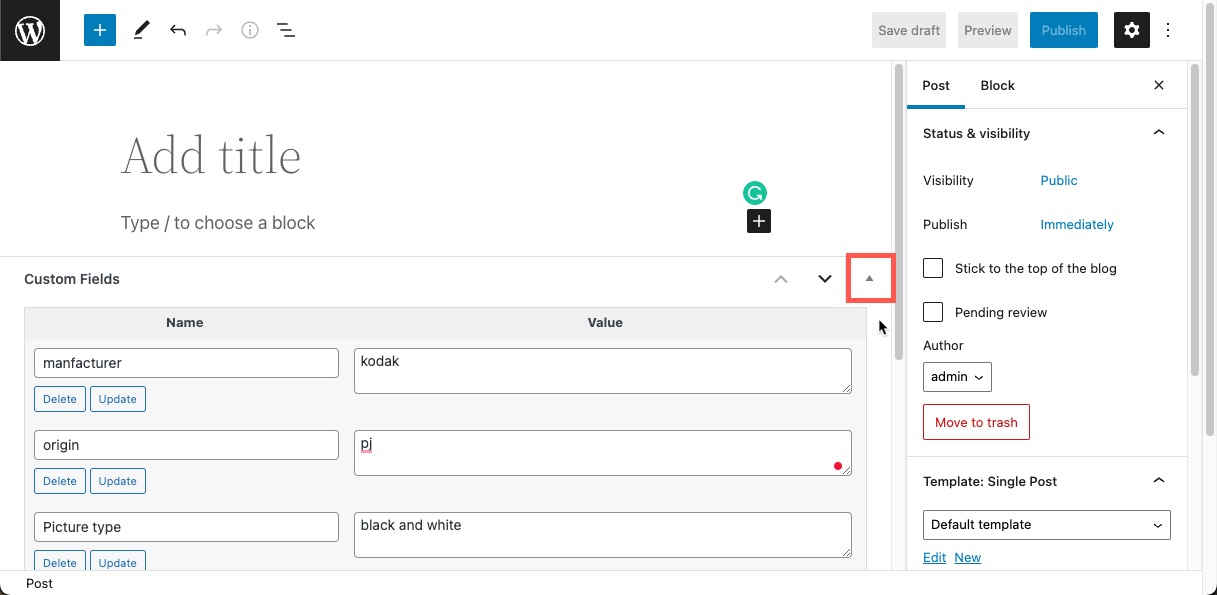
The screenshot above shows examples of custom fields added to a post.
Adding a Custom Field
Once the custom field has been enabled for the block, the WordPress table will begin to store the keys that you add.
Note that multiple plugins can affect how these fields are populated. For example, you may have an SEO plugin that already stores custom fields. If that is the case, then your choices for the key field will include everything stored by the plugin.
If you add multiple custom fields, your additions will also be stored, so that you can choose them from the drop-down menu when you create a custom field.
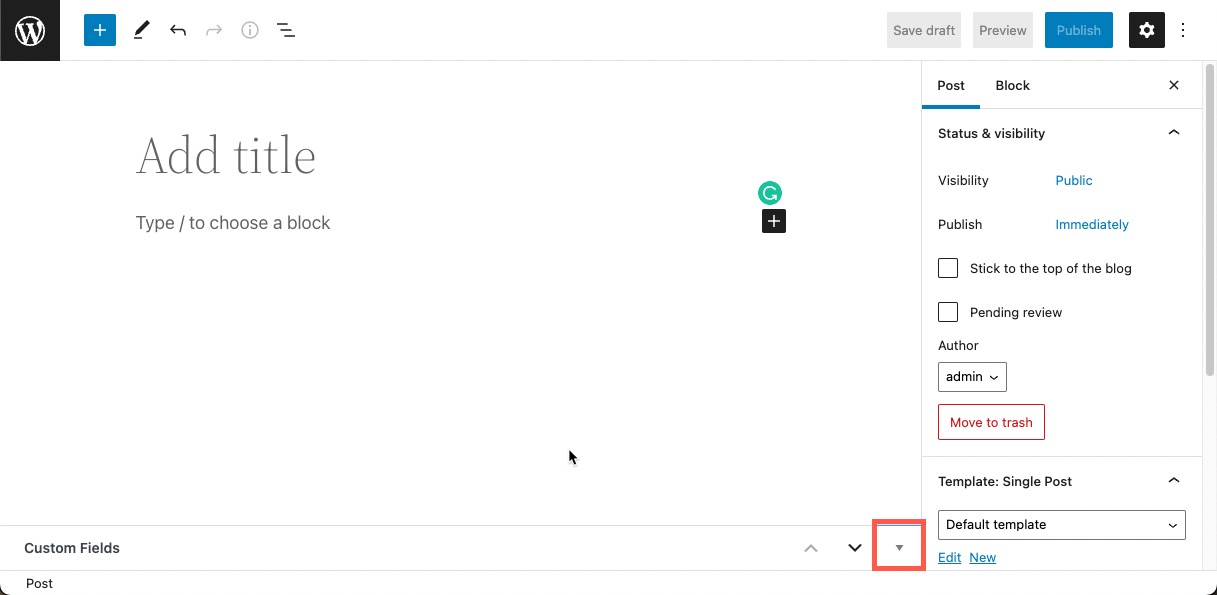
- If your Custom field is collapsed, you may need to click on the down arrow in the right corner to open it up.

Click on the arrow pointing down to open the custom fields.
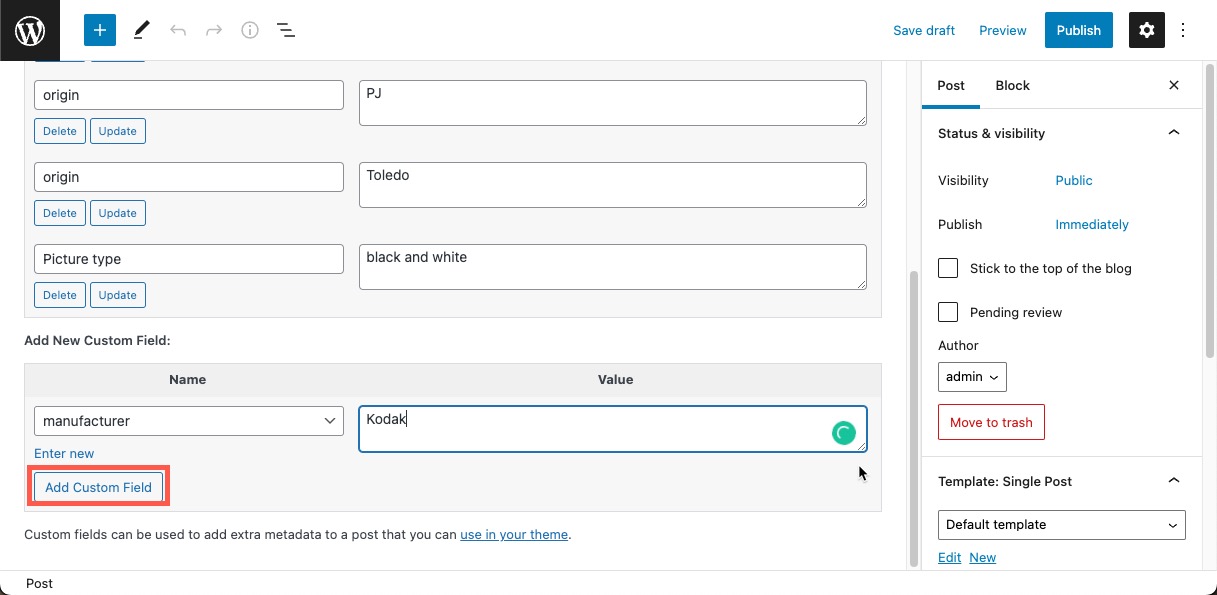
- To add a custom field, first, click on the drop-down arrow under the column labeled Name. Select an option for the name of the key element.

Note that you will be able to re-name this key after you have added it. If you have a new key name that you need to add, wait until after the custom field has been added. - Type in the Value you want for the key then click on the Add Custom Field button.

This completes the process of adding the custom field. Make sure that your post or page is saved so that any changes are preserved.
Deleting a Key
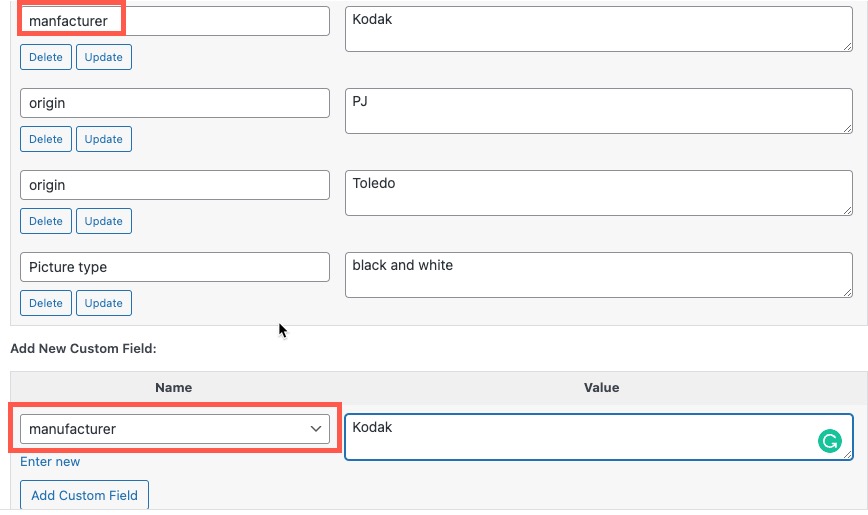
If you were looking closely at the keys in the instructions above you might have noticed that the word “manufacturer” is initially spelled wrong. To remove that key you will need to delete it.
- To start the correction, create a new custom field with the correct spelling.

- Add the value of the key. Don’t worry about it being a duplicate.
- Click on the Add Custom Field button to add the field.
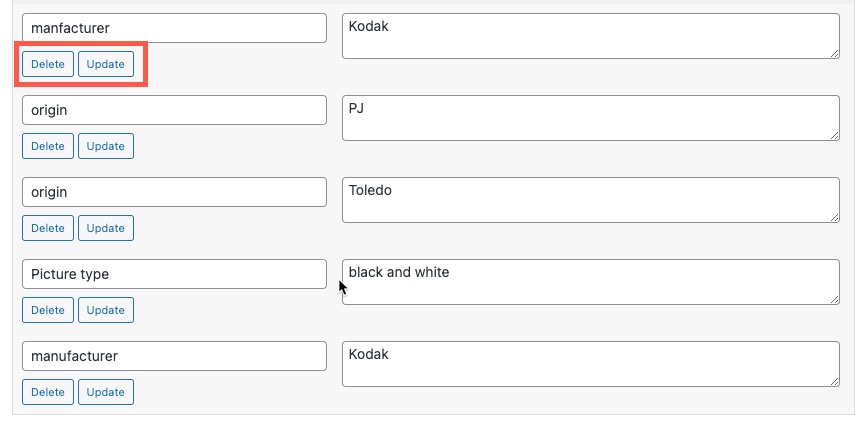
- Find the incorrectly spelled field, then click on the Delete button.

- Save your post or page.
You now know how to add and remove custom fields using the editors for the WordPress Full Site Editing system. Custom fields can be used to add functionality and also help with benefit content by improving its search engine optimization. Check out our articles for more information on WordPress Full Site Editing!
WordPress is constantly evolving! Stay up to date with the latest WordPress news and releases to keep your website modern and secure!
