WordPress websites are often built based on a theme, and they often have predefined formats on what their pages will look like. With patterns, you can take a simple theme like the default Twenty Twenty-two theme and use the full site editing system to create your own template. Since free Patterns are also available on the web through the WordPress.org site, this makes the ability to create new sites based on patterns much easier.
This tutorial will walk you through the steps of building a site by first creating a rough draft or wireframe of your eventual site, building the templates of your pages using patterns, and then showing how you can fill those templates with your own information.
We will be building a simple informational site with only four pages, but you will be able to see how easy it is to expand the site for your needs.
- Starting with a Rough Draft or Wire Frame
- Using Patterns to Build your Website Templates
- Filling Your Content Based on Your Selected Patterns
This tutorial uses WordPress 6.0 and the default Twenty Twenty-two theme. We will also be using patterns from the Pattern directory in WordPress.org.
Starting with a Rough Draft or Wire Frame
One of the best practices you can do when building a website is to create a rough draft or wireframe of the website you intend to build. You can use pencil/pen and paper to draw it out, get graphics programs, or even use programs dedicated to creating prototypes of applications/websites.
Before you start drafting your website (or while you’re doing it), you will need to make a list of the pages that you intend to include in your website. The website we will demonstrate in this tutorial is a simple informational site with the following pages:
Front Page
The front page is important because it is the first page that anyone sees when navigating to your site. It will also include the menu system to navigate your site, information that you want to present immediately to your viewers, and a footer that can include other reference information or contact information.
We will keep things simple and use the tools provided by Google Slides to create the rough draft. Basically, we can draw shapes on the slide and it can provide a model of how we want the website to be arranged. This is also an opportunity to put notes about what will be placed on a page.
The rough draft is not intended to be a pure representation of how the site will appear, but it will give you and others who might be part of the website building process insight into what will be on the site and your intentions for the operation. It is an approximate appearance of the site.
For example, this screenshot is a slide that represents the front page of the site:
Although I’m providing a general description of these pages, you can be really specific when building the draft so that you have a better idea of the items on the front page.
Additionally, since the Google Slide can be shared with people, you can collaborate with others. For example, you might have a strong graphics person who can provide your site graphics or other images. You can add the images to the slide to help make it closer to how the page will appear.
About Page
The about page is generally a biographic or information page that describes the history of an organization or person or the story behind it. It can also be used to provide mission statements or other important information that characterizes the organization or people who are represented by this website.
In the screenshot of the rough draft below, you can see that the header and footer remain in place. You can leave them the same, or change the size of the header or footer depending on the links you want to display when a person is viewing this page. At the very least, you should provide a link back to the home page of your website.
Contact Page
A contact page is generally a form that can be filled online through a computer or mobile device so that contact can be established with someone who may be interested in your products or services.
There are many different plugins that can be provided to create contact forms. We have provided a link to a weForms article that shows you how to create a contact form. The plugin provides the form as well as the tracking of responses to the form.
Contact pages should not include email addresses as they can be read by robots used by spammers who look for email addresses to send their spam. However, if you feel that an email address should be provided for further contact, then definitely include it. We would recommend a good spam filtering service to help fight spam emails that hit that address.
Phone numbers are generally not listed either, but if you have a business phone number and it is imperative that you are contacted by phone, then it can be added to this page.
Addresses for businesses should be added if a physical location is part of the information you’re trying to provide through the website.
Info Page
The info page can also be called a product information page or curricula vitae (of a person) – it’s generally a page (or pages) that include information on the persons(s), group, organization, or service that you want to advertise on the web.
You should provide media such as images or videos that will help to show visitors your knowledge or products.
The info page is different from the about page in that the information you are providing is more specific to describing your services or products that you want people to know about. You may also want to rename the page to something more appropriate.
Header and footers should remain on the page and provide navigation options for the viewer. This also helps to maintain colors and format that can help to establish the professionalism of your website.
Make sure to include a call to action that encourages interested parties to contact you through the contact page.
As you can see, it’s really very simple to quickly build an informative website. The next step is to find patterns that you can use to quickly build your site.
Using Patterns to Build your Website Templates
Patterns can be found in block themes that include them and in the WordPress.org Pattern directory. While you can go crazy choosing all kinds of patterns, it’s best to try and keep it simple so that website has a more uniform look.
Editing the Templates
To keep the website consistent, it’s best to first modify the website templates. The templates make up each page within the site. To see a list of the pages, you will first need to be in the site editor. If you’re in the WordPress Dashboard, click on Appearance, then click on Editor. Click on the WordPress symbol in the top left corner of the screen, then click on Templates.
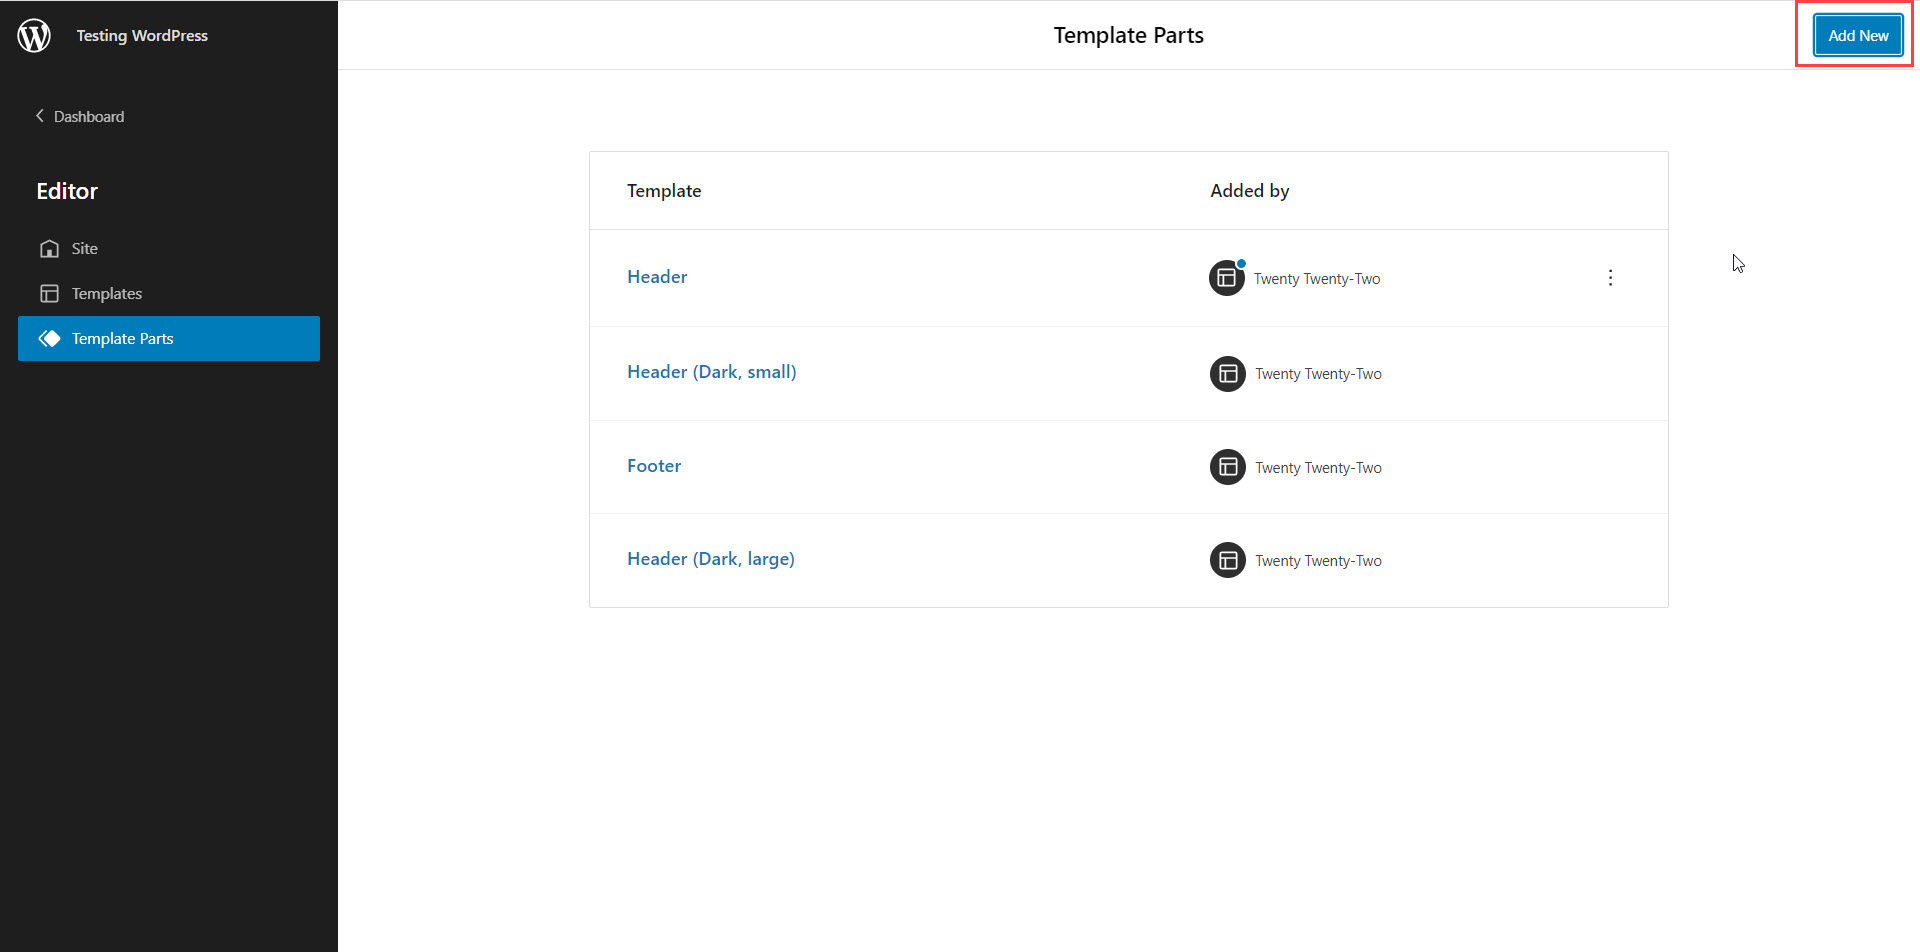
Each template represents a page within your website. If you wish to add your own page, then click on the Add New button in the top right corner.
Changing the Header on the Home Page
Making changes to some of the pages may at first seem daunting, but it’s a very simple process once you understand the elements of each page. The Home page is very important since that is the first page that anyone sees.
The Twenty Twenty-two theme home page uses a header and footer. In order to make changes to these elements, you will need to work with Template parts. Follow the steps below in order to change the header of the Home page by first changing the template part.
- Log in to the WordPress Administrator.
- Click on Appearance, then click on Editor.
- You will see the editor open the Twenty Twenty-two website. In the top left corner, click on the WordPress symbol. This will display a menu on the left side of the screen.
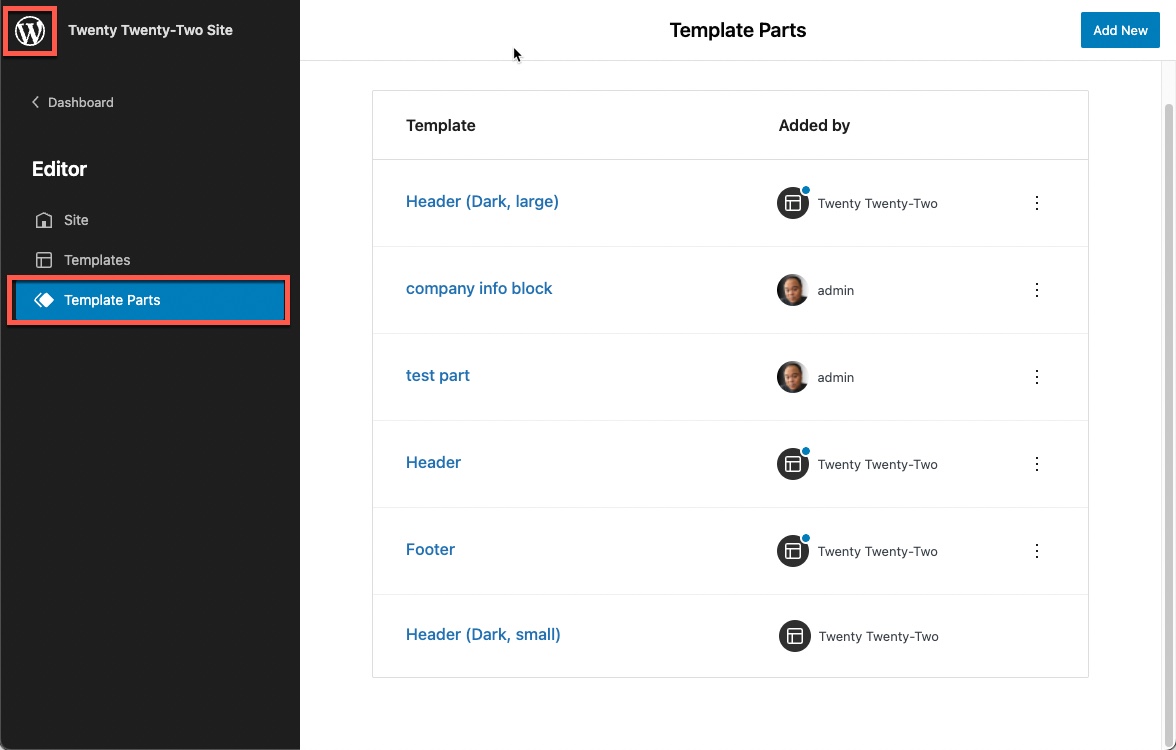
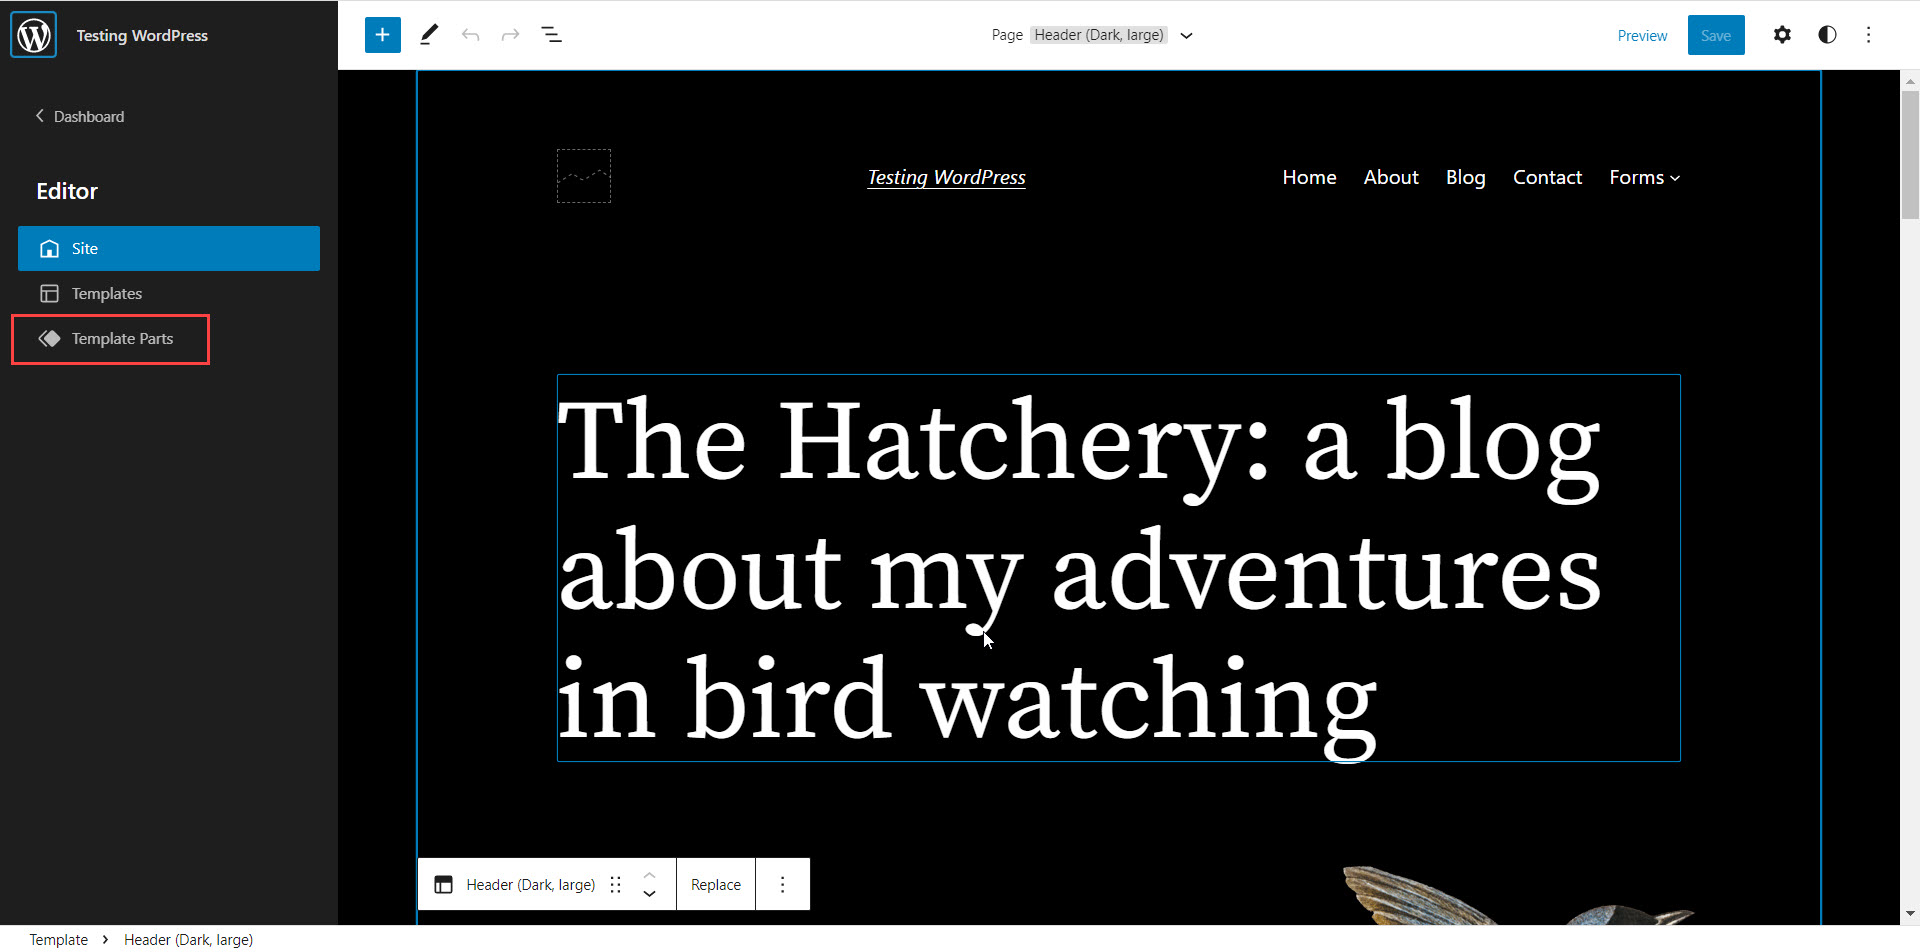
- Under Editor, click on Template Parts. This will show the template parts included with the Twenty Twenty-two theme. Template parts make up the templates used as headers or pages and in order to make changes to those elements in your site, you will need to first change the template parts or add to them.

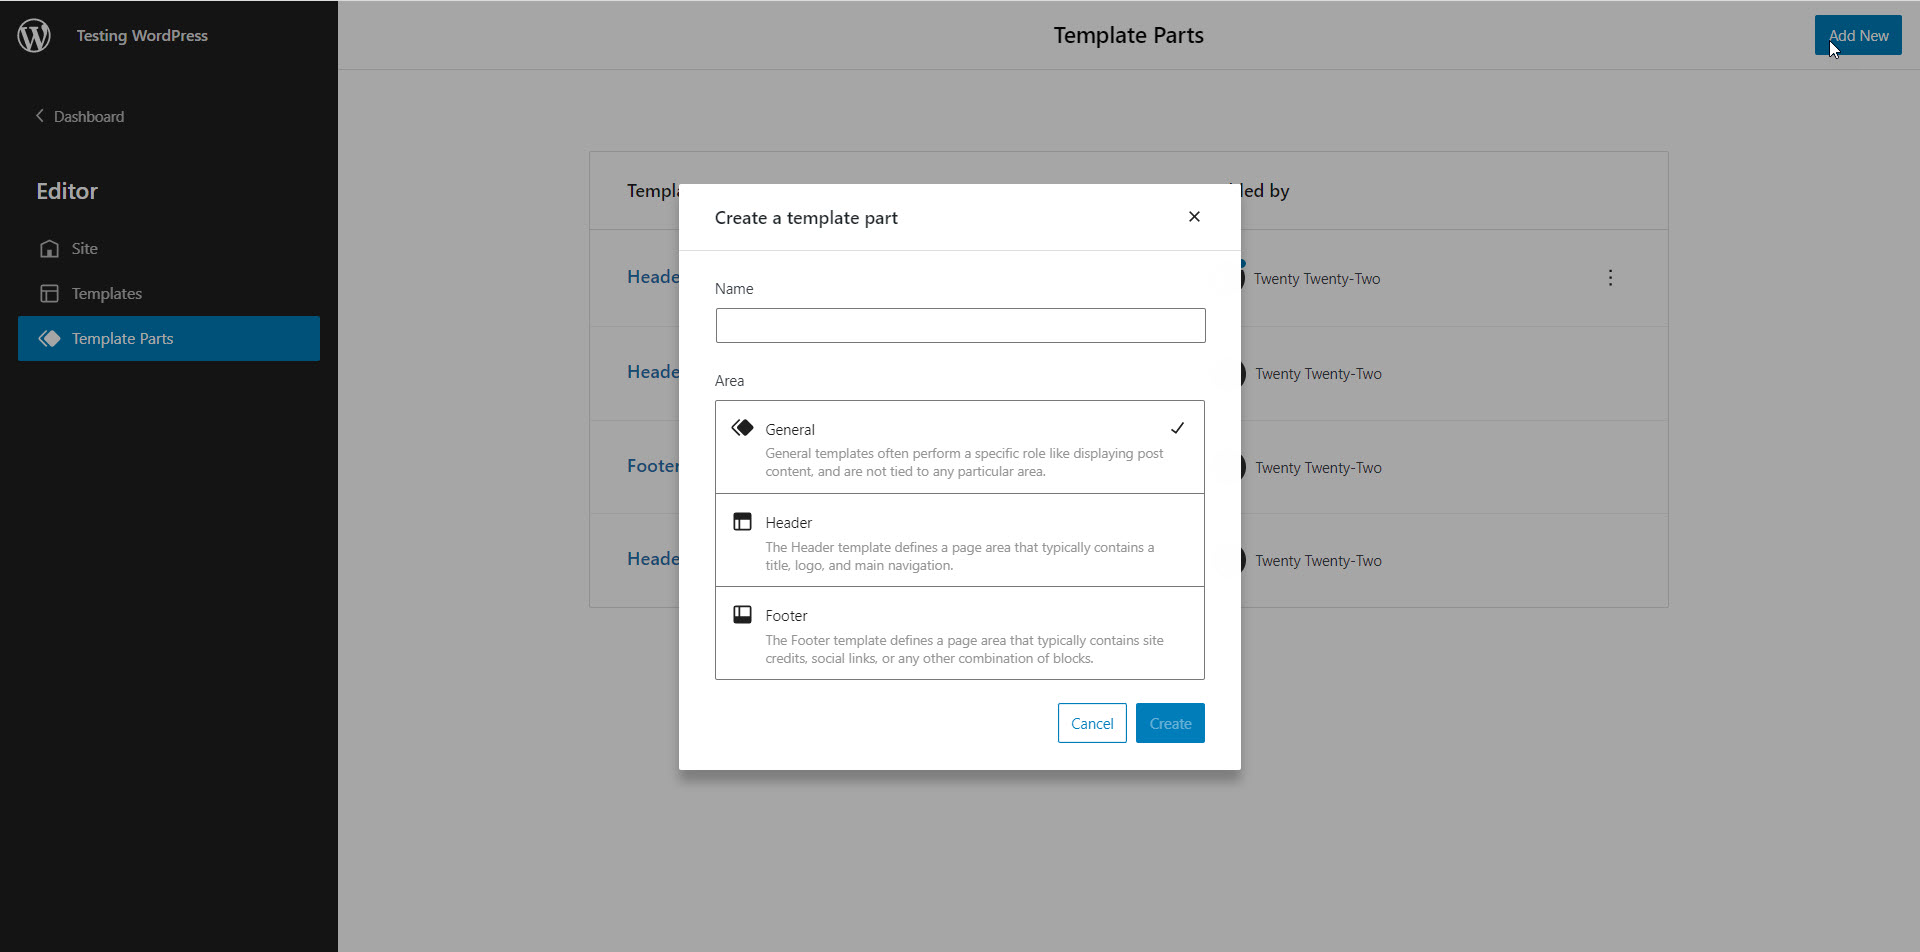
- You will see that there are several headers here that you can select. You can also add your own. In the top right corner, click on Add New.
- You will be given the choice of template part you want to create: General (checked by default), Header, or Footer. Since we’re modifying the header first, click on Header.

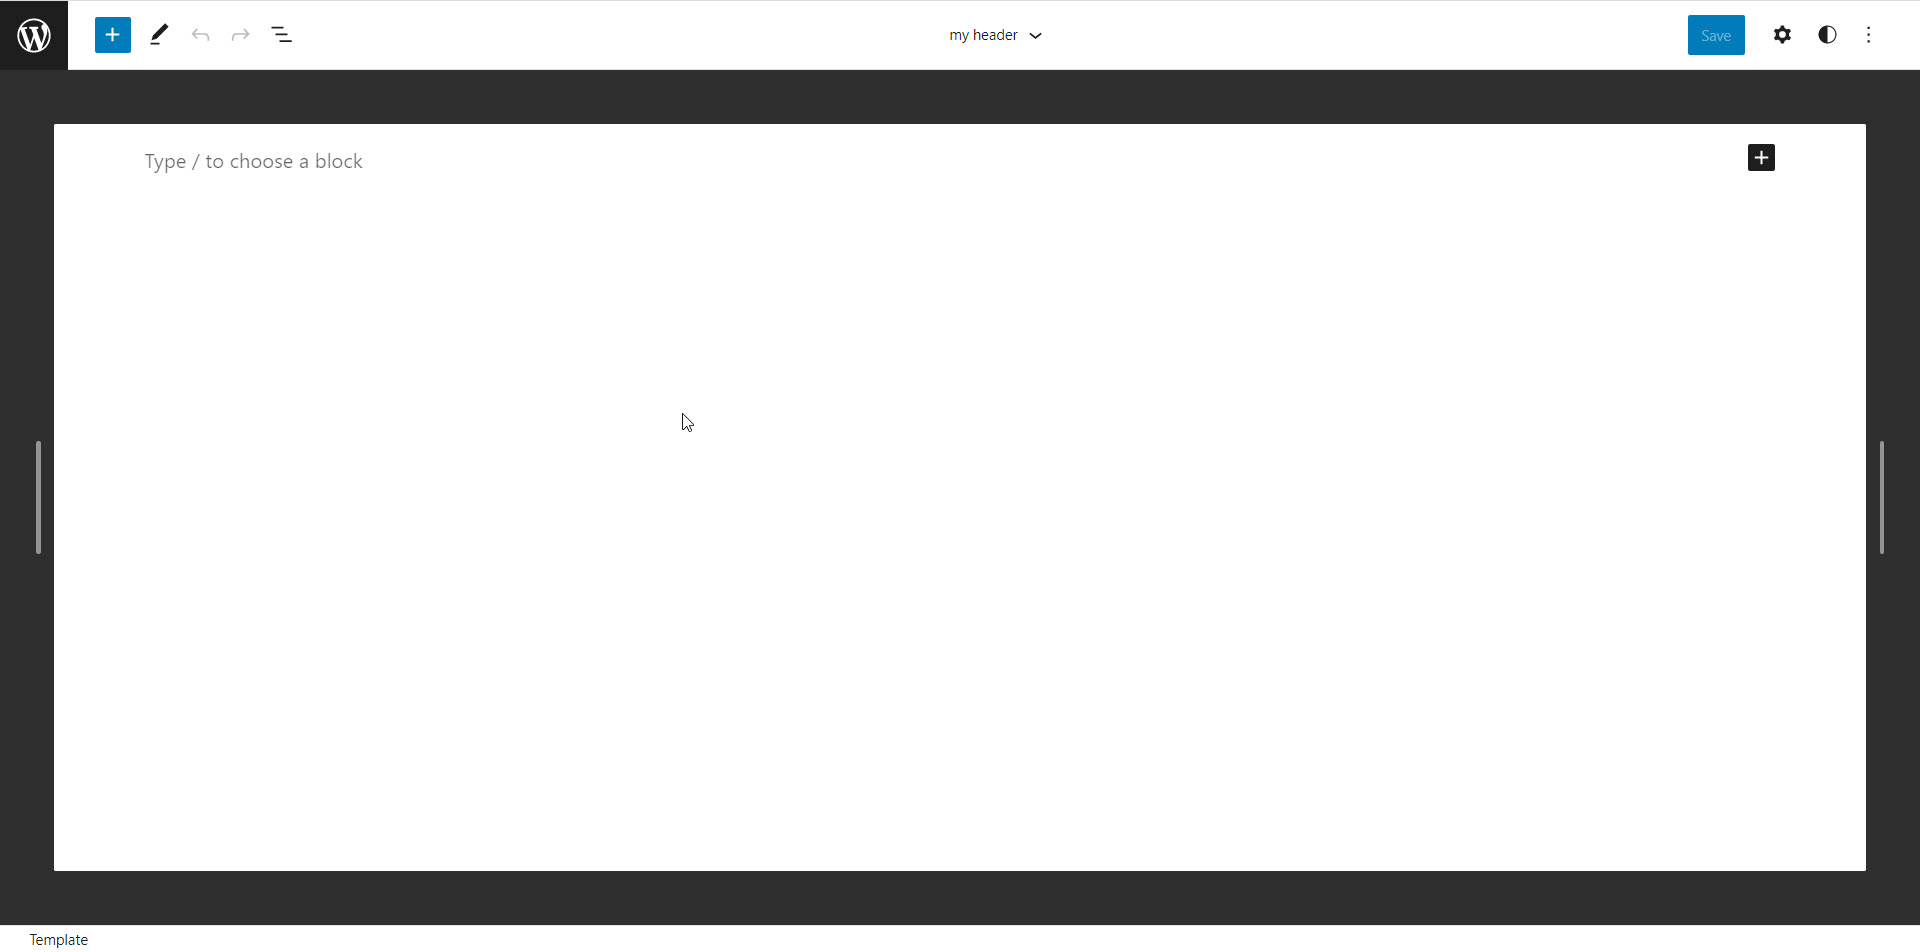
- You will notice that the Create button is grayed out. In order to make it clickable, you will need to name your template part first. Type a name for your new template part, then click on the Create button.
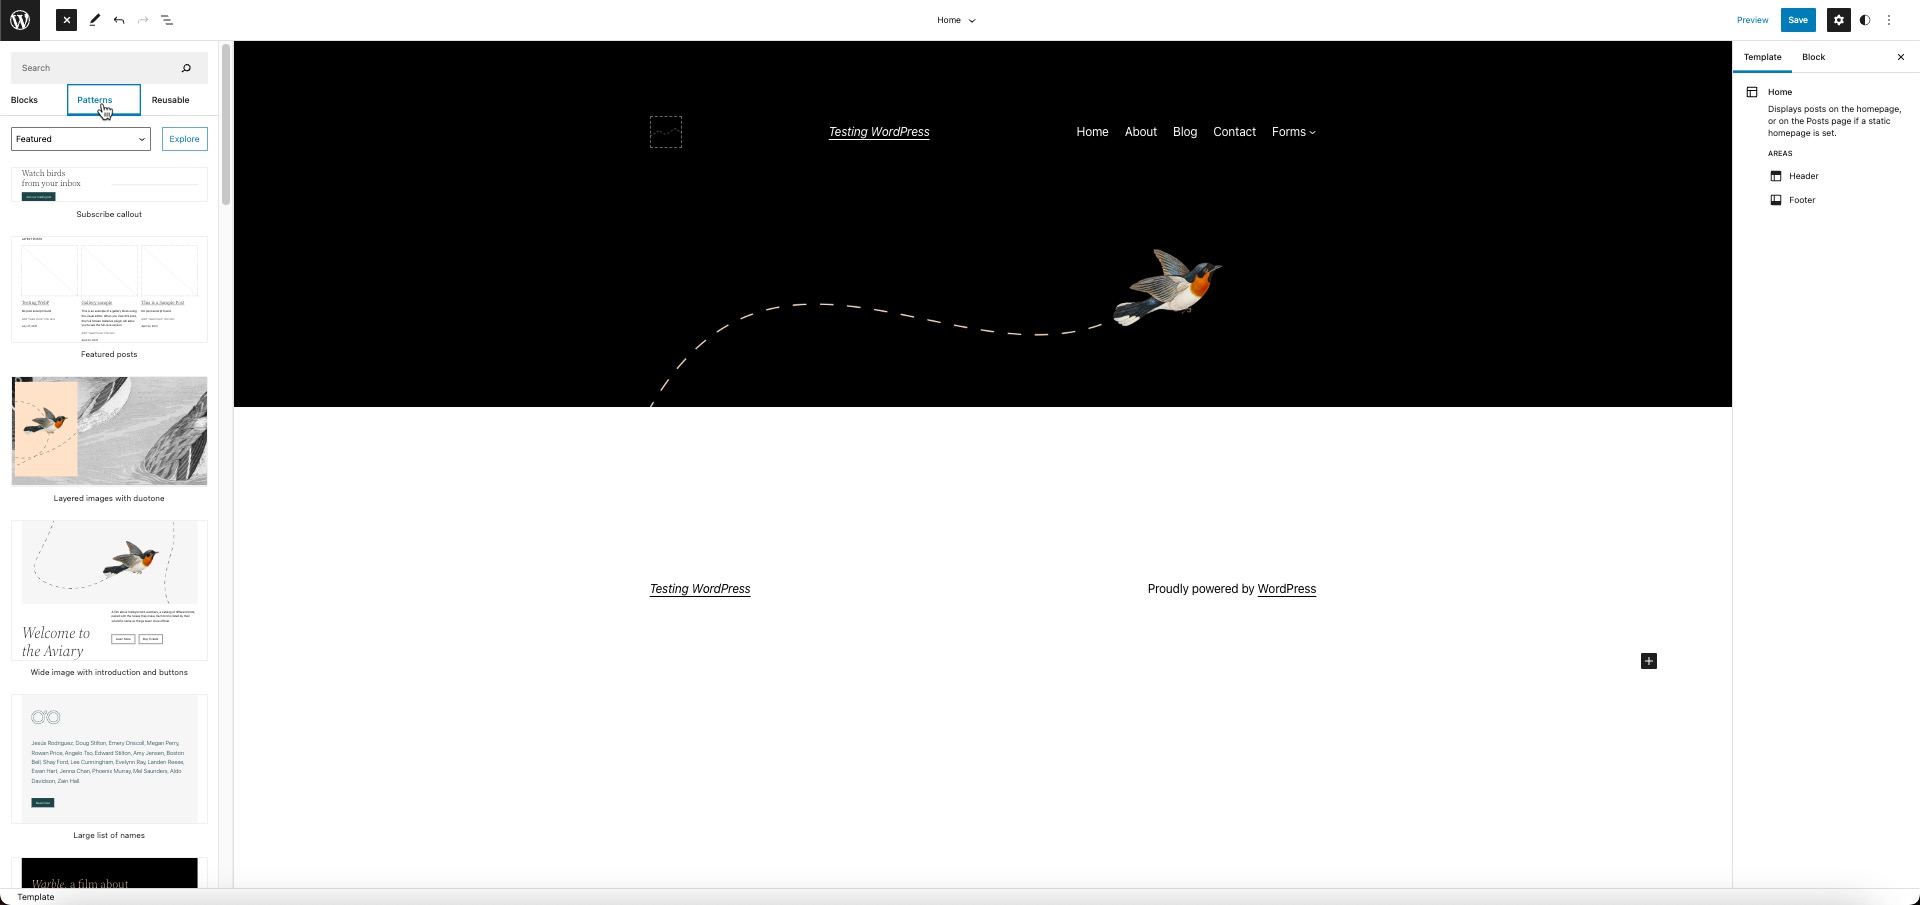
- You will see a blank white rectangle where you can create a new header. For this example, we’re going to use the patterns within the Twenty Twenty-two theme. Click on the + sign in the top left corner.

- Next, click on Patterns. By default, there is a filter that is set to Featured directly beneath the Blocks, Patterns, and Reusable options in the left column. Click on the drop-down arrow in the box and select Headers. You will then see a list of header patterns that come with the Twenty Twenty-two theme. Select the one you want to use.

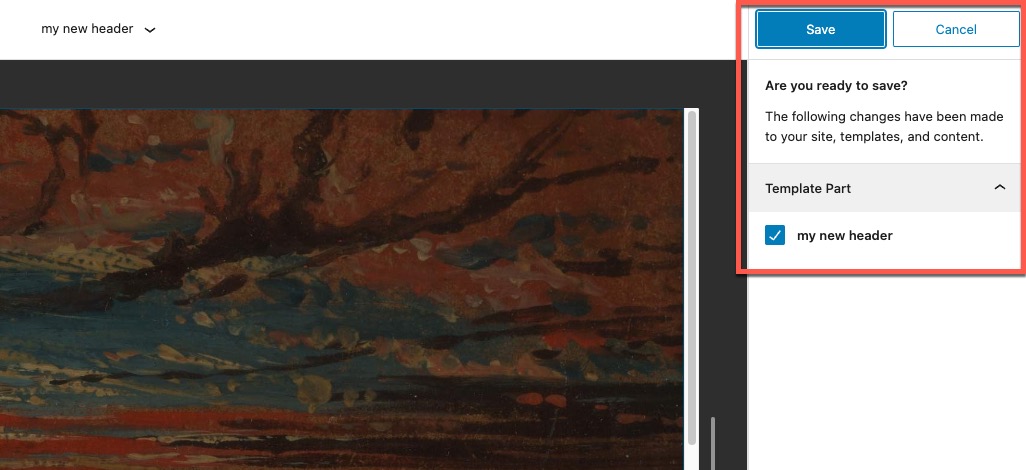
- Click on Save in the top right corner. It will confirm that you’re saving your new header. Click on the Save button again to confirm, or cancel to choose a different pattern for the header.

- Now we need to return to the Editor menu so that we can select the Home template to modify it. Click on the WordPress symbol in the top left corner, then click on Templates.
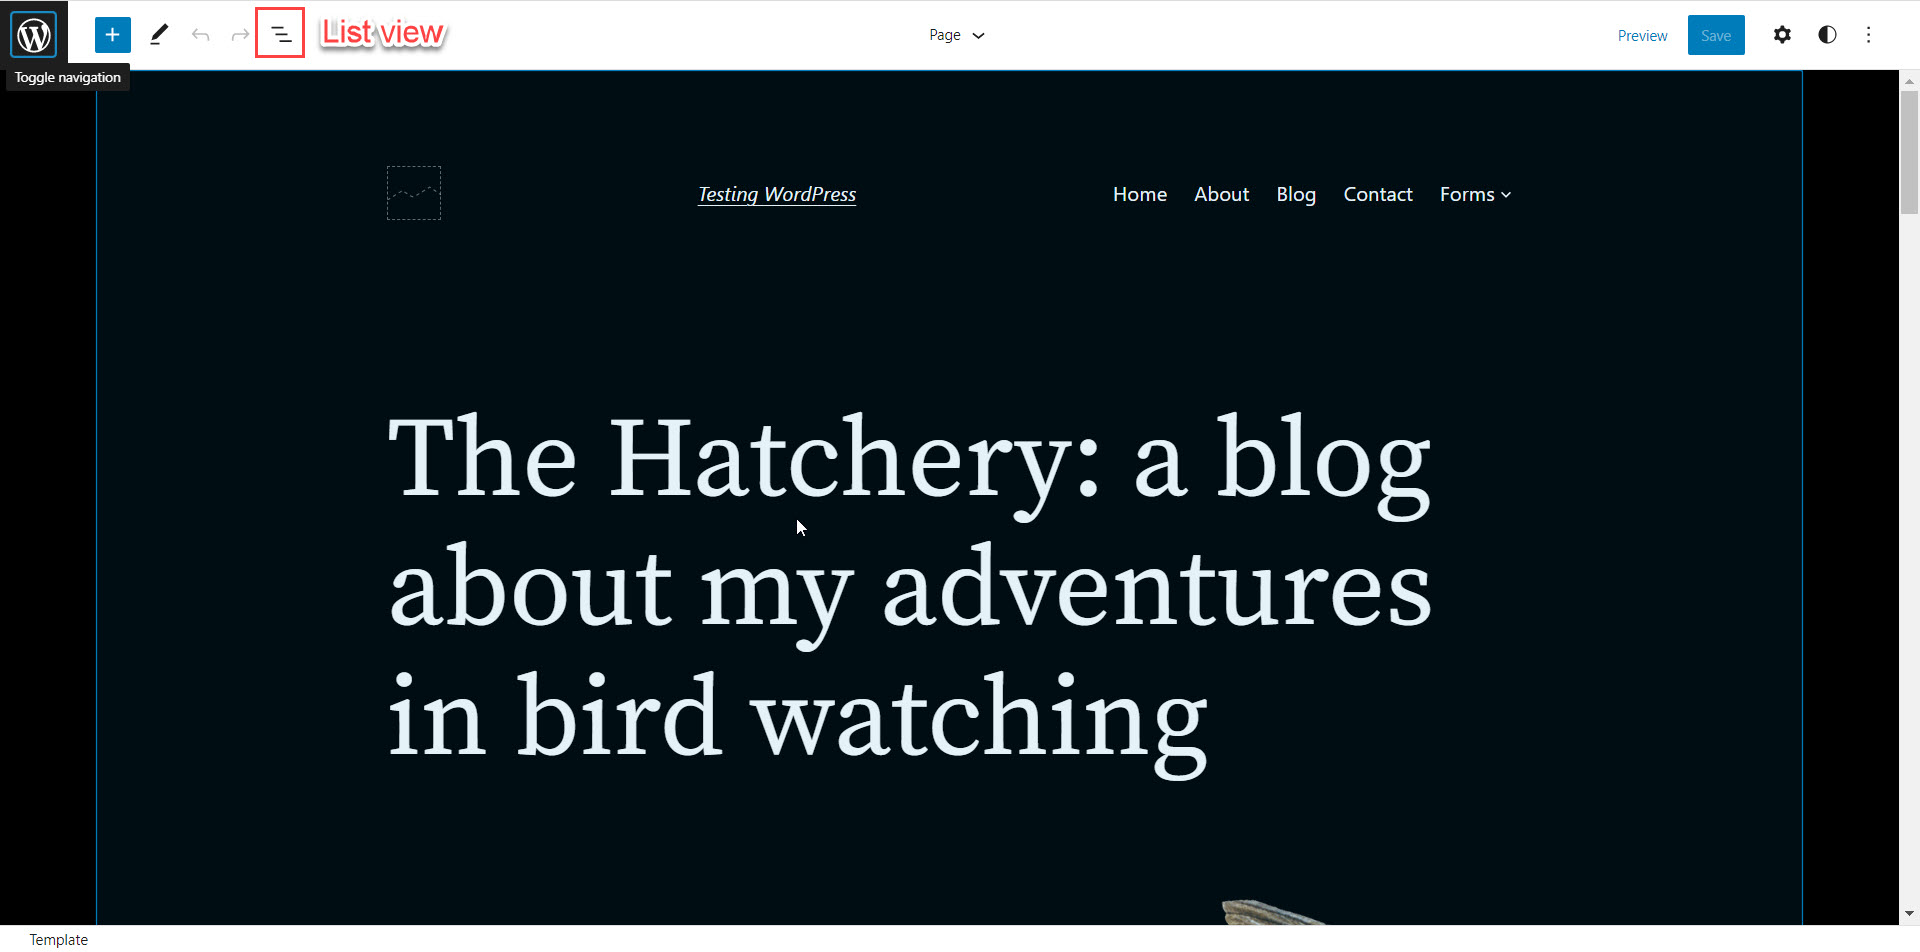
- Click on the Home template. To see this change more clearly, first, click on the List view option in the top-left corner.
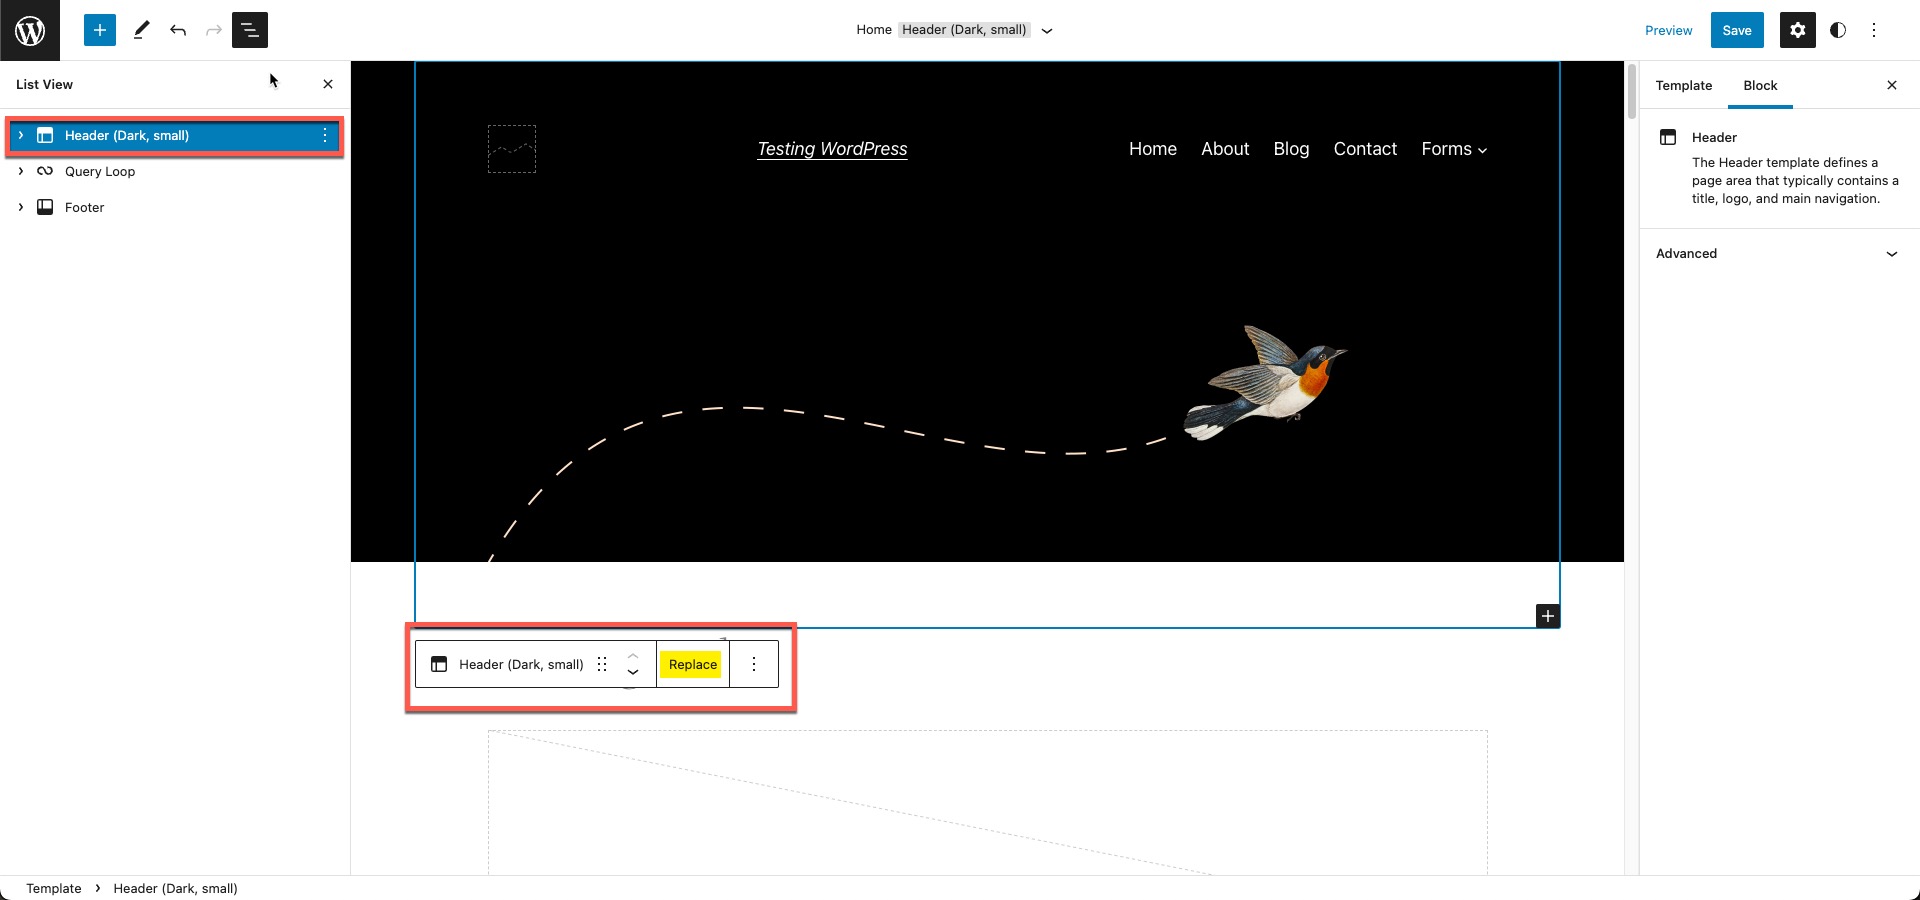
- This will bring up the list of blocks making up the Home page. The default header should be in place. Click on the Header (either in the editor screen or in the list view).
- You will see a contextual menu bar appear and you will see a REPLACE option on it.

- Click on Replace. This will bring up the list of available headers (from the template parts) and should include your newly created header. Choose your header.
- Click on Save in the top right corner. It will confirm that you’re saving your modified Home page. Click on the Save button again to confirm, or cancel to choose a different header for the Home page.
To make changes to the other pages of your WordPress site, repeat these steps, but select the page that you wish to edit (other than the home page). If you want to make further changes to the Home page template, then you can edit it without having to change a template part.
Just remember that template parts make up the header and footer. So, if you wish to change those elements, then you will need to change the corresponding template part first.
The Twenty Twenty-two theme only has header and footer template parts. This may differ in other themes.
Using Patterns from the WordPress.org Site
If you want to use a pattern from the WordPress.org site, then follow the steps below:
- Log in to the WordPress Administrator.
- Click on Appearance, then click on Editor.
- This will take you to the home page. In this example, we will demonstrate changing the header pattern. Click on list view at the top left corner of the editor. You can then see that the header consists of multiple blocks. The header is a template part in this pattern so, in order to create a custom one, we will need to create a new header.

- Click on the WordPress symbol in the top left corner. This will open the menu for the template and template parts that are part of the theme and make up the site. Click on Template Parts.

- You will see a footer and three headers that are in the Twenty Twenty-two theme. Click on the blue button labeled Add New in the top right corner.

- You will see a dialogue window open asking if you want to create a general(checked by default), header, or footer template part. We are creating a custom header, so select header, then add a name for the customer header. You will need to do this before you can click on the Create button.

- Once you click on the Create button, you will see the editor screen for the template part. Keep the editor open (don’t close it). Open a new tab in your internet browser and go to the WordPress.org Patterns directory and then select a new header pattern there.

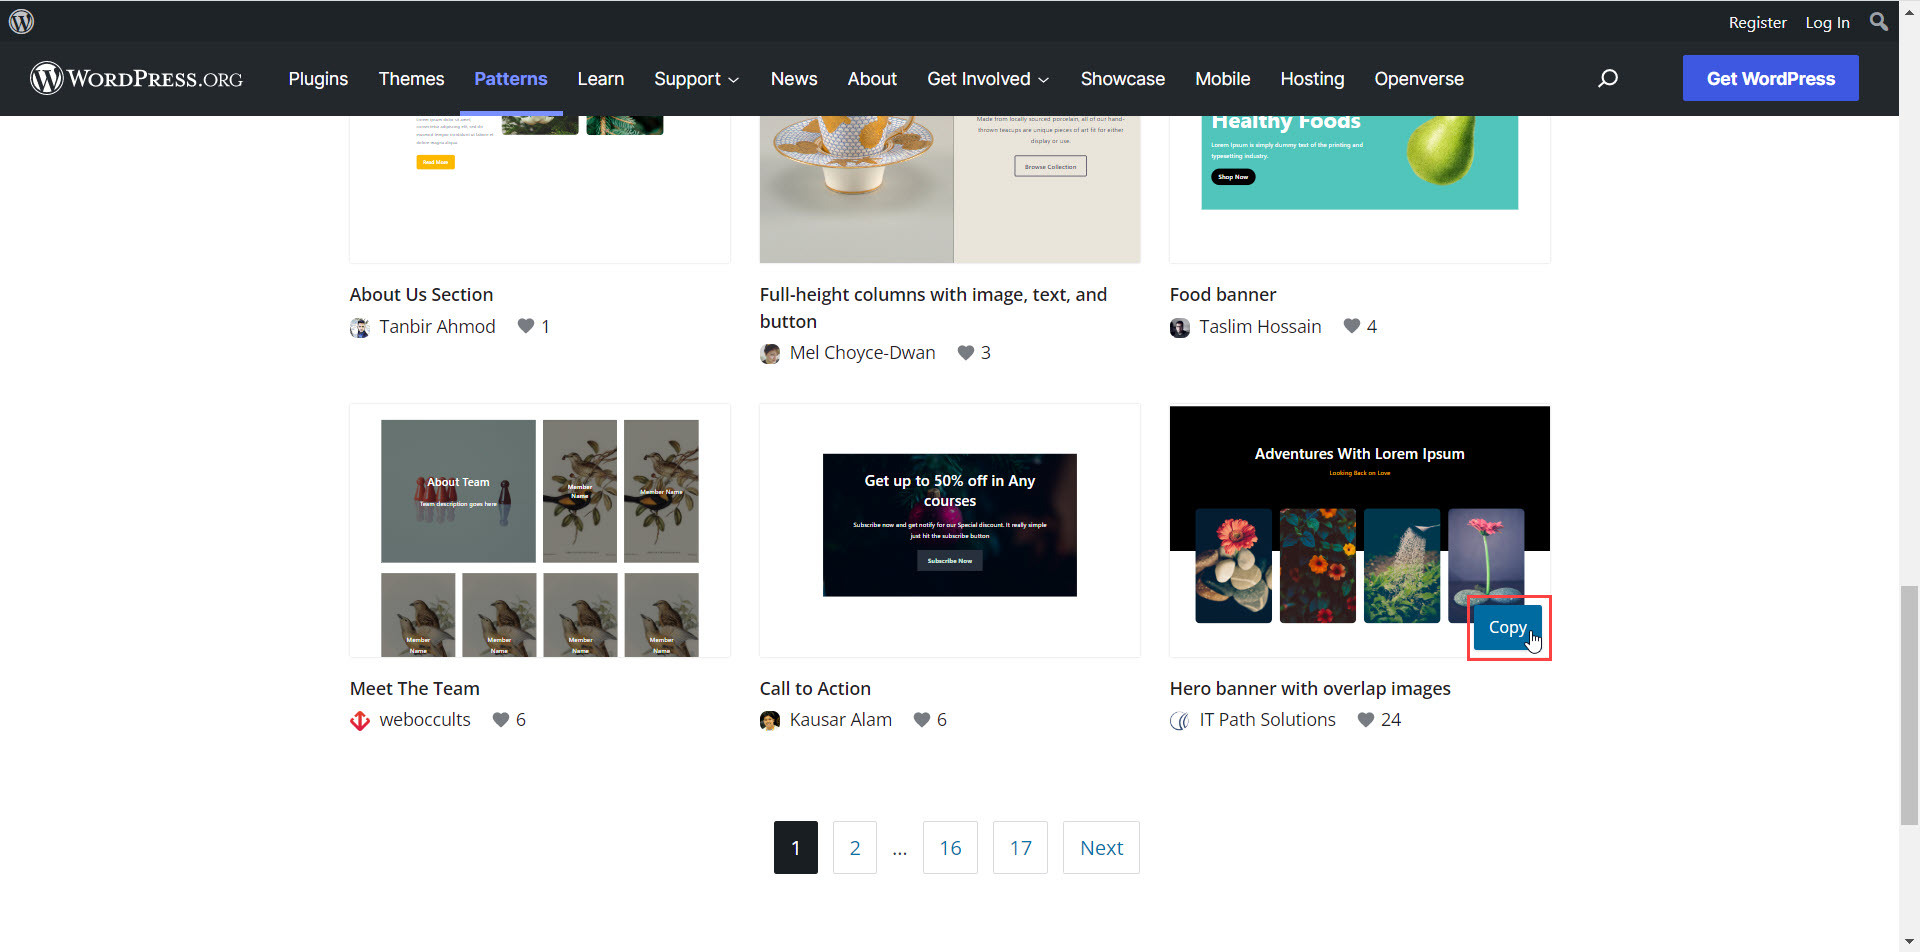
- If you use a pattern from the online directory, click on the copy button of the pattern you have selected and then paste it into the editor. For example, I have selected a pattern from the online directory and clicked on the copy button.

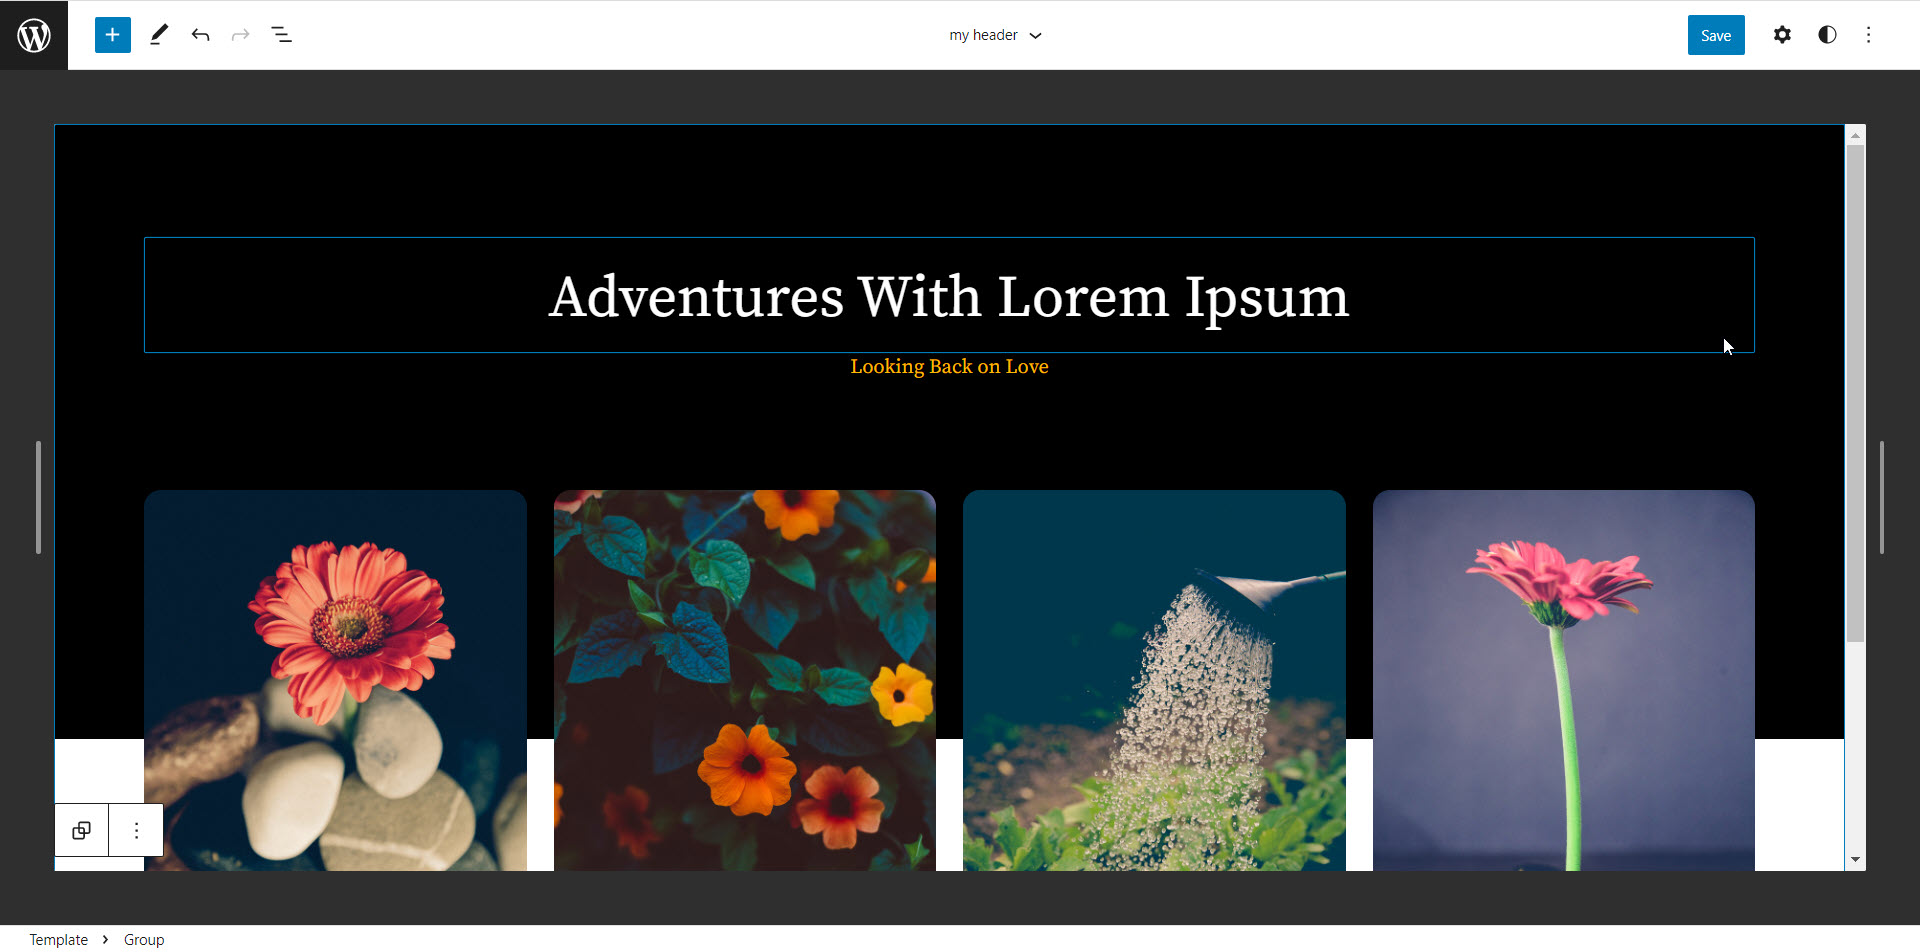
In the template editor, right-click on the block, then select Paste.
You will see the pattern added. It will appear like this:
- Click on the blue Save button in the top right corner of the template editor. Note that the graphics of the custom header can’t be edited unless you edit the template part. There you can select the graphic and replace it using the blocks.
You can repeat this process, but selecting the footer and then using the same steps to make changes. You would be creating a custom footer. The next step is to add your content to the modified theme.
Filling Your Content Based on Your Selected Patterns
The final step in using patterns to build a WordPress site is to fill your modified site using your own content. This is typically the easiest part of the process. You would go into the editor and add your content starting with the front page (home page).
Typically, the home page may have elements on it that don’t regularly change. These elements can be changed using the Site Editor (from the WordPress Dashboard: Appearance >Editor).
Otherwise, the content that is on your front page comes from posts that are displayed between the header and the footer. Create new content by creating posts.
You can also create new menus or submenus. To learn more about building menus you can go to Working Menus in WordPress FSE, or you may need to create submenus for your site.
Patterns are not restricted to simply making changes to the templates or template parts that make up your WordPress site. You can use them in a post to help provide some creativity in its appearance.
Finally, if you’re working with patterns, don’t be shy in editing them when using the WordPress full site editing system. They’re excellent guides in giving you a format to work with but they don’t need to have the same elements. Change them as needed per your needs.
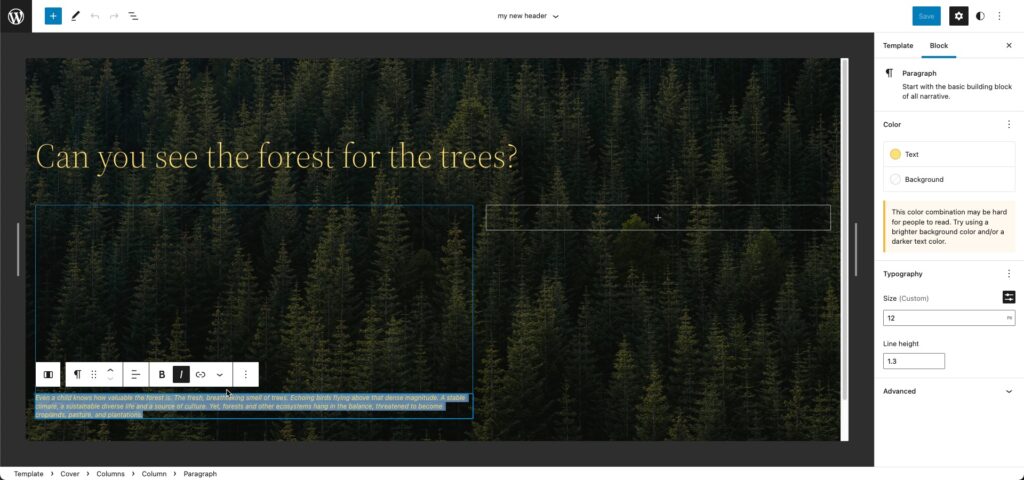
Here you can see the text highlighted for editing. You can also easily replace the background graphic or add other blocks. Have fun and be creative!
