One of the biggest obstacles to many WordPress users is the change in the menu creation process when going to the Full Site Editing (FSE) system. Creating custom menus appears to take the biggest hit. However, if you haven’t already tried it, the FSE system’s method of building menus is still very flexible and capable when building custom menus.
This article will focus on one aspect of custom menus – creating submenus. We will show you how to build a submenu and the options that you have while creating it.
This tutorial uses WordPress 6.0 and the Twenty Twenty-two theme. In order to use the Full Site Editing system to build menus, your theme must support block editing.
Creating a Submenu
To start, you will need to first create a menu. From there you can create submenus as needed.
- Log in to the WordPress Administrator.
- Open a page or post with an existing menu, or create a new menu.

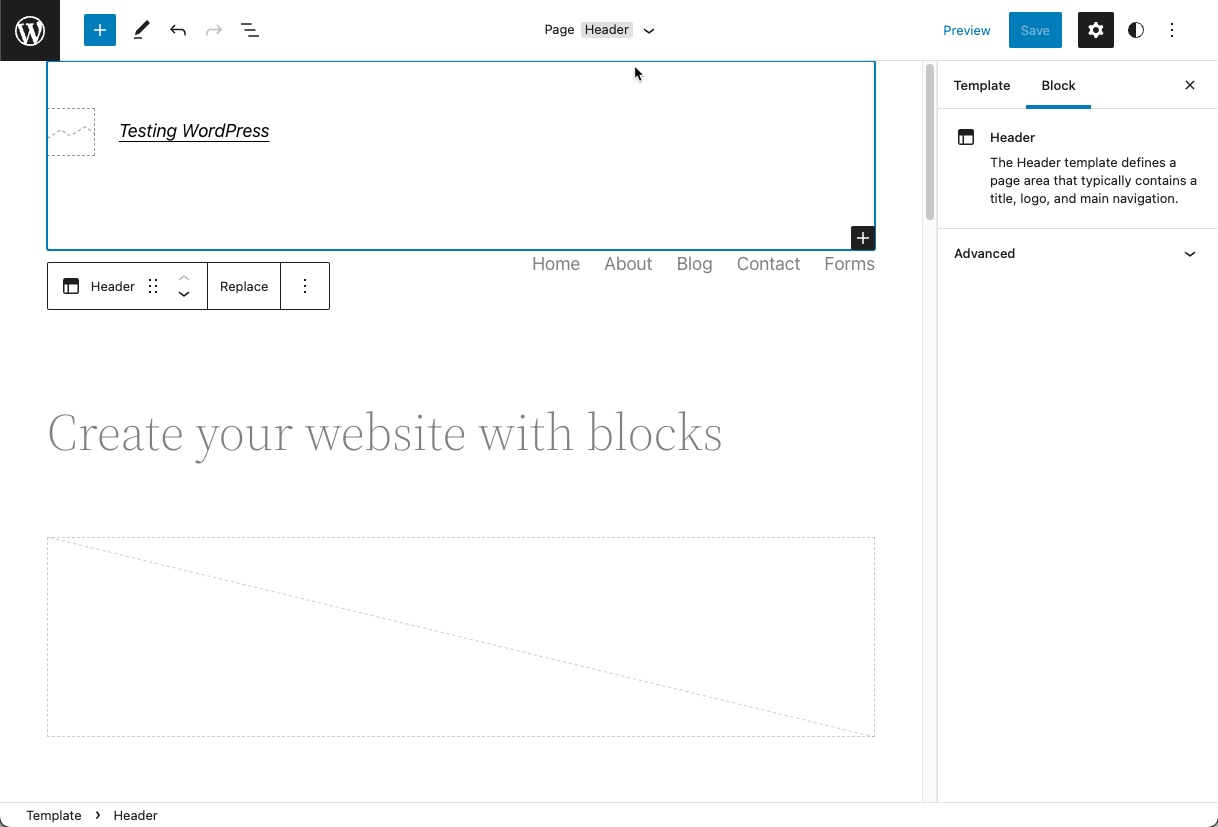
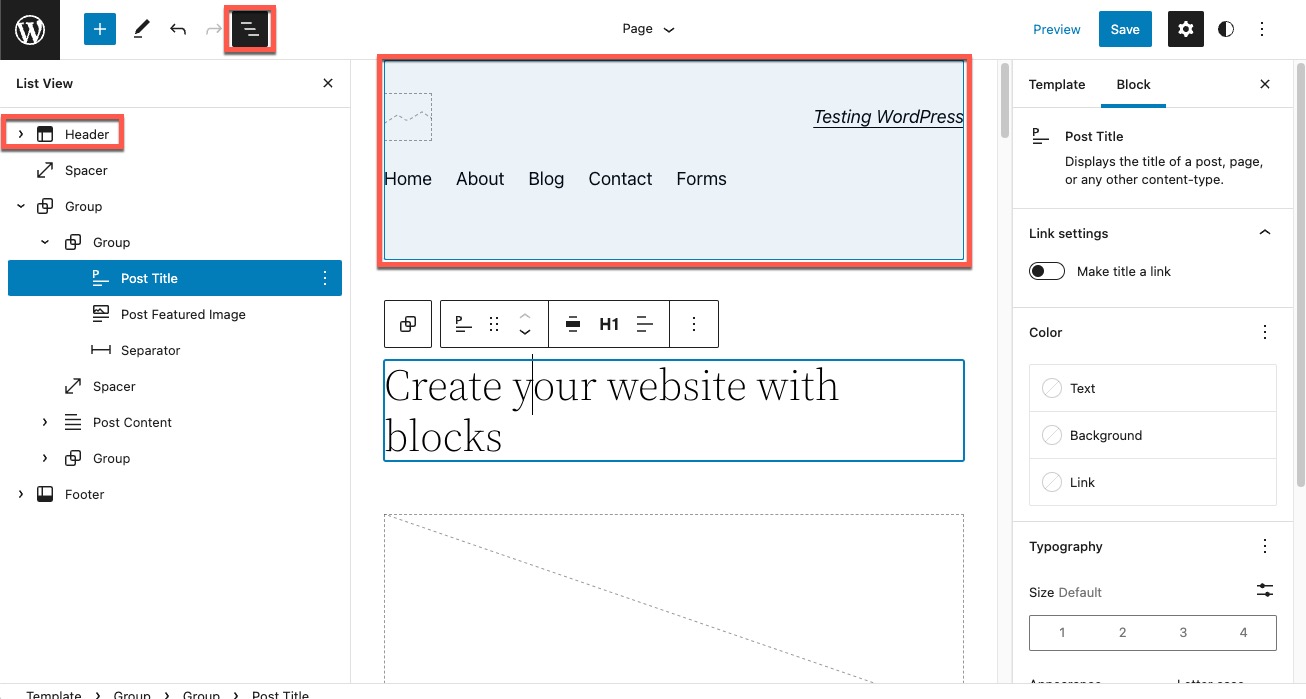
Note that I am editing the menu in the header of the home page in the Twenty Twenty-two theme in this tutorial. - Open the List View, then select the Navigation block.

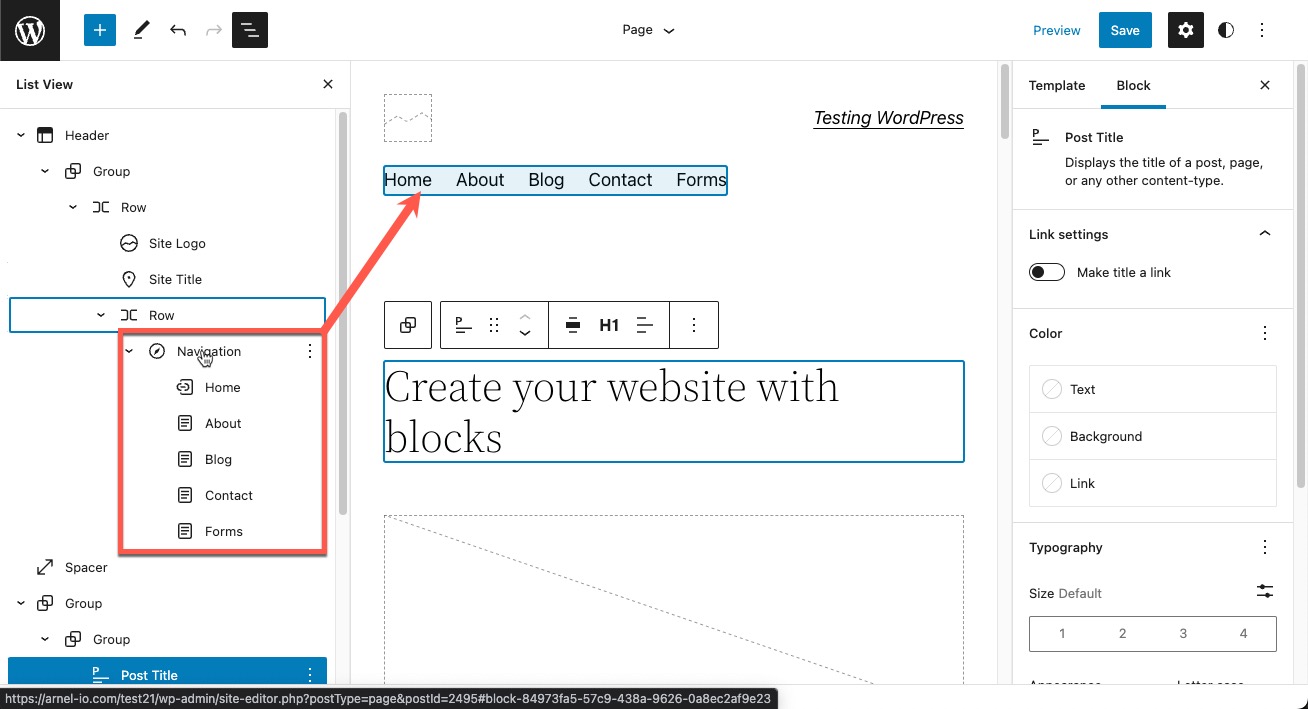
The Navigation block is what makes up the menu in FSE. The list view will display the list of blocks that are in the editor. The navigation block may not immediately be visible and you may have to click on the drop-down arrows to expand the block list.
The menu is created by the Navigation block. Click on the Navigation block and you’ll see the existing menu structure. - Select the parent item of the submenu.

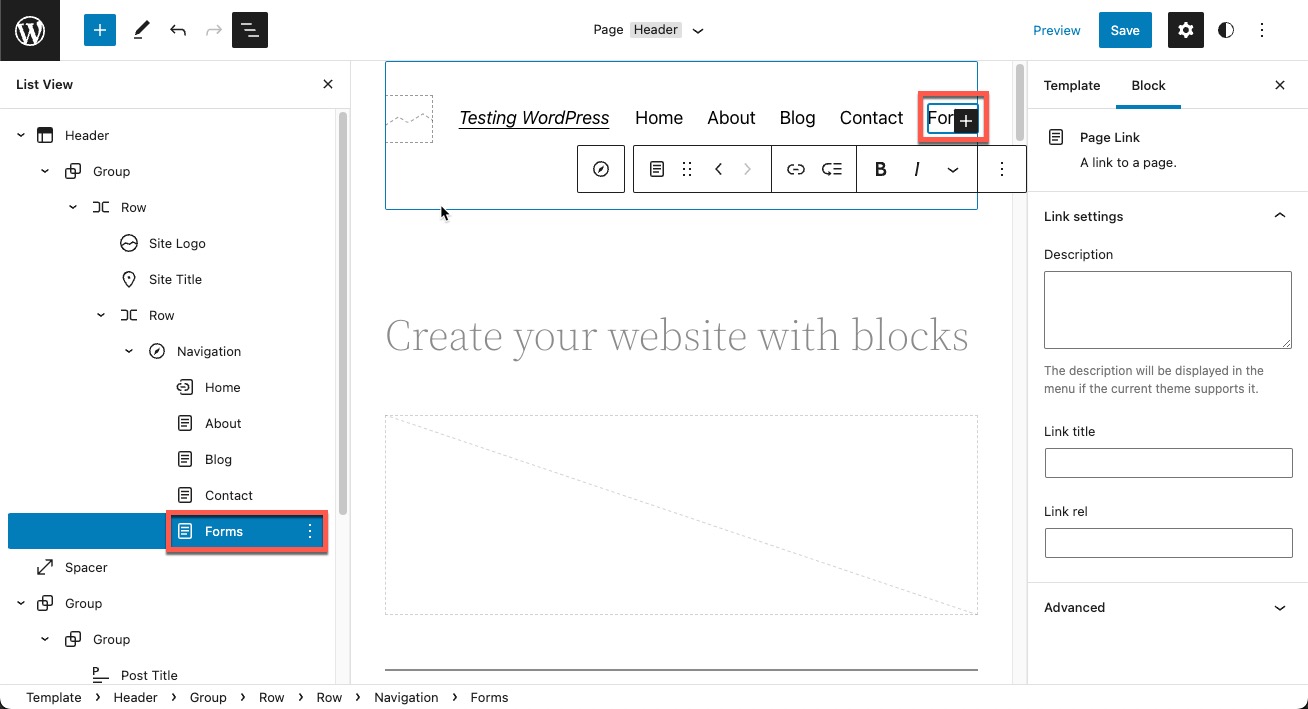
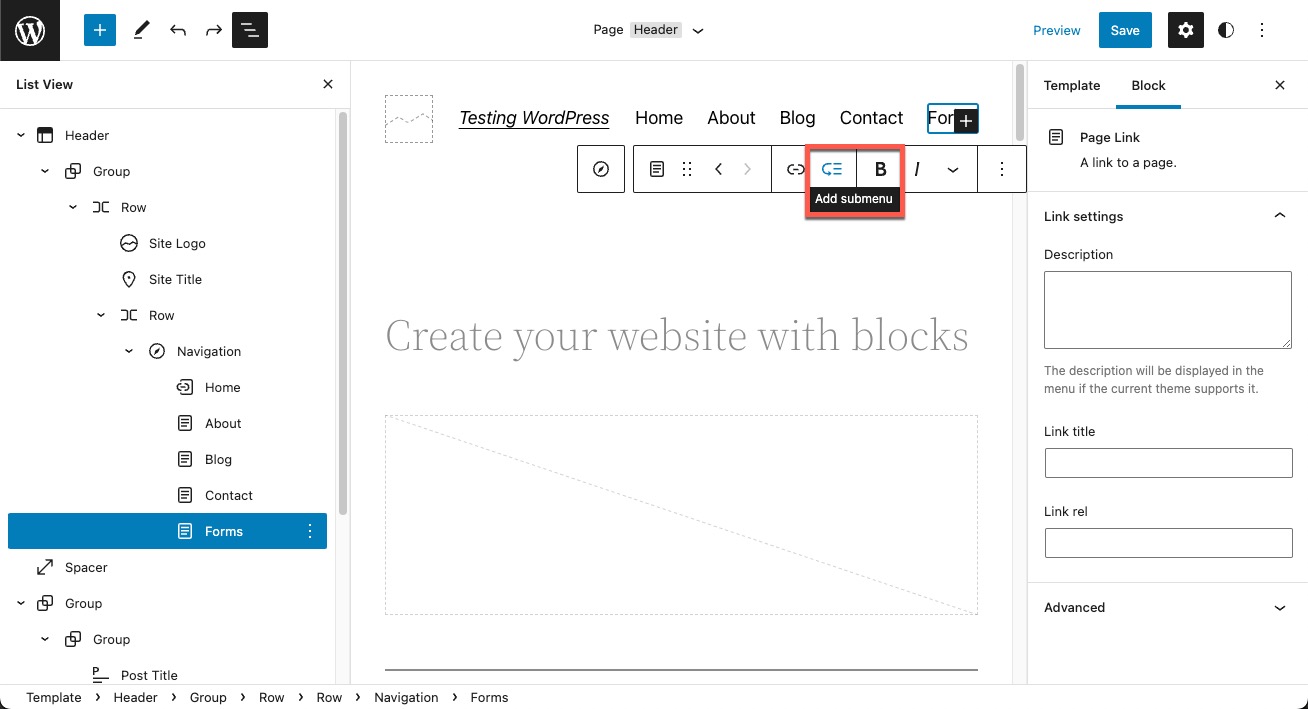
To create a submenu, click on the menu item where you want to start the submenu. This will bring up the menu bar for the menu. In our screenshot below, I have selected “FORMS” to be the parent of the submenu I’m creating. - Click on the Add submenu option as shown in the screenshot below.

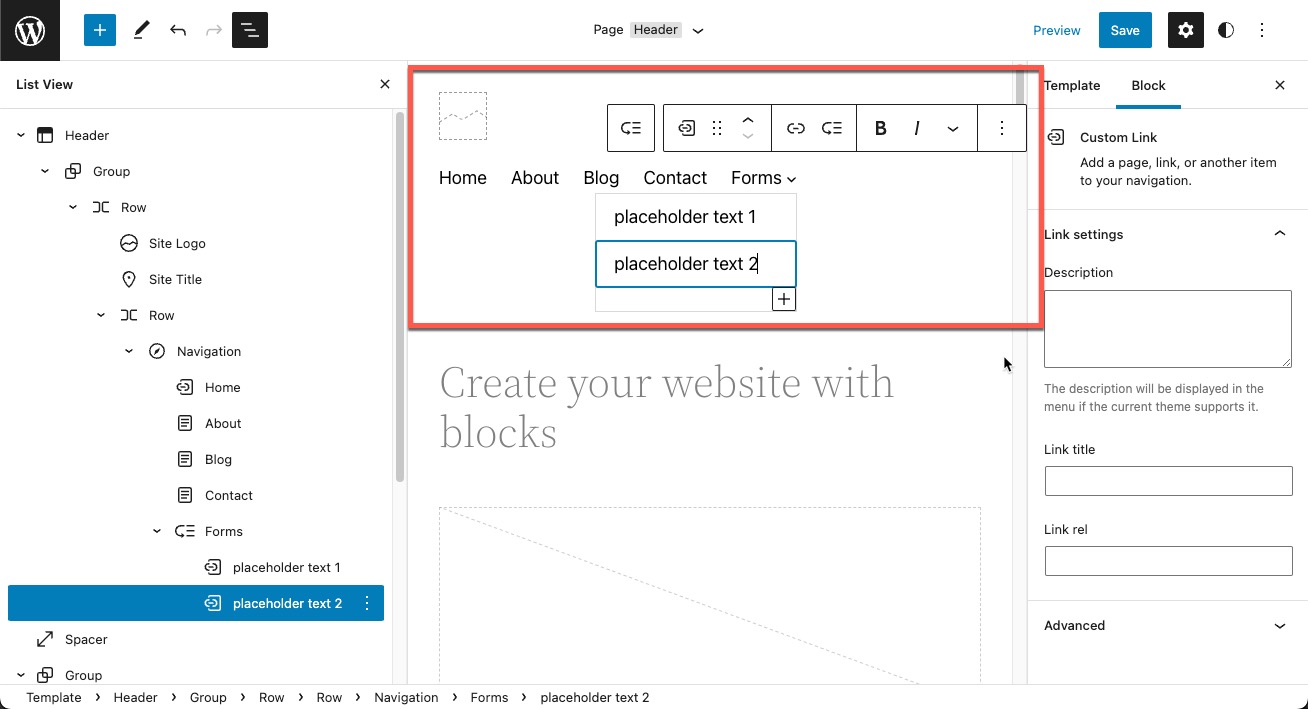
A contextual menu bar will appear when a menu item is selected. - Click on the + sign in the white block to add items to your submenu.

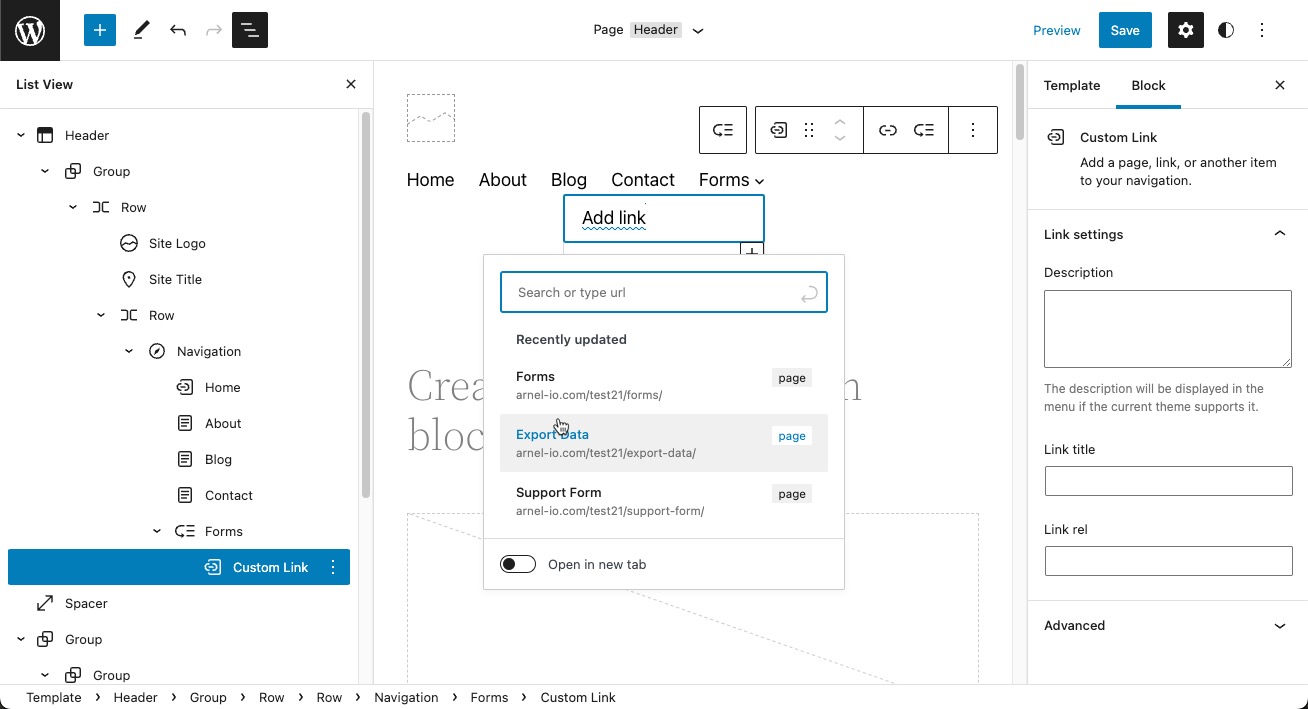
The example above shows “placeholder text” in the submenu items. When you first click on the + sign you will be given the option to search for the link, select an existing page, or type it in. There is also the option to open the submenu in a new browser tab. Clicking on this option will cause the internet browser to open a new tab when clicking on the submenu.
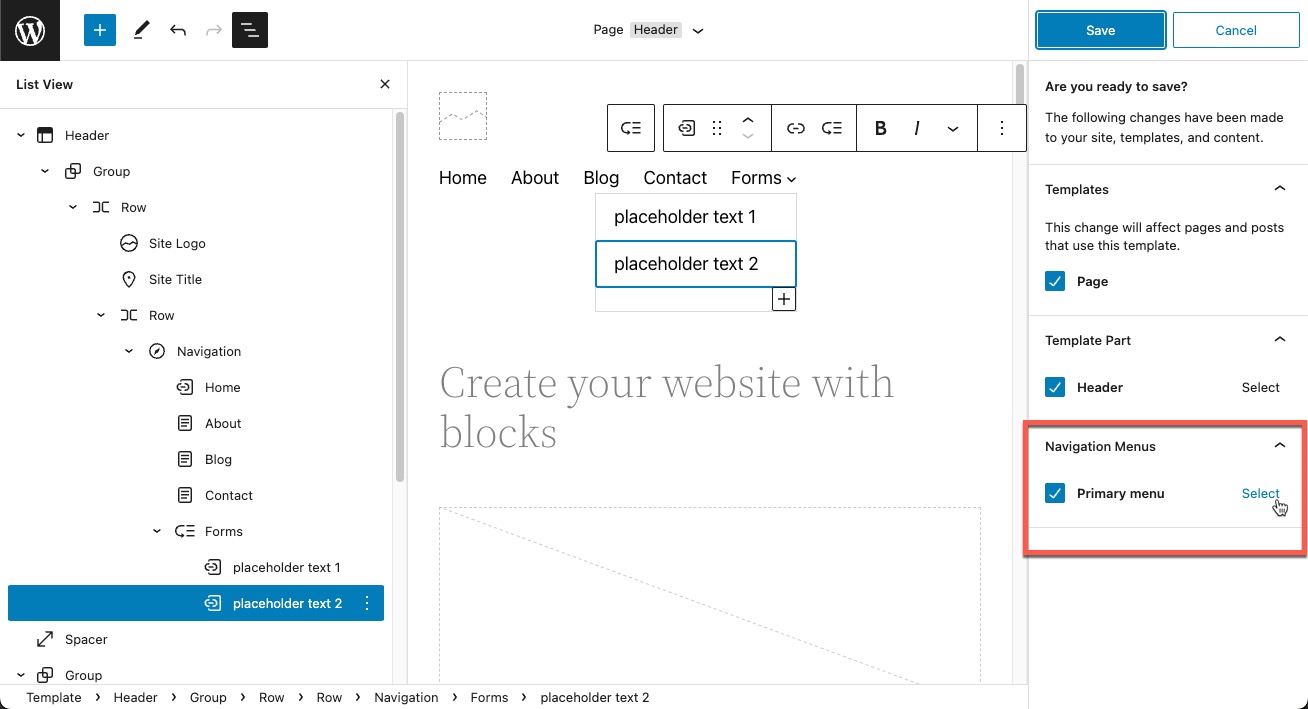
Use the option to search for links, add existing pages, or type in the text you want to add to your submenu. Continue clicking on the + sign to add more entries until you complete building your submenu. - When your submenu is complete, click on the blue Save button in the top right corner. You will be given a confirmation request before it can be saved. Click on Save again to save your submenu.

Note that If you wish to choose a different menu to save your submenu, then you will need to scroll to the Navigation Menus section (under Save) and then click on Select. You can then select a different menu to save to or create a new menu.
Submenu Options
The WordPress FSE system includes many options and the submenus are no exception. Each menu item is treated just like a normal menu item with the option to have Link settings – Description, Link Title, and Link rel.
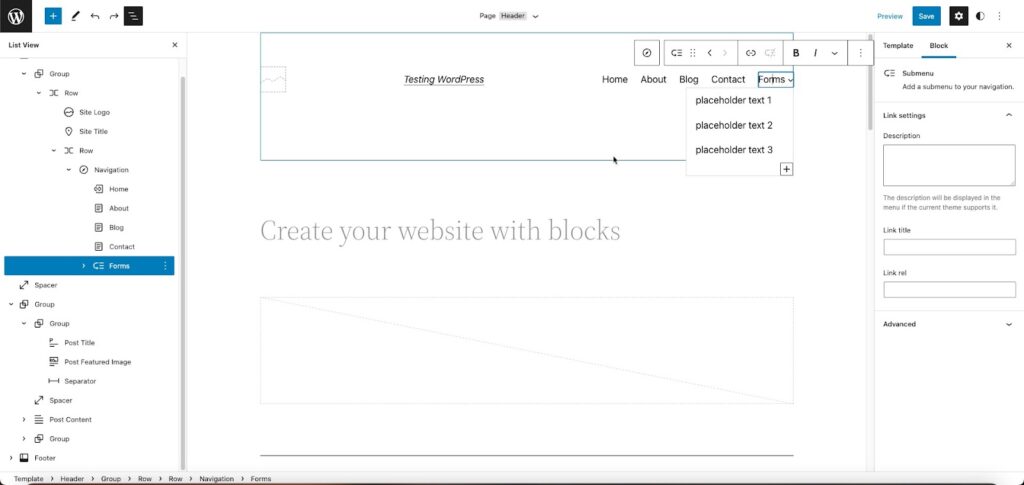
In the screenshot above you can see the submenu items and the block properties to the right for Forms. Each submenu item also has these properties:
- Description – a description of the link
- Link title – text to give more information about the link
- Link rel – describes the link relation between linked resource and current document; can be used to set values such as “nofollow.” Click on the following link to find a more detailed definition of the HTML a rel attribute.
You can also create further submenus under a submenu item by selecting a submenu item and then clicking on the add submenu icon. You can see the steps numbered in the screenshot below: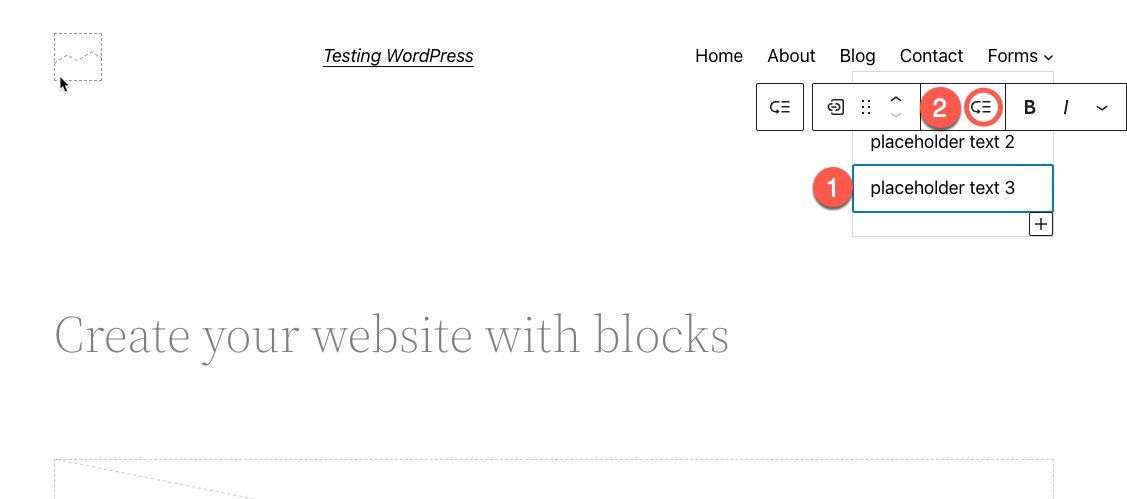
To more easily work with submenu items, it’s best to use the List view option. You can then get a detailed view of the blocks that make up your menu. Each block has a contextual menu.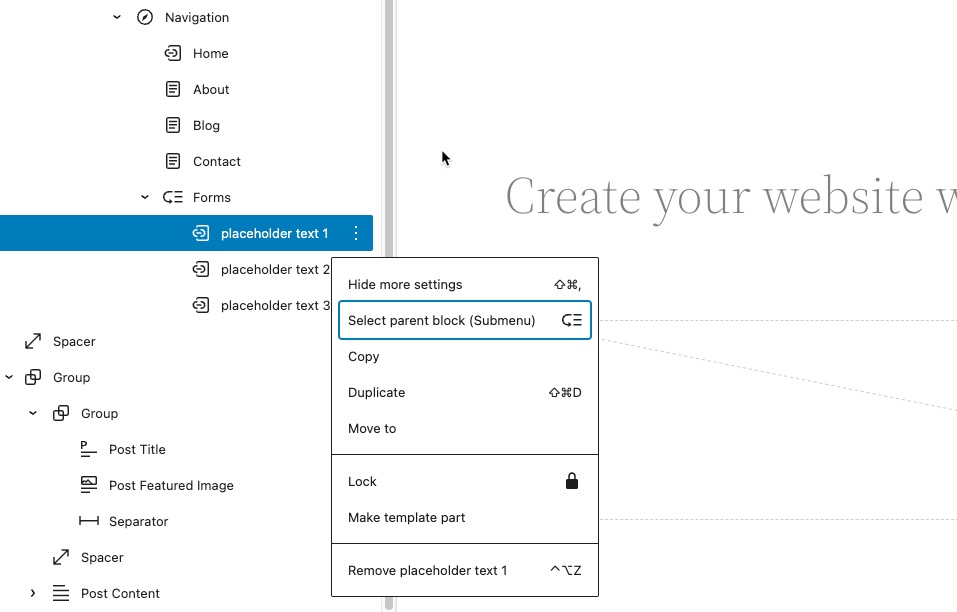
The contextual menu is made visible by clicking on the vertical 3-dot menu to the right of the menu item in list view (as seen above). The options in the menu include:
- Hide more settings – currently, this option re-locates the menu bar above the menu so that you can see the submenu items.
- Select parent block (Submenu) – this occurs when you select a menu item. That item can become the parent for a new submenu if you choose to create one.
- Copy – copies the link for the menu item to your clipboard
- Duplicate – copies and immediately pastes a duplicate of the menu item
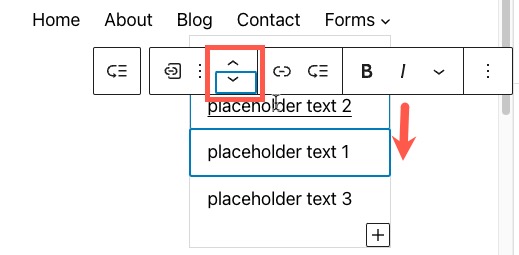
- Move to – this option is currently buggy in list view (it doesn’t do anything); the best way to move a menu item is to go to the submenu, select the menu item you want to move, then use the arrows in the contextual menu bar to move the menu item up or down

- Lock – locks the menu item from being changed or moved
- Make Template part – create a template part with the menu
- Remove “placeholder text 1” – delete the menu item. In this case, the text in the submenu is “placeholder text 1”, so the item is identified by the link text. Clicking here will remove the link from the submenu.
You now know how to create a custom submenu for your WordPress site. Check out our tutorials for more information on using WordPress Full Site Editing.
Learn more about the new WordPress editor, Gutenberg, and the capabilities of the separate Gutenberg plugin with our helpful Gutenberg articles!
