The Mastodon social media application is a self-hosted Twitter alternative you can use to communicate with a private community or the Fediverse.
Mastodon requires a Linux Ubuntu server (version 18.04 or greater). We recommend using a clean operating system (OS) image if possible as the Mastodon installation process requires many dependencies including PostgreSQL, Ruby, and Certbot.
- Install the Mastodon Social Media App
- Getting Started with the Mastodon Social Media App
- Learning Mastodon
Install the Mastodon Social Media App
- Log into SSH.
- Download Node.js from the NodeSource repository (for greater reliability compared to other repos):
curl -sL https://deb.nodesource.com/setup_12.x | bash -
- Install Node.js:
sudo apt-get install -y nodejs
- Download the Yarn GPG key:
curl -sS https://dl.yarnpkg.com/debian/pubkey.gpg | apt-key add -
- Add Yarn to your repo sources file:
echo "deb https://dl.yarnpkg.com/debian/ stable main" | tee /etc/apt/sources.list.d/yarn.list
- Update packages:
apt update
- Install all dependencies:
apt install -y imagemagick ffmpeg libpq-dev libxml2-dev libxslt1-dev file git-core g++ libprotobuf-dev protobuf-compiler pkg-config nodejs gcc autoconf bison build-essential libssl-dev libyaml-dev libreadline6-dev zlib1g-dev libncurses5-dev libffi-dev libgdbm-dev nginx redis-server redis-tools postgresql postgresql-contrib certbot python3-certbot-nginx yarn libidn11-dev libicu-dev libjemalloc-dev
This will take a few minutes. - Mastodon developers recommend using rbenv to ensure you get the latest Ruby versions as soon as possible. However, it requires a dedicated system user. Create a system user without the ability to login from SSH:
adduser --disabled-login mastodon
- Switch to the new user:
su - mastodon
- Download rbenv:
git clone https://github.com/rbenv/rbenv.git ~/.rbenv
cd ~/.rbenv && src/configure && make -C src
echo 'export PATH="$HOME/.rbenv/bin:$PATH"' >> ~/.bashrc
echo 'eval "$(rbenv init -)"' >> ~/.bashrc
exec bash
git clone https://github.com/rbenv/ruby-build.git ~/.rbenv/plugins/ruby-build
- Start the installation:
RUBY_CONFIGURE_OPTS=--with-jemalloc rbenv install 2.7.2
This may take a few minutes.rbenv global 2.7.2
- Install Bundler:
gem install bundler --no-document
- Switch back to the root user:
exit
- Log into PostgreSQL:
sudo -u postgres psql
The following warning doesn’t affect the installation process: “could not change directory to “/root”: Permission denied.” - Create a mastodon database user:
CREATE USER mastodon CREATEDB;
- Exit the PostgreSQL CLI:
\q
- Switch back to the mastodon system user:
su - mastodon
- Download Mastodon and switch to the “live” directory:
git clone https://github.com/tootsuite/mastodon.git live && cd live
git checkout $(git tag -l | grep -v 'rc[0-9]*$' | sort -V | tail -n 1)
- Install Ruby and JavaScript dependencies:
bundle config deployment 'true'
bundle config without 'development test'
bundle install -j$(getconf _NPROCESSORS_ONLN)
This might take a few minutes. - Install dependencies:
yarn install --pure-lockfile
If you receive the following error you’ll need to install the latest Yarn version with NPM.yarn: error: no such option: --pure-lockfile
If you don’t receive the error, continue to the next section.
Return to the root user:exit
Remove the Yarn executable:rm /usr/bin/yarn
Install Yarn with NPM:npm install --global yarn
Log back into the mastodon user:su - mastodon
Return to the “live” directory:cd live/
Try again:yarn install --pure-lockfile
You should see “Done in X.XXs” when it finishes.
Initial Mastodon Setup
Ensure there are no other resource intensive tasks running before continuing (e.g. antivirus scans).
- Run the Mastodon setup:
RAILS_ENV=production bundle exec rake mastodon:setup
- Type the domain name for your Mastodon instance.
- Specify whether your instance will be for a single user. Single user mode disables registrations and redirects the landing page (for registrations and logins) to your public profile.
- Answer “n” for having not used Docker.
- Accept the default PostgreSQL options unless you have a more complex setup.
- Accept the default Redis options.
- Decide whether to store uploaded files “on the cloud.”
- Decide whether you’ll send emails from your system.
- Set an email address to send emails. The default is “notifications@.” You’ll also have the option to send a test email.
- Type “Y” to save the configuration.
- Prepare the PostgreSQL database.
- Compile the assets.
- Pay attention to any notices. For example, we got a recommendation to update caniuse-lite:
npx browserslist@latest --update-db
- Select “Y” to create an admin user.
- Specify the username and email address. Note that this will be a Mastodon social media account. Consider using a name instead of something like “admin.”
- Save the password in a password manager.
- Return to the root user.
exit
- Copy the downloaded Mastodon NGINX configuration file to your NGINX web server:
cp /home/mastodon/live/dist/nginx.conf /etc/nginx/sites-available/mastodon
- Create a symlink:
ln -s /etc/nginx/sites-available/mastodon /etc/nginx/sites-enabled/mastodon
- Edit the Mastodon NGINX configuration file:
nano /etc/nginx/sites-available/mastodon
- Replace every instance of “example.com” (4). The quickest way in Nano is to type Ctrl + \, “example.com,” Enter, your Mastodon domain, and Enter.
- Save changes.
- Restart NGINX:
systemctl restart nginx
Simply reboot the system if you encounter the error “Failed to start A high performance web server and a reverse proxy server.”
Install an SSL Certificate
Certbot manages Let’s Encrypt SSL certificates for your domain(s). It is one of the dependencies installed earlier.
- Create an SSL certificate with Certbot, replacing “example.com” with your domain:
certbot --nginx -d example.com
- You’ll need to provide an email account, agree to the terms of service, and decide whether to share your email with the Electronic Frontier Foundation (EFF).
- Choose “1” if you have apps that cannot use an SSL certificate. You can create the redirect manually later.
Choose “2” to redirect all web traffic to HTTPS (recommended). - Copy the downloaded Mastodon service file:
cp /home/mastodon/live/dist/mastodon-*.service /etc/systemd/system/
- Reload Systemd:
systemctl daemon-reload
- Start Mastodon:
systemctl enable --now mastodon-web mastodon-sidekiq mastodon-streaming
Getting Started with the Mastodon Social Media App
Log into Mastodon
- Visit your new Mastodon instance in a web browser.

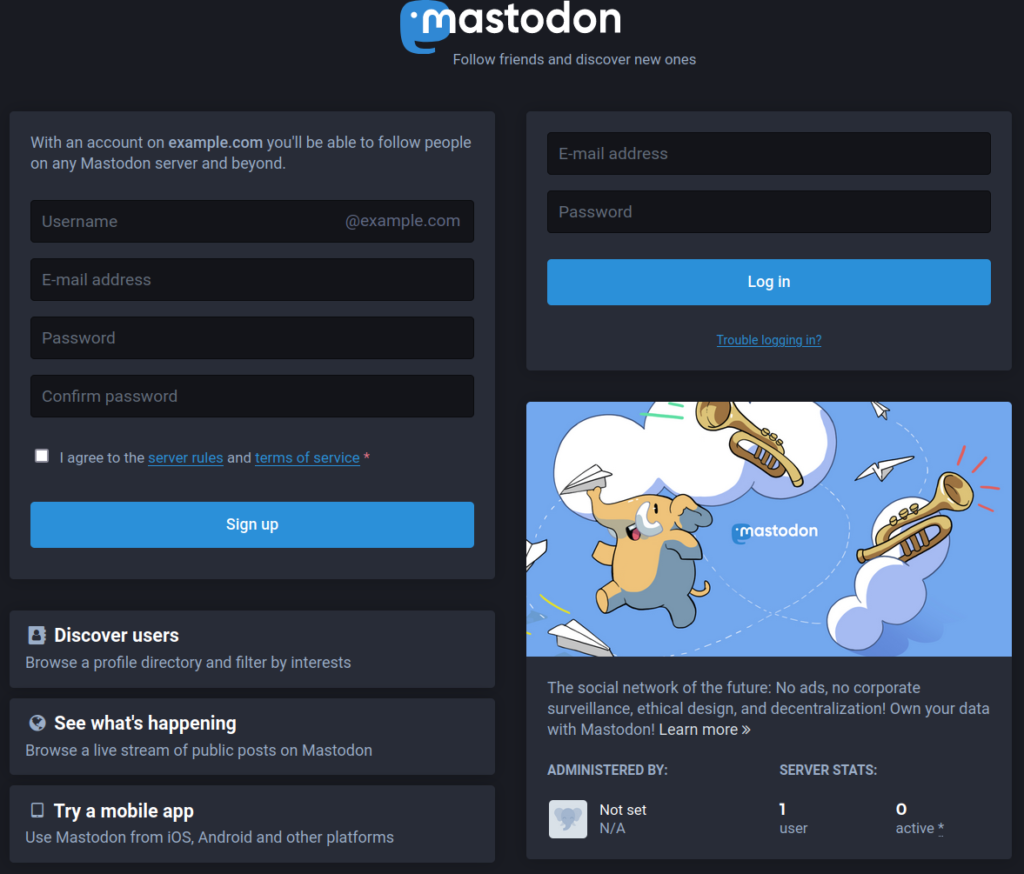
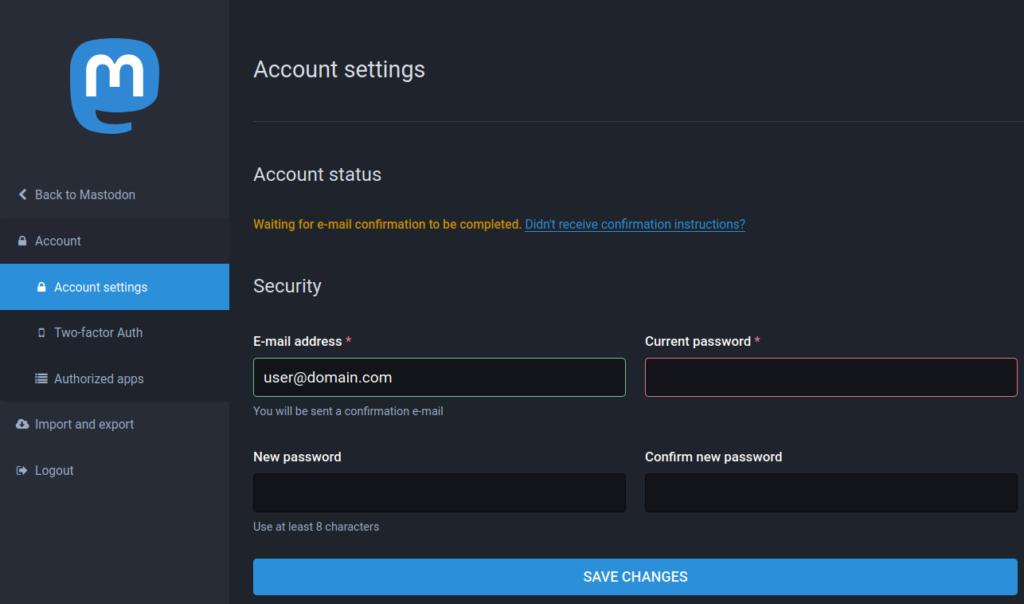
- Log into Mastodon on the right. When you login you’ll see the following notice at the top: “Waiting for e-mail confirmation to be completed. Didn’t receive confirmation instructions?”

- Check your email and confirm your Mastodon account if you received the email. Then skip to the admin settings. If you didn’t receive the confirmation email, continue to the next section.
Manually Confirm a Mastodon Account
- If you didn’t receive the confirmation email, log into SSH and the mastodon user.
su - mastodon
- Navigate to the “live” directory:
cd live/
- Manually confirm the Mastodon account with the following command, replacing “username” with the user you created:
RAILS_ENV=production bin/tootctl account modify username --confirm
- If you registered another username from the registration page you can use the following command to grant admin privileges to that user as well:
RAILS_ENV=production bin/tootctl account modify username --role admin
- Refresh the Mastodon page.
Admin Settings
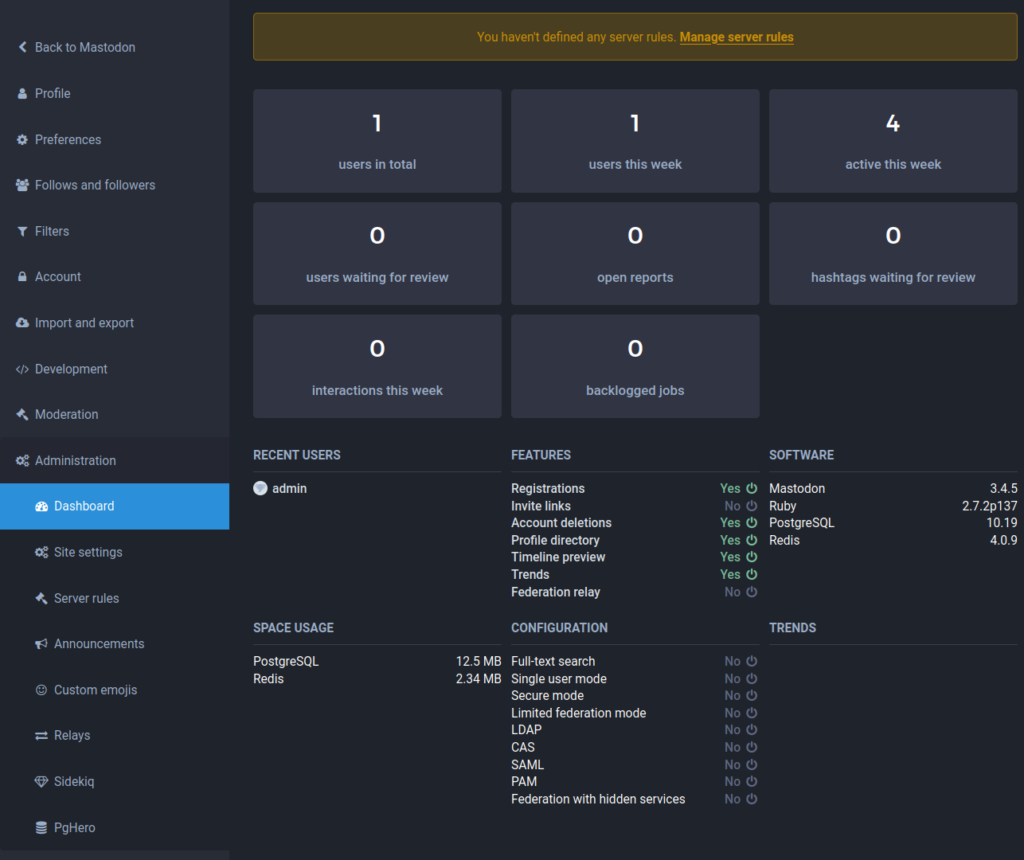
Administrators have access to two restricted sections for managing the Mastodon server:
Moderation
- Application audit log
- List of reported accounts on your instance
- List of registered accounts
- Active invitation links to join your server
- Stats on hashtags created by your users
- Recommended users to follow
- Federation settings to block external domains across the Mastodon social network
- Blocked e-mail domains
- IP rules to limit or block signups
Administration
- Change site settings for appearance, privacy, and more
- Write server rules
- Share announcements with users
- Upload custom emojis
- Set up a federation relay connection for greater visibility across Mastodon’s Fediverse
- View Sidekiq Ruby analytics
- Manage database data with PgHero
To delete admin accounts you must do one of the following:
- Login as the account and delete it under “Account settings”
- Run the following terminal command as the mastodon system user:
RAILS_ENV=production bin/tootctl accounts delete username
Learning Mastodon
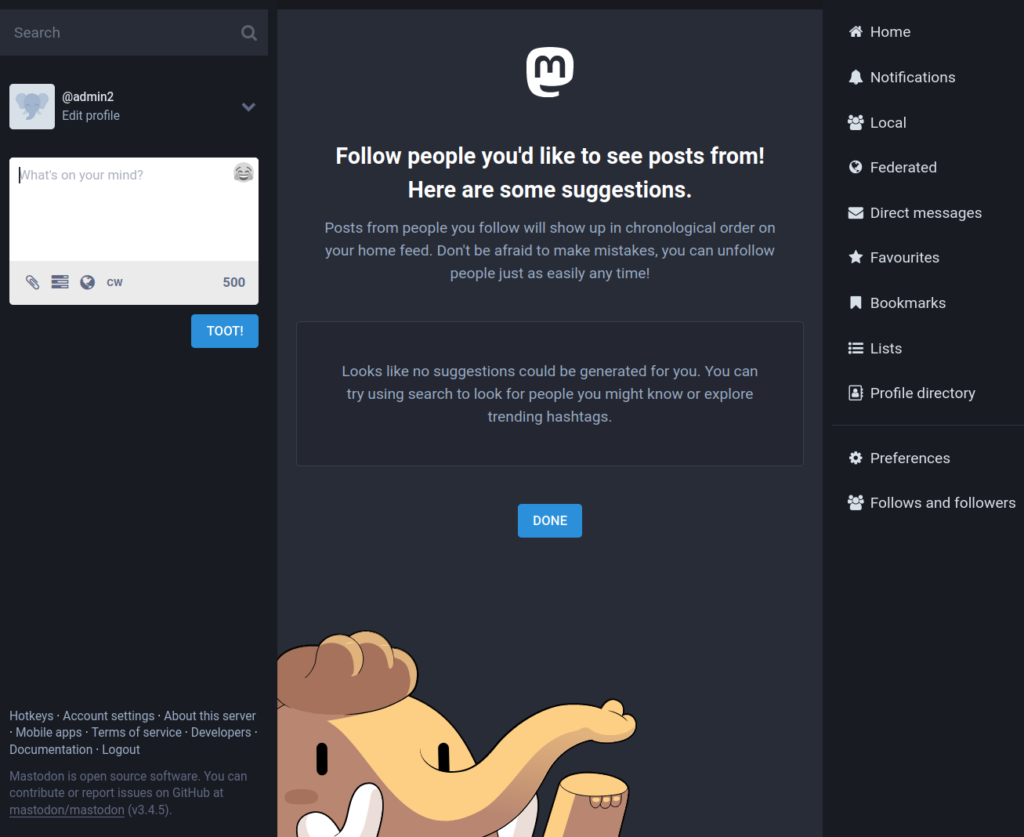
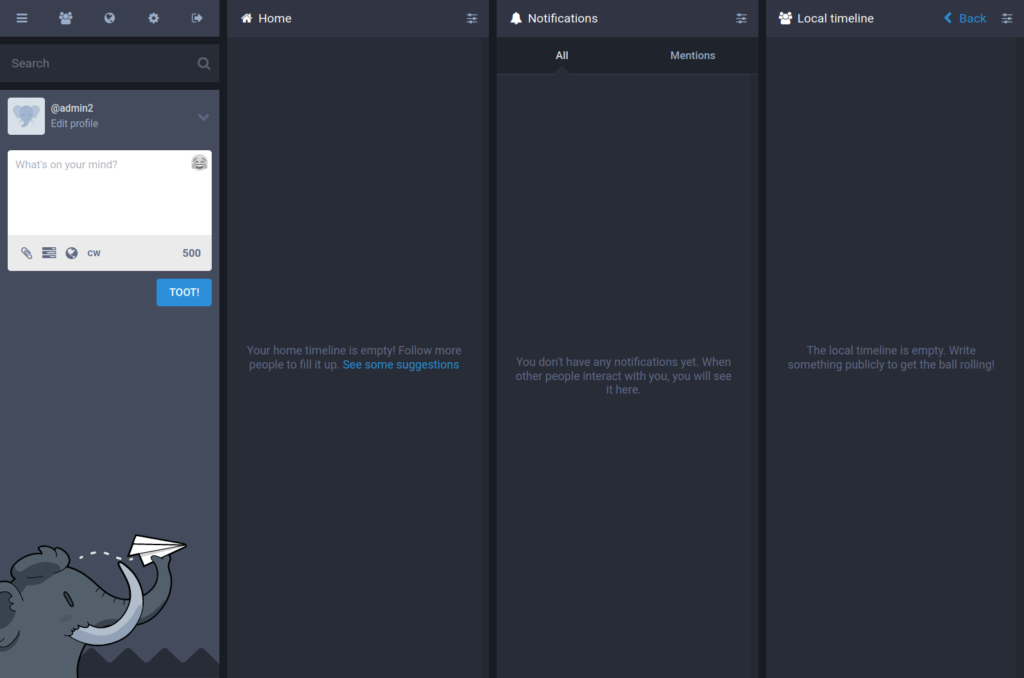
Select “Back to Mastodon” at the top of the settings page to see the local timeline.
View profile options and create “toots” (messages under 500 characters) on the left. Posts show in the center section. Options on the right display:
- Account notifications
- Different timelines (local or federated)
- Direct messages (DMs)
- Bookmarked toots
- Lists you’ve created
- Profile directory for your instance
Social media managers may prefer an interface that shows multiple timelines at once, similar to TweetDeck.
- Select “Edit profile” at the top to view profile settings.
- Select “Preferences” > “Appearance.”
- Check the box for “Enable advanced web interface.”
- Save changes.
- Select “Back to Mastodon” to see the multiple columns available.
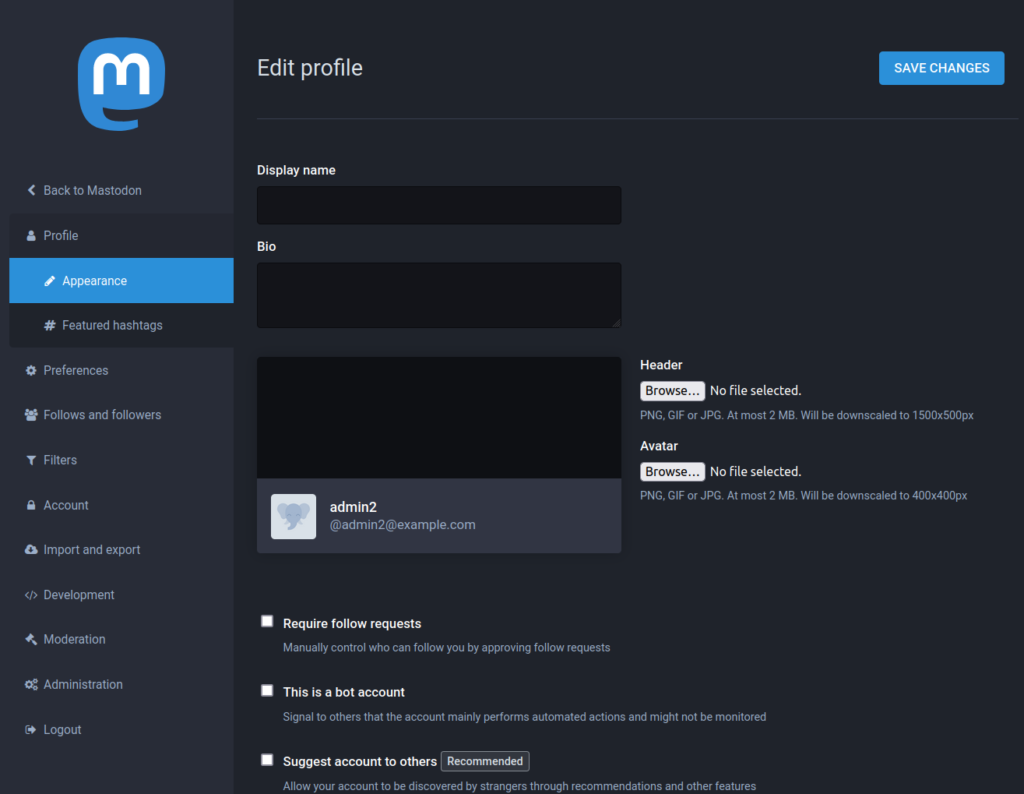
Profile Settings
Select “Profile” > “Appearance” to edit the following:
- Display name
- Bio
- Header image
- Avatar (profile image)
Profile metadata: these links are listed under your profile. The label is the link title and the content is the URL.

At the bottom you can transfer or delete your account.
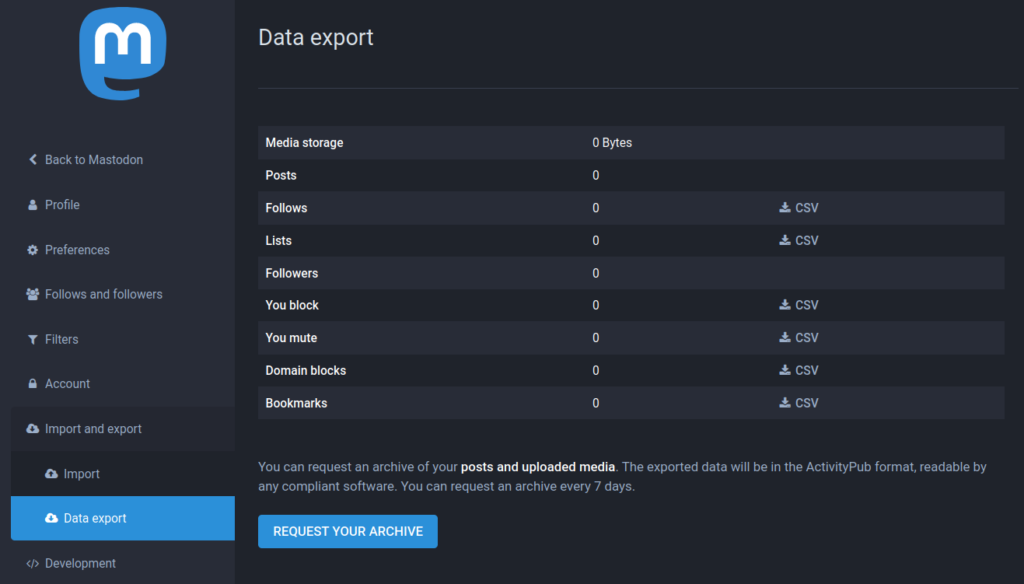
Backups
Select “Import and export” > “Data export” to download an ActivityPub compliant CSV file including your:
- Posts
- Accounts followed
- Lists
- Followers
- Blocked users
- Muted users
- Blocked domains
- Bookmarks
Third Party Integrations
Applications integrated with your Mastodon account show in “Account” > “Authorized apps.” You’ll have the “Web” app by default. Here’s our guide on integrating WordPress with Mastodon.
Web developers can create apps with the Mastodon API in the Development page.Check back often to learn more about Fediverse apps.
With our Cloud Server Hosting, you can deploy a lightning-fast, reliable cloud platform with built-in redundancy – ensuring the availability of your environment!
