Elasticsearch is a free open-source analytics application capable of storing and recalling big data in real-time. It’s a great option for anyone searching through large amounts of data on a regular basis. Elasticsearch can also be installed along with Logstash, Kibana, and Beats for a powerful security information and event management (SIEM) application called the Elastic Stack, or ELK Stack.
Even when not accompanied by the rest of the ELK Stack, it may be preferred over the popular ArcSight and Splunk SIEM tools because of the price (free) and Elasticsearch integrations for many popular web applications today including Drupal, Ansible, and Wireshark.
In this article, we’ll cover how to:
- Install Elasticsearch
- Start Elasticsearch
- Configure Elasticsearch
- Use Elasticsearch with WordPress
- Use Elasticsearch Query DSL
Get the best in security and performance without the high price with our Managed Linux VPS Hosting.
Installing Elasticsearch
The easiest way to install Elasticsearch is from their repositories instead of the OS default repos. This is still an easier option compared to a manual installation and ensures you’ll be able easily keep Elasticsearch updated.
For dedicated cPanel servers, Elasticsearch require that the “/tmp” directory be executable. Otherwise, you’ll need to compile Elasticsearch from source code and set your own temporary files directory during the configuration.
Install Elasticsearch on CentOS
- SSH into your server as root.
- Download the Elasticsearch PGP key:
rpm --import https://artifacts.elastic.co/GPG-KEY-elasticsearch
- Create an
elasticsearch.repofile in/etc/yum.repos.d/using Nano, VIM, or Emacs:nano /etc/yum.repos.d/elasticsearch.repo
- Add the following to the file:
[elasticsearch]
name=Elasticsearch repository for 7.x packages
baseurl=https://artifacts.elastic.co/packages/7.x/yum
gpgcheck=1
gpgkey=https://artifacts.elastic.co/GPG-KEY-elasticsearch
enabled=0
autorefresh=1
type=rpm-md - Save changes.
- Now install Elasticsearch:
sudo yum install --enablerepo=elasticsearch elasticsearch
The configured repository is disabled by default to prevent upgrading Elasticsearch when upgrading the rest of the system. Therefore, installation and upgrade commands must explicitly enable the repo.
- Open port 9200 in your firewall: Firewalld, UFW, CSF, etc. Or if you need to use another port, edit the Elasticsearch YAML file.
- Check that Elasticsearch is running on an open port:
curl -X GET localhost:9200
- If you receive
curl: (7) Failed connect to localhost:9200; Connection refused, check your Firewalld settings again.
Install Elasticsearch on Debian
- SSH into your server as root.
- Download the Elasticsearch PGP key:
wget -qO - https://artifacts.elastic.co/GPG-KEY-elasticsearch | sudo apt-key add -
- Install apt-transport-https to access packages with an SSL (HTTPS) connection:
sudo apt-get install apt-transport-https
- Add the Elastic repo to a new elastic-7.x.list file:
echo "deb https://artifacts.elastic.co/packages/7.x/apt stable main" | sudo tee /etc/apt/sources.list.d/elastic-7.x.list
- Install Elasticsearch:
sudo apt-get update && sudo apt-get install elasticsearch
Setting Elasticsearch as a System Service
Use the following command to start Elasticsearch now:
systemctl start elasticsearch
Use the following command to enable Elasticsearch to automatically start upon system reboot:
systemctl enable elasticsearch
Use the following command to check for any issues related to starting or enabling Elasticsearch:
systemctl status elasticsearch
Configuring Elasticsearch
To make changes to Elasticsearch, edit the Elasticsearch YAML file:
nano /etc/elasticsearch/elasticsearch.yml
By default, Elasticsearch uses port 9200 or the next available port between 9200-9300. If you need to specify a different Elasticsearch port, change the following line and remove the # at the beginning:
#http.port: 9200
Ensure Elasticsearch is running on an open port, changing localhost to your domain or other hostname as needed:
curl -X GET localhost:9200
To find your server IP in the command line, use hostname -i
If this Elasticsearch installation will join a node cluster, change the hostname to a server IP address or server hostname and remove the # at the beginning of the following line:
#network.host: 192.168.0.1
You can also create descriptive node name for easier navigation among cluster setups by modifying the following line:
#node.name: node-1
Elasticsearch with WordPress
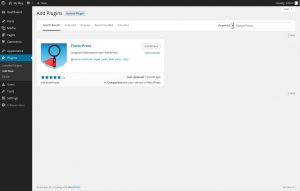
WordPress users that work with WP_Query objects can use the Elasticsearch search engine with ElasticPress in WordPress.
Elasticsearch Query DSL
To get started, read about how to use the Elasticsearch Query domain specific language (DSL) for working with indexes or create Elasticsearch documents.
whn i installed it with Cpanel it not work and stopped. what the good way to make it work
Hello Mahmoud,
Thank you for your question. Are you receiving any error messages when you attempt to use the software? Any information you can provide will assist in our troubleshooting efforts.
Best Regards,
Alyssa K.
How does one make this CageFS (CloudLinux) compatible? I’ve tried my regular methods, but I cannot seem to get it carried throughout the Cage.
Can this installation happen on your shared hosting packages ?! Or is it a must to have a VPS to make this work ?
This must be performed on a VPS at least, because it requires root access. However, if you have WordPress, there are plugins like Jetpack which uses Elasticsearch in their premium version to make searching your site faster.
Thx for your guide, it was almost perfect in my case. What I changed was, in step 4:
[elasticsearch-1.7]
name=Elasticsearch repository for 1.7.x packages
baseurl=https://packages.elastic.co/elasticsearch/1.7/centos
gpgcheck=1
gpgkey=https://packages.elastic.co/GPG-KEY-elasticsearch
enabled=1
And then
sudo nano /etc/elasticsearch/elasticsearch.ymlusing these options:
network.host: 0.0.0.0
http.port: 9200
And finally,
sudo service elasticsearch startFix the tutorial Please !@!@
Hello Amit,
Thank you for contacting. We recently tested this article successfully, and everything seems to be working.
What issues are you having with the guide?
Are getting any errors? What are they?
Thank you,
John-Paul
This page needs updated, the URL for the repository is now packages.elastic.co. Also, newer versions exist beyond 1.4.
Thank you for letting us know. We’ll certainly review the article and update where necessary.
Hello,
After struggling a bit, I managed to get it running. For some reasons, my webservices which are calling the elastic client, are only working inside a specific folder.
Thanks anyway!
Hello,
One of the reason I chose inmotion for my website is because it provides a tutorial for installing elasticsearch, which is present in my website. I have already followed all the steps successfully. But the service is not working on the website. I am getting the following error response on php services that creates an elastic search client :
Fatal error: Class ‘Elasticsearch\Client’ not found in /home/catove5/public_html/catovert/gateway/app/init.php on line 5
Can you please indicate what should be done next to get it running on the website?