
Rocket.Chat is an open-source, online communications platform you can self-host on Linux systems. When you install Rocket.Chat you gain an open-source platform where you have complete control over system availability and your team’s data.
Rocket.Chat now uses the snapd package manager, available for all Linux operating systems. This makes installation and upgrades easier to manage for developers and end users. The snapd package will also install important Rocket.Chat dependencies including MongoDB, NodeJS, and GraphicsMagick.
Unfortunately, snapd is not compatible with InMotion Cloud Server Hosting at this time. InMotion customers will need to manually install Rocket.Chat on a Debian / Ubuntu cloud server, or purchase a dedicated server to install Rocket.Chat with snapd.
Install Rocket.Chat
There are multiple ways to install Rocket.Chat. Continuing reading to figure out which is the best method for your environment.
snapd
- Log into SSH as root and ensure port 3000 is open in your server firewall.
- Install the snapd package manager.
Debian / Ubuntu:sudo apt-get install snapd
AlmaLinux and other Enterprise Linux-based distributions:sudo yum install epel-release
sudo yum install snapd
sudo systemctl enable --now snapd.socket
- Install Rocket.Chat:
sudo snap install rocketchat-server
sudo snap set rocketchat-server siteurl=https://your-rocketchat-url.com.com
sudo systemctl enable --now snap.rocketchat-server.rocketchat-caddy
sudo snap restart rocketchat-server
You can install a free Let’s Encrypt SSL with Certbot using snapd or PIP. Rocket.Chat recommends Caddy SSL for secure communications.
Rocket.Chat Setup Wizard
- Access your new installation in a web browser (http://your-rocketchat-url.com:3000).
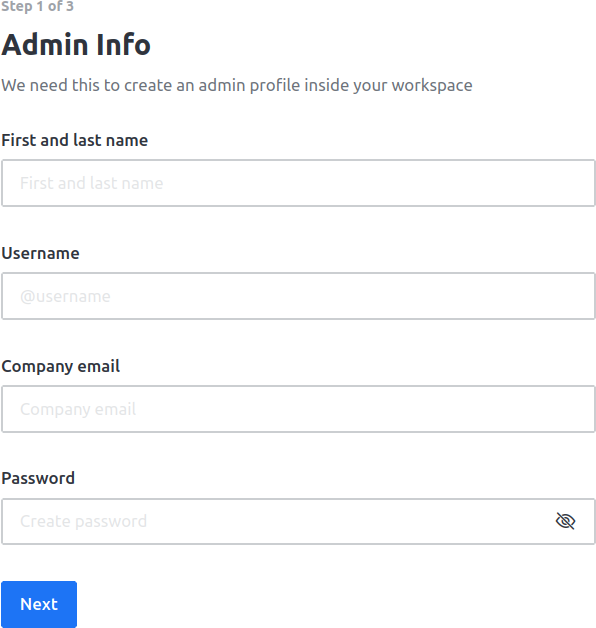
- Specify a full name, username, email address, and password. Select Next.

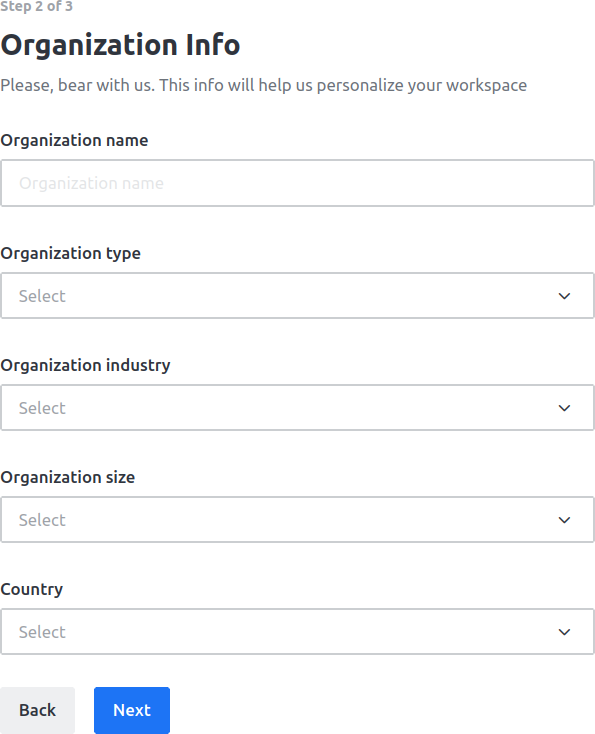
- Type in your organization info – name, type, industry, size, and country.

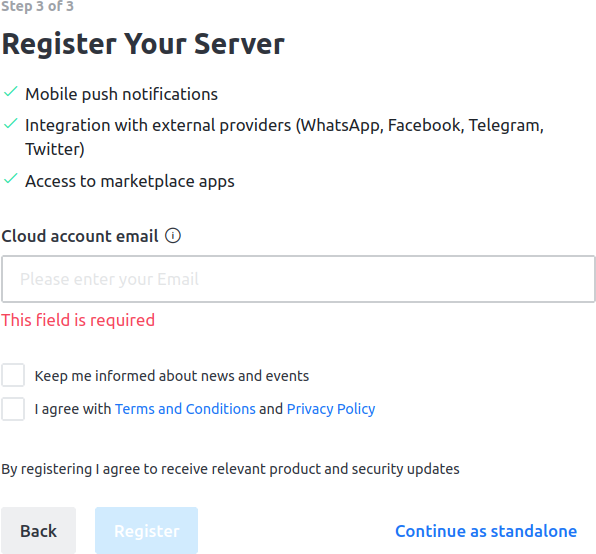
- Register your server for mobile notifications, integration with social media platforms, and access to marketplace apps. Or you can skip this step for now by selecting Continue as standalone.

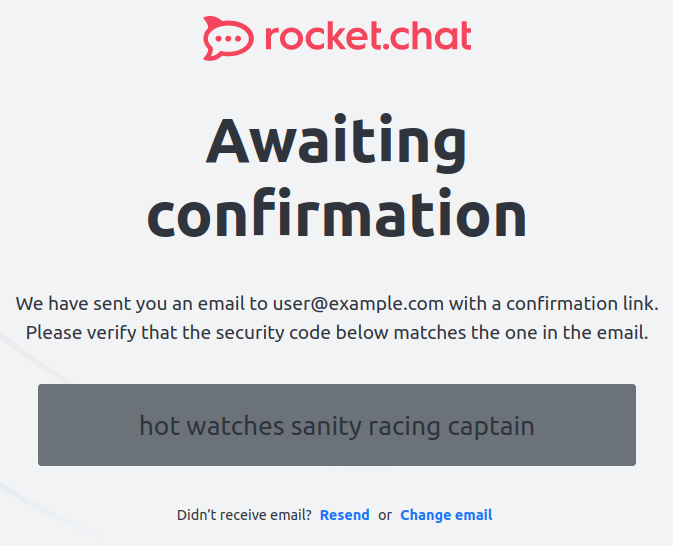
- On the next page you’ll see a combination of words. Ensure this combination matches the confirmation email you received. If they match, select the Verify registration link in the email.

- A new browser tab from https://cloud.rocket.chat will open stating “Email Confirmed.” Close the tab and return to your setup page which will automatically log you into Rocket.Chat.
Getting Started with Rocket.Chat
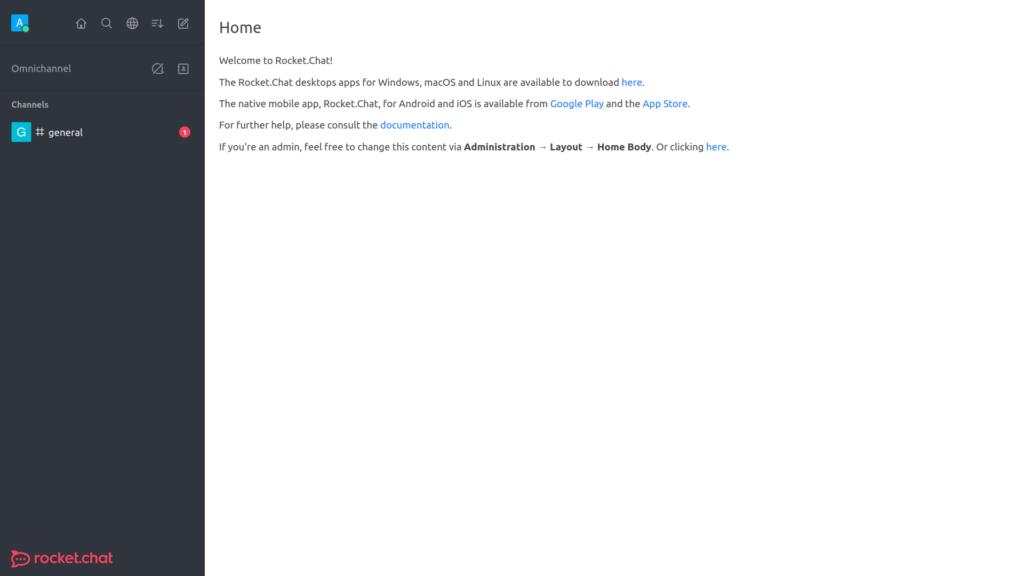
The home page will share some quick info about integrating desktop and mobile apps for Rocket.Chat. The sidebar on the left is the main navigation menu for using your chat system. Below we’ll cover some basic tasks.
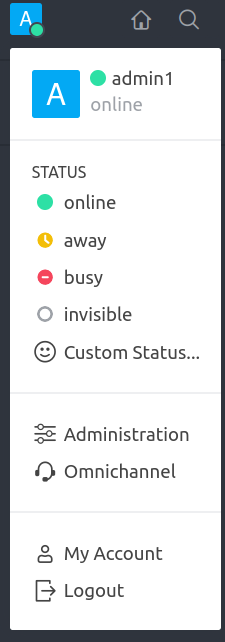
Select the username button in the upper-left corner to:
- Set user status from online, away, and others
- Access administration settings
- Access Omnichannel for live chat communication integrations including email, WhatsApp, and WeChat
- Configure user settings
- Log out
The buttons beside the user icon allow you to:
- Return to the homepage
- Search users
- Search your directory for other channels created
- Customize your user interface display
- Create a new channel, team, direct message, or discussion
You start with the #general channel. Select the channel on the left to access the chatroom and following options:
- Favorite (star) the channel
- Detailed room information
- Search threads
- Search discussions
- Search and invite members
- Search messages
- List uploaded files
- And more…

Next Steps
Access administration settings from the user menu for common tasks including:
- Creating users
- Configuring email for password resets, two-factor authentication (TFA) and notifications
- Installing Rocket.Chat apps for additional features and security
- Integrate video conferencing with Jitsi or BigBlueButton
You should configure SMTP immediately for cases where a user can’t log into Rocket.Chat (Administration > Email > SMTP).
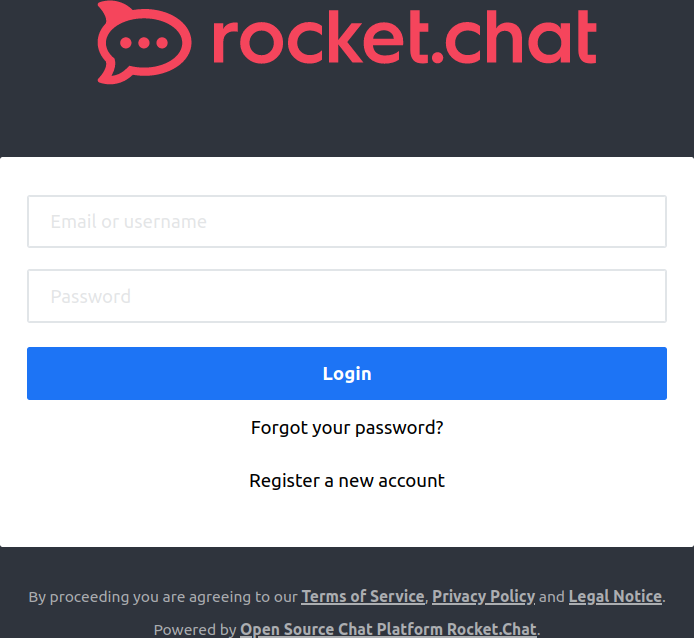
Here’s the login prompt you’ll see to log into Rocket.Chat.
With our Cloud Server Hosting, you can deploy a lightning-fast, reliable cloud platform with built-in redundancy – ensuring the availability of your environment!
