How to Optimize your WordPress Database with WP-Optimize Settings

In this article, we will teach you how to use the WP-Optimize plugin settings to fully optimize your WordPress database quickly and easily.

Why Optimize Your WP Database

Optimizing your WordPress database is essential for maintaining fast load times and peak site performance. Over time, your database accumulates unnecessary data that causes performance issues, including:

  • Spam and trashed comments
  • Old post revisions and auto-drafts
  • Obsolete transient options and cached data

This buildup, known as database bloat, can significantly slow down your website. This guide provides clear, step-by-step instructions for setting up WP-Optimize, allowing you to easily remove this bloat and keep your database lean, efficient, and optimized for speed.

Installing the WP-Optimize plugin

  1. First, you will need to log into your WordPress dashboard.
  2. Now that you are inside your WordPress dashboard, you will need to locate the WP-Optimize plugin. To do so, look to the left side menu bar and click on Plugins then on Add New.
  3. Here you will see a search box. Enter “WP-Optimize” here to search for it within the WordPress plugin database. The plugin you are looking for should be the first result.
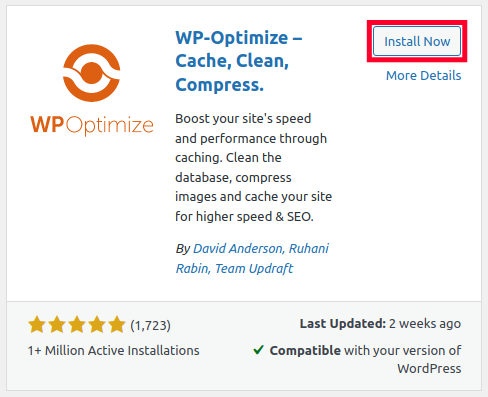
  4. Now that you have located the WP-Optimize plugin, click on Install Now. WordPress will now take care of the download and installation process for you.
    Installing WP-Optimize Plugin
  5. Once complete, click on Activate Plugin to ensure that it is running on your WordPress site.

Optimizing Your WordPress Database With WP-Optimize

  1. Before making any changes, you will want to backup your database just to be sure that if anything goes wrong, that you have a fully working copy already available.
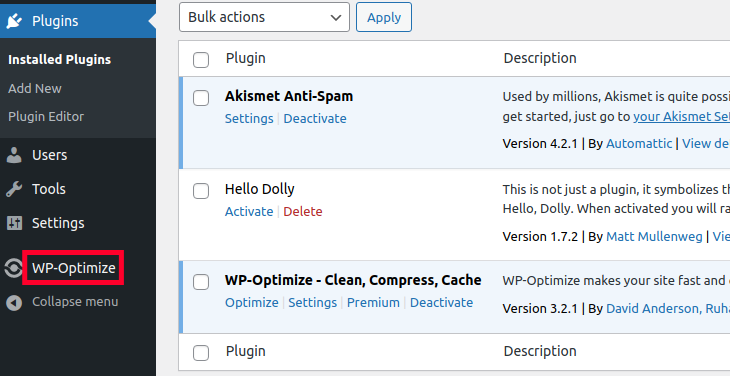
  2. Now, take a look to the left side of your dashboard and click on WP-Optimize.
    Opening The WP-Optimize Plugin
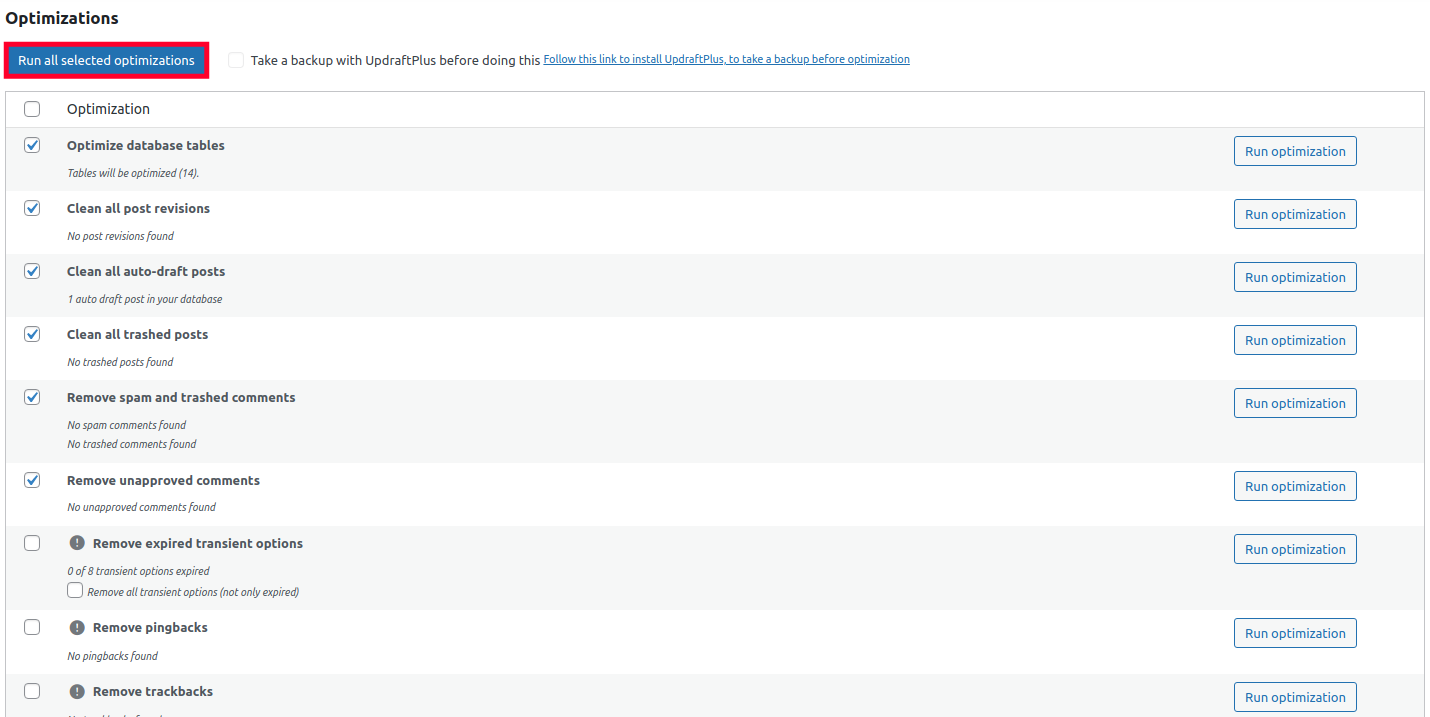
  3. Here, you will see the full optimization panel with various database optimization options. The ones listed with an exclamation point can potentially break things so use these at your own risk. Of course, as you have made a backup of your database in the previous step, you can always restore it if anything goes wrong. Once you have selected your preferred options, click Run all selected optimizations.
    Run All Selected Optimizations in WordPress

WP Optimize Settings

WP Optimize has several settings. Here are 7 key ones:

  • Post Revisions: Removes old revisions of posts and pages. (Safe to delete)
  • Auto-Draft Posts: Deletes automatically saved drafts that were never published. (Safe to delete)
  • Trashed Posts: Permanently removes posts and pages from trash. (Safe to delete)
  • Spam Comments: Permanently deletes comments identified as spam. (Safe to delete)
  • Trackbacks/Pingbacks: Removes notifications of external links or mentions. (Generally safe to delete)
  • Tables Optimization: Streamlines database tables for improved efficiency. (Safe to delete; may take longer on large sites)
  • Transient Options: Clears temporary cached data used by plugins and themes. (Generally safe to delete; some caches may need to rebuild)

Automatically optimizing your WordPress database with WP-Optimize

Within the WP-Optimizer plugin, you may also set it to automatically optimize your WordPress database with the following steps.

  1. Click on WP-Optimize to the left side of your WordPress Dashboard.
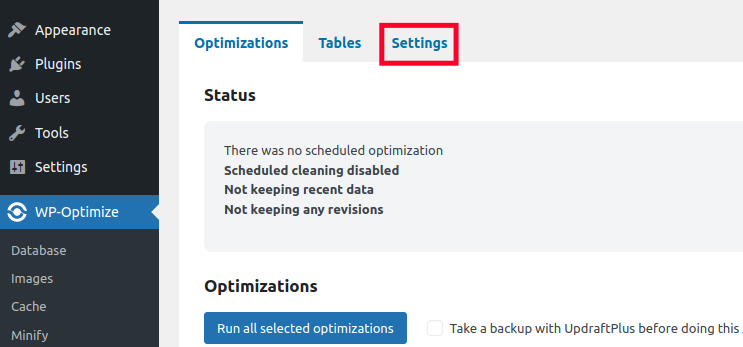
  2. Click on the top Settings tab.
    WP-Optimize-Settings
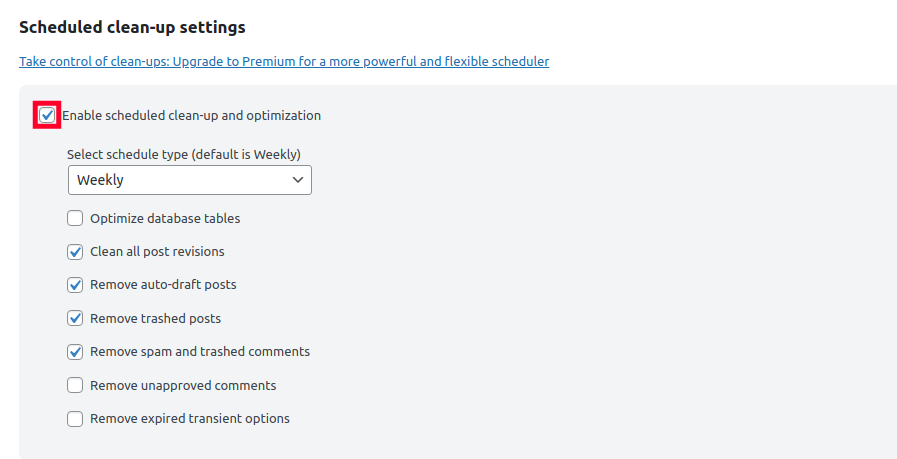
  3. Here, you will see a column labeled Auto Clean-up Settings. To enable automatic cleanup, click the checkbox labeled Enable scheduled clean-up and optimization.
  4. Select your options for what you want automatically cleaned up, then click on Save settings. Your WordPress database will now be optimized according to the schedule that you have set.
    Enabling Scheduled Cleanup and Optimization in WordPress

Congratulations, now you know how to optimize your WordPress site using the WP-Optimize plugin.

Troubleshooting Common Issues

While WP-Optimize generally works smoothly, you might occasionally encounter problems after optimization. Below are some common issues, along with actionable steps to resolve them:

White Screen/Error Messages:

If you see a blank white screen or PHP error messages after optimization, it typically means the server has hit resource limits or there’s a conflict with other plugins.


Possible solutions:

  • Increase your site’s PHP memory limit in the wp-config.php file or via your hosting provider’s dashboard.
  • Temporarily disable other plugins through FTP by renaming their directories, then reactivate them individually to identify conflicting plugins.
  • Check server error logs in your hosting control panel (e.g., cPanel) for more detailed error messages.

Missing Content

Aggressive optimization can sometimes inadvertently delete more than intended, causing certain posts, pages, or comments to disappear.

Possible solutions:

  • Immediately restore your website from the latest backup (always recommended before running optimizations).
  • Run WP-Optimize again with less aggressive settings, carefully reviewing options such as “Post Revisions,” “Auto-Draft Posts,” and “Trashed Posts.”

Plugin Conflicts

Some plugins, particularly those related to caching or database-intensive operations, can conflict with WP-Optimize. Symptoms include erratic plugin behavior, broken features, or optimization failures.


Possible solutions:

  • Temporarily deactivate your caching or database-related plugins to isolate the conflict.
  • Reactivate each plugin individually, running tests after each activation to pinpoint the conflicting plugin.
  • Consider replacing conflicting plugins or adjusting their settings to improve compatibility with WP-Optimize.

Performance Not Improved

If your website speed doesn’t noticeably improve after optimization, external factors may be affecting your site’s performance, or the optimization might not have been sufficient.


Possible solutions:

  • Verify your hosting resources (CPU, RAM, PHP configuration) are adequate for your site’s needs. Upgrade if necessary.
  • Check your theme and plugins: poorly coded themes or plugins often impact loading times.
  • Use a performance monitoring tool (e.g., GTmetrix, Pingdom) to identify slow-loading resources or scripts.
  • Optimize additional areas such as images, JavaScript, and CSS files to complement WP-Optimize database improvements.

By following these troubleshooting steps, you’ll ensure WP-Optimize enhances your site’s performance effectively, keeping it streamlined, reliable, and fast.

Say goodbye to slow loading times and hello to high-performance websites with our new WordPress VPS Hosting plans. Experience 40x faster WordPress page load speeds on purpose-built servers that guarantee 99.99% uptime.

check markHigh-Performance VPS check markFully-Managed Support check markFree SSL & Dedicated IP check markAdvanced Server Caching

Managed WordPress

InMotion Hosting Contributor
InMotion Hosting Contributor Content Writer

InMotion Hosting contributors are highly knowledgeable individuals who create relevant content on new trends and troubleshooting techniques to help you achieve your online goals!

More Articles by InMotion Hosting

6 thoughts on “How to Optimize your WordPress Database with WP-Optimize Settings

  1. How to fix “Optimize InnoDB tables anyway” in WP-Optimize plugin?


    Have any solution to optimize InnoDB tables in WordPress?

    1. I’m sorry however, I’m not sure what you are asking for assistance with. Is there a particular step in this guide that you are experiencing issues with?

  2. Man, this site is filled with many valuable informations but the appearance sucks a lotzzz. Looks so freakin’ oldskoool. You better change the theme to the more attractive one!

    1. Not this exactly. This article is about a particular plugin. However, it is possible to do some optimization through the .htaccess file.

Comments are closed.