The focus of this article is to outline the steps for installing Moodle 2.3.2. The setup is relatively simple and similar to other Open Source Software program installations. First the server must meet the required system requirements. This tutorial is focused on cPanel hosting servers. Other Non-cPanel hosting companies may have a different way of setting up databases, getting server specs and so forth. Please contact the hosting company to determine how to accomplish these tasks.
Moodle 2.3.2 Requirements
The following server configuration is required for Moodle to be installed on the server.
- PHP 5.3.2
- MySQL 5.1.33
To find the php version and MySQL version on the server please refer to this guide.
Moodle 2.3.2 Installation Steps
- Download Moodle 2.3.2
When looking for the Moodle version to download, there will be several available typically. The version to download is the Current stable builds. Moodle can be downloaded at the following link.download.moodle.orgTypically the download will be in a .zip, .rar, .tgz or other file format. The file that was downloaded for this tutorial was moodle-2.3.2.tgz. These can simply be extracted through your file manager when uploaded.
- Upload Moodle 2.3.2
Once a copy of Moodle is downloaded, the files will need to be uploaded to the server. The archive file of Moodle can be uploaded directly to the server and extracted or the file can be extracted on the local computer and the uploaded to the document root location for the moodle install. When extracting and uploading the files to the server, Keep in mind that the extracted file will put the files in a subfolder (typically called “moodle”). Make sure the files are not placed in a subfolder. If the files are in a subfolder, move the files to the correct location using the File Manager or an FTP client. The files will need to be directly in the document root folder. - Create the Database for the Installation
In order to install Moodle 2.3.2, a database will need to be created with a database user added to it. Moodle stores the content in the database and pulls that content into the web page using php server scripting. For more information on setting up a database on the server please see the following link on “How do I create a MySQL database in my control panel (cpanel)?” Keep in mind that the server host on the server will be localhost and that the user created for the database will need to be added to the database. If not, the installation will give a database connection error. Make sure the database username, database name, and password are saved in a notepad or other text editor so they can be referenced later during the install. They will be needed for the 4.4 Database settingssection of the Moodle install.IMPORTANT! Make sure when creating the database that the collation is set to utf8_unicode_ci or you will get the following error. The collation for the database can be set in PhpMyAdmin on the structure tab.
“It is required that you store all your data in Unicode format (UTF-8). New installations must be performed on databases that have their default character set as Unicode. If you are upgrading, you should perform the UTF-8 migration process (see the Admin page).”
- Initial set up for Moodle
When installing Moodle 2.3.2, the installation is done through the browser by visiting the site where the Moodle was uploaded. For example, if Moodle is being installed on a subdomain or subfolder the url will look similar to the following.
SubFolder
https://example.com/moodleSubdomain
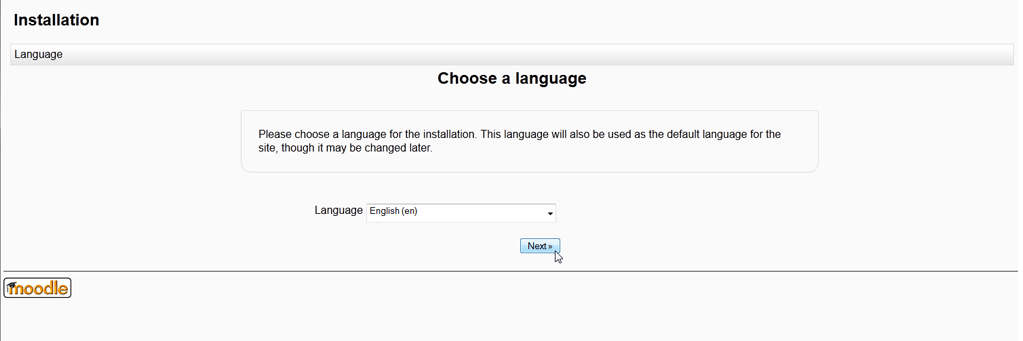
https://moodle.example.comWhen visiting for the first time, the Choose a Language screen will show at first. Select the required language and click Next.
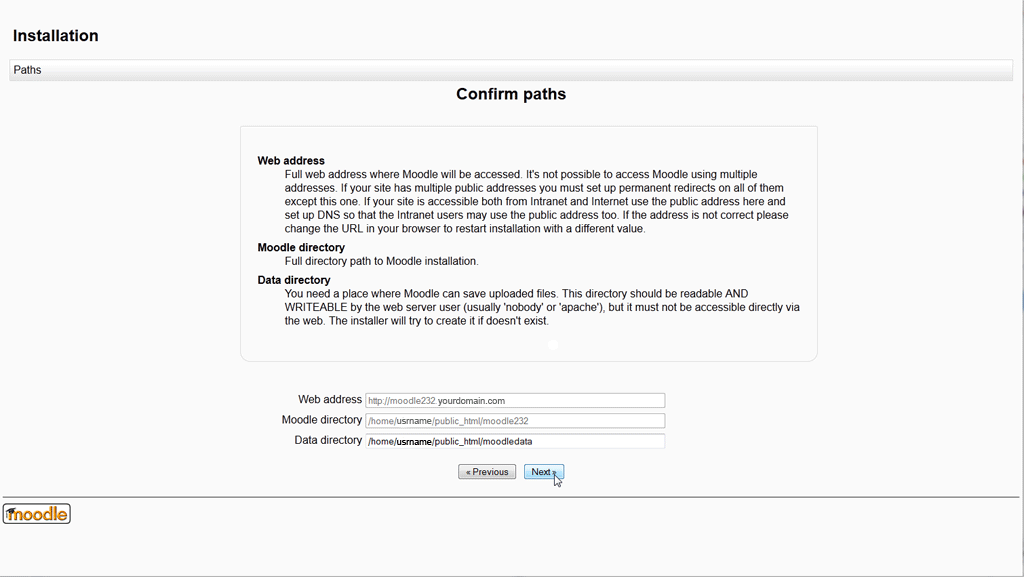
4.2. Confirm PathsThe next screen will prompt you to Confirm the installation paths for the Moodle installation. The Web Address and the Moodle directory should be set by the install script by default. The Data Directory Will be set as well; except it can be changed if you want the installation in a different directory location on your server. Leave the default paths and click Next.
4.3. Choose Database DriverThe database driver is what your server will use to connect to the database. On Linux/cPanel servers, the setting required is Improved MySQL (native/mysqli). Select Improved MySQL (native/mysqli) then click “Next”. If the server the Moodle is installed on is not Linux/cPanel, then an inquiry will need to be sent to the hosting company to find which database is supported.
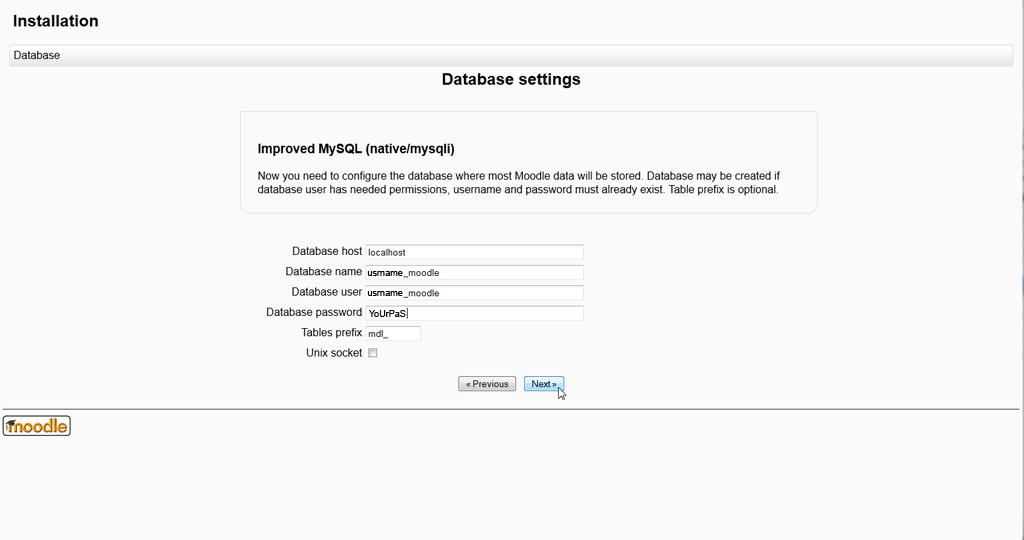
4.4. Database SettingsUse the Database settings that were set on step 3 Create the Database for the Installation. Enter the database name, username, and password. Leave the table prefix as is as this is set for the database table names. Leave the Unix Socket setting unchecked and click Next.
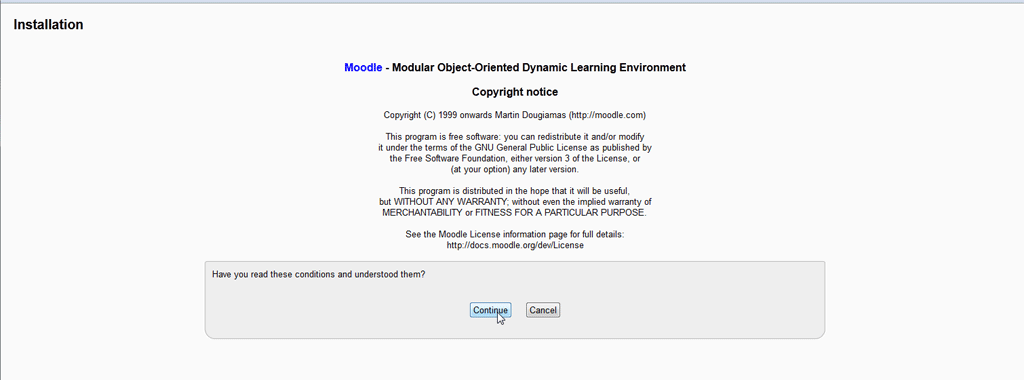
4.5. Copyright NoticeThis page is for accepting the General Public License. Select Continue to go to the next install screen.
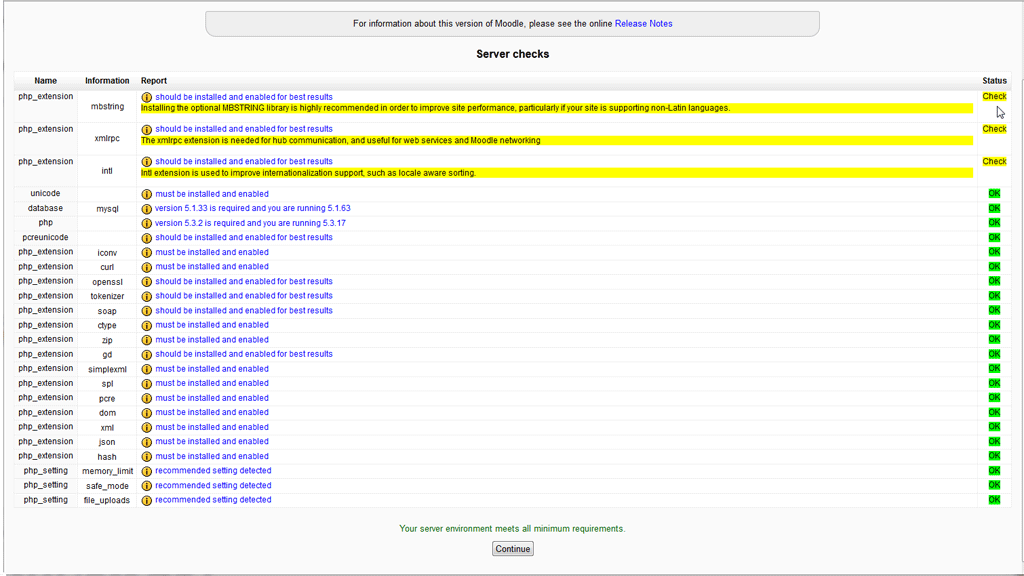
4.6. Server ChecksThe Server checks page is important as it will examine the server for configuration requirements. Required server configuration settings for Moodle to work will highlight in red. Most of these configuration changes can be set it the php.ini. For more information on setting php.ini values please see the “How to update your local php settings“.
The Yellow highlighted configuration settings are Warnings and Moodle can be installed if they are simple Warnings. If for whatever reason the Red settings cannot be changed, the web hosting company will need to look at the server to fix these. When the Server Checks are at an acceptable level click Continue.
4.7. Server InstallationAfter the Continue button is clicked on the Server Checks Screen, the install script will show a list of tables that are set up for the database. Each should say Success in green font.
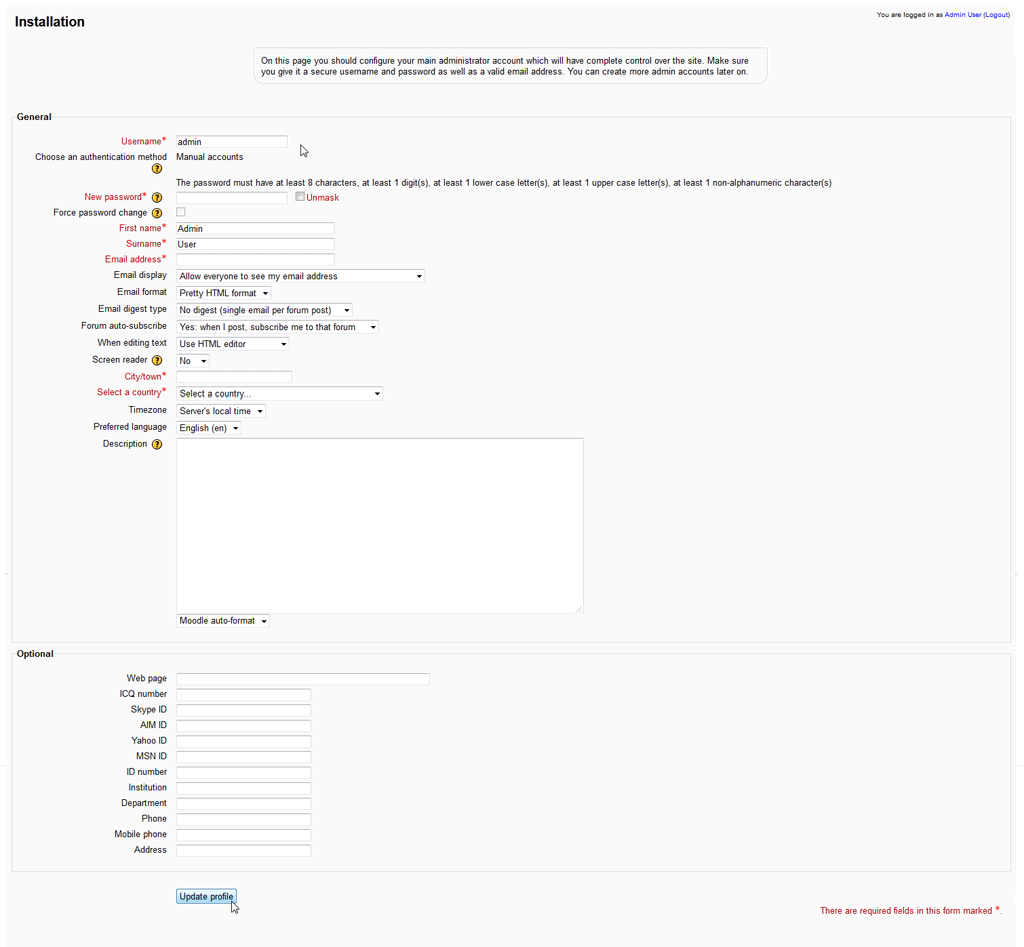
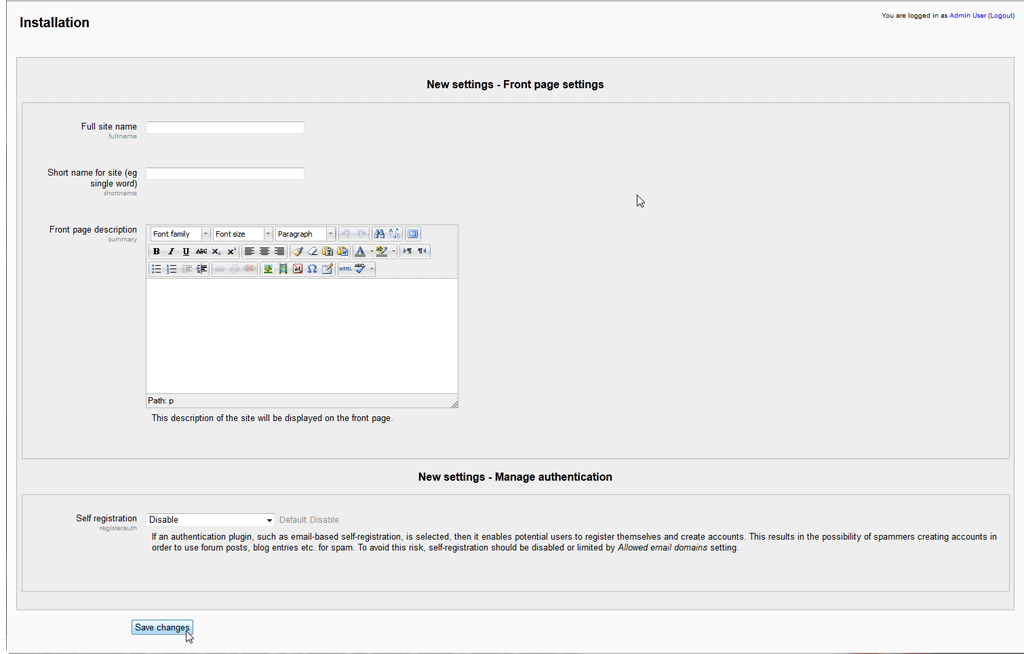
When Finished Click Continue. The Administration set up screen will load for setting up the main administrator account. Once completed setting the administrator, click Update Profile.This will load the New Settings – Front Page settings page. Fill out the Full Site Name, Short name for the site, Front Page Description, and the Self Registration. These settings are not terribly critical as they can always be updated through the Moodle administrator backend after installation.
- Finishing the Install
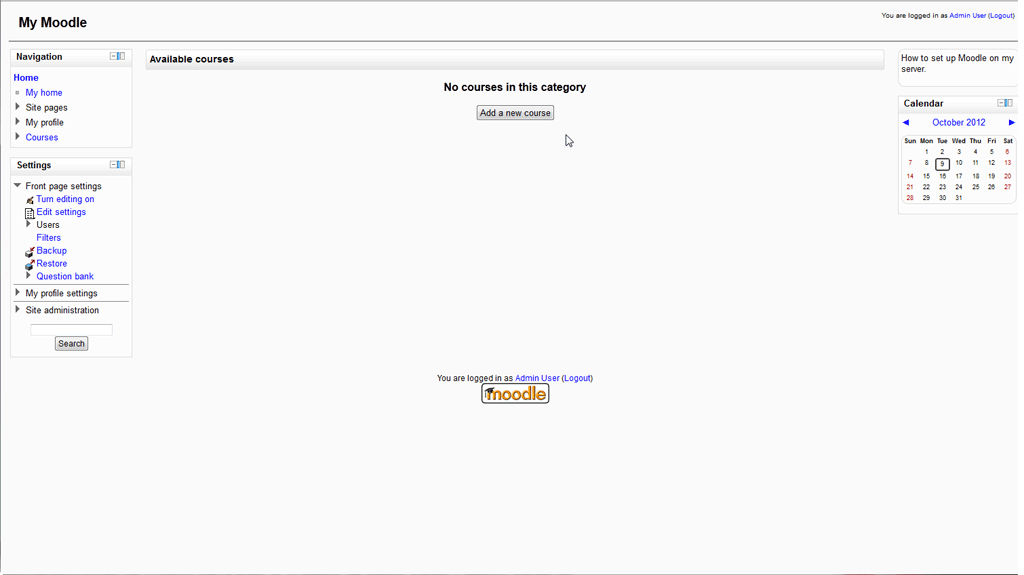
There will be no notification of the success of the installation. The base Moodle home page will load and should look like the following image.
After setting up Moodle on the server, the Moodle administrator dashboard will be accessible. The next tutorial is How to log into the Moodle 2.3.2 Administrator Dashboard.


i’ve downloaded moodle 3.7+ when i go for installation, it works properly in lang selection page but when i proceed to confirm path it shows error
Hello and thanks for contacting us. Please provide more information regarding the error or contact Live Support for further assistance.
I have Moodle 3.7 installed and can access the Administrative panel once in Moodle. Unfortunately, Moodle functioning is extremely limited. Most of the major links are shown, but do not follow the link once clicked. Also, any of the toggle appear as small rectangular blocks and do not function as well. Working with Chat support and looking on Moodle forums, the functionality of using Moodle does not occur.
Hello. I recommend you check out Moodle’s multiple options for getting support.
Hello. I am trying to install Moodle. However, after the copyright notice I get an error page. It says error reading the database. What am I doing wrong? I have followed all the instructions.
Ondine it sounds as if there is a misconfiguration in your php.ini file. What error are you seeing specifically? What do your log files say regarding the error?