Instructors using the Moodle learning management system (LMS) can integrate password-protected Jitsi video conference rooms into classrooms with the Jitsi Moodle plugin. The advantage of the Jitsi Moodle plugin is it saves your customized settings for creating conferences, making it easy for all instructors to insert conference rooms in a uniform manner. Jitsi integration works great on the
What is Jitsi Meet? It is a great Zoom alternative for facilitating real-time communication within your online learning courses. It is a free, open-source solution you can install on an Ubuntu cloud server, or use with the https://Meet.Jit.si web application (for free). Notable features include:
- No need to create an account or share any personal information to use it
- Free apps available for Apple, Android, and desktop operating systems
- Multiple ways to protect meetings from unauthorized users
- Jitsi integrations for popular web applications
Below we’ll cover the following:
Configure the Jitsi Moodle Plugin
Install the Jitsi Moodle Plugin
Install the Jitsi Moodle plugin from https://moodle.org/plugins/mod_jitsi. To configure Jitsi during the installation process, skip to the next section.
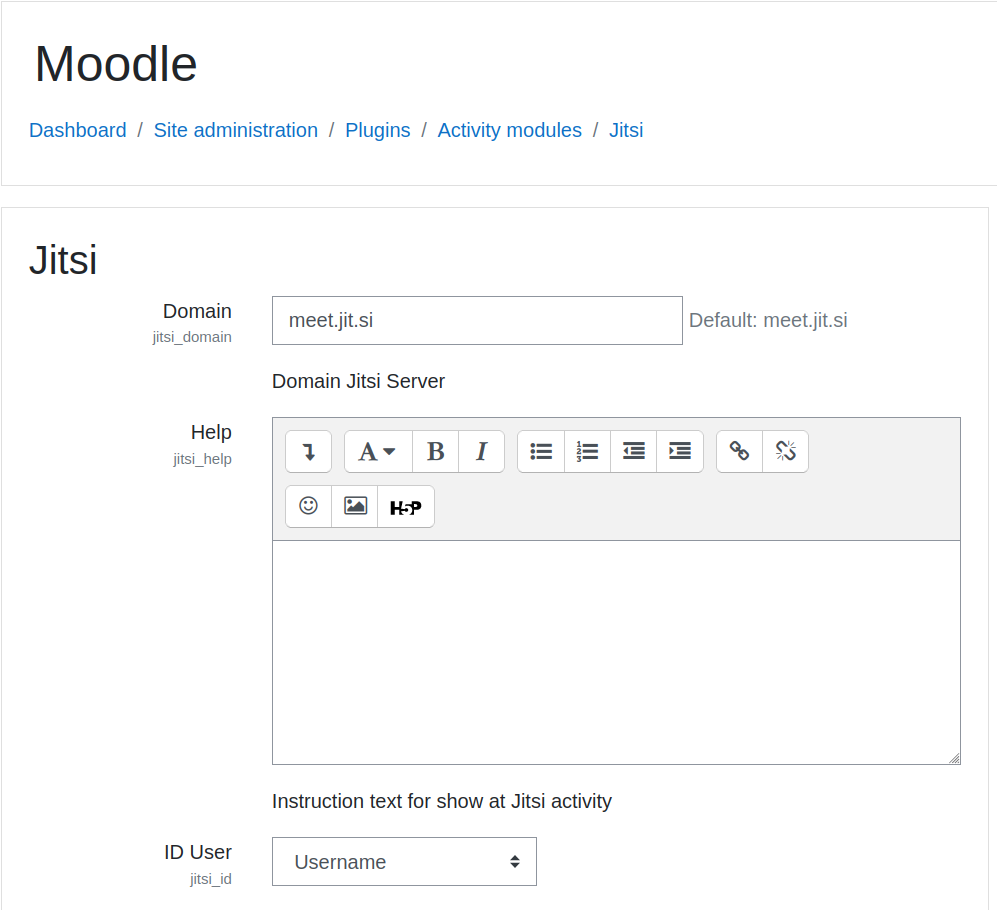
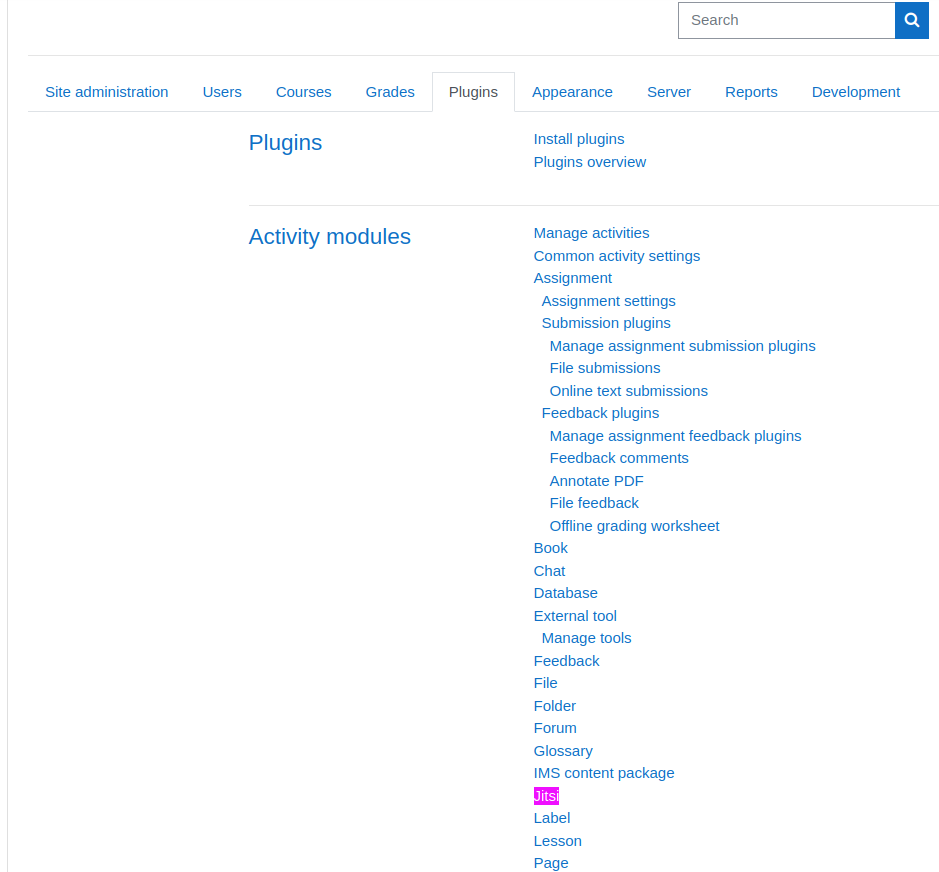
To configure Jitsi at a later point after the initial plugin installation, you can access the settings by selecting Site Administration on the left. At the top, select Plugins. Scroll down and select Jitsi.
Configure Jitsi Meetings
- For Domain (jitsi_domain), you can use the default meet.jit.si or a Jitsi instance installed elsewhere. If you use meet.jit.si, you should use the plugin password protection options (covered below) to prevent unauthorized users from entering your meeting.

Jitsi moderated meetings, meetings created at moderated.Jitsi.net which allow you to specify who has moderator privileges, cannot be used here. Alternative options for moderated meetings are covered in a later section. - For Help text (jitsi_help), which shows beside the Access button in Jitsi “activities,” consider adding resource links on how to use Jitsi Meet or points of contact for broadcast issues.
- Set the ID User (jitsi_id) for your classroom attendees. The options are username, first and last name, or alias.
- The Separator (jitsi_separator) between the session name fields can be a period (.), dash (-), underscore (_), or empty space. We recommend dashes as they’re easiest to see. Change per your preference.
- Up to three Session name fields (jitsi_sesionname) can be used as part of the video conference room URL – course shortname, session ID, and session name. Hold Ctrl to select more than one.

- You can enable the Security Button (jitsi_securitybutton) to add or change a Jitsi password during the session. However, to secure all Jitsi rooms with the same password beforehand, we recommend disabling this and using the plugin option below instead.
- Enable Invite Options (jitsi_invitebuttons) for additional options to easily share the meeting URL and dial-in information externally.
- Specify maximum Simultaneous cameras (jitsi_channellastcam) to set how many recent participants are shown at once. Use
-1to remove the limit. We recommend using a conservative number, especially if using private Jitsi Meet hosting. - Enable Background options (jitsi_blurbutton) to blur user backgrounds.
- Decide whether to show the YouTube sharing option (jitsi_shareyoutube).
- Change the Watermark Link (jitsi_watermarklink) to your e-learning website.
- Specify whether participants Finish and Return to the course once the Jitsi session ends.
- You can enable Deep Link (jitsi_deeplink) to allow users to open the meeting in the Jitsi app.
- Set a Password (jitsi_password) to secure Jitsi sessions from outsiders (highly recommended if using meet.jit.si).
- Private sessions (jitsi_privatesessions) adds a private room to Moodle user profiles.
- Show avatars in Jitsi (jitsi_showavatars) shows user Moodle profile pictures in Jitsi.
- Enable the Record option (jitsi_record) to upload meetings to Dropbox.
- Enable Youtube Streaming (jitsi_livebutton) for moderators.
- Set Method (jitsi_streamingoption) to “Jitsi interface” or a “YouTube stream.” For YouTube, you’ll need to integrate your Google account with OAuth2 id (jitsi_oauth_id) and OAuth2 secret (jitsi_oauth_secret).
- Set Token configuration with App_ID (jitsi_app_id) and Secret (jitsi_secret) if required on your private Jitsi server for additional security.
- Save changes.
Add Jitsi Meet in Moodle Courses
After you configure your Moodle Jitsi Meet integration, you’ll be able to add Jitsi in Moodle courses as activities. This ensures students don’t need to remember room names and makes analytics tracking easier.
- While logged into the Moodle administrator dashboard, select Site home on the left.
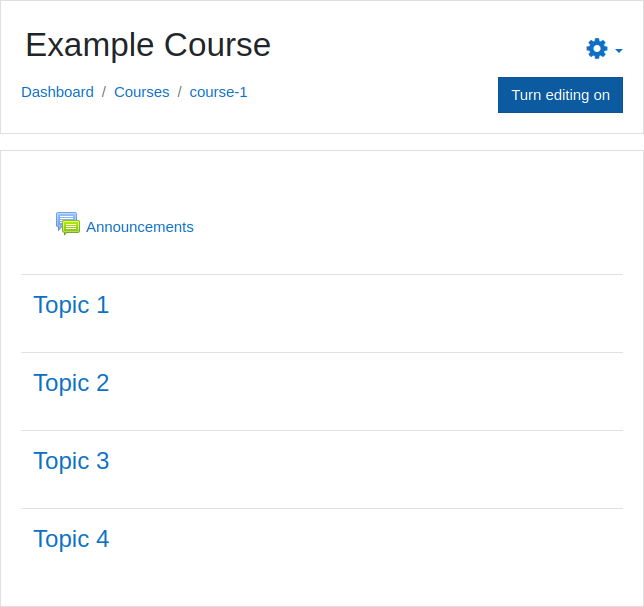
- Select or create a course.
- On the right, select Turn Editing on.

- Under a section or topic, select + Add an activity or resource.
- Select the Jitsi button.

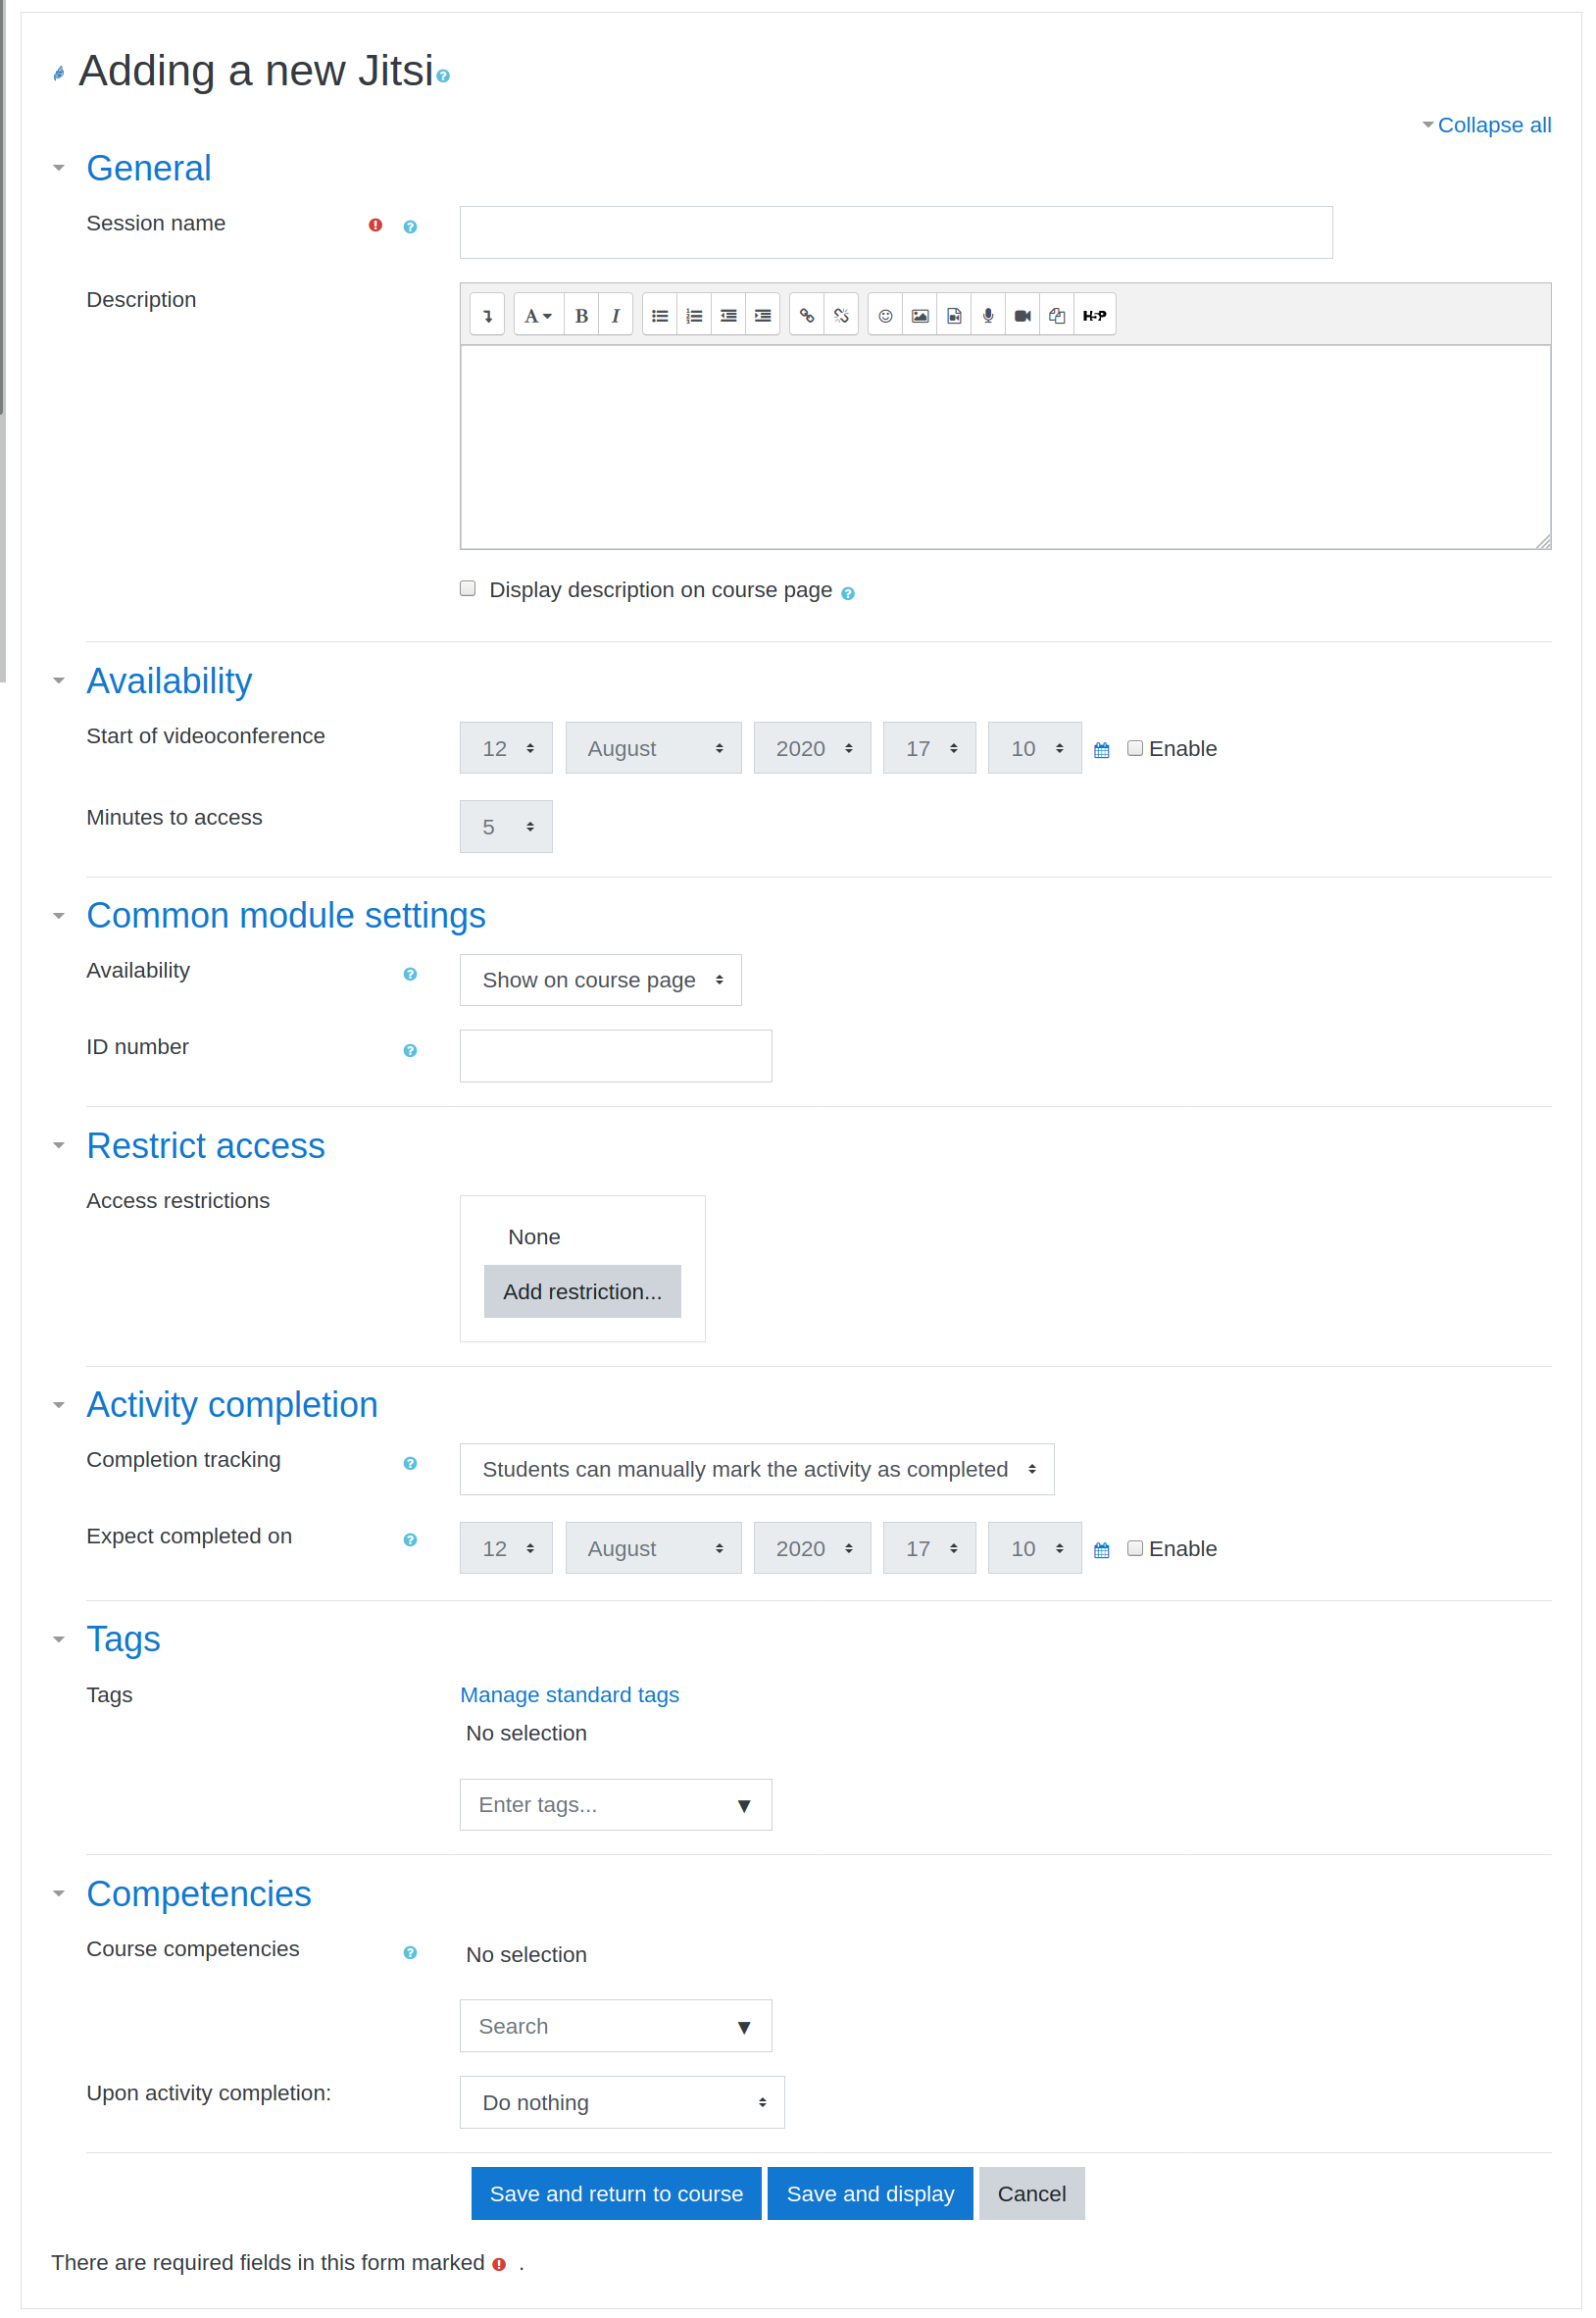
- Add a session name and configure the room as needed.
- Select Save and display to see how the section looks live.
- You’ll see the Jitsi activity session name, session description, and the Help (jitsi_help) text from the Jitsi plugin settings. Click the Access button.
- On the next page, you’ll be able to copy the Jitsi meeting URL, enable your mic and webcam, and join the meeting. Select Join meeting.
Moderated Jitsi Meetings
The Jitsi moderated meeting is a new feature in which the room creator can specify who has moderation privileges. This is perfect for moderating a room of individuals with potentially heated conversations or grade-school students.
For private instances, admin users can be created within the Jitsi Prosody and Jifoco configuration.
Unfortunately, the Moodle Jitsi plugin (Release v3.1.2) doesn’t support moderated meetings. For Moodle live streaming where you’re the only moderator, the two easiest methods are to create a Jitsi moderated meeting and do one of the following:
- Add the guest URL as a Moodle URL activity
- Embed the guest meeting code as a Moodle Page activity
How to Use Jitsi Meet
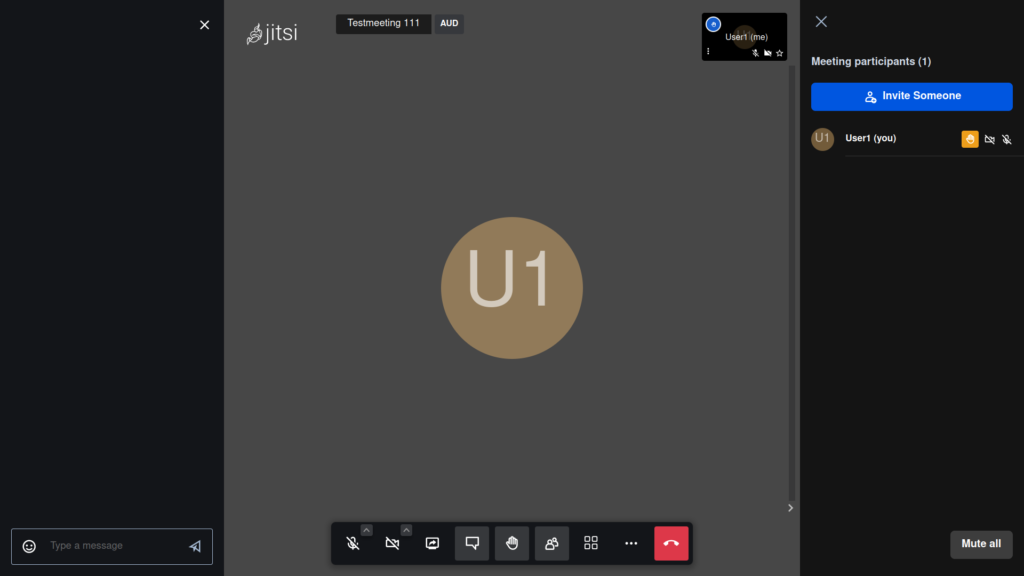
Your Jitsi meeting may offer different options depending on your Jitsi plugin settings. By default, users will be able to:
- Share their screen
- Raise their hand
- Open the text chatroom
- Enable their mic and camera
- Adjust video quality
- View speaker stats (how long users have been in the room)
Once you finish your Moodle video conference, click the red phone icon at the bottom to close the Jitsi meeting.
Themes Supporting the Jitsi Meet Plugin
The Fordson Moodle theme boasts native support for Jitsi Moodle integration. While the Jitsi plugin doesn’t require a specific theme to work properly, it may be worth checking out for a more fluid user experience. We haven’t tested the theme (yet).
Doing More With Jitsi Meet
Do you have questions about how to do something in Jitsi to enhance your online learning platform? Let us know in the Community Support Center.
