Moodle does not have a built in slider available in the Moodle plugins, so, in order to add a slider, you will need to code it into your page using jQuery. There are many free jQuery plugins you can use to get a slider working. In this tutorial we will use the Simple jQuery slider. The jQuery plugin is available at the following url.
https://github.com/jcobb/basic-jquery-slider/zipball/masterAfter you get the plugin zip file named jcobb-basic-jquery-slider-8ffe118.zip you will be able to upload the files necessary for the slider to work. Below are the steps to insert the Simple slider in your Moodle site.
Important! This tutorial explains how to add the jQuery slider in the AfterBurner theme. The steps are basicaly the same for the other themes as well.
Adding the Simple jQuery slider to Moodle
- Upload the slider zip file to the theme folder. In this case the afterburner theme is in the
/theme/afterburnerdirectory. - Extract the .zip file so the files are in the directory like the snapshot to the right.
- Edit the following files in your Moodle theme files.
/theme/afterburner/layout/default.php

/theme/afterburner/layout/embedded.php
Paste the following code in the head section of your theme files.<!-- bjqs.css contains the *essential* css needed for the slider to work -->
<link rel="stylesheet" href="bjqs.css">
<!-- some pretty fonts for this demo page - not required for the slider -->
<link href='https://fonts.googleapis.com/css?family=Source+Code+Pro|Open+Sans:300'
rel='stylesheet' type='text/css'>
<!-- demo.css contains additional styles used to set up this demo page - not required for the slider -->
<link rel="stylesheet" href="demo.css">
<!-- load jQuery and the plugin --> <script src="https://code.jquery.com/jquery-1.7.1.min.js"></script>
<script src="js/bjqs-1.3.min.js"></script>Important! Make sure you make the links in your code go to your server location with the URL. Instead of :
<link rel="stylesheet" href="bjqs.css">
You will need to reference your files like this:
<link rel="stylesheet" href="https://example.com/theme/afterburner/bjqs.css">Save the changes.

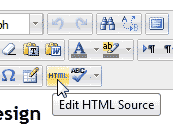
Log into Moodle. Edit the page you want the slider to show up on. Click the Edit HTML Source button in the WYSIWYG editor.

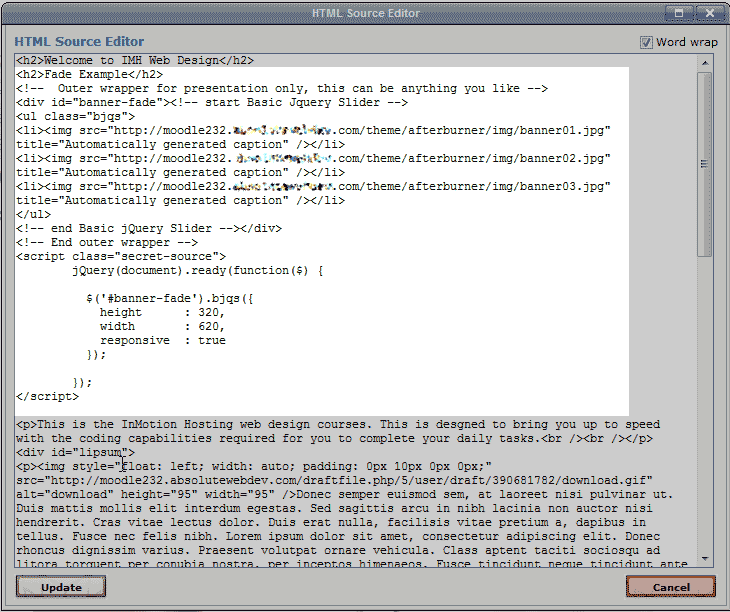
Paste the following code into your page where you want the slider to show.
<!-- Outer wrapper for presentation only, this can be anything you like -->

<div id="banner-fade">

<!-- start Basic Jquery Slider -->

<ul class="bjqs">

<li><img src="https://example.com/theme/afterburner/img/banner01.jpg"

title="Automatically generated caption"></li>

<li><img src="https://example.com/theme/afterburner/img/banner02.jpg"

title="Automatically generated caption"></li>

<li><img src="https://example.com/theme/afterburner/img/banner03.jpg"

title="Automatically generated caption"></li> </ul>

<!-- end Basic jQuery Slider --> </div>

<!-- End outer wrapper -->

<script class="secret-source">

jQuery(document).ready(function($) { $('#banner-fade')

.bjqs({ height : 320, width : 620, responsive : true }); }); </script>
Important! Make sure you make the links in your code go to your server location with the URL and that your images are stored in the
theme/afterburner/imgfolder location. Instead of :
src="img/banner03.jpg"
You will need to reference your files like this:
src="https://example.com/theme/afterburner/img/banner03.jpg"
If not the images will not load.Save the files.
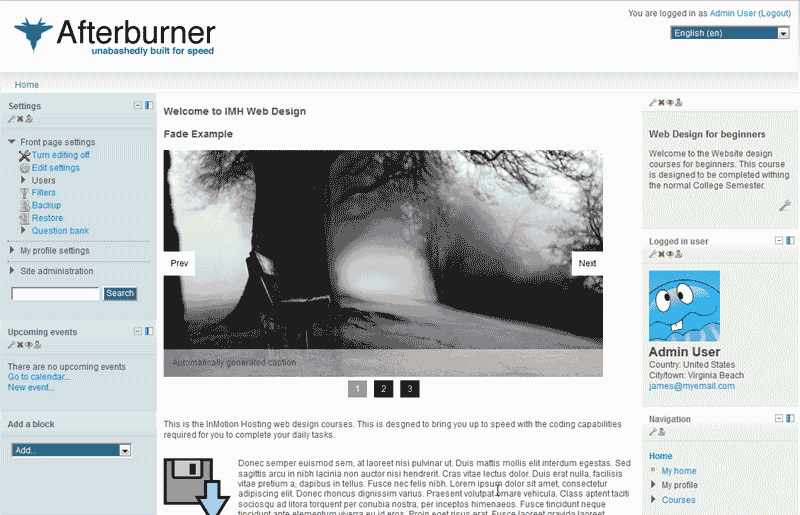
Now your Moodle will have a slider with your images on it.


Hi
how to change automatically generated caption in slider??
Please tell me
Hello Khan,
You should only have to change the image title if you are following the code above.
Best Regards,
TJ Edens
Hey, tanks for your explanations.
Slider Moodle JQuery does not for me, Images are shown but as elements of list.
I have this error in Console : bjqs is not a function. How can i deal with it ?
Hello Test Moodle,
Are you sure that you are loading your jQuery before the script you are using?
Best Regards,
TJ Edens
hi there, my images are shoing but not as a banner… they show with bullet points, as if they were subjects.
I’ve realized that, when I update the scritp into the HTLM editor, this part:
<script class=”secret-source”>
jQuery(document).ready(function($) {
$(‘#banner-fade’).bjqs({
height : 320,
width : 620,
responsive : true
});
});
</script>
automatically changes to:
<script type=”text/javascript”>// <![CDATA[
jQuery(document).ready(function($) {
$(‘#banner-fade’).bjqs({
height : 320,
width : 620,
responsive : true
});
});
// ]]></script>
What am I doing wrong?
I mean, the images do display, and I’ve changed everything accordingly, I belive the issue is the transformation, I don’t know why the script changes automatically.
Thank you for the help.
Hello Maria,
Thank you for your question. We are happy to help, but will need some additional information.
Can you provide a link to the banner/bullet points, so we can replicate the problem.
Also, what theme/plugins are you using for Moodle ?
Thank you,
John-Paul
Hello!
Thanx for slider.
One question, how to put this slider on front page only? Is there any ways for that?
I’m using Moodle 2.6, theme “Clean”.
Hello Pavel,
Thank you for your question about putting a slider on the Moodle front page. In Step 4, just edit the front page.
This should only add the slider to the front page. If it is added to every page by default, you will most likely have to use a different theme, or create a custom front page in Moodle.
Feel free to post any additional questions below.
Thank you,
John-Paul
it is not working . and i m unable to find demo.css and bjqs.css file so my css is not add to images that is in html editor
Help me
Hello lalit,
Thank you for your question. The demo.css, and bjqs.css files are downloaded by following the link in the top of the article:
https://github.com/jcobb/basic-jquery-slider/zipball/master
It is included in the compressed file titled jcobb-basic-jquery-slider-8ffe118.zip.
If you have any further questions, feel free to post them below.
Thank you,
-John-Paul
nice slider, it save my time
That’s great. It works perfectly with my Moodle.
However I have got problems viewing it from a mobile phone. I am currently testing it from my iPhone.
Would you be able to provide some support with this?
Thanks
Hello RDM,
Sorry for the problems with the slider on the iPhone. This code is based on a third-party developed solution and is provided in order to give a simple solution for a Moodle installation. It’s difficult to tell how you have setup the slider and determine why it’s not working on iPhone without having some specific details on your installation (and a link to the problem page). I would highly recommend that you use a different jQuery slider that is made for IOS. Here’s an option that you may want to try: Swiper. If you want to keep using the one in this article, then you may want to contact the author(s) of this jquery by going to this link: Github page for the jquery.
Regards,
Arnel C.
Tanks abt this .that was really useful but…
i dont use afterburner them ,i use Binarius.
in my them files dosnt exist any file like that you say!!(Defualt.php and…)
The steps should be the same for most themes. If you do not see the files referenced, I recommend speaking the the developer of your theme for more information on how to modify it to do this.