One of the best tools you have for getting quick images for your website is your smartphone. Recent updates with the iPhone iOS version 13 improve on the option to share files without having to use AirDrop. This quick tutorial will show you how to get an image from the Photos app using Files in iOS 13.
This feature requires that you are using iCloud. All Apple ID accounts come with 5 GB free, so you do not need to pay for storage space.
Turning on iCloud for Photos
You will need to activate the iCloud option for Photos before you can share images in Files on your iPhone. Note that you may need to log in to your Apple account in order to enable the feature. Follow the steps below to turn it on.
- On your iPhone find Settings. Tap on the Settings icon to open it up.
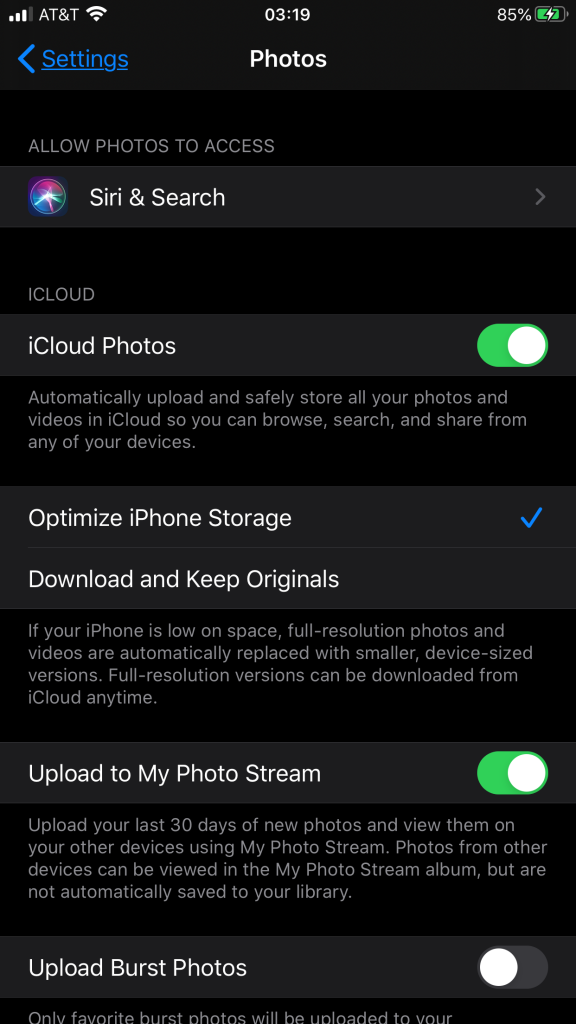
- Scroll down until you see Photos and then tap on it.

- Click on the slider labeled iCloud Photos.
Once you have authenticated your account you will be able to access the photos saved into your Files. If you need to access iCloud from a Windows PC then simply click the link for a guide to iCloud for Windows.
How to get a Photo from your iPhone to your Computer without using AirDrop
AirDrop lets you quickly move a file from your iPhone to an Apple computer or mobile device. However, you may be one of many users who only have one Apple device and a Windows computer. Since 2017, Apple has provided a Files option in iOS, but with iOS 13, the feature is more useful. Use the steps below to see how simple it is to get an image to your computer from your iPhone.
- Sign in to your iPhone and then go to Photos.
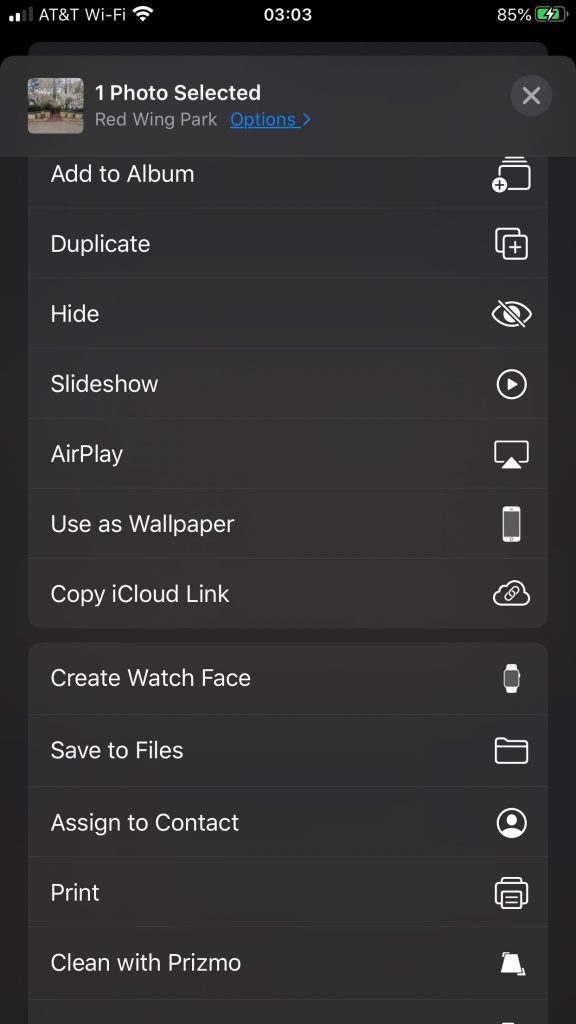
- Select the image you want to use. Then click on the share icon in the bottom left of the screen.

- You will then see a screen that has a number of different ways to share the image file. However, we’re going to use the Save to Files option. Scroll down until you see that option in the list and tap it to select where you will save your image file.
- You will then see the list of folders that were created within iCloud. Select a folder where you want to save the image. Click the following link for more information on working with files and folders in the iCloud drive.
- Once you have selected the folder you want to save the file to, click on Save in the top right corner of the screen.
Once the file transfers, it will then be accessible through your computer’s link to the iCloud drive. On an Apple computer, you can search for the iCloud Drive app. Click here for the official Apple documentation on setting up iCloud for Windows.
The other options that iOS 13 has introduced to the Files app include:
- Connect to external or network drives
- Extract/compress ZIP file
- Search for files
Congratulations! You now know how to get images from your iPhone to a folder on your computer without having to use AirDrop. To learn more about working with your website, please see our Website Design Educational channel.