The following article shows you how to setup the MODx content management system using the Softaculous installation program. It includes how to find MODx, describes the settings, and completes the installation once you have made all of the settings. It also includes a section on getting started with MODx.
How to Install MODx using Softaculous in cPanel
- Login to the cPanel.
- Locate and click on Softaculous icon in the Software/Services section of cPanel.
- When the Softaculous screen appears, go to the top right corner and click on the SEARCH field. Type in “MODx”.
- The next screen will be the MODx installation screen in Softaculous. Make sure to review the requirements for installation and the version. If the version that you’re seeing is good, and you have the available hard drive space, go to the top right and click on the blue button labeled INSTALL.
- You will then be required to fill in the information for installing. The screenshot below illustrates the screen that you will see. Below the image is the list of the settings and description of each.
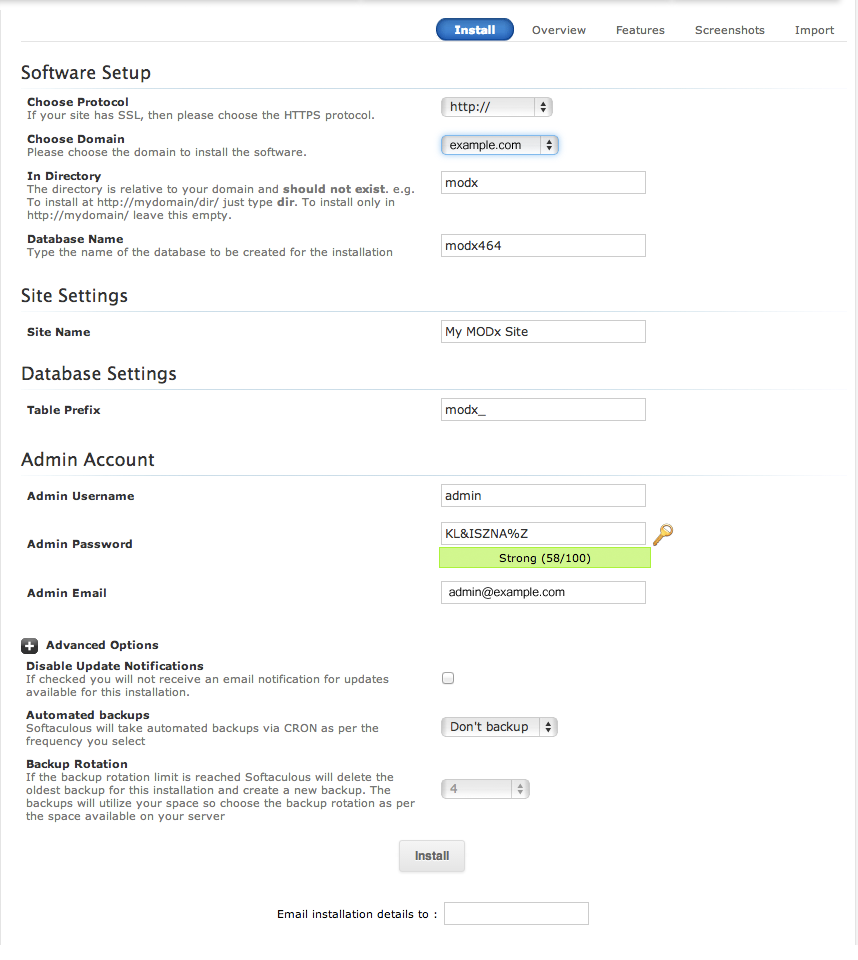
Installation setting Description Choose Protocol If you are using a SSL certificate for your URL, then select HTTPS, otherwise use HTTP Choose Domain Domains that can be selected must be registered in the cPanel as either the primary domain, add-on domain, or subdomain. In Directory The directory is the location where the files will be installed. Leave the entry empty of you wish for the files to be installed to the root of the domain name. Otherwise, type in the name of the folder you wish to use. This folder cannot already exist in the folder as Softaculous will create the folder if an entry has been added. Database Name Name of the database that is created for you within the server. You can change the name, or use the default name created by the installation Site Name Name of the MODx site that you’re creating. This can be simply text describing the site Table Prefix Each table that is created the database will start with this prefix. You can use the default value “MODx_” or create your own prefix. Admin Username Name of the Administrator used for logging into the Administrator Admin Password Password used for the admin. Note that there is a password strength indicator that will let you know if the password you enter is good. Click on the key to have a password automatically generated for you. Admin email Email address of the administrator Advanced Options Click on the +(plus) sign to expand the advanced options. Disable Update Notifications – Softaculous will notify you when updates are available unless you disable it here.
Automated backups -Softaculous has the ability to make automated backups of the installation using a CRON job.
Backup Rotation – This is the number backups that will be made before it starts overwriting the files. For example, if you use the default value of “4”, then 4 backups will be made. On the 5th backup, the first file will be overwritten. This is done to preserve hard drive space.
INSTALL button Click this button to start the Softaculous installation of MODx using the settings you have entered Email installation details to In order to get a copy of the installation settings that you have entered, click on the field and add your email address.
This completes the installation of MODx using Softaculous. The next tutorial is Getting Started with MODx. For more information on using Softaculous for application installation, please go to Installing Programs Using Softaculous.
You have loaded MODx Revolution, but now you need to start building the website. One of the first steps in learning how to use MODx is learning how to start creating/adding your content a web page or document. The following tutorial will walk you through the most simple process of making a document web page in MODx. There will be a brief introduction to the interface and you will be able to see the resulting page created the addition of text and a few simple HTML commands.
Introduction to Creating a MODx Document
- Log into the MODx Dashboard as an Administrator
- After logging into the MODx dashboard, you should see a screen similar to the following:
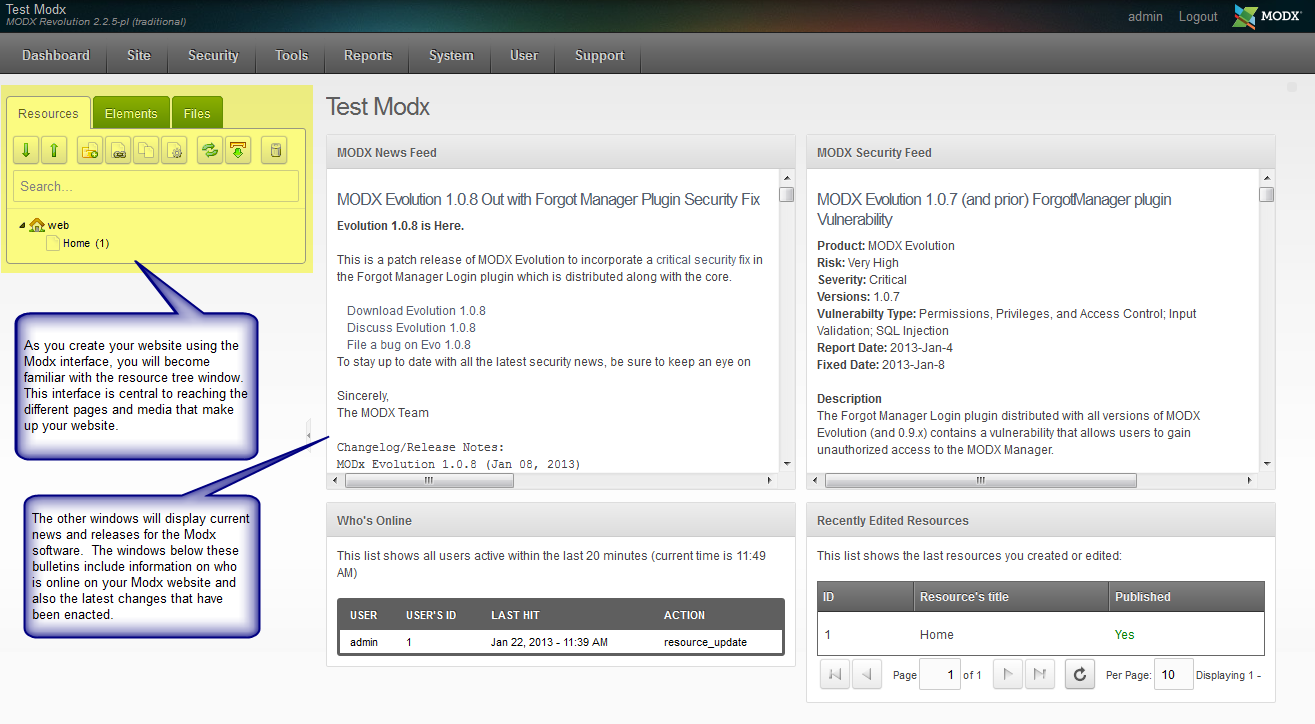 Resources for MODx include documents, weblinks, symlinks and static resources, but we will be concentrating primarily on documents in order to give you a basic introduction. The screenshot above gives you a quick summary with the interface that you will see when you first log-in to the MODx Dashboard as an administrator. The interface highlighted in yellow is the Resource Tree which can be used by other resources that this interface will help you reach as you become familiar with MODx. Resources that make up your website will always be listed in this interface. When you first load MODx, the base page will be a blank white page. If you do not see your resources expanded, then click on the green-arrow pointing down in order expand the tree. The screenshot below gives you a quick summary of the different sections of the resource navigator (note: only the DOCUMENT RESOURCE specific options are displayed).
 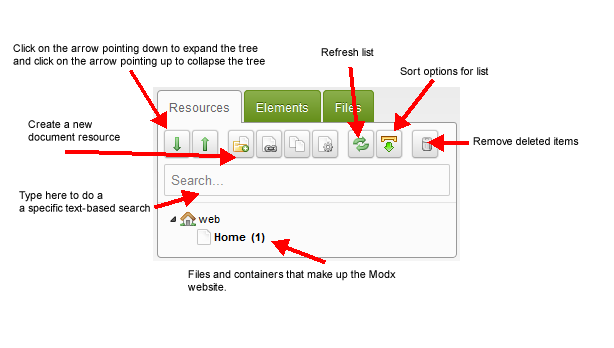 For now, look for the document named HOME (as shown above), and left-click on it to proceed.
 - When you select a document resource within the resource tree, the interface to the right of the resource tree will change showing you the document resource edit window for the resource that you have selected. In this case, you have clicked on a document resource, so you should see the following:
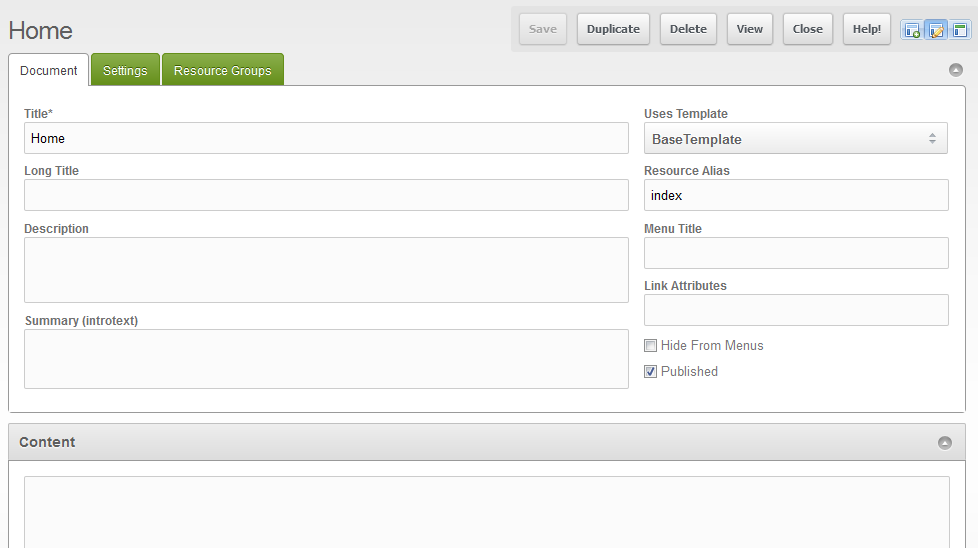 If you click on VIEW in the top right hand corner, you will be able to see the home page in a separate window. This page is your front-end website being generated by MODx. Since the CONTENT section is blank, then there is nothing on the page. This means that when you view the site, it will be a blank white page. Here’s a quick table describing each option in the interface (above the content field):
Title This is the page title of the document Uses Template The template used to format the page Long Title A longer version of the page title Resource Alias Alias used when there are friendly URLs. For example, if the alias is ‘friendlyURL’ and content type is HTML, then the friendly URL would become “friendlyURL.html” Description Description of the page Menu Title Title used for menu entry Summary (introtext) Summarizes content for search purposes Link Attributes Used with menu building snippets Hide from menus Prevents this document resource from being displayed in the menus Published Indicates of the page appears to the public or not There are many options and settings that can be used when creating a document resource. For the purposes of this tutorial we will only be showing plain text and how it can be modified with simple HTML.
Click in the LONG TITLE field and type in “sample home page”. (note: The quotation marks should be left out in all of the entries).
- Next, click in the DESCRIPTION field and type in “This is a sample home page to learn how to add quick page of text.”
- In the field to the right labeled MENU TITLE, type in “home”.
- Below the DESCRIPTION is the SUMMARY (Introtext) field. Click in that field and type in same thing as in the description: “This is a sample home page to learn how to add quick page of text.”
- If the PUBLISHED option is not already checked, then place a checkmark in the box.
- The CONTENT section contains the actual content of the page. In this case we’re just going to add the following text:
A simple web site
Bits of words and pictures make
Something with nothingYou an copy and paste the above text into the content field, or you can type whatever you wish instead of my whimsical haiku.
- At the top right hand of the page is a floating menu bar that has the option SAVE. Click on SAVE to save your text entries.
- In that same menu bar, click on VIEW. A separate window will open in the browser you are using showing the text. You should see this:
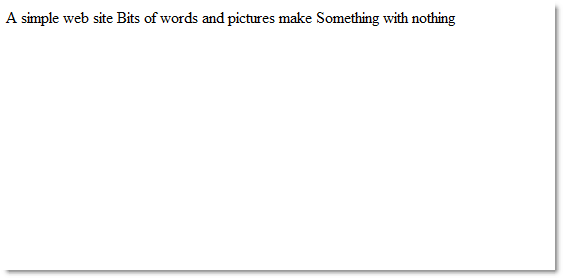
Note that the text is unformatted and even though you may have pasted it in paragraph form as per step 8, the text is set in one long line. Although it is not formatted as we wish, this shows how quickly you can start creating a web page using the MODx interface. There are many options that you can use here, but again we’re going to provide a simple demonstration of the MODx interface. One of the most basic and powerful options used to manipulate web pages within MODx is HTML. For this we will provide the HTML code in the following example:<h1>My Simple Website</h1>
<br /><br />
<p>
A simple web site <br />
Bits of words and pictures make<br />
Something with nothing <br />
</p>Copy this code exactly as you see it above and replace the text that you previously typed within the CONTENT field.
- Click on SAVE in the top right hand corner.
- Click on VIEW in the menu bar and you should see the following:
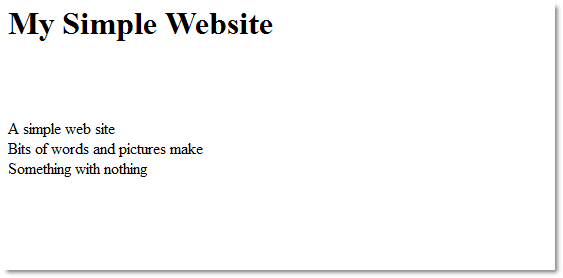 This example shows the results of the formatting and uses three simple simple HTML commands to format the text:<h1></h1> – Header command
<br /> – line break
<p> </p> – paragraph
As you can see, just entering a few basic commands can quickly transform the text that you enter into something much easier to read. MODx was created with HTML in mind, so all HTML (PHP) commands will work when creating the pages. Additionally, you can load an editor into the interface so that you have the editor creating the formatted text instead of manually typing in the HTML code.