In this article, we will walk you through the process of manually adding Google Analytics to your website built with Ghost. Unfortunately, at the time of writing this Ghost does not have a plugin or specific setting to integrate Google Analytics to your site, but the process is still fairly straightforward due to the simplicty of Ghost themes.
Adding a new site to Google Analytics for Ghost to use
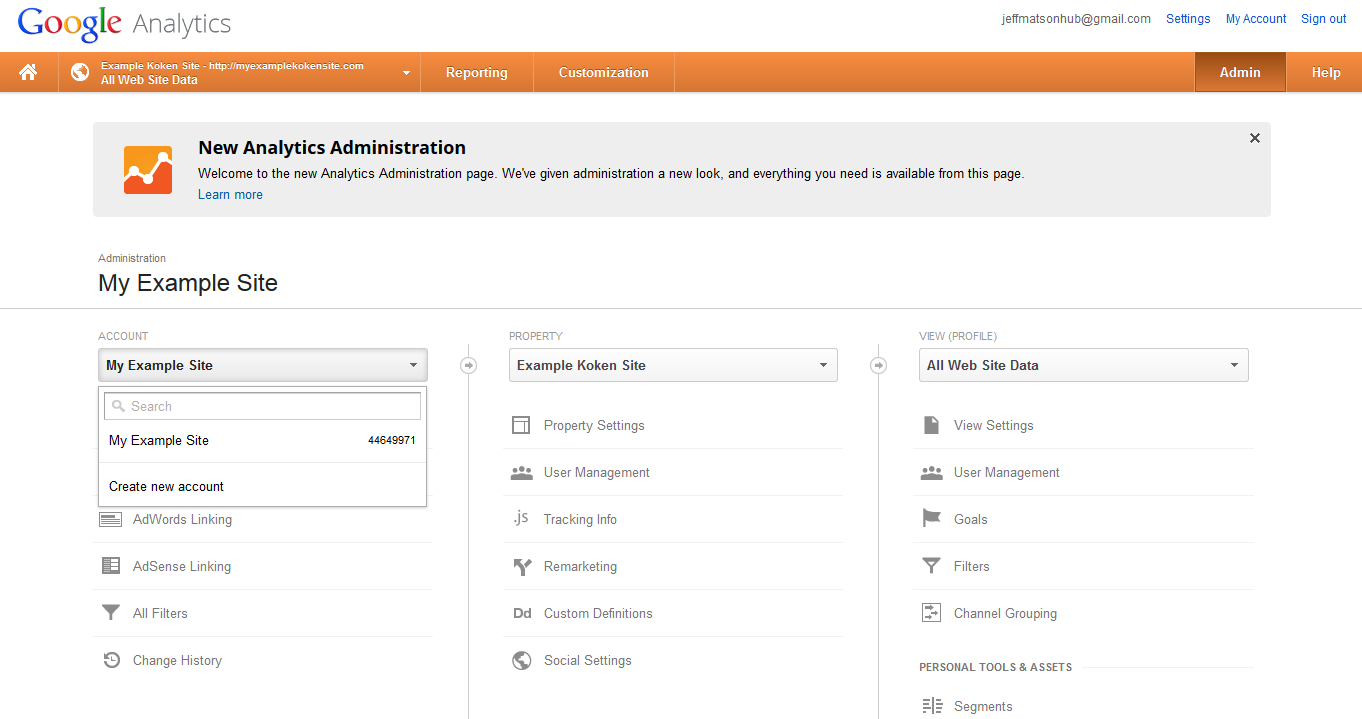
If this is the first time that you are setting this site up with Google Analytics, you will need to first create a new site within Google Analytics. To do so, log into your Google Analytics account, then click on Admin. The left side section will have a dropdown box. Click on that, then click on “Create new account”.
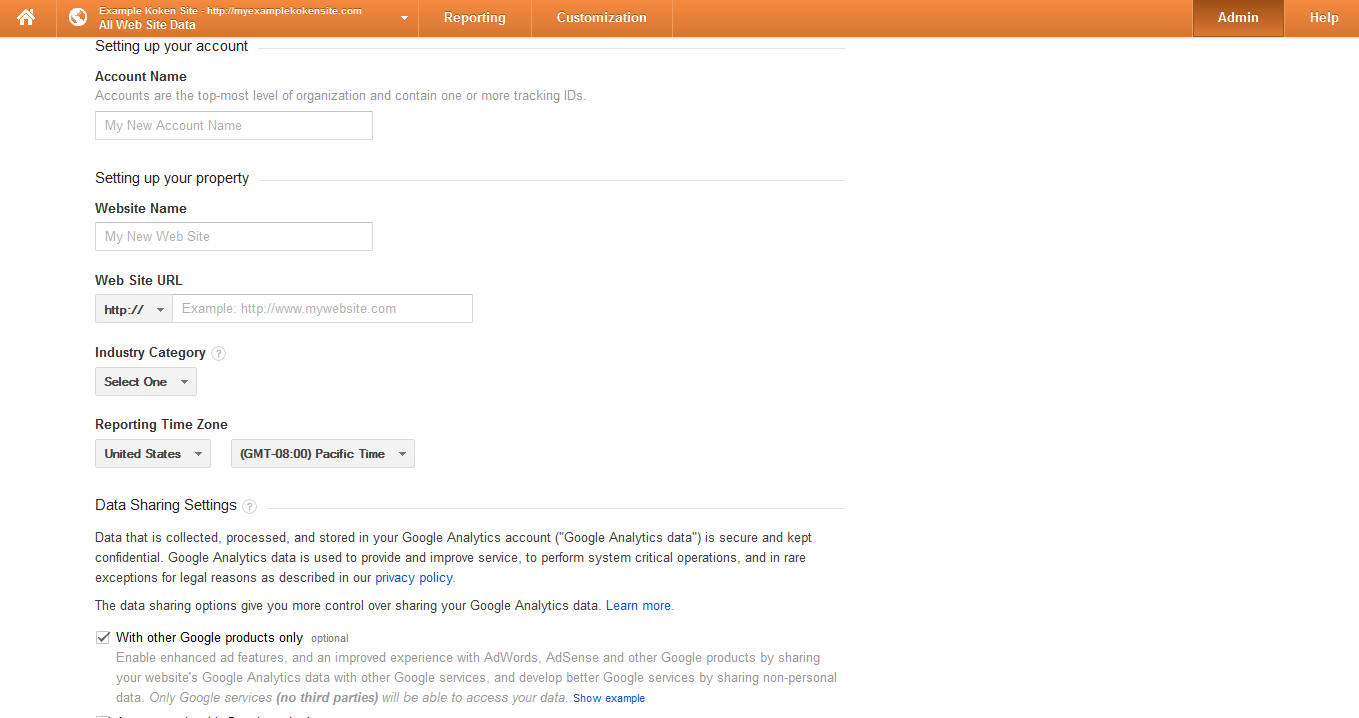
Next, simply enter in your information for your site such as a name for it, the URL, category, and time zone.
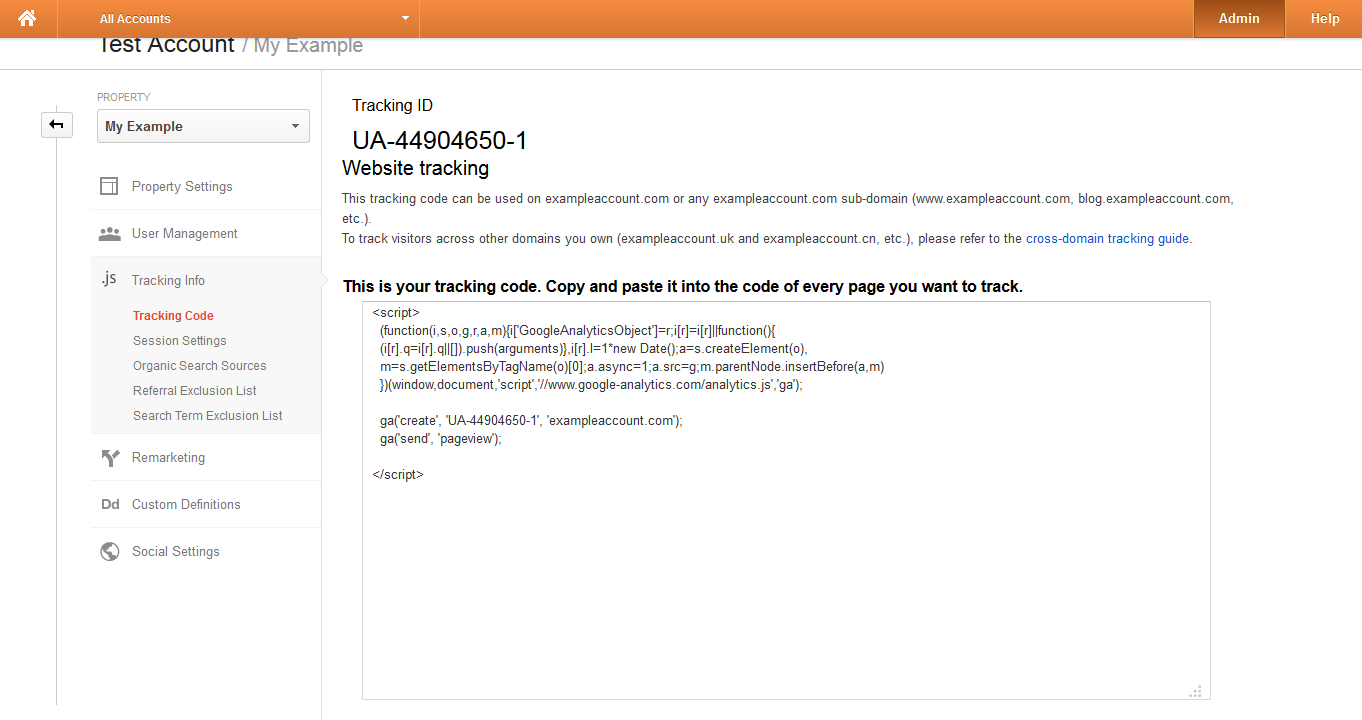
After you have created the new account, you will be provided a tracking code. Be sure to keep this in a easy to remember place as you will be using it for the next steps.
Inserting your Google Analytics tracking code into Ghost
Although we do not yet have a solution available to place Google Analytics within a site made with Ghost directly through the admin dashboard, it can be inserted just as easily within your Ghost theme.
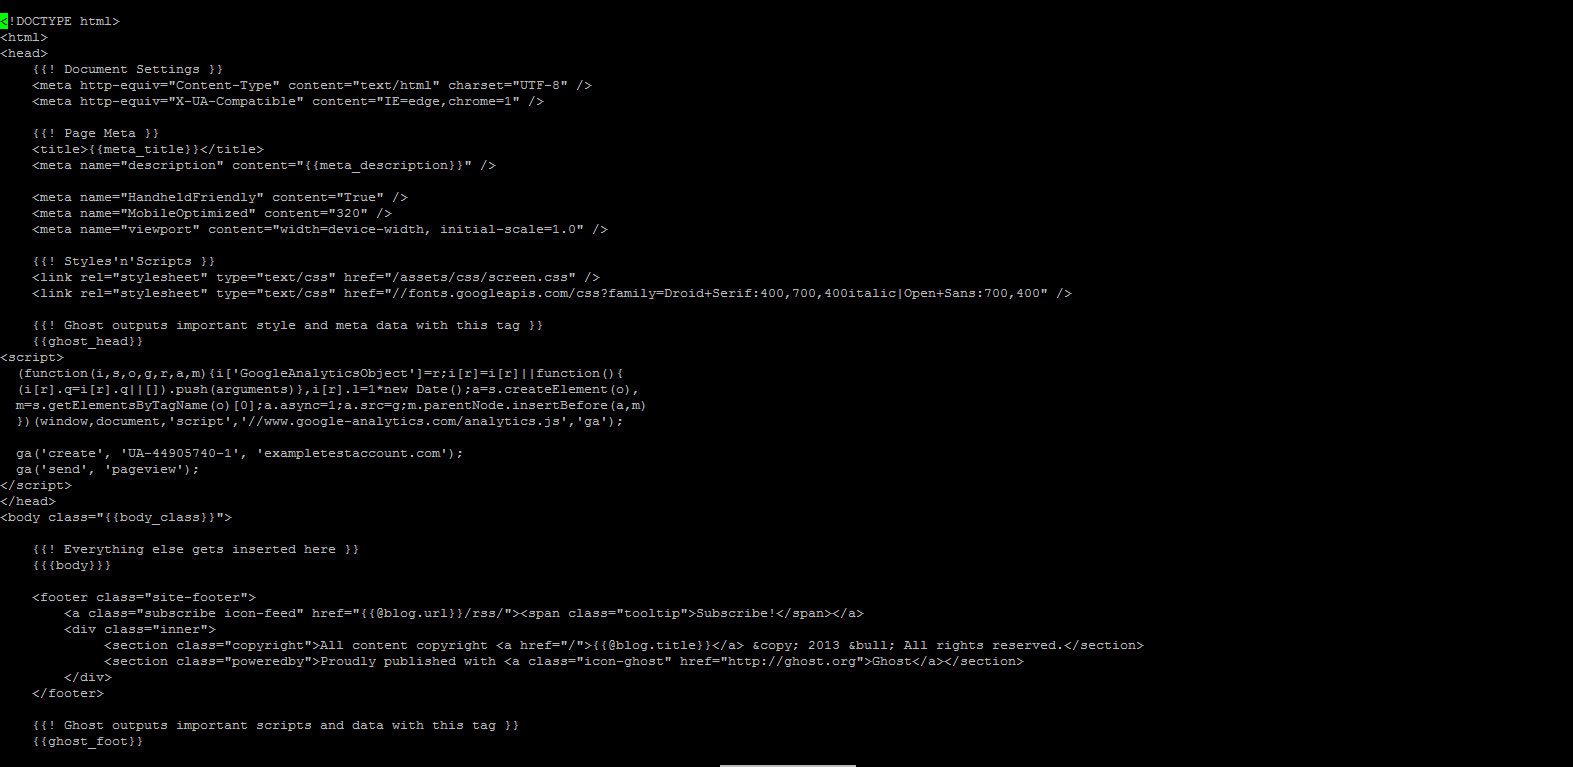
First, you will need to locate a file that is used on every page within your Ghost theme. In this example, we are using the default Casper theme in which we can easily insert it into the default.hbs file. Any themes will be located in their respctive folders inside the /content/themes folder.
From here, locate your default.hbs file and open it. In here, you will see some familiar HTML tags. Then, locate the </head> tag. Once you have found this HTML tag, simply place your Google Analytics code directly above it. Once it is in there, save your file and restart Ghost. You should now see your data being successfully tracked by Google Analytics.


If you’re using CloudFlare as your CDN, no need to modify files. Instead, there’s an app for that: https://www.habdas.org/add-google-analytics-ghost-cloudflare/
Hello Josh,
Thank you for your suggestion about using Cloudflare CDN services with Ghost. If you want to create a post about your app in our User Submitted section, I would be happy to link your comment to it.
If you have any further questions, feel free to post them below.
Thank you,
-John-Paul
@jeffMa – thanks for the help! you’re right. just had to wait a few days and it showed up.
All, I’ve put the tracking in default.hbs and can see it reflected in the page source. Still Google Analytics is telling me tracking is not installed. Does anyone have any tips at this point? Thanks.
FYI – Using the Amazon Ghost AMI on an EC2
If you’re seeing it in the source, it should be all set. I have seen Google Analytics take a few visits to your site before it is reporting correctly so that could be a possibility. As long as the tracking code is visible in the source between the opening and closing <head> tags, everything is in place correctly and Google may just be lagging behind in fully detecting the tracking code.
Thanks Jeff. Just got started on ghost and this helped check a task off my list.
Cheers!