Creating a post in WordPress is one of the most basic functions that you can do when you’re a WordPress user. However, it’s not always immediately obvious how to make posts a little more lively and interesting for your users. So, we’re going to show you how to create a basic WordPress post with a little spice using the new Gutenberg editor – and no plugins.
If you would rather use a plugin to create a recipe, check out How To Create a Recipe Blog in WordPress with WP Recipe Maker.
Find a great home for your WordPress site by subscribing to InMotion’s WordPress Hosting solutions.
Before you start
Before you start creating the post, if you write things down or determine what you’re going to do then everything becomes easier! So make a shortlist of things you should do before you create a great post!
- Determine your goals for the post! My goal with this post is to teach people how to make an interesting post and learn how to cook a traditional Filipino dish.
- Depending on your goals, your post might be really long or really short. To help clarify your post, outline what you’re going to write. It will help you organize and determine key points (and keywords) that will help you provide a clear, concise message/story/tutorial for whatever it is that you’re writing.
- Start a media list. Your list might include narrations, videos, or images. As you create your outline, add your ideas as to the media that you will add. This list will continually change as you create your post. Media will help people better understand the story you’re writing. It’s the spice!
- Dive in! Don’t worry about people seeing your work before it’s done. You can always save it as a draft and preview it before you’re ready to publish it.
Creating the Post -What affects how your post appears?
When you create a new post, you need to be logged into the WordPress Administrator Dashboard. You need to be aware that the format and appearance of a post are generally determined by the theme you have selected for your WordPress site and the template that you use for the post. When you create a post, you’ll find the template option in the column to the right.
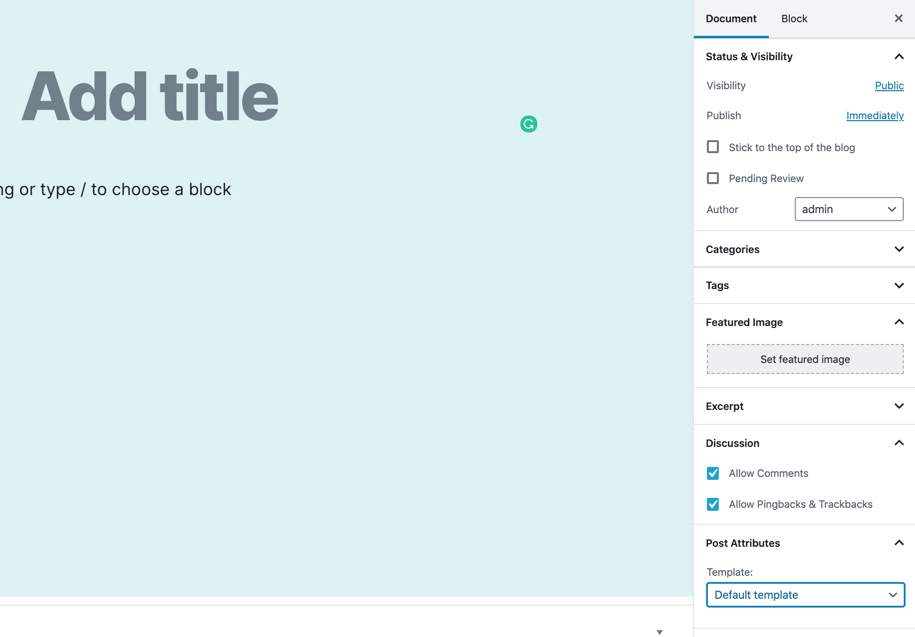
The new Gutenberg editor is the default editor for WordPress as of version 5.0. The elements of each post or page are composed of blocks. The blocks you use will also affect how your post appears.
Some basic suggestions:
- Keep your audience in mind when you create these posts. If you’re trying to keep things short and sweet because you don’t want to lose your readers, then make sure you’re not writing a really long paragraph.
- Keep your headings in order. Your title will be an H1, and then your headings for your paragraphs will be H2. If you have subsections, then they’ll be H3. Don’t mix up that order. Search engines generally prefer order to chaos.
- Use useful media that informs and attracts your readers. Don’t use a screenshot that is so blurry that it just confuses a viewer. Your audio should be clear and any video should be easy to view.
- Don’t forget to add the Alt text for your images. When you add an image block, you can add this in the image properties
- If you’re going to add a video file, use a service like YouTube or Vimeo. It’s good for search engines and it makes it easier for your visitors to see the video.
Ingredients List – making things interesting
When you cook anything you usually start with a basic list of ingredients. As you gain experience and you want to make things a little different, you start experimenting with adding things to your recipe to see if you spice it up. Here’s an example of the ingredients list for a Filipino traditional soup called tinola.
Columns – here you can see an example of the columns block used to display the finished item, the list of ingredients, the cooking tools, and some notes on the recipe.
- 2-2.5 lbs of chicken
- 48 oz. chicken broth
- salt
- pepper
- 2″ piece of ginger (minced)
- 2 cloves of garlic (minced)
- 1 medium or large onion (diced)
- 1 tbs. of extra virgin olive oil
- 1 medium zucchini (sliced thick)
- 1 chayote (sliced thick)
- 1/2 lb of baby bok choy
- optional – 1 banana pepper
- optional – 2 tbs. fish sauce
Cooking tools
- tall stockpot (I used a 6qt Instant Pot)
Notes: This is a basic version of the recipe. It can vary widely and you can use different types of vegetables to your preferred taste. Make sure to thoroughly wash your vegetables! If you’re going to use the pepper, do not cut it up. Just it thoroughly, then add it to the mix when you’re adding the broth. The pepper is optional but may make the soup too peppery for some people. Try it uncut first if you’re going to use it. You can also substitute spinach for the bok choy.
Colored background – you can create a colored paragraph by simply changing its background. This will typically highlight an explanation or comment and is often called a sidebar. In this case, it’s the entire column. The images are inline and there is a video block used to show you how to mince garlic.
Mincing garlic – If you’re not familiar with peeling and mincing garlic, you may find this pretty useful.
Step 1 – Get a clove of garlic and a wide flat knife
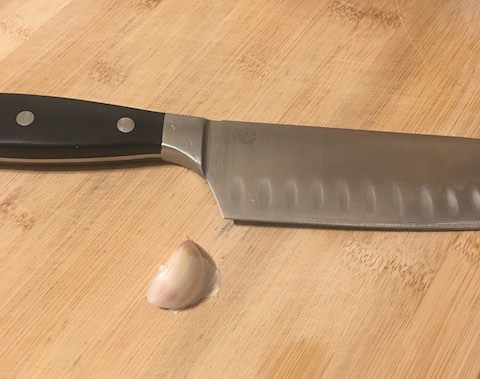
Step 2 – Place the clove under the flat part of the knife
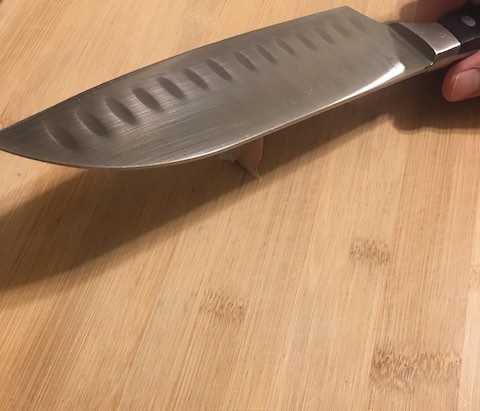
Step 3 – Using your other hand, place pressure on the knife to crush the garlic clove with the flat of the knife.
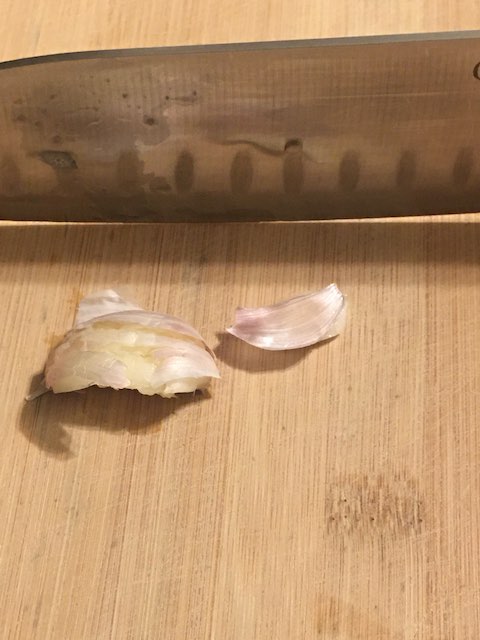
Step 4 – Pull the dried husk off the garlic clove. It should be easy to pull it off now.
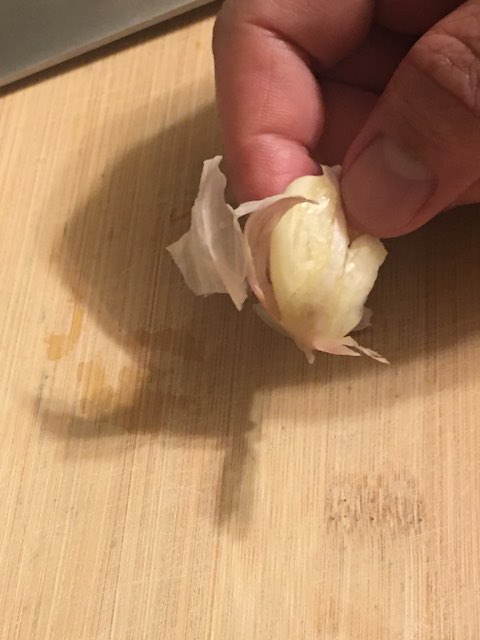
Step 5 – Place the peeled garlic clove on the cutting board. Please careful not to cut your fingers. You can mince the garlic like this:
Video block – This short little video was uploaded to the webserver. This is not usually recommended as the media assets unless the video is small. Otherwise, we recommend that the assets be played from a CDN or service like YouTube or Vimeo.
You should mince it so that the resulting pieces of garlic are fine (more than in this picture):
The main issue with using inline images is that they cannot be enlarged. Images added in their own blocks can be linked to their media page.
Quotes
You can use quotes or pull quotes blocks in order to separate your text and add a little flavor. The following paragraph shows how a quote block is used and explains why you should learn how to cook.
When I was learning this recipe I had recently watched a movie DVD extra where the producer/director demonstrated how to create a recipe shown in his movie. I remember his quote on why you should know how to cook:
You should know how to cook. After all, you have to eat to live.
Robert Rodriguez
Ordered Lists
Ordered lists help provide an order to the steps that you’re presenting. In this case, the ordered list is summarizing the steps for cooking the recipe.
Here’s the list of the steps to cook
- Cube the chicken. Many people will often say to use the bone when cooking soups or stews. I like to leave the bones out in a soup if you’re using a broth. Also, it makes it a little friendlier and less messy to eat. You can always leave them in for cooking and take them out after you’re done. If you’re going to leave the bones in for people to gnaw on, then make sure to separate as much of the meat from the bone as you can. I typically cut the meat into bite-size chunks. This helps to make it easier to cook and easier to eat. Put the cut chicken into a bowl where you can mix it with the salt and pepper.
- Salt and pepper to your taste. I use kosher salt, so maybe a teaspoon per pound. I also like to use coarse black pepper (the coarser the better). At least a teaspoon of pepper per pound of chicken.
- Brown the chicken. Add about a tablespoon of extra virgin olive oil to your stockpot. Don’t add too much or your soup will become too oily. My images show that I’m cooking in a 6-quart Instant Pot. It’s what I had handy. I do not use the pressure cooking part of it. The other convenient thing about using the Instant Pot is that if I’m bringing the dish to a party, it’s easy to transport and then heat at the other location. The important part about this step is to heat the olive oil first. Give it 4-5 minutes to heat up, then add the chicken. When you brown it, make sure you’re stirring it. Your chicken should basically turn from the raw to slightly brown. Don’t overcook the chicken when you’re browning. If it looks a little raw, it’s fine. You will be boiling it as well. If you’re cooking on a stove, then your heat should be set to medium. If it’s too hot, you can easily overcook the chicken and many pots (especially stainless steel ones) recommend medium heat. If you’re cooking in an Instant Pot as I did, then just hit the saute button.

- Add the garlic, ginger, and onions to the chicken. Stir it well so that the chicken is thoroughly covered with the mixture. Cook it for another 5-6 minutes. If you’re using the fish sauce then add it here as well. I recommend a Filipino Fish Sauce, not the most pleasant smelling thing (so beware), but it adds a little umami to the dish.
- Add the chicken broth. I tend to use a low-sodium chicken broth. If you’re using a bouillon cube or broth with salt in it, then you may want to use less than 48 ounces. If you want a measurement, use 42 ounces, and then some water to make up the rest. You’ll need to taste the soup after it’s boiled a bit and salt as needed for your taste. Or you can serve it as is and leave the salt levels to your eaters. If you’re using the banana pepper, then add it here. Bring it to a boil.
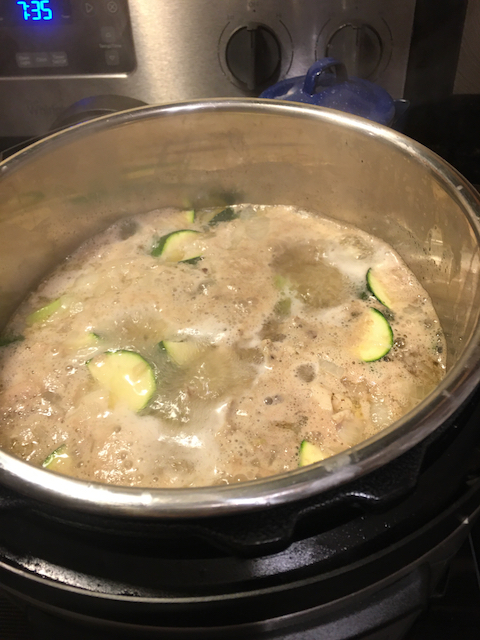
- Add the chayote and zucchini after it’s boiling. The longer you boil vegetables, the softer they’ll be. Or as my mother likes to chide me, “your vegetables will be mushy!” I typically don’t mind the mushy vegetables in a soup, but if you do, then add it after the soup has been boiling for 5 minutes. Otherwise, once it’s boiling add the veggies and bring back to a boil for 5 minutes.
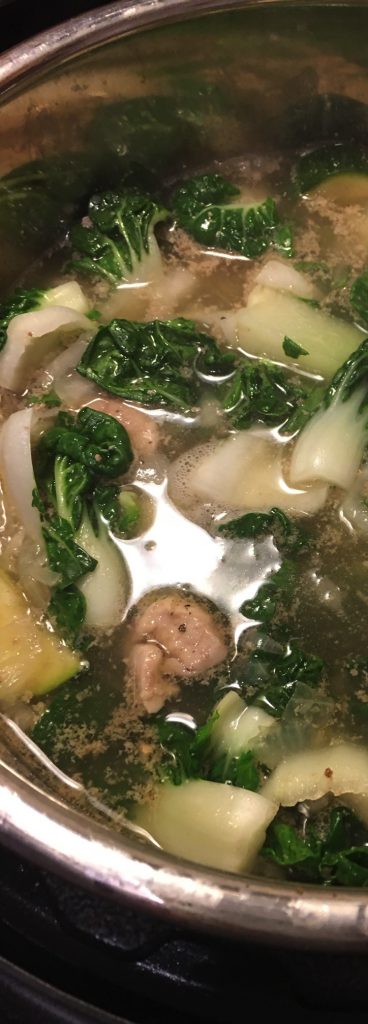
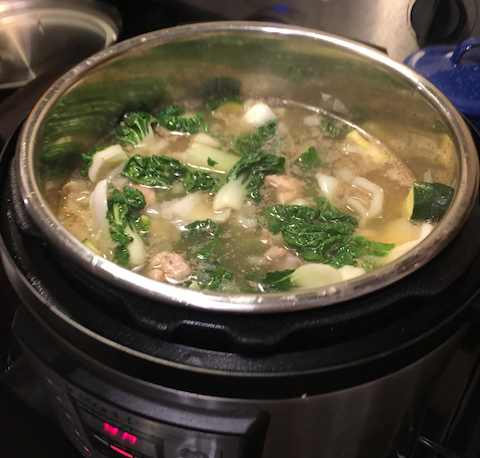
- Finally, add the bok choy. When I add a large bok choy or a bag of baby bok choy (maybe 1/2 lb.) it may go over the top of the pot. So, you should gradually add and mix in the bok choy. Boil it for another 5 minutes and you’re done!
Congratulations! You now know how to make Filipino Chicken Tinola soup! Serve it with a side of rice, you can season it with salt and pepper as needed.
There are many blocks that you can add to spice up your posts. This post is an example of how to share a recipe using different blocks to help keep it interesting. WordPress continually improves its interfaces to make things easier for the user. Using these blocks helps to make your content easier and more fun to read. You can view this post without the tutorial on my blog. Learn more about using WordPress by going to our WordPress Product Guide.
