Creating tags for your products in PrestaShop 1.5 is useful in helping your customers to find the right products. The tags are essentially keywords. These keywords can be used to associate them to specific products for easier searching. For example, if you sell ipods you will want to have them associated with ‘mp3 player’ or ‘music player’ or any other useful keywords.
You want to associate your products to tags as soon as you create them so they can be found right away. Follow along below as our instructions take you through setting up tags for your products in PrestaShop 1.5.
Adding product tags in PrestaShop 1.5
- Log into your PrestaShop 1.5 admin dashboard.
- Using the top menu bar, hover over the Catalog tab and click on the Tags option.
- This leads you to the Tags screen where you will see a list of all tags in your store. To add a new file tag, click on the green Add New button in the upper right corner.

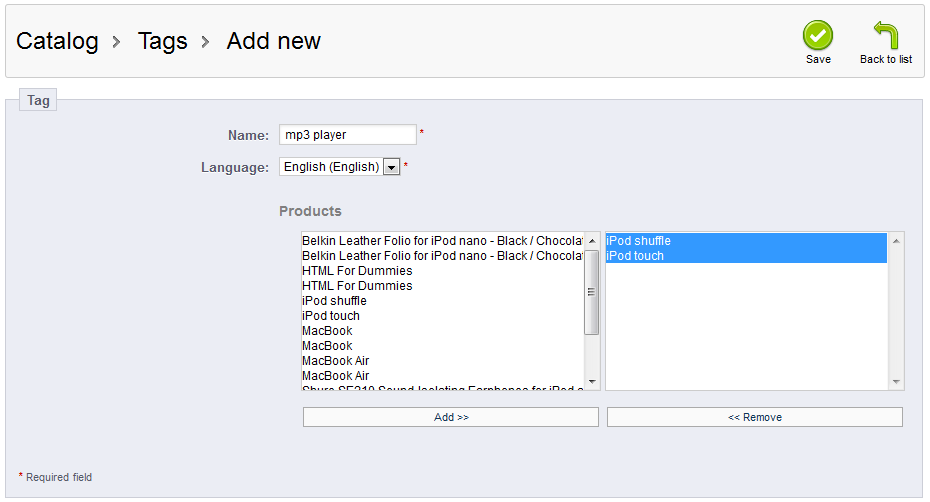
- This leads you to the screen to enter the tag data. You are required to give it a Name and select a Language. There are two lists under the Products label, the left side is a list of all products while the right is the list of products you want the tag to apply to. Initially, the right list will be empty. You can scroll through the left list and add the products you want to relate the tag to by double-clicking them.
You can also select them by highlighting them and selecting the Add button at the bottom of the list. You can also remove them from the right list in the same manner (double-clicking or highlighting and clicking the Remove button).

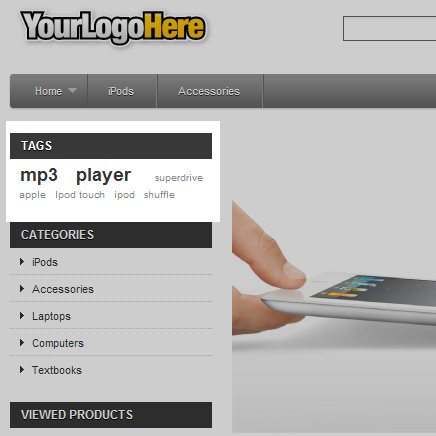
- Once all the information is entered and the correct products entered in the right-hand list, click on the green Save button in the upper right corner to save the tag information. You will return to the attachment list screen and will see your new tag in the list. The new tag will also appear to customers in the front end.


