
Migrating from cPanel to Control Web Panel (CWP) can offer numerous benefits, including cost savings and enhanced server management capabilities. This guide will provide a comprehensive step-by-step process to ensure a smooth migration from cPanel to CWP.
- Prerequisites
- Step-by-Step Migration Guide
- Troubleshooting Common Issues
- Post-Migration Best Practices
Prerequisites
Before beginning the migration process, ensure that you have the following:
- Root access to both cPanel and CWP servers
- A complete backup of all data on the cPanel server
- CWP installed on the new destination server
Step-by-Step Migration Guide
Step 1: Allow Server IPs Through Firewall
Allow Destination CWP Server’s IP in cPanel Server’s Firewall
- Log into WHM as Root.
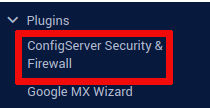
- Navigate to Plugins -> ConfigServer Security & Firewall.
- Scroll down to the csf- Quick Actions section and locate the Quick Allow section.
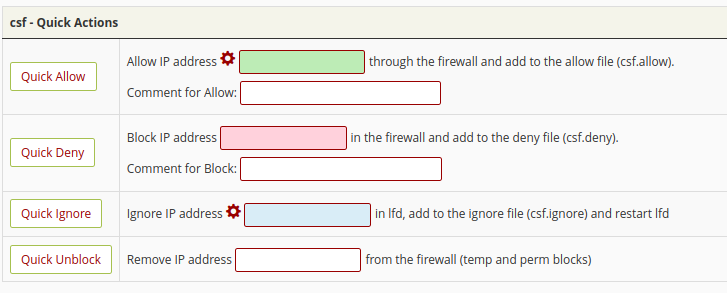
- Type the destination CWP server’s IP in the green Allow IP address input box.
- Click Quick Allow.
Allow cPanel Server’s IP in CWP Server’s Firewall
- Log into CWP Admin as Root.
- Navigate to Security -> CSF Firewall.
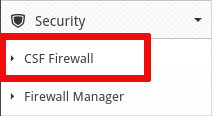
- Type the cPanel server’s IP in the green Allow IP input box.
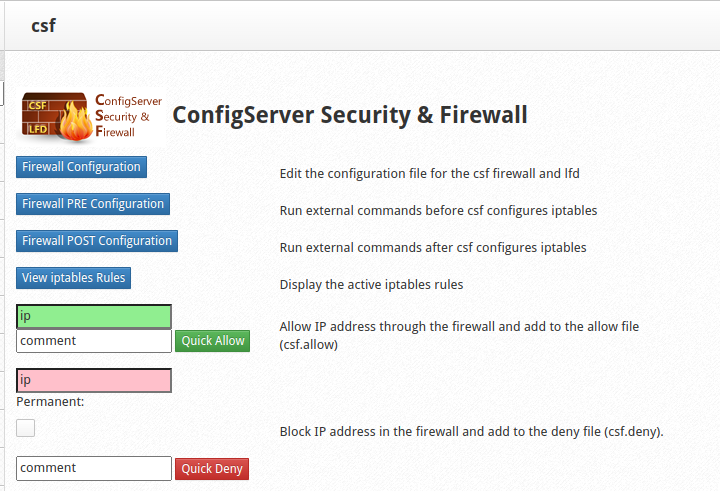
- Click Quick Allow.
Step 2: Create Connection
Generate API Token in WHM
- Log into WHM as Root if you are not already logged in.
- Navigate to Development -> Manage API Tokens.

- Click on Generate Token.

- Name your token and set Privileges to Everything.

- Click Save and copy the generated token.
Create Connection in CWP
- Log in to your CWP Admin Panel.
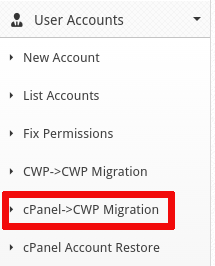
- Navigate to User Accounts -> cPanel->CWP Migration.
- Enter the remote cPanel server’s IP address, username (root), root password, SSH port, and API token you previously copied.
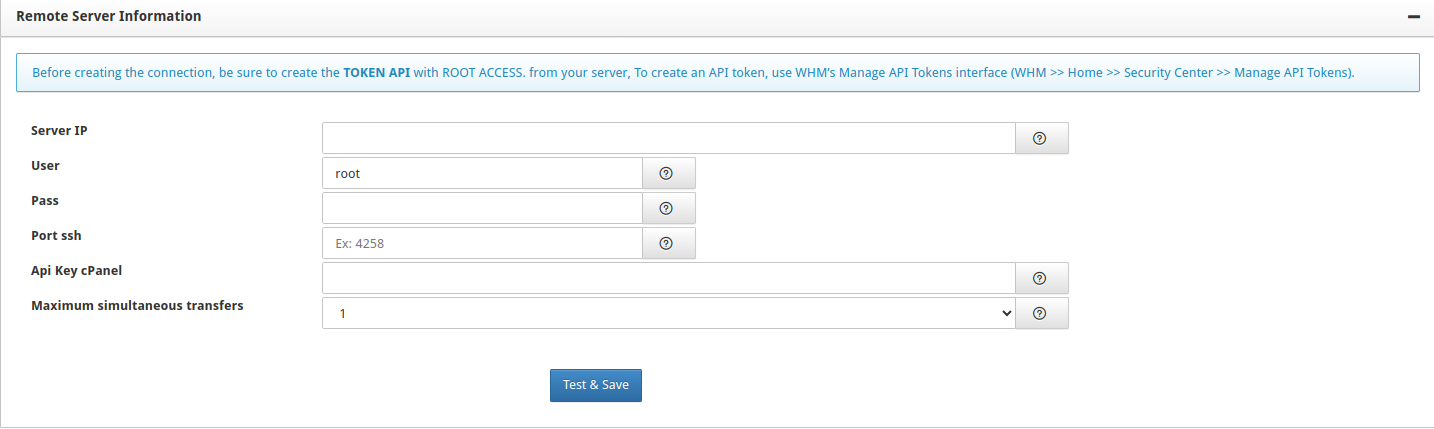
- Click Test & Save to save the connection details.
Step 3: Select Accounts to Migrate
View Remote Server Details
- In CWP, click on the configured remote server from the Remote Server List.

- View the available packages and accounts on the cPanel server.
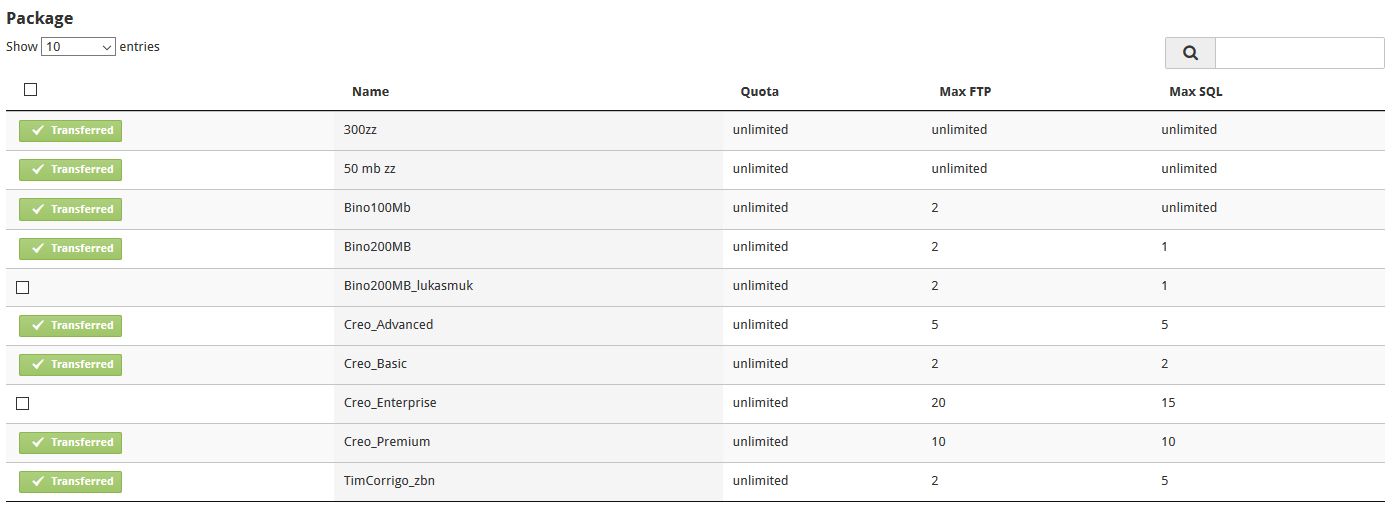
Choose Accounts for Migration
- Check the boxes next to the accounts and packages you wish to migrate.
- Review the selected accounts and packages to ensure accuracy.
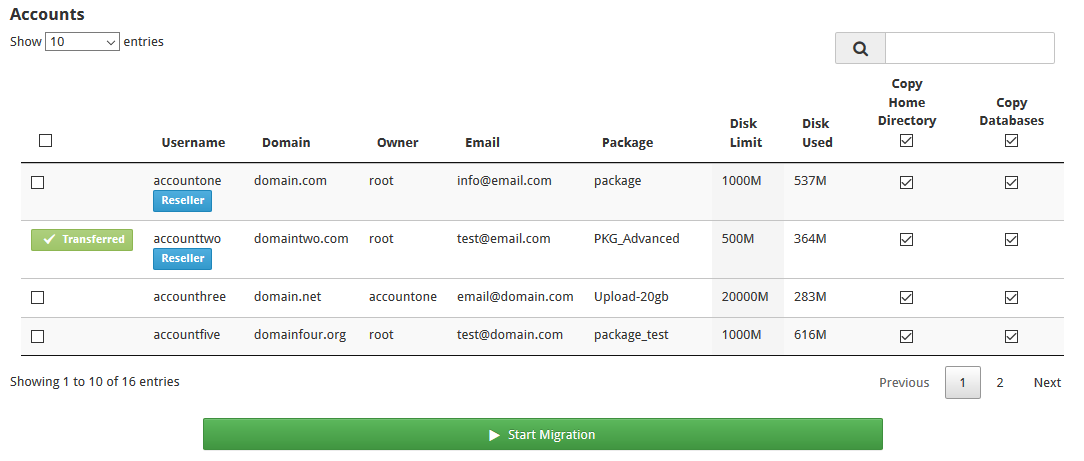
Step 4: Start Migration
Initiate Migration Process
- Click the Start Migration button.
- Monitor the migration progress in real-time via the progress bar and status messages.
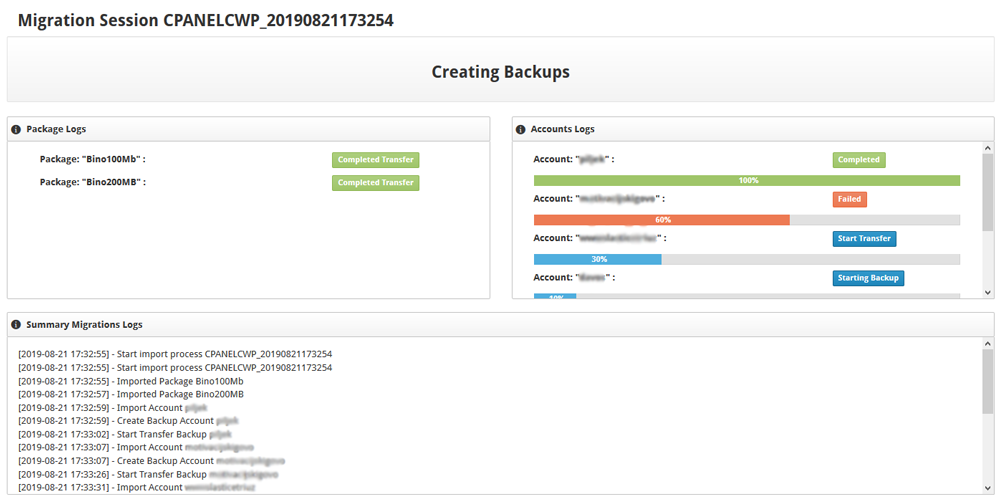
Verify Migration
- Once the migration is complete, log into the CWP server and check the migrated accounts.
- Verify that all websites, emails, and databases are functional.
Troubleshooting Common Issues
Connection Errors
- Ensure the API token and server details are correct
- Verify that both servers are running.
- Ensure the servers’ IPs are added to each other’s firewall as described in Step 1.
Incomplete Migrations
- Double-check the selected accounts for migration
- Re-run the migration process for any accounts that failed.
Post-Migration Best Practices
- Verify DNS Settings: If necessary, update DNS records to point to the new CWP.
- Test Thoroughly: Check all websites, email accounts, and databases to ensure everything is functioning correctly.
- Regular Backups: Implement a regular backup schedule on the new CWP server to prevent data loss.
Scalable VPS Infrastructure, Fully Managed
When shared hosting can't handle your traffic, VPS delivers dedicated resources that scale with demand. Our team manages the technical complexity while you manage your business.
 NVMe Storage High-Availability Ironclad Security Premium Support