The ImunifyAV FREE cPanel plugin is a Dedicated hosting and VPS hosting service option for users to scan their Linux server for malware.
ImunifyAV offers users a second option to the ClamAV cPanel plugin, which has fewer features compared to its command-line interface (CLI). Notably, the ImunifyAV plugin stands out with its additional features, making it an great choice for developers.
- Automated server scans to decrease the number of redundant tasks you have to do manually
- Resource consumption options to ensure your web applications and customers’ user experience (UX) aren’t negatively affected during scans
- History and additional info on past scans to help identify patterns in cyber attacks
- List of directories in a specified “Ignore list”
Below we cover how to:
Install ImunifyAV FREE
- SSH into your server
- Download the ImunifyAV installation shell script from Imunify360.com/antivirus:
wget https://repo.imunify360.cloudlinux.com/defence360/imav-deploy.sh
- Run the installation shell script:
bash imav-deploy.sh
- Update ImunifyAV:
yum update imunify-antivirus
Get Started in WHM
- Log into WHM as user root
- On the left, select ImunifyAV
- Under the Actions column, select the right arrow button to the right of a cPanel user to scan the account
- Select YES, SCAN to confirm scanning the user’s files
- On the right, select Scan all to scan your entire server
- Select YES, SCAN ALL to confirm scanning all cPanel user’s files

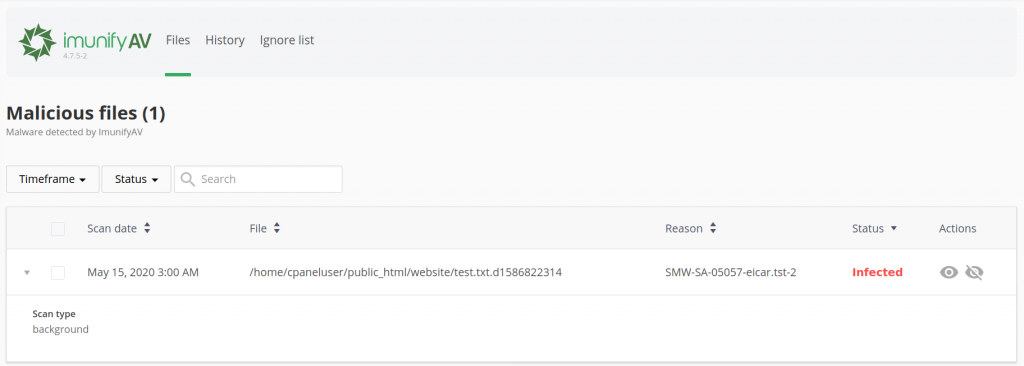
Manage Malicious Files
If the Infection status for a cPanel user states # infections, you have a few options. Under the Actions column, select the chart button (View report). Depending on the file and your preferred workflow, do one of the following:
- Under the Actions column, select the eye button (View file) to see the contents of the file
- Delete the file using cPanel File Manager or SSH
- If it’s a legit file, select the crossed-out eye button (Add to the ignore list)
- Contact Live Support requesting an account scan or further assistance
False positives happen sometimes. Don’t be so eager to delete a file marked as malware. If there are multiple files listed that may be benign and important, create a server snapshot before you make any major changes.

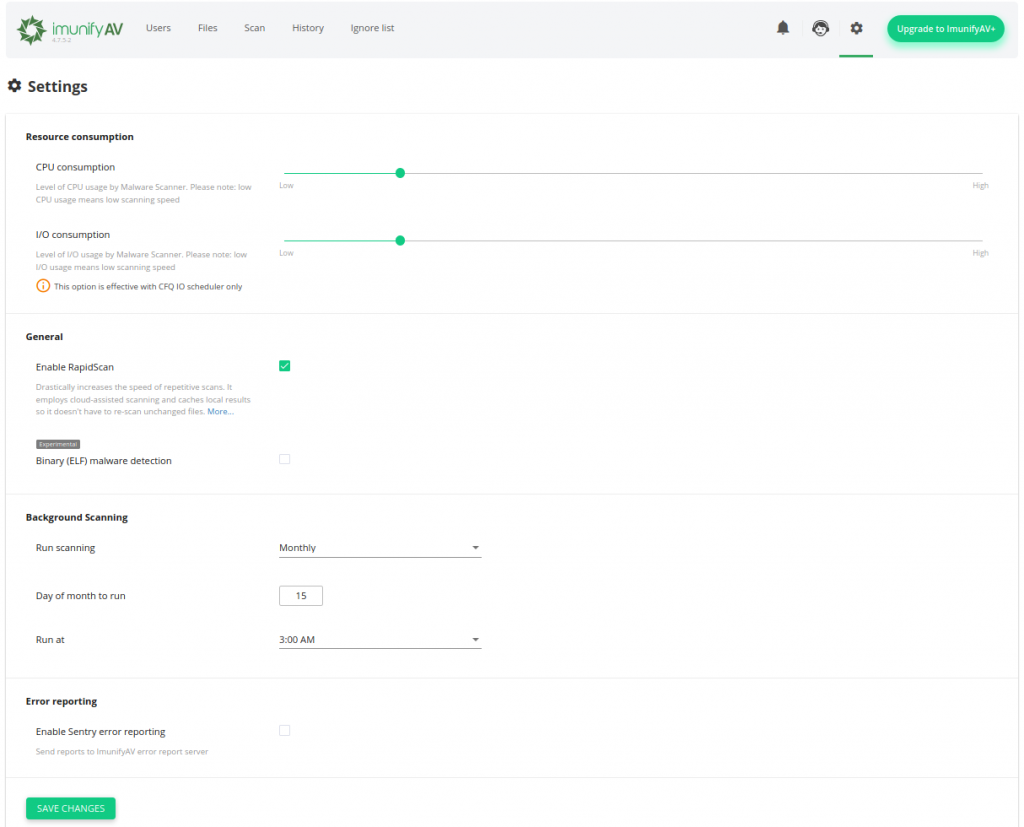
Configure ImunifyAV Settings
- On the right, select the gear button (settings)
- Configure the Resource consumption settings to fit your server performance needs
- Configure monthly Background Scanning settings, or disable it from the Run scanning drop-down menu
- Uncheck Enable Sentry error reporting
- Save Changes at the bottom

Upgrade to ImunifyAV+ for additional features including easy file removal and more.
Enable ImunifyAV For cPanel Users
The ImunifyAV cPanel user interface is hidden by default. Enabling it allows cPanel users to view their malicious files, scan history, and ignore list.
To enable The ImunifyAV cPanel user interface via SSH:
/opt/alt/python35/share/imunify360/scripts/av-userside-plugin.sh
To disable The ImunifyAV cPanel user interface:
/opt/alt/python35/share/imunify360/scripts/av-userside-plugin.sh -r

Uninstall ImunifyAV
ImunifyAV isn’t for everyone. There are many factors when choosing between ImunifyAV FREE and ClamAV. If for whatever reason you decide not to continue using it, uninstalling it is easy via SSH.
- Stop the ImunifyAV application:
systemctl stop imunify-antivirus
Orservice imunify-antivirus stop
- If you’ve removed the imav-deploy.sh installation script, download it again to uninstall the program:
wget https://repo.imunify360.cloudlinux.com/defence360/imav-deploy.sh
- Uninstall ImunifyAV:
bash imav-deploy.sh --uninstall
Learn more about how to harden your VPS to get the most out of Managed VPS Hosting.
Enjoy high-performance, lightning-fast servers with increased security and maximum up-time with our Secure VPS Hosting!
Linux VPS
cPanel or Control Web Panel
Scalable
Website Migration Assistance
