While WP Accessibility helps improve WordPress accessibility compliance, Access Monitor schedules different types of accessibility tests within your WordPress dashboard. Now, you can save and compare test results instead of depending on external web apps such as WAVE.Webaim.org.
Accessibility is becoming a more known aspect of overall website performance whether you’re using our Nginx-powered WordPress Hosting or third-party integrations to enhance user experience.
Below we’ll cover the following:
Configure Access Monitor
- Log into WordPress.
- Install the Access Monitor plugin.
- Hover over Access Monitor on the left and click Access Monitor Settings.
- Create a Tenon.io account for an API key.
- In your Tenon.io dashboard, click API Key.
- Paste your Tenon API key in your WordPress dashboard and Update Settings.
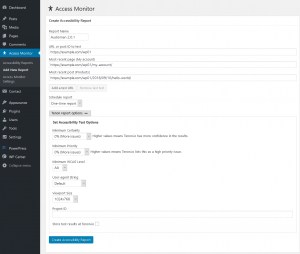
- On the left, click Add New Report under Access Monitor.
- Configure your desired report and Create Accessibility Report.
Accessibility Reports
Access Monitor reports are visible within WordPress and your Tenon.io dashboard:
WordPress
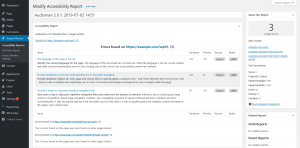
From the Accessibility or Add New Report section, click the report name for found issues, an explanation, and the related code.
Tenon.io
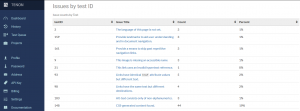
On your Tenon.io dashboard, click Project: All DOWN-ARROW and click D DEFAULT_PROJECT. Click specific issues under Issues by test ID and Issue Title for more information.
Learn more about improving WordPress accessibility at Make.WordPress.org.


