The simple definition of patterns is that they are a combination of WordPress blocks. Patterns result from the block system and block-based themes becoming more prevalent in WordPress editors. The patterns option in the visual editor gives you access to the pre-created block combinations for quick page creation.
For example, you could use patterns to create a contact page with a form, text, and social media icons pre-configured based on the pattern’s design. You can create pages with images, headers, and text blocks by adding a pattern with one click.
The terms site editor and page or post editor are used interchangeably to describe the visual editor developed through the Gutenberg project. The site editor is used to edit the front end of a WordPress site. The visual editor is used to edit pages, posts, templates, and template parts of a WordPress site depending on where they’re opened.
Patterns in the Site Editor
WordPress block patterns were first integrated into the WordPress core in version 5.8. Patterns became more refined with the Twenty Twenty-One theme, with eight patterns available in the Site Editor. Since then, patterns have become available through the WordPress.org site and are often included in block-based patterns.

Patterns are now organized in groups that are part of a theme. As block-based themes become more common, you will also see increased patterns provided with each theme. You can also now copy free patterns from the WordPress.org site.
Steps for Adding Patterns in the Editor
Patterns are easily added to posts or pages using the visual editor. The steps below start with a post being edited.

- Click on the plus (+) sign.
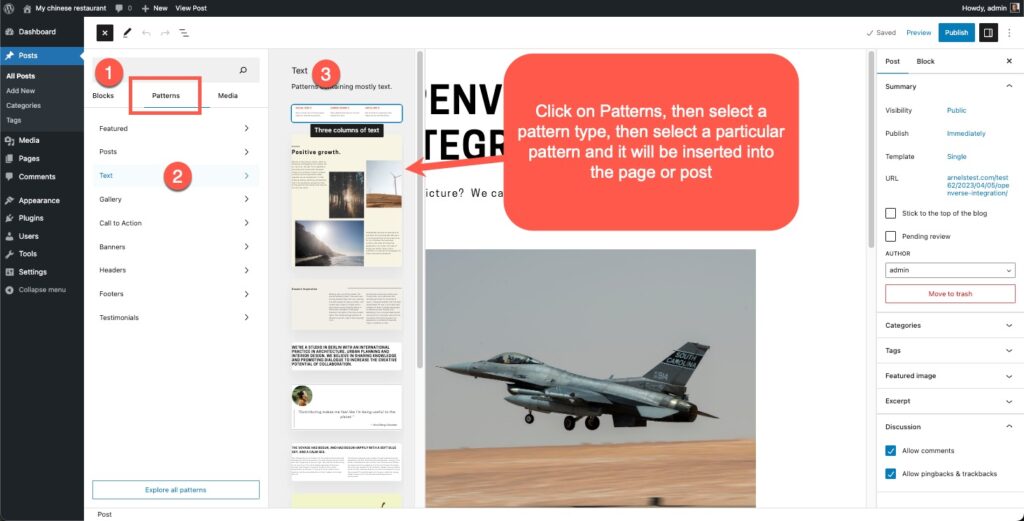
- Click on Patterns. You will see the groups of patterns.
- Pick a pattern group, then pick a pattern you want to insert.
- Click Save, Update, or Publish to save your changes on the page or post.
When you hover over a pattern you will see a line appear on the page or post where the pattern will be inserted.
Patterns in WordPress.org

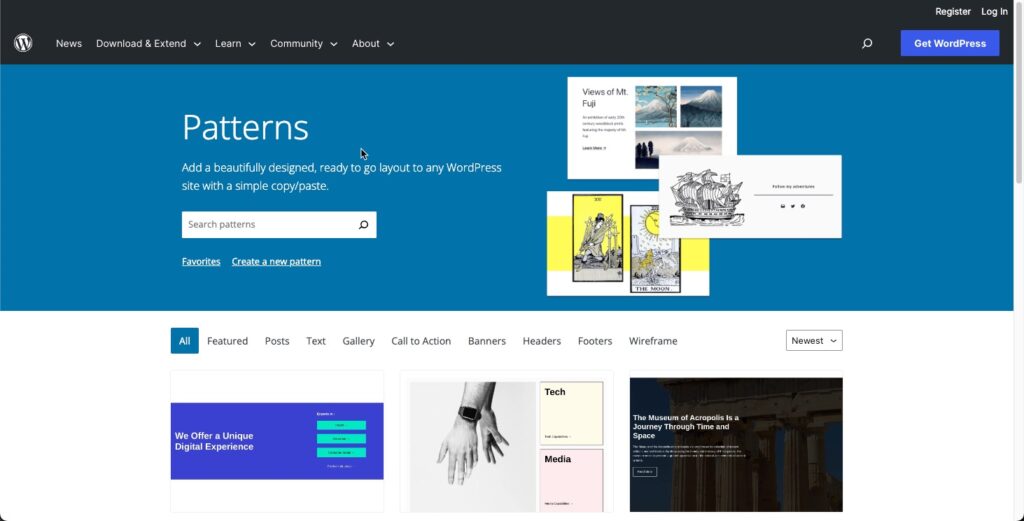
Adding patterns from the WordPress.org Patterns directory involves copying the pattern and pasting it into your page or post.
- Open the page or post where you want to add the pattern.
- Find the location where you want to add the pattern.
- Open a separate tab or window and go to the WordPress Patterns page.
- Find the pattern you want to use.
- Click on Copy.
- Return to your page or post, right-click with your mouse, and select Paste.
- Save your changes.
Make sure to double-check the pattern that you pasted.
The method for adding and moving patterns is the same if you’re working on pages, posts, or the home page on your WordPress site. Working with patterns can help you quickly flesh out your website structure or content with very little effort. Check out our WordPress Educational channel for more tips and tricks!
Learn more about the new WordPress editor, Gutenberg, and the capabilities of the separate Gutenberg plugin with our helpful Gutenberg articles!