In this tutorial:
Installing the TablePress plugin Creating new tables Adding content to your table Inserting your table into a page or post
Creating tables in WordPress usually requires a lot of HTML, but with the TablePress plugin, you will be able to easily insert tables into pages and posts with just a few clicks.
Installing the TablePress plugin
- First, be sure that you are logged into your WordPress admin dashboard.

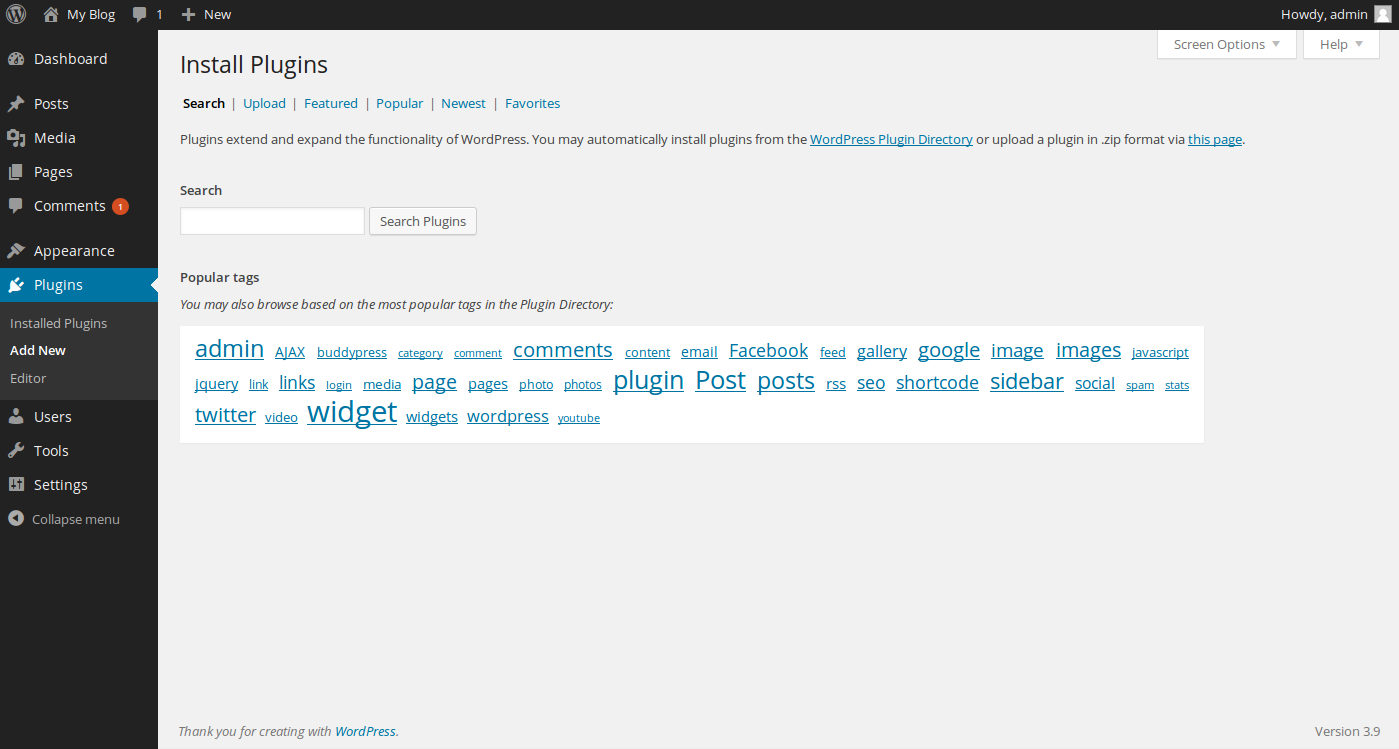
Once logged in, hover over Plugins, and click on Add New. This will take you to the WordPress plugin installation page.

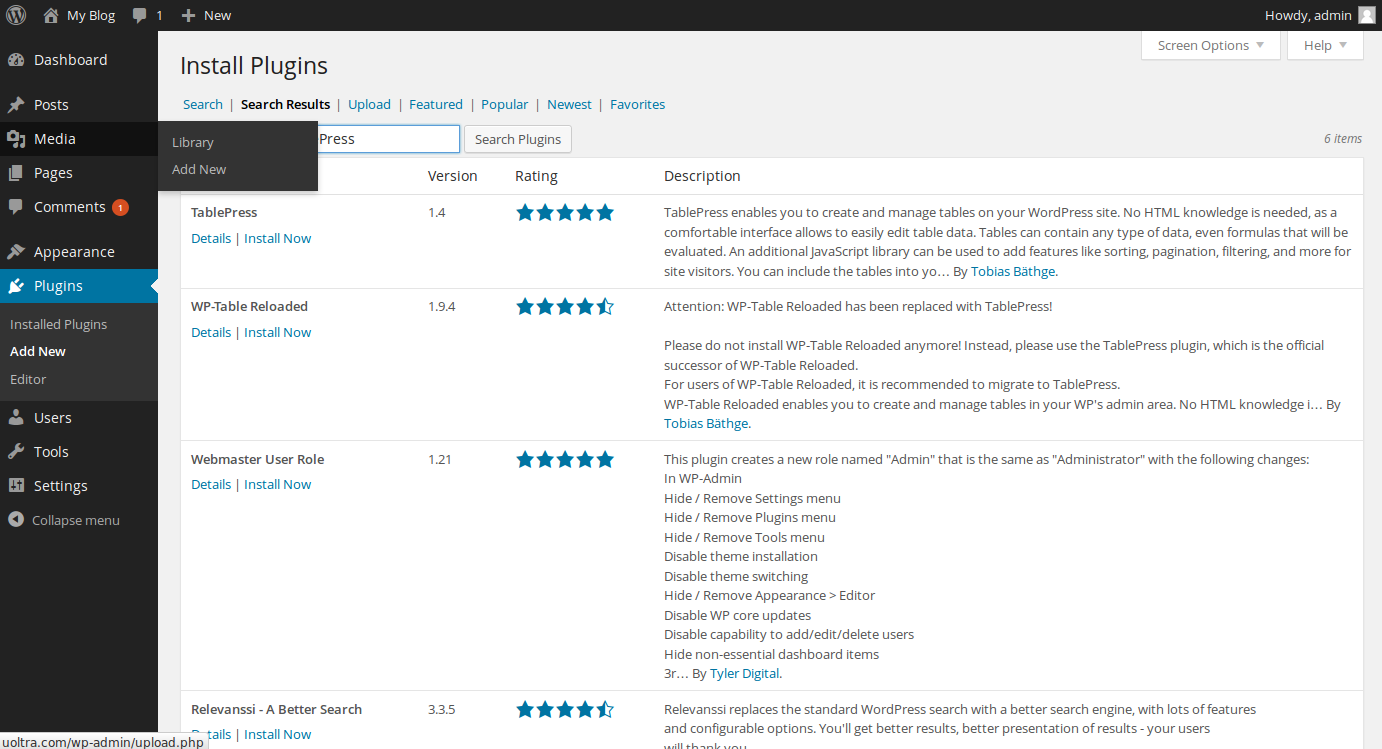
On the plugin installation page, enter TablePress into the search form and click Search Plugins. You will then be presented with your search results.

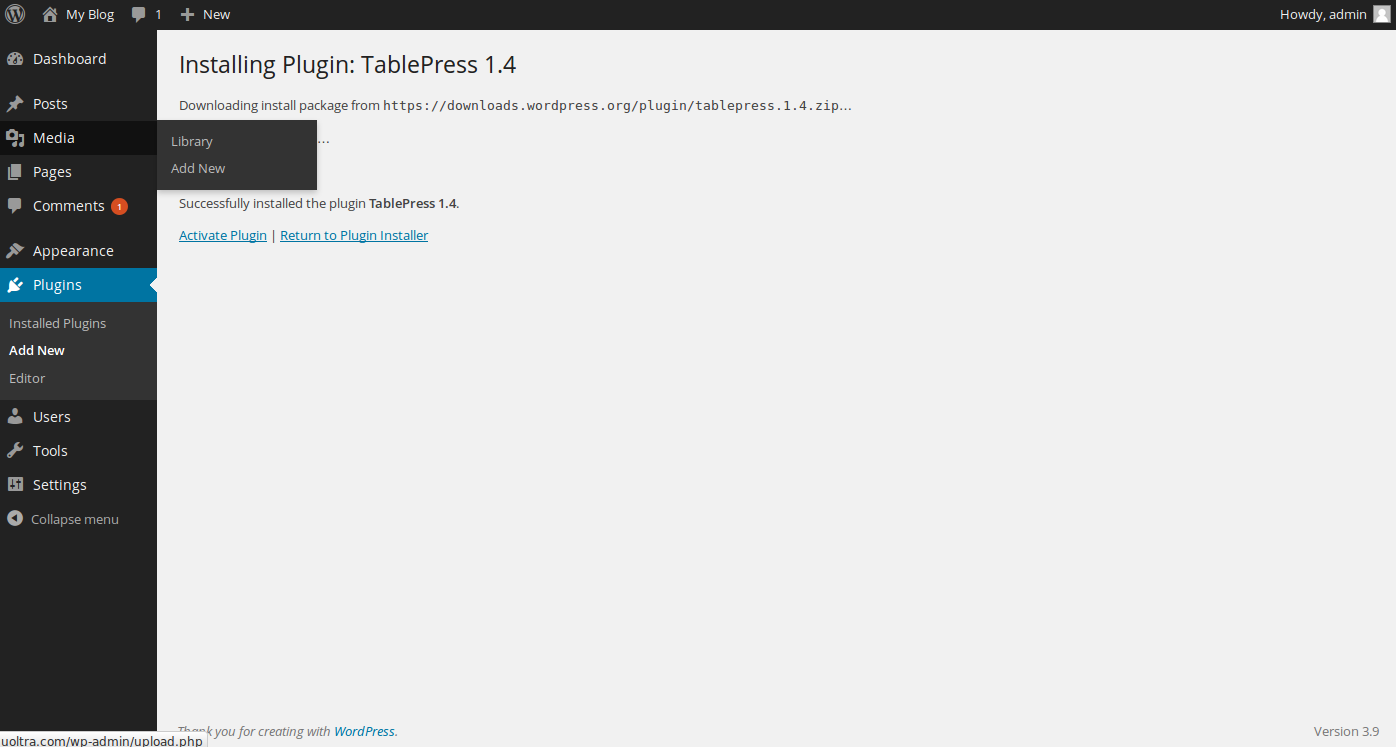
Within your search results, you will see a plugin named TablePress which will be located at the top of the list. Click Install Now under the entry for TablePress. WordPress will then automatically handle the download and installation for TablePress. Be sure to click Activate Plugin once complete.
Creating new tables
Before you can insert a table into a page or post, you will first need to create one. In this section we will show you how to create a table

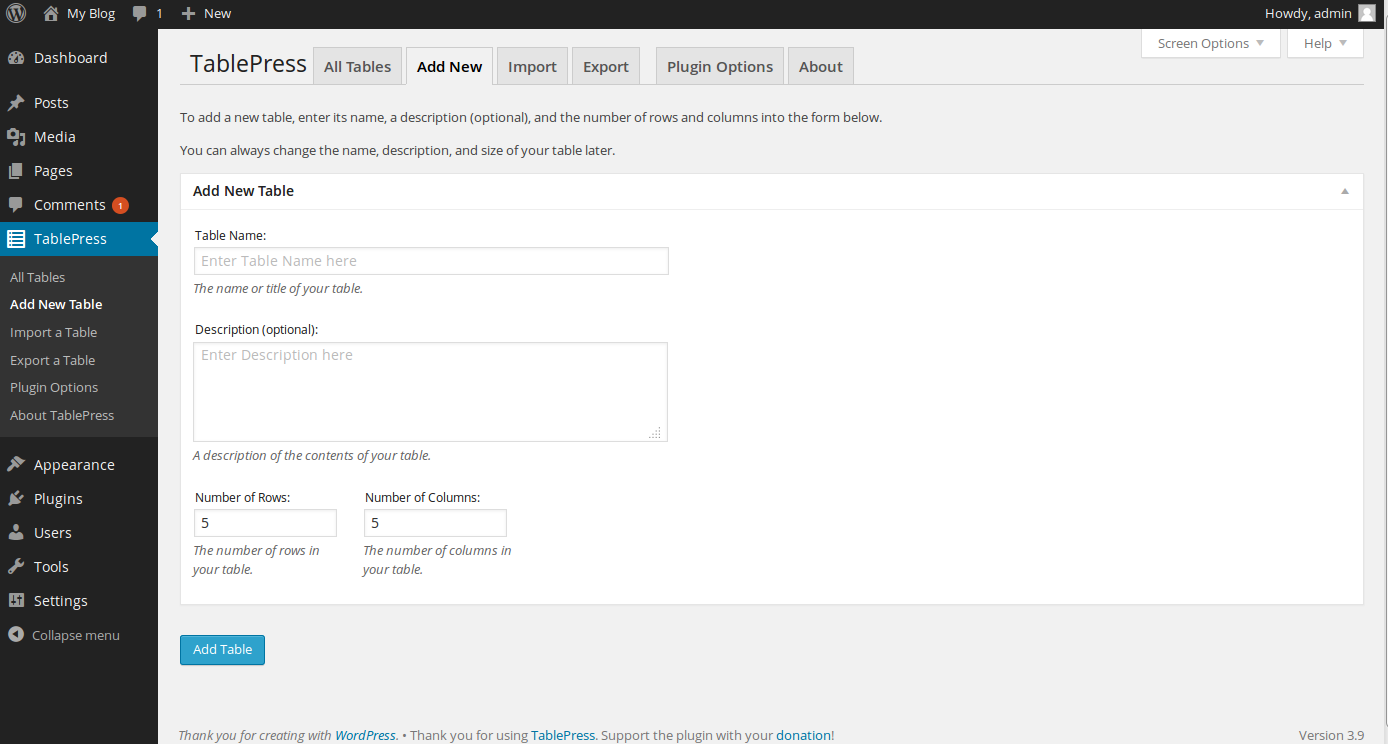
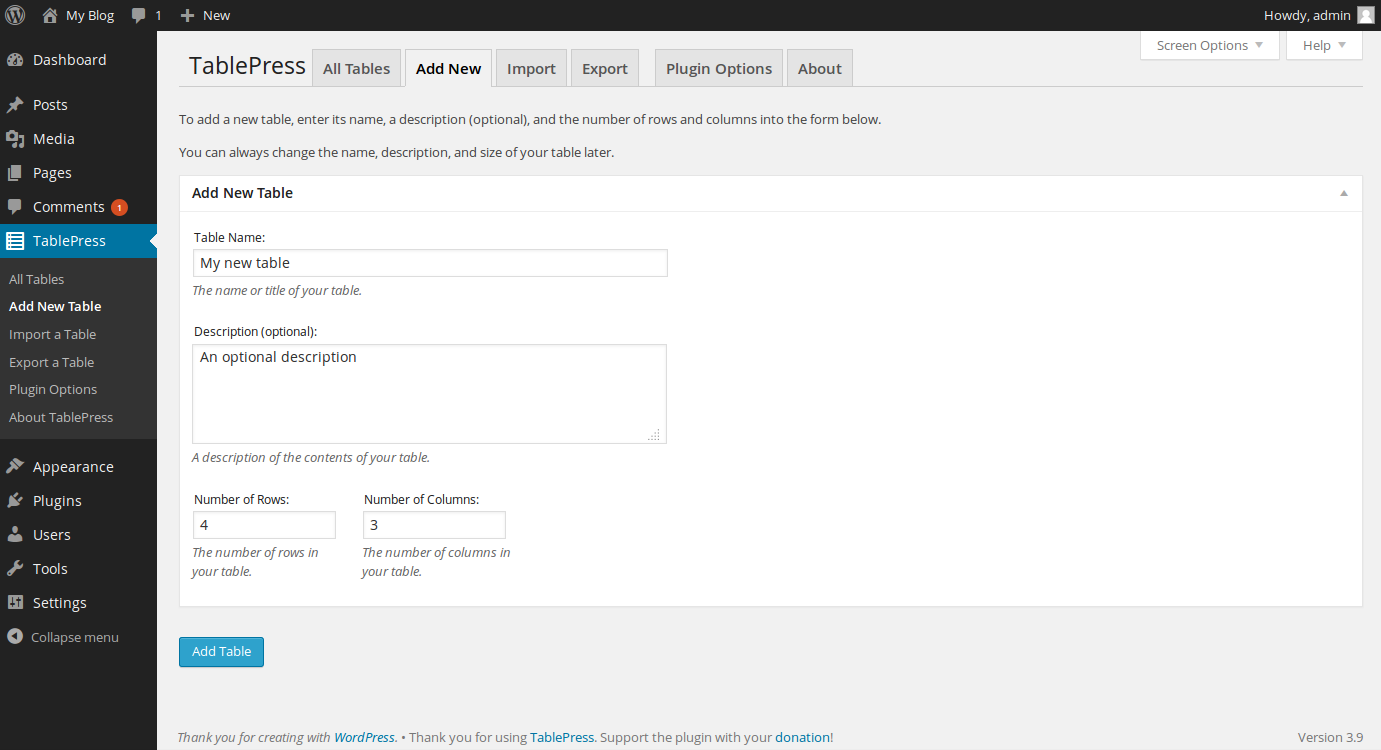
To begin creating a new table within WordPress using the TablePress plugin, hover over TablePress in the left side menu bar, then click on Add New Table.

On the new table creation page, enter in a table name, description (this field is optional), the number of rows, and the number of columns. Once complete, click Add Table.
Adding content to your table
So far we have installed TablePress and created a table, but we still don’t have any content within the newly created table. In this section, we will show you how to add table content.

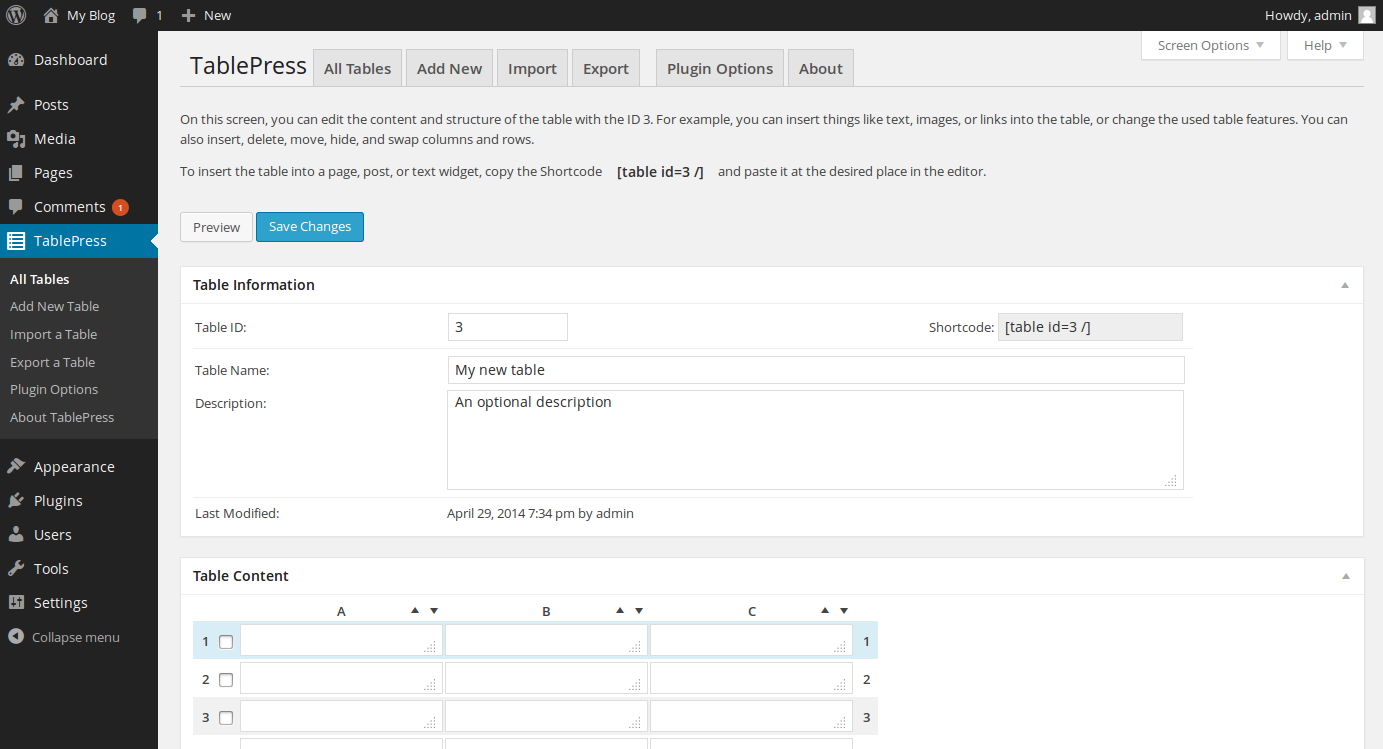
To access any tables created, hover over TablePress on the left side menu, and click on All Tables. Once on this page, all tables you have created will be shown. Simply click on the name of the table that you want to add content to.

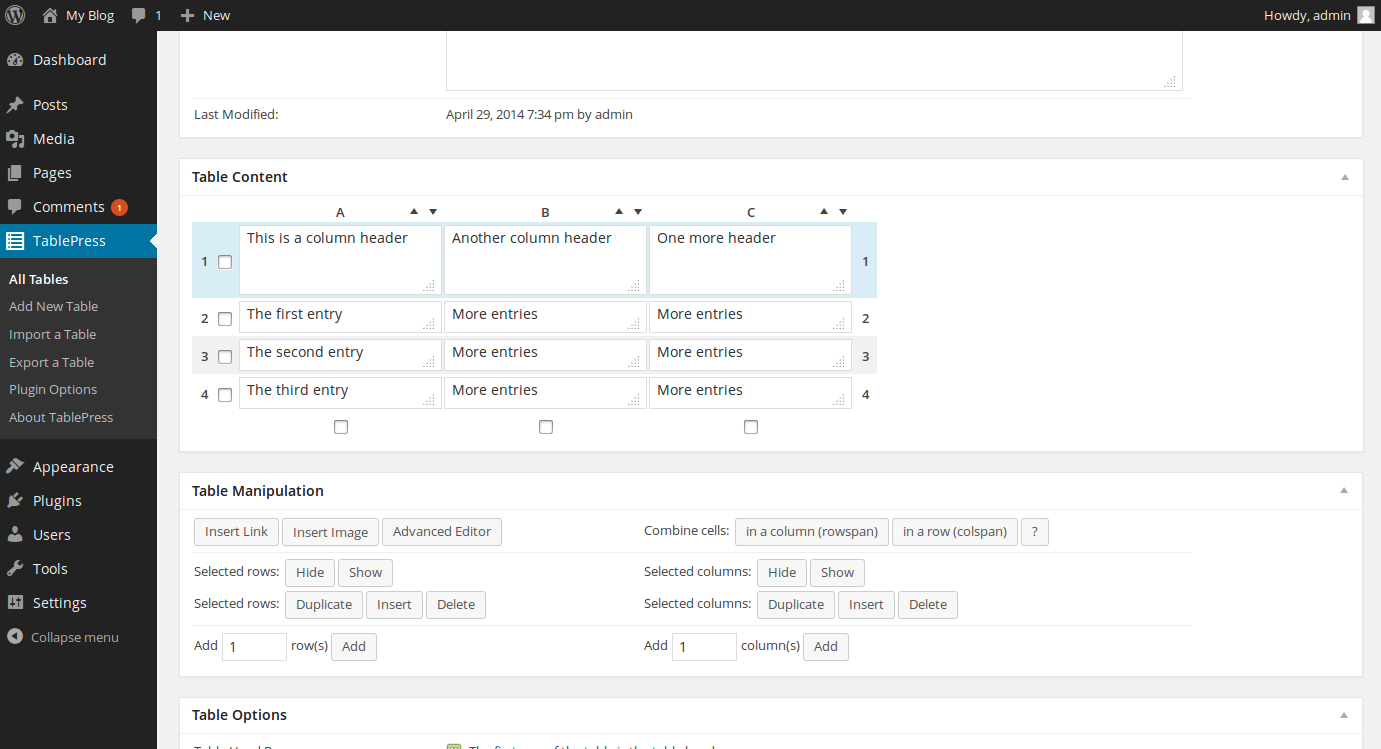
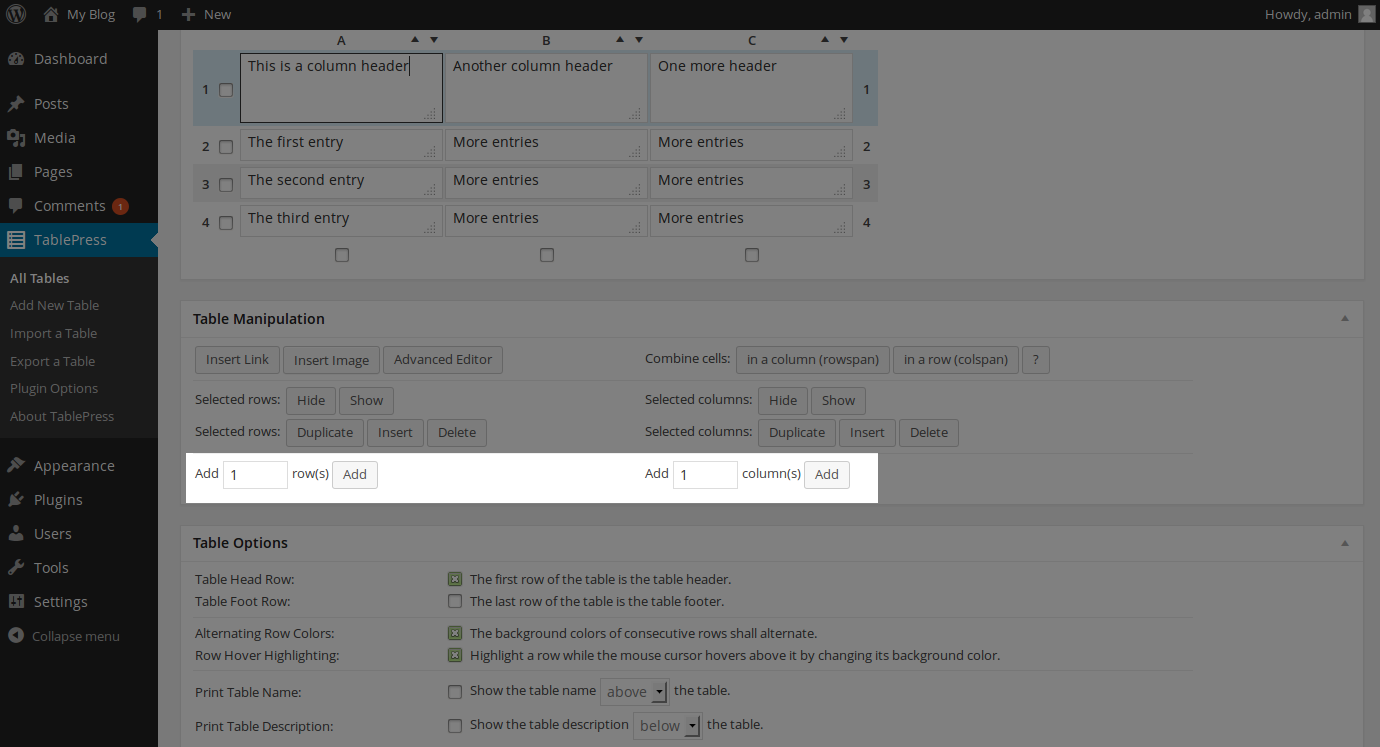
Within the edit screen for your table, you will see a heading labeled Table Content. Under this heading, you will see your table. You may click within any fields in the table to add content to it.

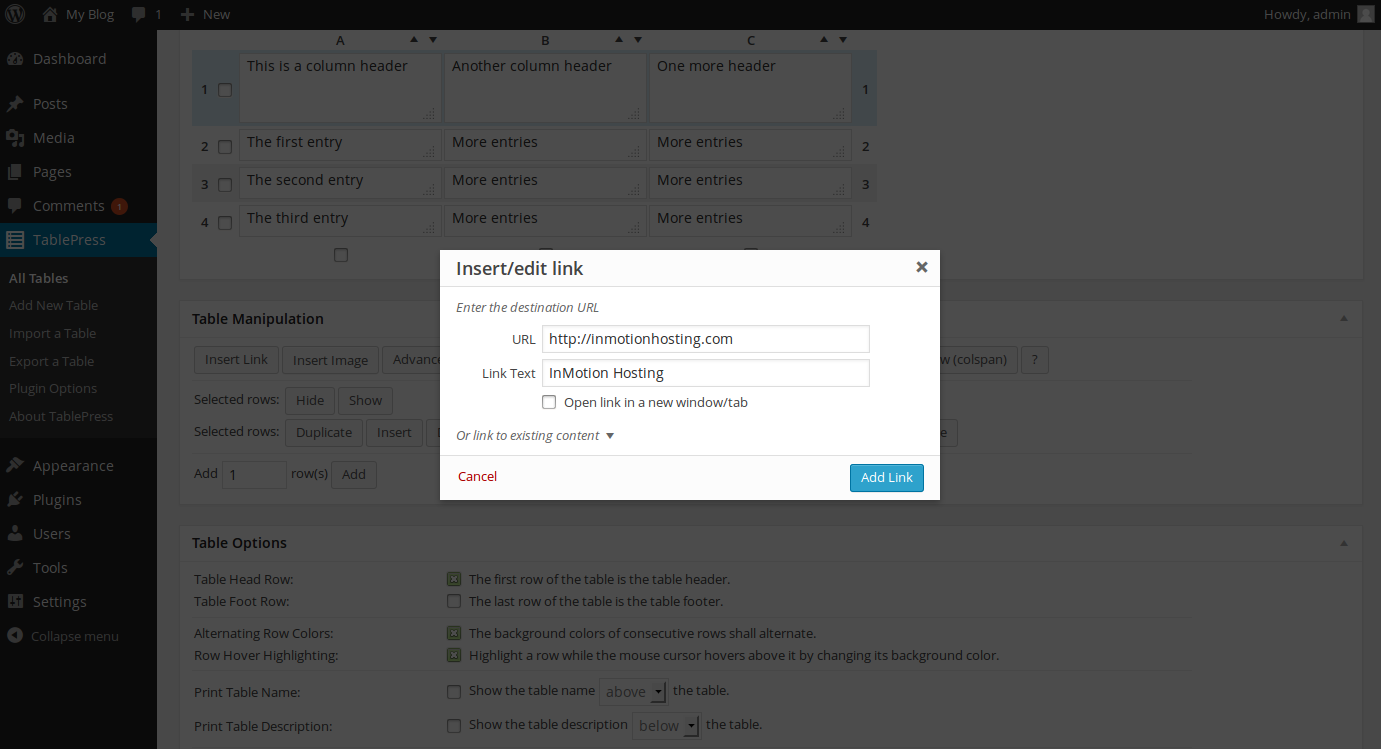
You may also insert additional things other than text such as images and links. To do so, click on the field that you want the content to be in, then click the Insert Link or Insert Image button under the Table Manipulation heading to add the new content.

It is also possible to add additional rows or columns to your table from this screen as well. To do so, click on the appropriate buttons at the bottom of the Table Manipulation section to add your desired number of rows and columns.
- There are several other options that you can change within the TablePress plugin. We cannot go over all of them in this article, but feel free to experiment with your newly created table. Once you have made all of your desired changes, click the Save Changes button at the bottom of the page.
Inserting your table into a page or post
Now that you have created your table and populated it with data, all you need to do now is to insert it into your page or post. In this section, we will show you how to do so.

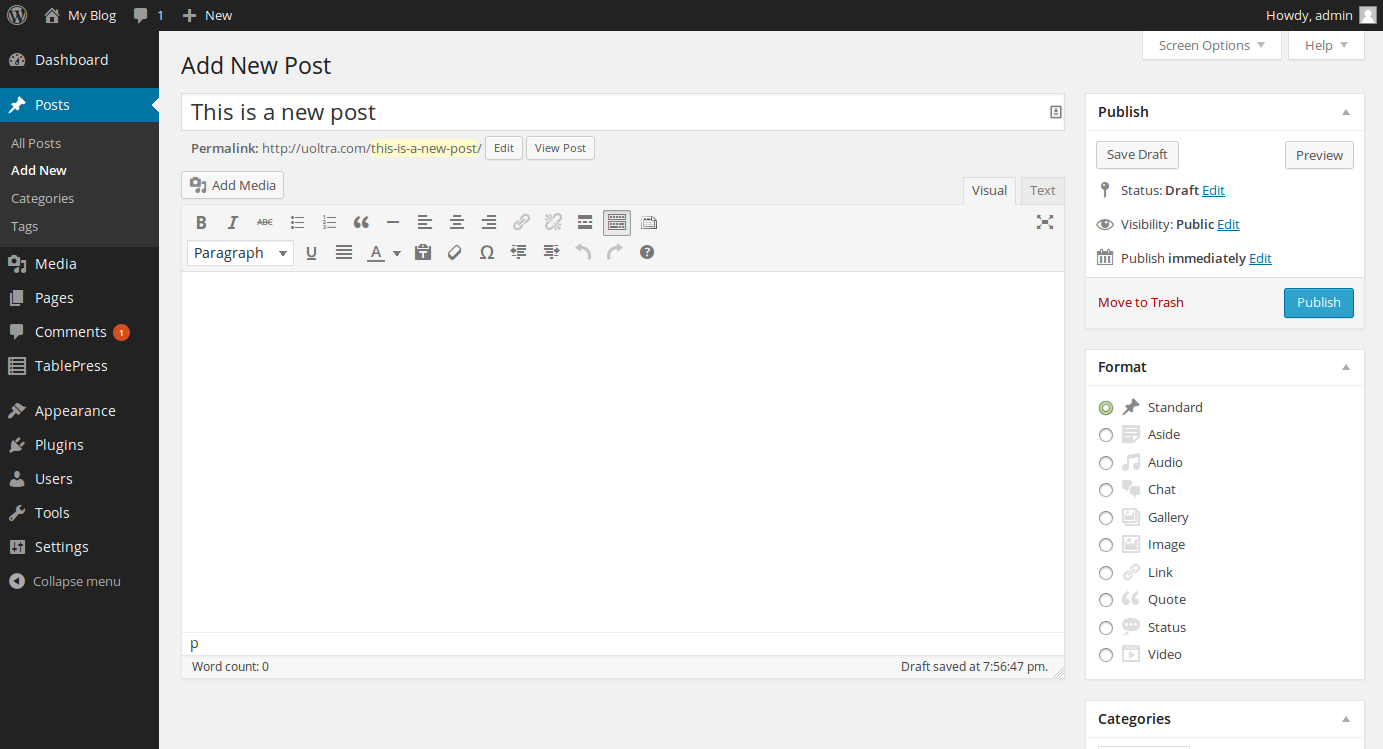
First, you will need to be on the page or post edit screen. You may insert this content into an existing page/post, or create a new page/post.

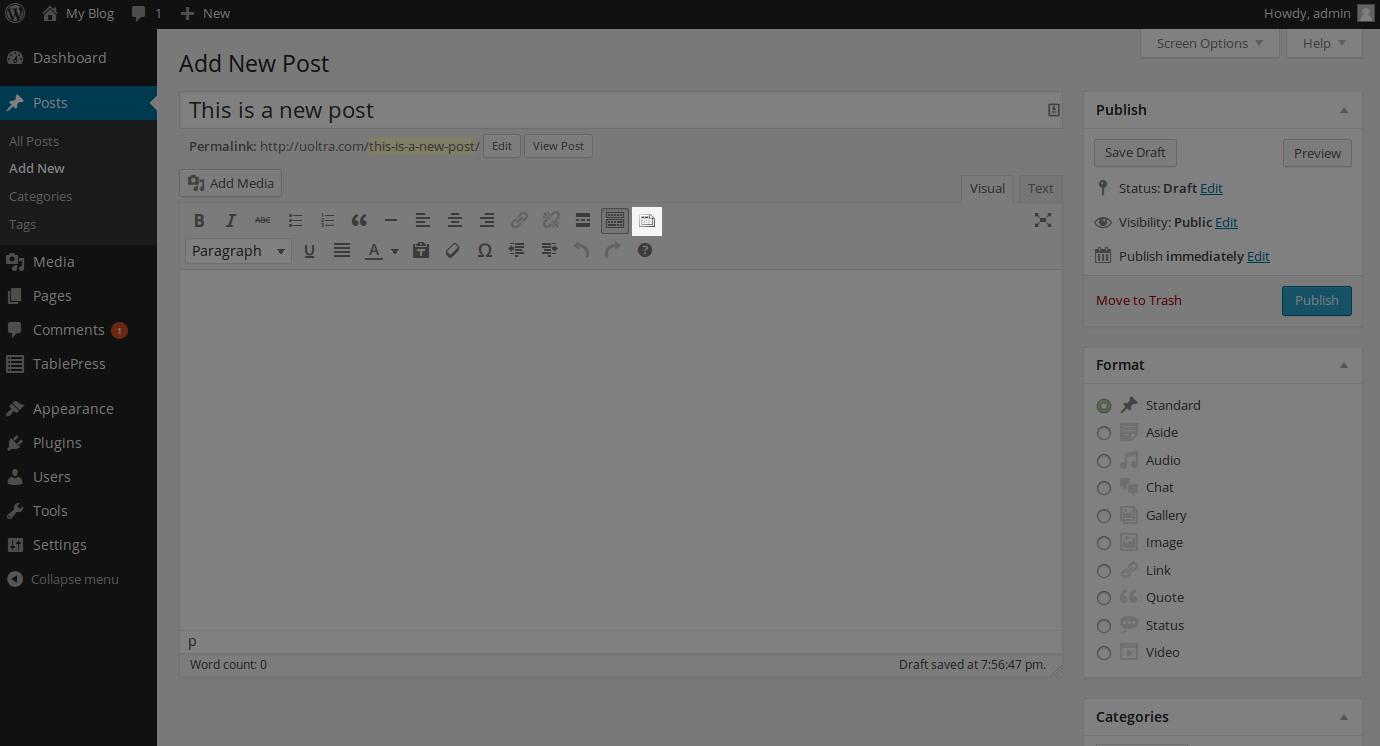
Within the post content box, there is now a new button on the toolbar to insert a table from TablePress. This button is located on the right side of the toolbar.

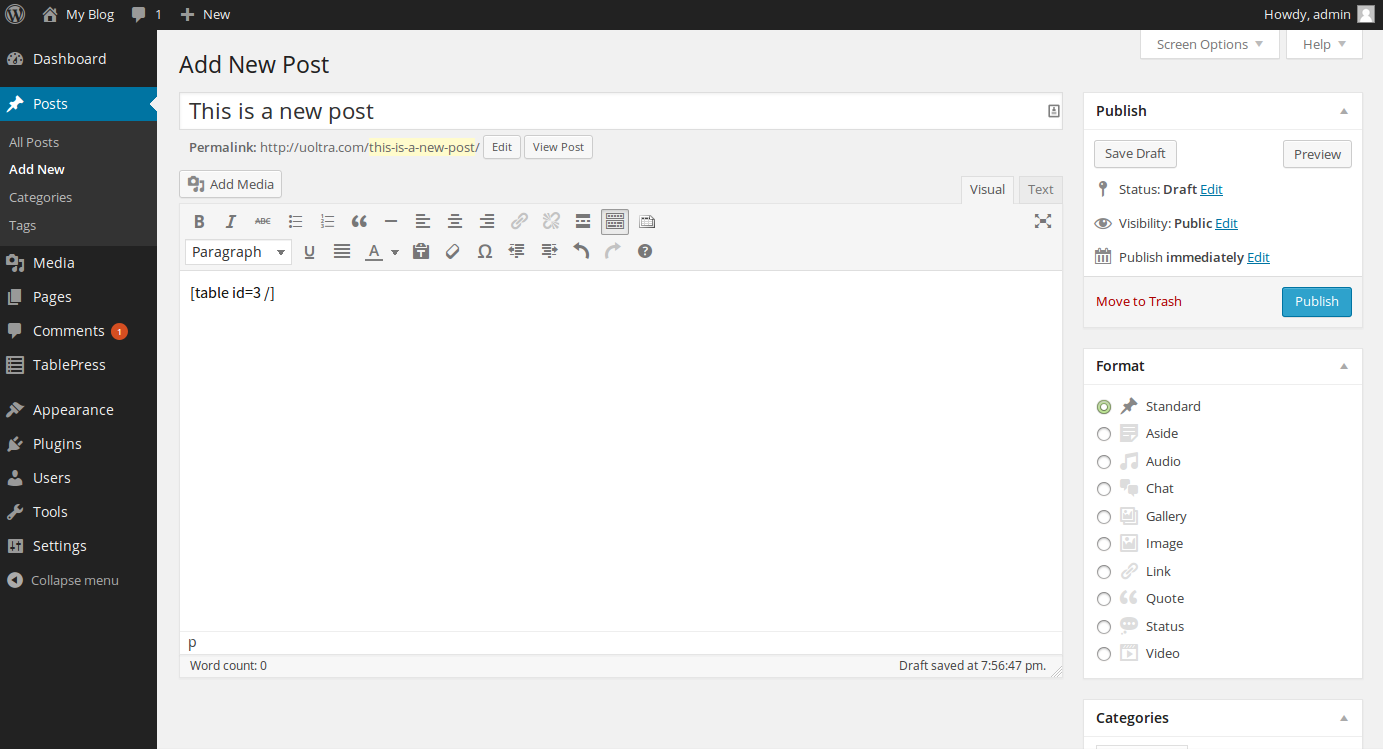
Once the button to insert a table from TablePress is clicked, you will be presented with a list of your tables. Find the table that you want to insert, and click on the Insert Shortcode button. You should now see the shortcode for the table that you chose to insert within the post field.

Now that your table is inserted, be sure to save your post/page and view it. If everything was inserted correctly, you will see something like the image to the right. Congratulations! You have just inserted your new table into your WordPress site.
