Generally, there are a few ways to display images on your WordPress website. You can use a gallery, display them one image at a time in posts or pages, add them as a featured image, add them to a header, or use some type of rotating image display that we often call a slideshow. A default WordPress installation includes the usual options to add images or galleries, but it does not provide a slideshow option. You can get different options for a gallery or slideshow using plugins, but we are going to focus on the Jetpack Slideshow option. Since it is made by Automattic (the same people who put out WordPress), the plugin is basically guaranteed to be compatible and more secure. Also, when you are using Jetpack to create a slideshow the option is seamlessly integrated into the Gutenberg editor blocks. You won’t have to go to another menu to find it. Follow the steps below to:
- Learn how to find the Jetpack slideshow option and enable it
- Learn how to use the Jetpack option to create a slideshow in WordPress
You will need to have the Jetpack Plugin installed on your WordPress website in order to follow the directions below.
Activating Slideshow in Jetpack
Enabling the Jetpack slideshow (or carousel) option is very simple. You just need to go into the Jetpack settings and click on the enable option. We’ll step you through the process below.
- Log in to your WordPress Administrator Dashboard.
- In the menu on the left side of the screen, find the option labeled Jetpack and click on it.
- Click on Settings in the Jetpack menu.
- In the Settings section click on the menu labeled Writing.
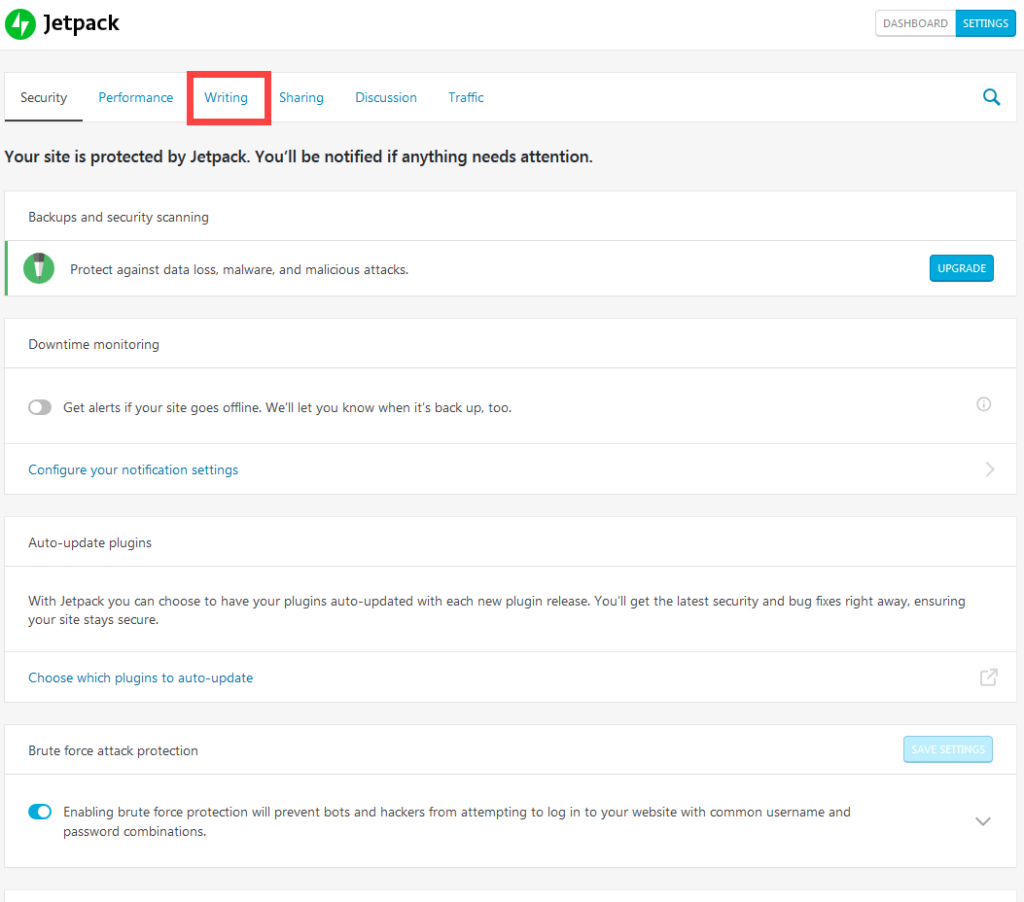
- Scroll down until you find the section labeled Media.
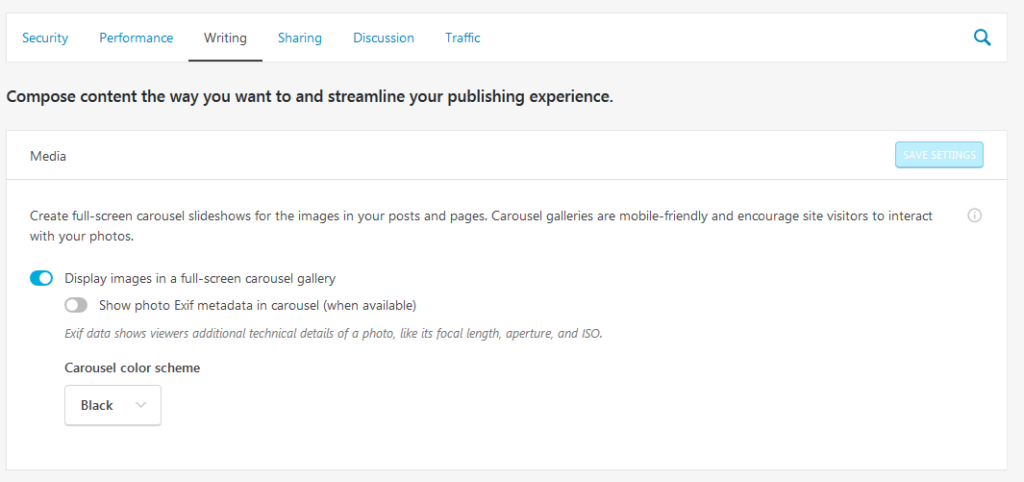
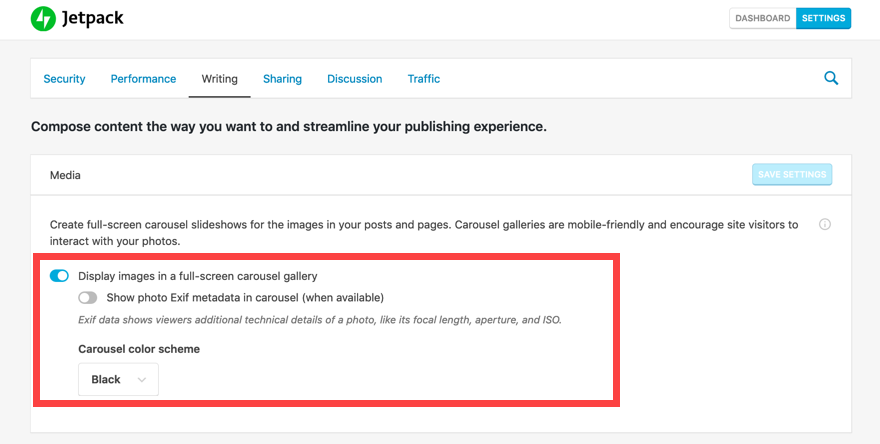
- Here you will see a slider that is labeled Display images in a full-screen carousel gallery. If the feature is not enabled, then it will be grayed out with the slider positioned to the left. Click on the slider, and it will slide to the right and then turn blue. There is also an option to display Exif data if the data has been added to the image. Typically, you only need to display this information for photographers or when needed by your viewers. At the bottom of the Media option, you will see a drop-down arrow that lets you select the carousel color scheme. You can select either black or white.
Looking for a way to improve your WordPress Hosting experience? Check the WordPress Hosting solutions from InMotion Hosting
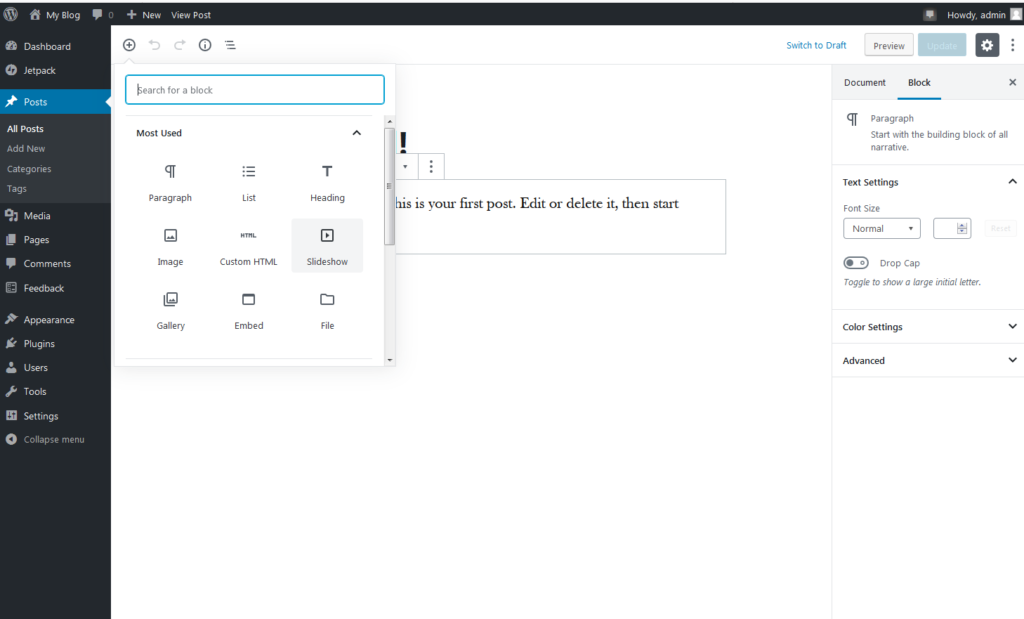
When you enable the feature Jetpack will automatically save the change. This completes the activation of the feature for the Jetpack slideshow. The option for the slideshow will appear in your block options when creating a post or page. To see it, simply edit or create a post/page, then click on add a block and search for “slideshow.”
How to Create a Jetpack Slideshow in WordPress
Using the Jetpack slideshow feature is very simple. You only need to create a block, add images, and order images if necessary. We will walk you through the process of creating a Jetpack slideshow with the instructions below:
- og in to the WordPress Administrator
- Create or Edit a new post or page. We’re using a post in this example, but it will be the same steps.
- Add a new block in the editor, and then search for the slideshow block. If you don’t see the icon for the slideshow block, click on the search field and type in, “Slideshow.”
- Next, you will need to add your slideshow images. You can either upload new images or use images that are already in your Media Library.
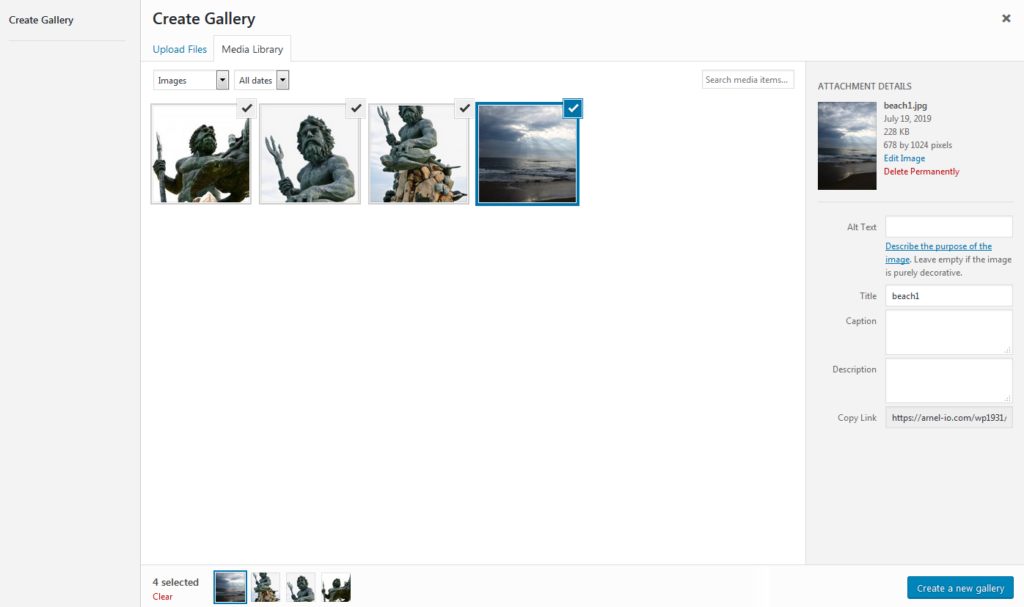
- Once you have selected your images, you can go to each image and add a title, caption, or description. You can also reorder the images by simply clicking on the image and dragging them in to place. Images will appear in sequence from the left to the right.
- Once you have completed making sure that your images are properly set, click on the blue button in the bottom right-hand corner labeled Create a new gallery.
- You will then need to click on Insert Gallery in order to add it to your page or post.
- Save or update your post or page.
Congratulations! You can now add a Jetpack slideshow into a page or post on your WordPress site. Each slideshow block has a few options for viewing. You can set it to Autoplay between the slides or you can click on the Effect options to change the way slide changes. Also note that you can click on a left or right arrow to move between the images in the slideshow, or you can click on the dots at the bottom of the slideshow to get to a particle image. As you can see Jetpack provides some great features for WordPress. Learn more about how you can use Jetpack from the InMotion Hosting Support Center!
More articles about Jetpack:
