After installing the Storefront theme in WordPress you can begin branding and customizing your WooCommerce store. In this tutorial, we will show you how to set your site identity in the Storefront theme. This includes updating your site title, tagline, logo, and icon. If you are running a WordPress site you may be interested in InMotion’s managed WordPress Hosting platform.
Set your Site Identity
- Log into your WordPress Dashboard.
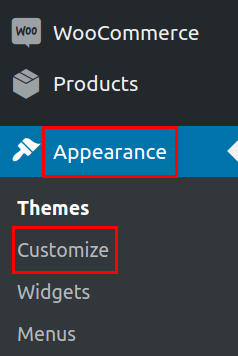
 In your navigation menu click Appearance then Customize.
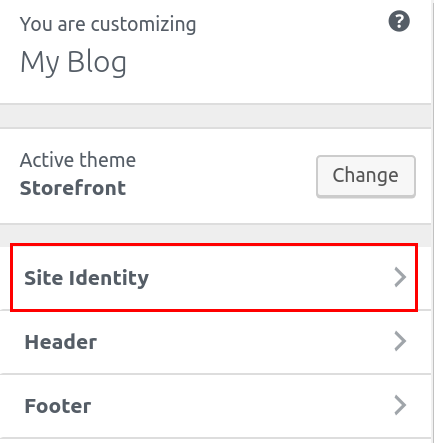
  You will then be on the Storefront Customizer page. Click the Site Identity link.
 - If you want to replace the Site Title with a logo click the Select logo button. Then, upload your logo or choose it from the Media Library.Note: If you do not want to use a logo, proceed to the next step.You should see your new logo display immediately.
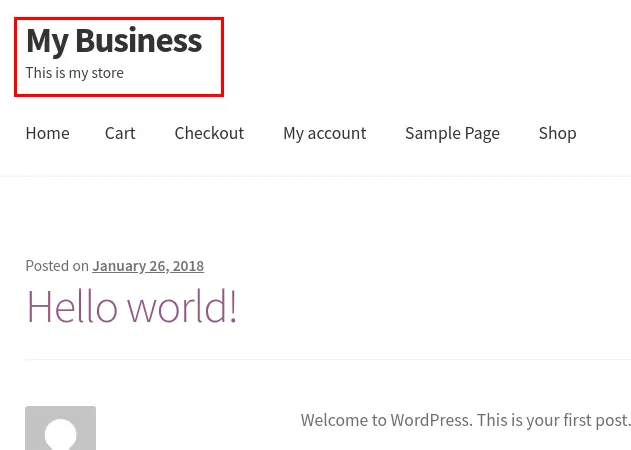
- Enter your Site Title and Tagline if you are not using a logo.You will see the updated Title and Tagline immediately.
- If you want to use a custom Site Icon click the Select Image button. Then, upload your icon or choose it from the Media Library if it was uploaded previously.You should see the new icon displayed immediately.
- Click the Publish button to save your changes.

Congratulations, now you know how to set your site identity in the Storefront theme! In the next guide, we will show you how to customize the header of your WooCommerce site in the StoreFront theme, from your WordPress Dashboard.
