Lists organize your contacts and are an important tool in HubSpot CRM. Creating lists allows you to use marketing segments that categorize your customers. This aids your email marketing efforts by identifying who should receive your marketing emails.
This tutorial will describe the two main types of lists and then show you how to create a list in HubSpot.
Types of Lists – Active or Static
Active lists automatically update over time. For example, if you base the list on company contacts that have deals over $1000, then that list may change as the number of companies you do business with (over $1000) increases.
You would use active lists for regular customers who frequently inquire for information. They would then be able to get emails from your email campaigns as well as any updates from subscriptions.
A Static list does not change. Suppose you have customers who have repeatedly refused to open your emails or have requested that you unsubscribe them, but they are regular customers. In that case, you might create a list that infrequently receives informational emails. This helps keep them from being irritated with higher volumes of marketing messages.
Using Active and Static lists helps you focus on opportunities where your marketing email efforts will have the most impact.
How to Create a List in HubSpot
To create lists, you need contacts. Contacts can consist of people or businesses. Lists are based on filters that allow you to specify a group from your contacts. For example, you may want to create a group of people based on their lead status. Or you may want to target a geographic area.
- Log into HubSpot.
- In HubSpot, click on Contacts > Lists from the menu.
- You will see the Lists page that will display your saved lists.

- Click on Create List in the top right corner.
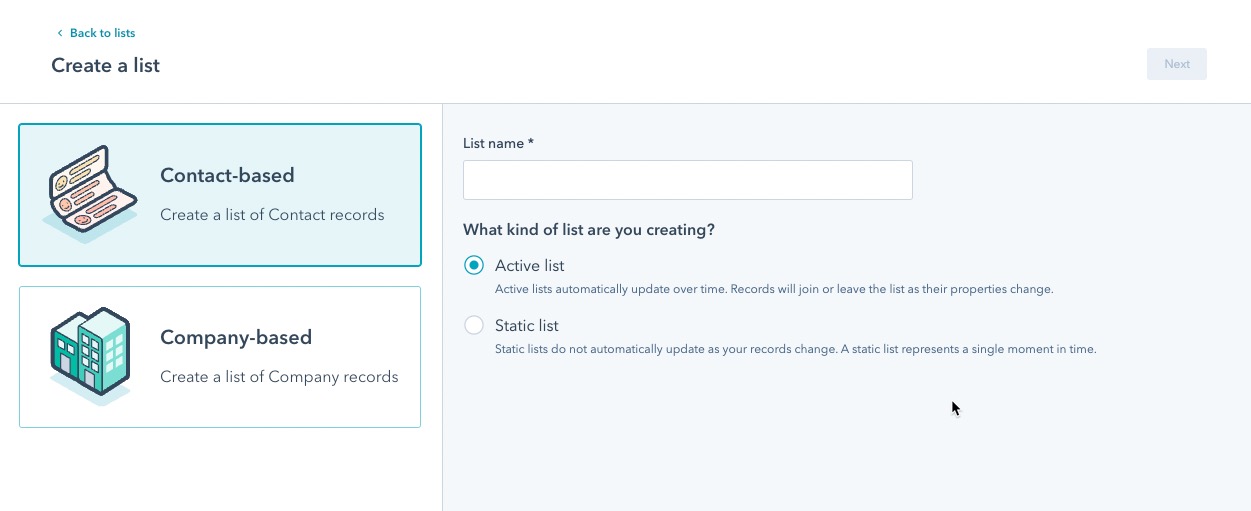
- Type in a name for your list.
- You can create a list based on Contact records, or you can base it on Company records. Choose the type you want to use.

- Select the kind of list you want to create: Active or Static.
- Click Next.
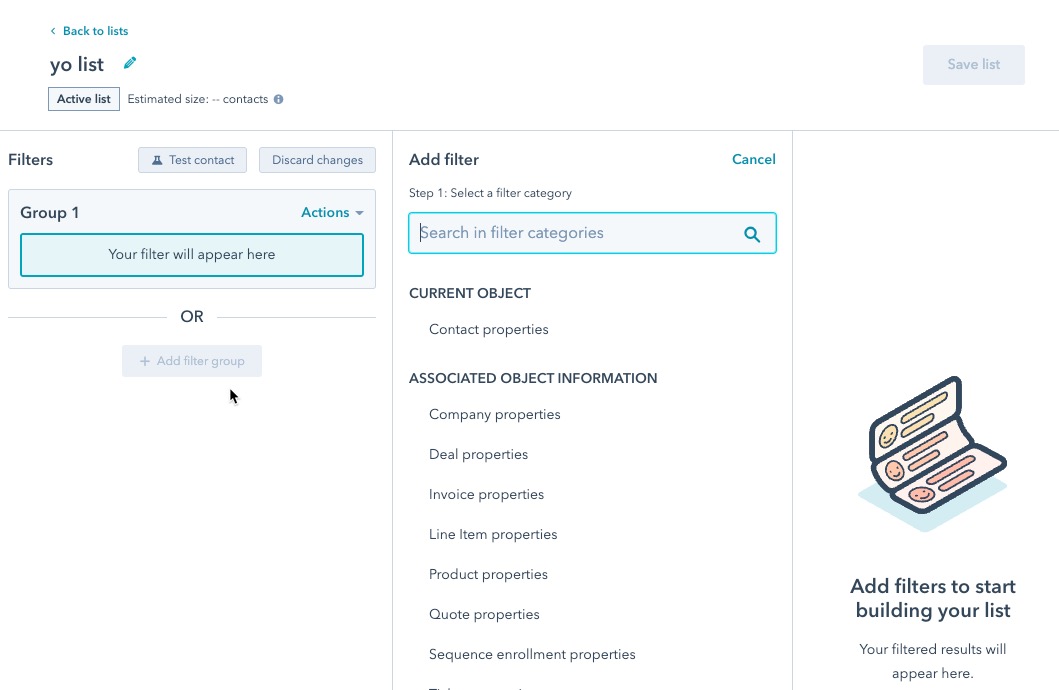
- You will then need to add filters to create your list. Click on Add filter.

- Select a filter to help identify your contacts and create your list.

- Click on Save List in the top corner to complete the process.
The process of building the list may take some time if you have a lot of contacts. Complete lists will appear in the far right column.
Using lists is important for organizing your contacts in your email marketing efforts. It helps to identify the segments of your contacts who would benefit from your email marketing efforts.
As you grow your business and accumulate email marketing data, your lists will also mature. You can separate them into more significant segments that reflect your target audience.


