In this tutorial, we are going to create a website at PHPandMySQL.inmotiontesting.com. This website is going to have 2 pages, and each page is going to allow for comments.
When users submit a comment, we’ll want to keep track of the following information:
- Their name
- Their email address
- Their website
- Their actual comment
- The time the comment was submitted
In order to keep track of this data, we need to:
- Create a database for our website
- Create a table in the database that has values for name, email, website, and comment.
Step 1. Creating a Database
The easiest way to create a database is to use the MySQL Database Wizard available in cPanel. This will not only create a database for you, but help you create a database user and assign the user privileges to your database. For more help with creating a database, please see How do I create a MySQL Database in my cPanel?
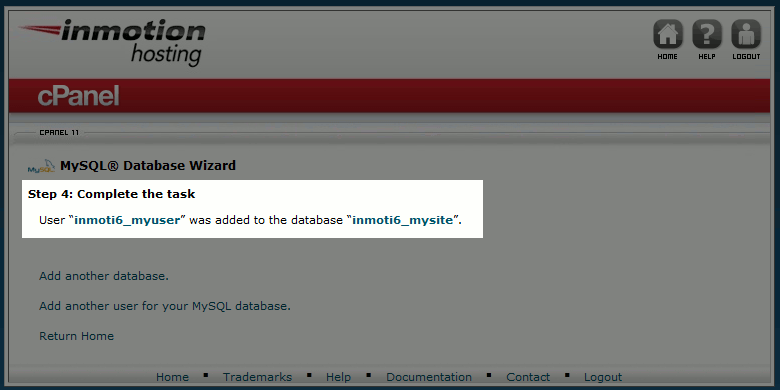
If you’re following along with our example, we’ve used the MySQL Database Wizard and:
- Created a database named inmoti6_mysite
- Created a database user inmoti6_myuser with a password of mypassword
- Assigned inmoti6_myuser with privileges to inmoti6_mysite
Step 2. Creating a Table
Now that we’ve created our database, we need to create a table to hold all user comments. This table will be called “comments”. To create this table:
- Log into cPanel and click the phpMyAdmin icon
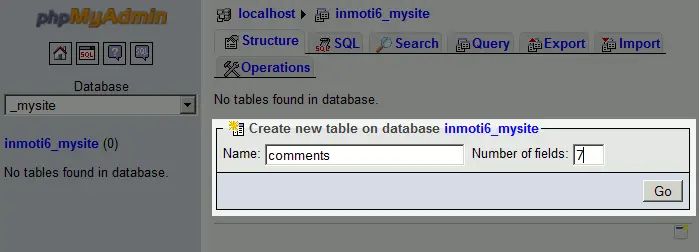
- Select your database in the left menu. (we clicked on “_mysite” because our database is “inmoti6_mysite”)
- On the right side of the page under “Create new table on database”, enter “comments” as the name and 7 as the number of fields and click “Go”
- On the next screen, we will need to fill in specific details for our table. Please use the screenshot and details below to create the table
Field: id
Type: INT
A_I: (put a check in the box)
To help manage individual comments, for example to delete one, we want to assign a specific id number to each comment.Field: name
Type: VARCHAR
Length/Values: 60Field: email
Type: VARCHAR
Length/Values: 60Field: website
Type: VARCHAR
Length/Values: 60Field: comment
Type: TEXTField: timestamp
Type: TIMESTAMP
Default: CURRENT_TIMESTAMPField: articleid
Type: INT
Each comment needs to belong to a specific article, otherwise we wouldn’t know which comments to display for which pages.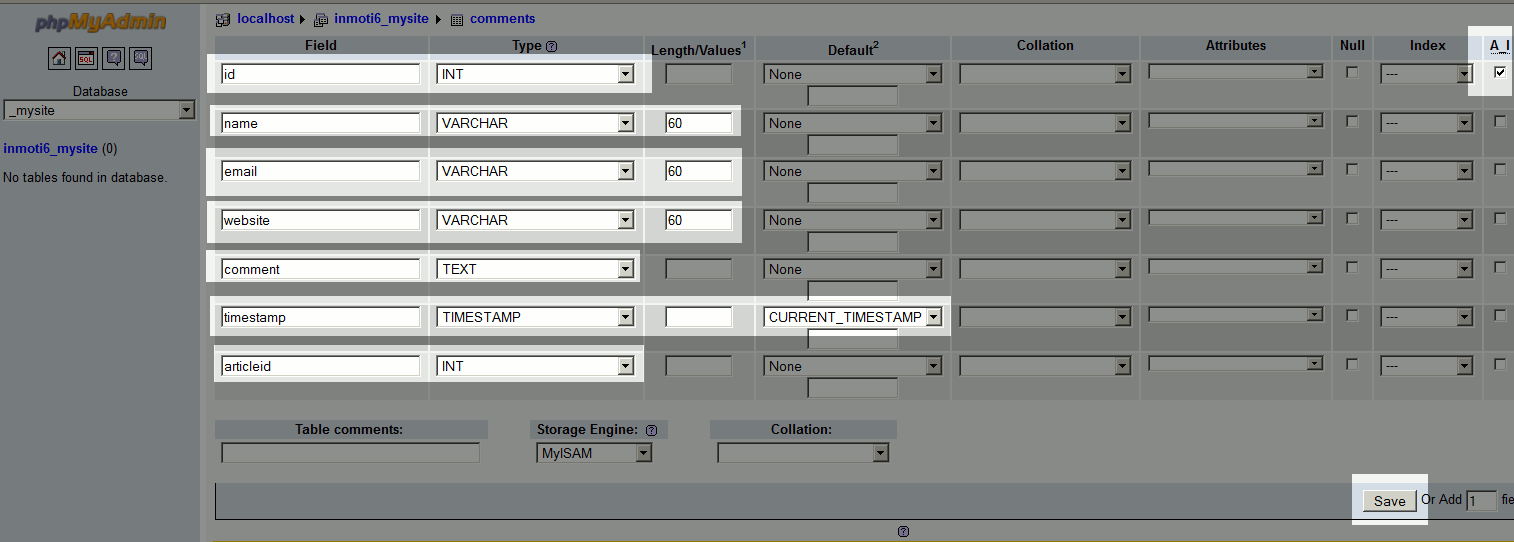
- After you have filled in the details above, click “Save”
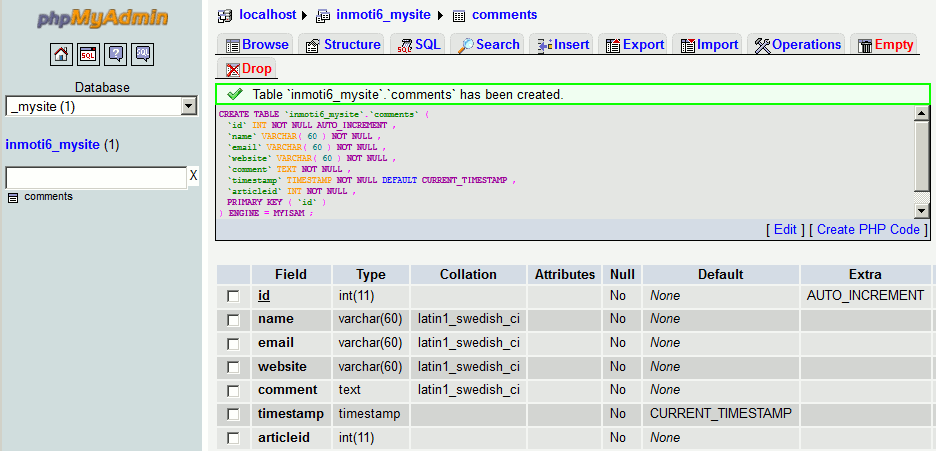



Congratulations, as this point we have successfully created our database and setup our table! In our next article, we’ll show you how to create a form using HTML that asks the user for their comment.