You may often find yourself working on a large project that takes a long time to finish. Invoices generated for these jobs may occur over a period of a year or longer. Fortunately, Sprout Invoices lets you create projects that you can track and set some values. For example, you may set an hourly rate for a project task, add a description, and set the date range for the project.
Looking for a place to run your eCommerce WordPress site? Look no further than InMotion’s WordPress Hosting solutions! You’ll find secure, optimized servers that are configured to meet your budget needs.
Create a Project in Sprout Invoices
When you’re adding a new project with the Sprout Invoices plugin, you will need to be logged in to the WordPress Administrator Dashboard.
- Click on Invoices in the main WordPress menu (or click on Sprout Invoices at the top of the page). Then, click on Projects.
- Click on Add New to create a new Project.

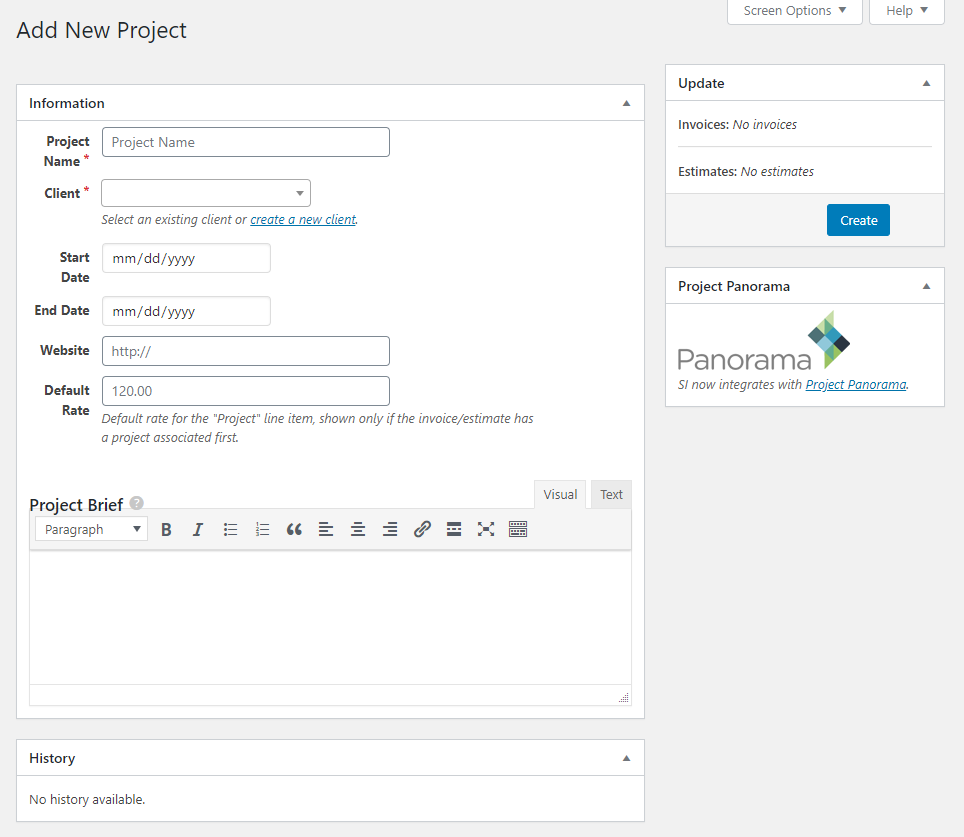
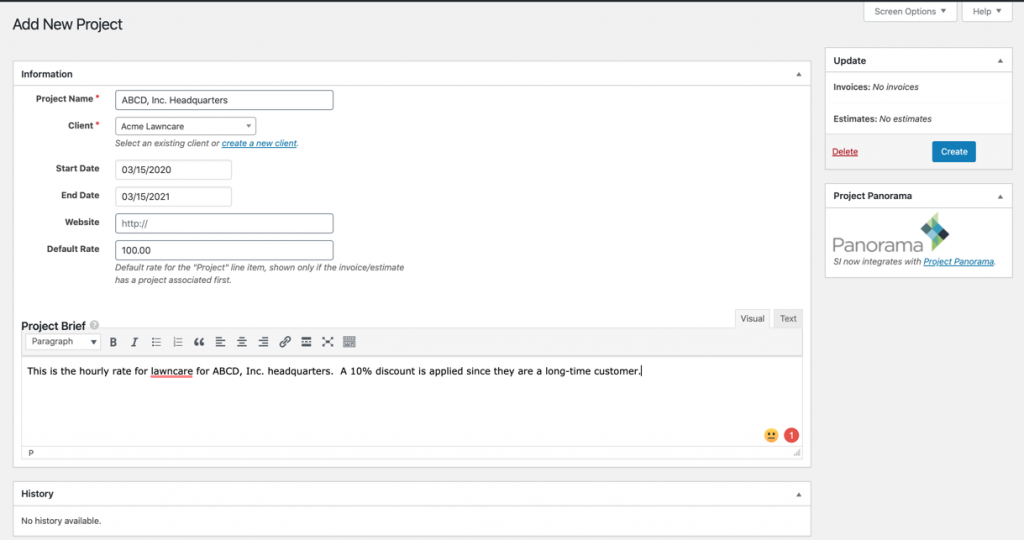
- You will then see the form for the project that you are tracking. Start by giving the project a name.

- Next, you need to select a client. If you do not have a client, then you can create one at this point. For more information, see How to Create a Client.
- You will then need to determine the start and end date for the project.
- If there is a website associated with the project or client you can add it to the Website field.
- The Default Rate is next. It determines how much you are charging by the hour.
- Finally, there is the Project Brief. This is a description of the project where you can add descriptive text and other media associated with the project.
- Once you have completed adding all of the fields, click on the blue Create button in the top right corner of the screen. This will create the project within Sprout Invoices.
Tracking Time
Tracking time is the management of work being done for an existing project. As stated earlier, you will need at least the Pro version of Sprout Invoices in order to use this feature.

When you add time to an existing project, it allows you to create an invoice and then charge a customer based on a selected project. We will cover each field used for tracking time and describe it.
- Project – select the project that you wish to log time for.
- Activity is the task that is being executed. You can create or edit an activity by clicking on the links provided.
- Time is the activity/task time listed in hours.
- Note – allows you to set a note for the task being performed
- Date – date of the time you’re tracking.
- Click on the blue Log Time button to save time that you have selected.
In the list of the logged times, you will see a column labeled note that indicates if the logged time has been invoiced or not. To the far right will be a symbol of an invoice. If you click on it, it will automatically bring you to the invoices section where you can edit and send it to the associated client.
Final Comments
This completes our tutorial on creating a project and tracking time for a project. Using Sprout Invoices makes it quick and easy to track the work that’s being done for projects. Check out our Sprout Invoices Product Guide for more information.