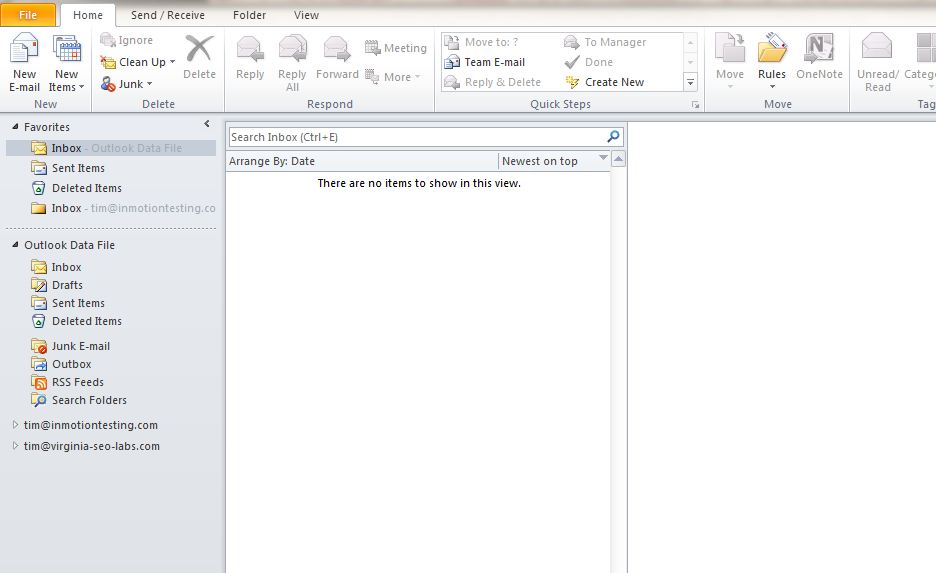
Often, it will be necessary to review your account settings in Outlook 2010. This step-by-step tutorial will show you how to access the account settings for the Outlook 2010 email client. If by chance you are looking for the set up guide please see our setup guide for Outlook 2010. To review the account settings, you will first need to open Outlook 2010:
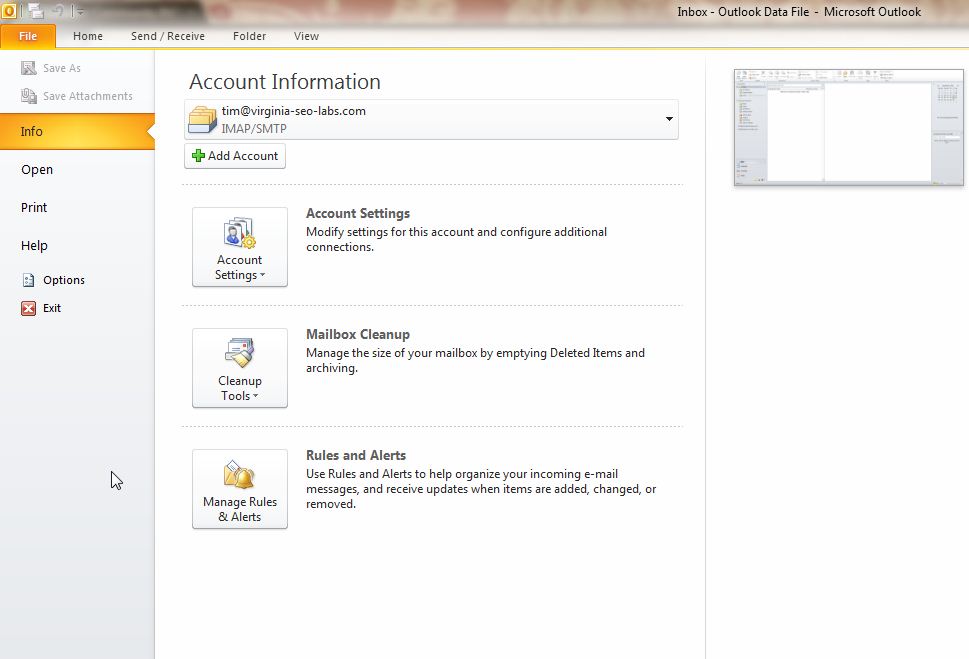
Once you have Outlook 2010 open, click on the “file” tab on the top left labeled “File“:
Then, select “account settings” as highlighted in the screenshot below and click on the popup box:
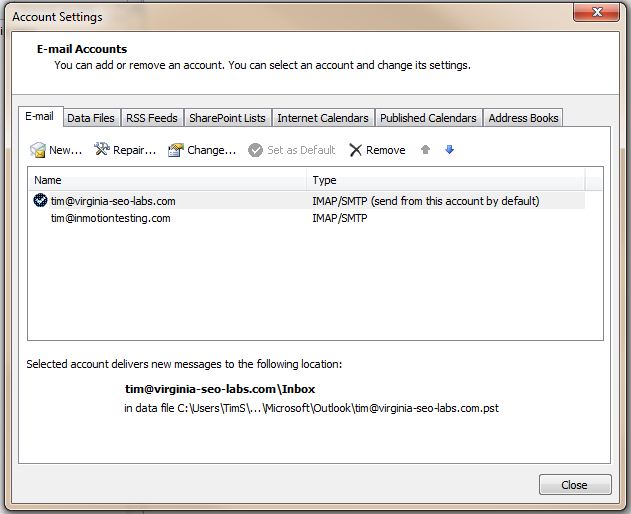
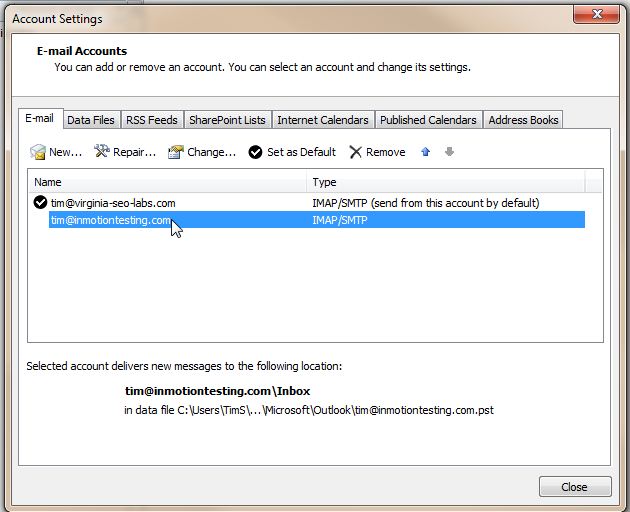
Now, you will see all the email accounts you have set up in Outlook.
Double-click on the account you wish to view the account settings for:
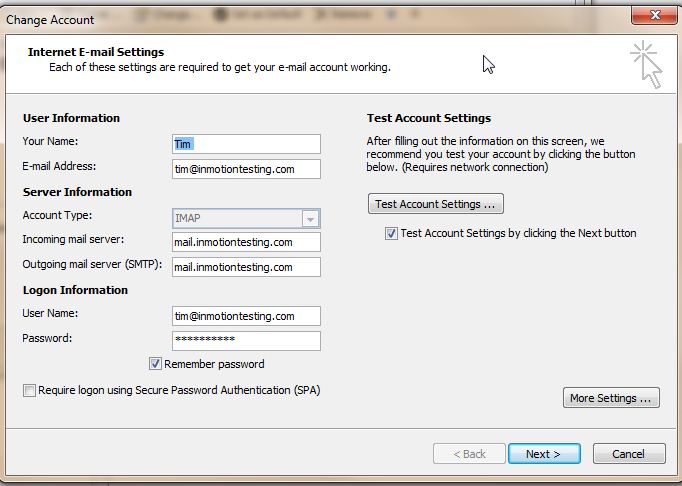
On this following screenshot you can edit your incoming and outgoing servers, email address and login information:
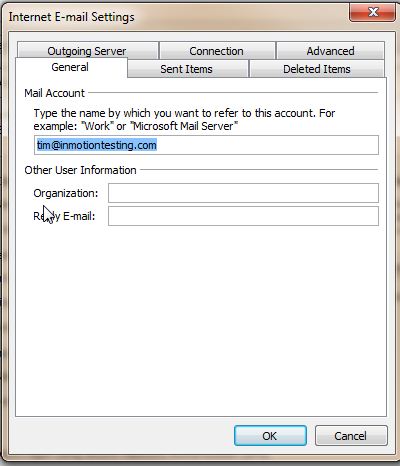
If you click on “More Settings” in the lower right corner you will be able to see more details about your account:
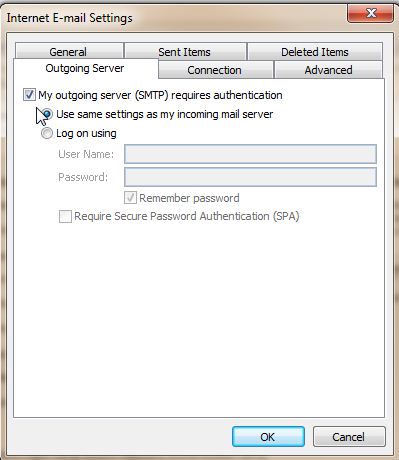
Click on the “Outgoing Server” tab and it will display settings for the outgoing (SMTP) server.
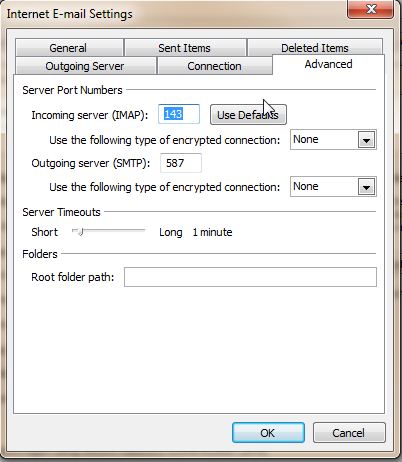
Next, click on “Advanced“. The advanced tab will display the port numbers to use for incoming and outgoing mail.
Congratulations! At this point you should know how to review all the account settings associated with your email account in Outlook 2010.


I have Outlook 365 and the screens look very different. How do I get my secure SSL email setup?
I reviewed the support documentation for Outlook 365 and they indicate that you need to add the email account through the advanced setup option. You will need to have your secure email settings on hand to complete the setup.
What about the settings for Outlook 2016? Same as 2010?
Yes, it should be the exact same steps.
I clicked on Outlook 2016, but it brings me here to Outlook 2010.
Thanks for reporting this. The link is updated.
still brings me to 2010
Thanks for bringing this to our attention – we will be reviewing the link to make sure that it is valid or needs update.
Sept 12, the link is still wrong. There is no instruction for 2016, and the screens are different from 2010.
I’m sorry for the issue, here is the article for Outlook 2016.