WordPress 6.2 “Dolphy” is an important release version that includes over 900 changes to the software. The major changes focus on integrating visual editing into the front end of the WordPress interface.
These improvements involve the menus, templates, site editor, media, and style options. They benefit the user by providing a more functional interface and new features for the creation and editing process.
To familiarize you with this new release, we will focus on describing seven of these changes using a WordPress installed on our shared WordPress Hosting. These changes include:
- Building Menus with the New Navigation Block
- Editing Templates
- Adding Custom CSS to a theme or blocks
- Improved Pattern Insertion with New Categories
- Distraction-free Mode
- Openverse Free Media Library Integration
- Site Editor Style Book
Building Menus with the New Navigation Block
The navigation block is no longer modified solely on the page of the site editor. It is handled in the block properties column to provide a clearer view and interface to create your menus.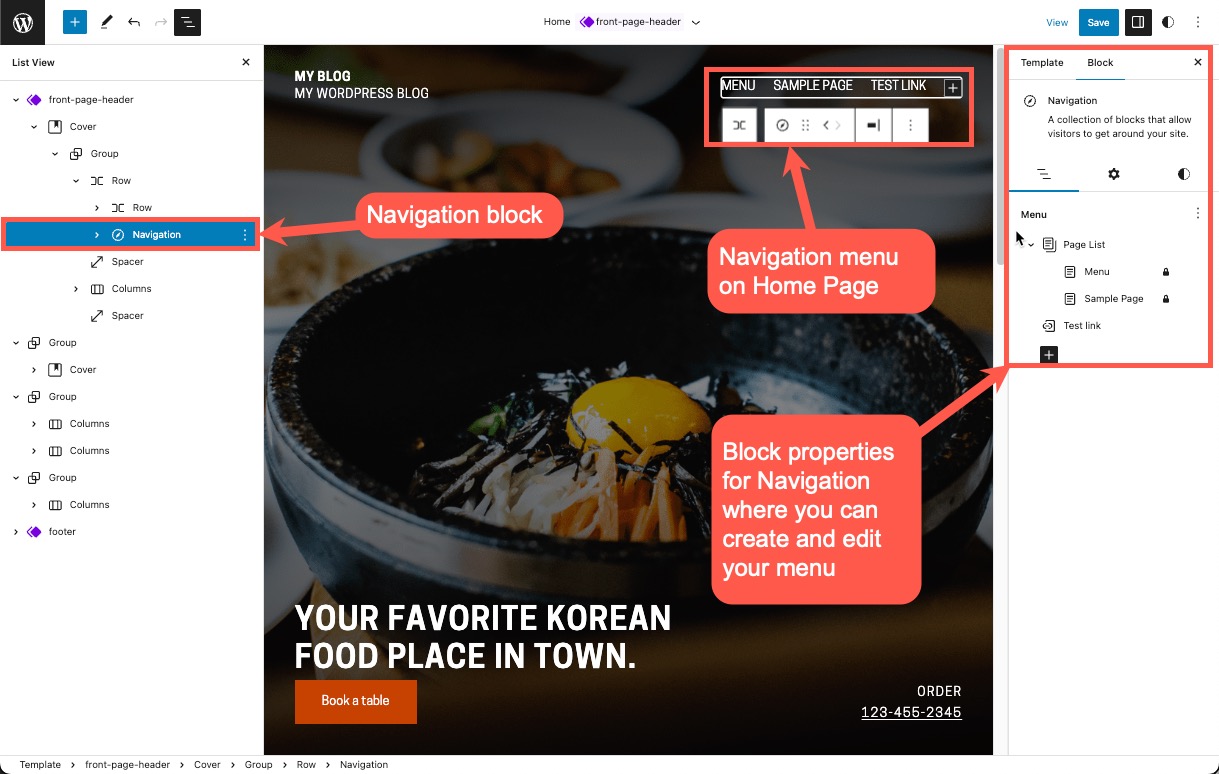
The menu development allows you to add or remove page links, custom links, submenus, spacers, and a search block. You can also add a site logo. The Add block option will only let you see blocks you can use in the menu.
To edit or create your menu on your home page, follow these steps:
- Log in to the WordPress Administrator.
- Click on Appearance.
- Click on Editor.
- Click on the header block.
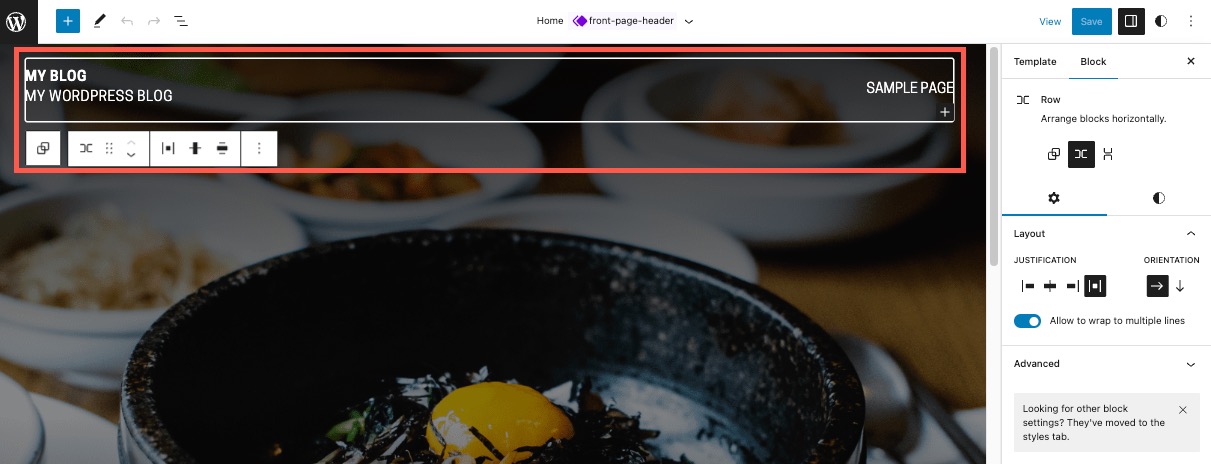
- Click on the menu. Note: If you have a page list and they are locked, left-click on the menu again, and you will see an edit option appear in the toolbar.

- Edit the menu in the block properties in the right column.
- Save your changes.
If you have trouble finding the navigation block in the header, open the list view and then expand the groups saved in the header until you find the navigation block. When you select the navigation block, the option to edit the menu will appear in the right column.
If you have a theme where the pages have all been deleted and there is no navigation menu to start, you must add a Navigation block to start your menu when you select the header.
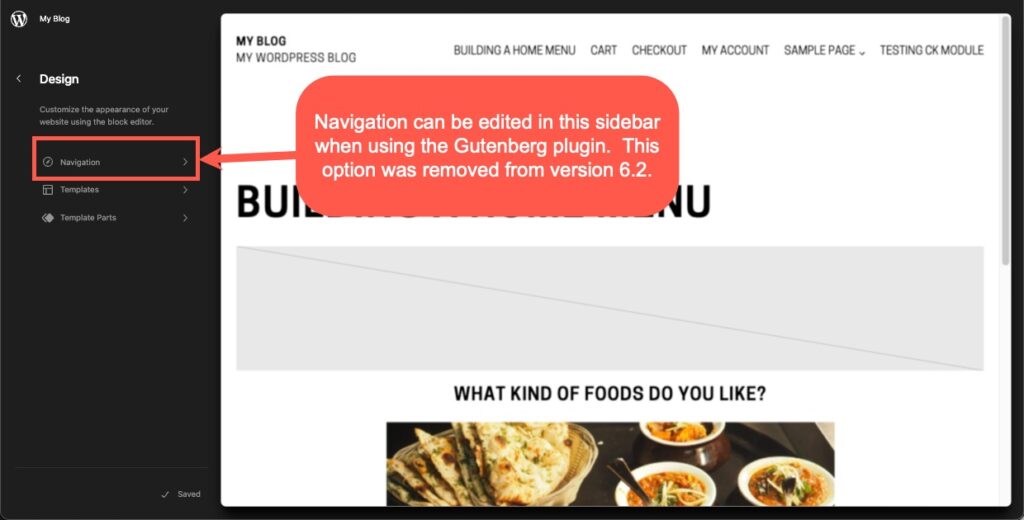
Note that the navigation option is removed from the sidebar previously in the early release candidates for 6.2 or using the Gutenberg plugin. It was removed in release candidate 2 of the 6.2 release but remains in the sidebar when using the Gutenberg plugin.
Editing Templates
Working with Templates in the Site Editor has also been reorganized. Here you can see that you can easily access the templates and template parts in the sidebar.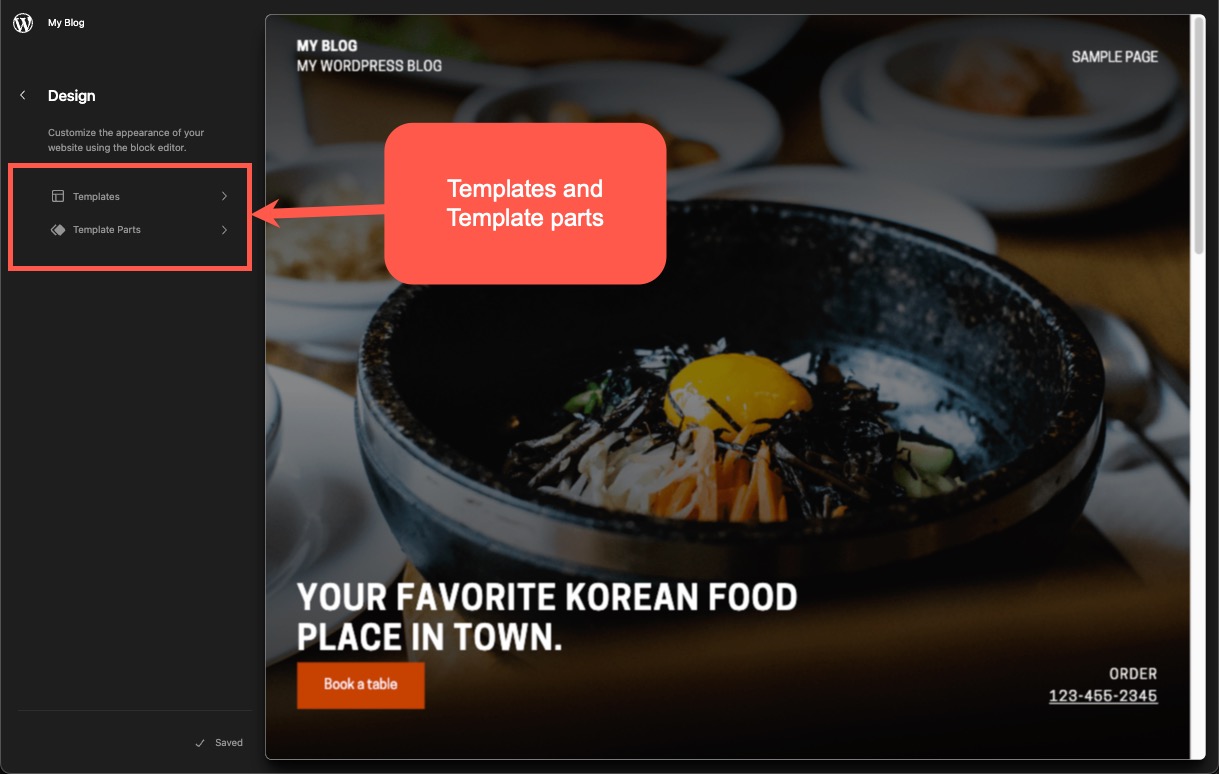
If you expand the templates list, you’ll see something like the following:
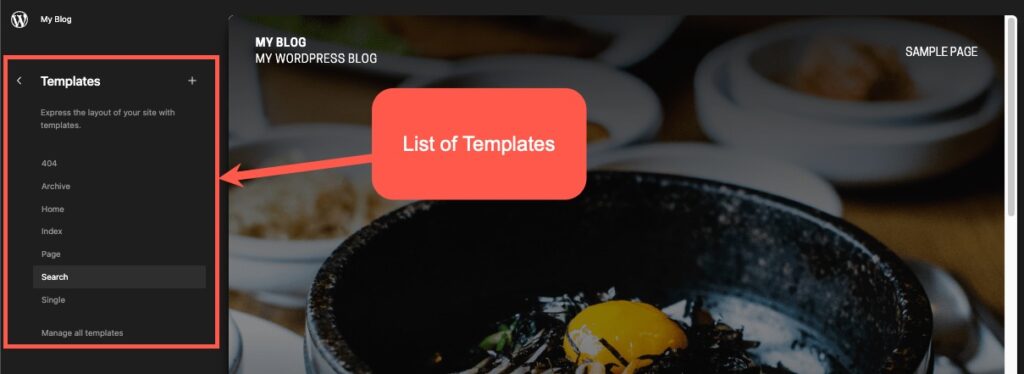
If you select a template, it will open it so you can edit it in the site editor. The template parts are managed in the same way.
To edit a template:
- Log in to the WordPress Administrator.
- Click on Appearance.
- Click on Editor.
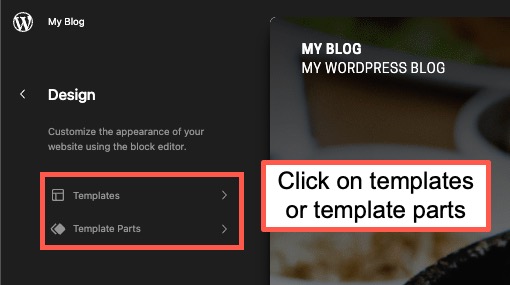
- Click on Templates or Template parts.
- Select the item you want to edit.
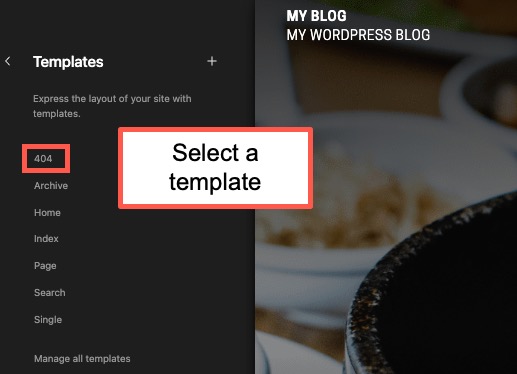
- The template or template part will be displayed. Click on the edit icon or the displayed item to open the editor.
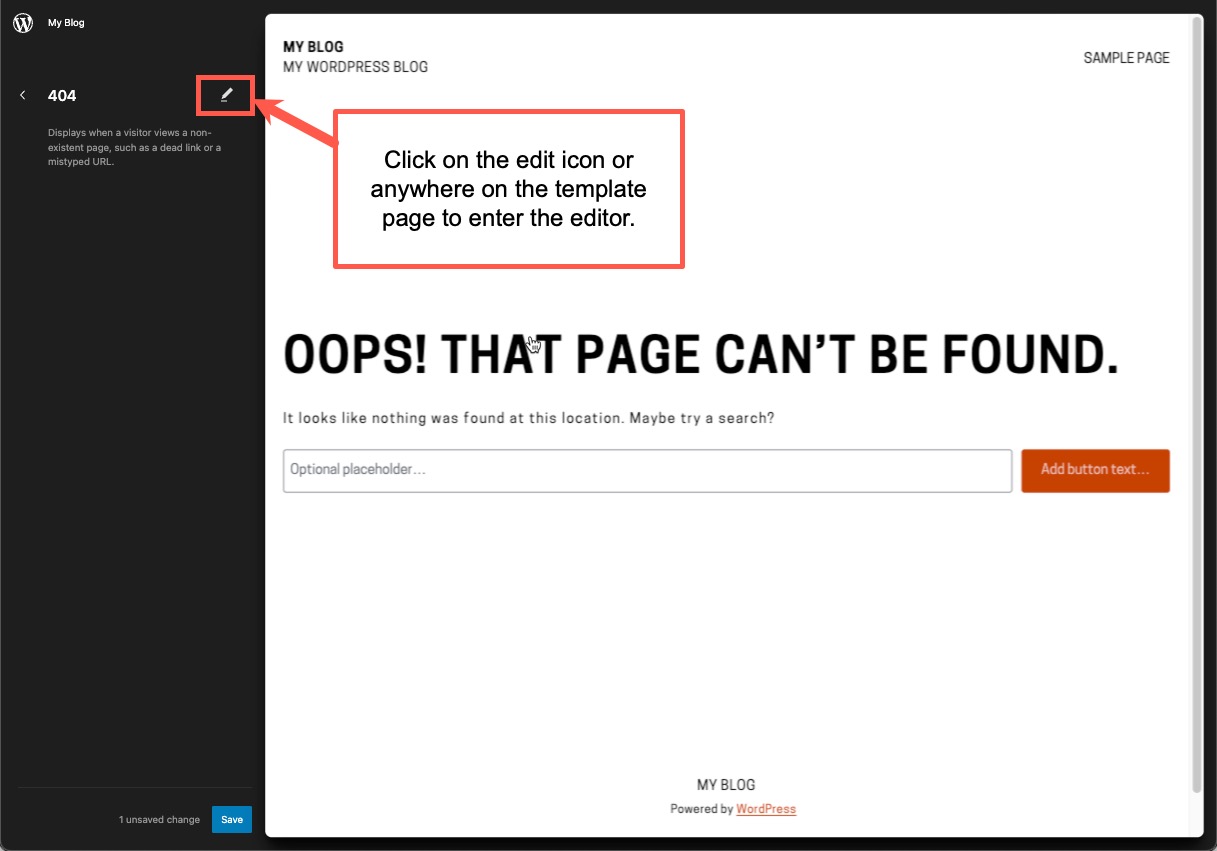
- Make your changes.
- Click on Save.
Adding Custom CSS to Theme or Blocks
Before 6.2, adding Custom CSS for a theme or block was difficult because there is no Theme Customizer interface unless the theme specifically supports it. You can also add additional CSS through the Style Book. This will be described later in this article. Follow these steps to add CSS:
- Log in to the WordPress Administrator.
- Click on Appearance, then click on Site Editor.
- Next, in the top right corner, click on the Styles icon in the top right corner of the editor.

- Click on the 3-vertical dots in the Styles menu.
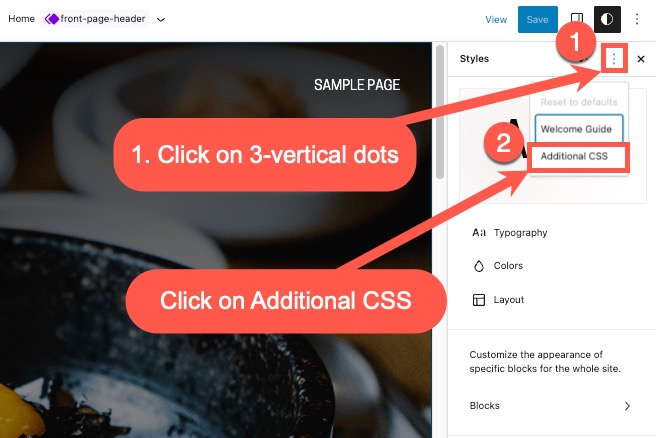
- This will open a field for additional CSS entries. Enter your CSS code.
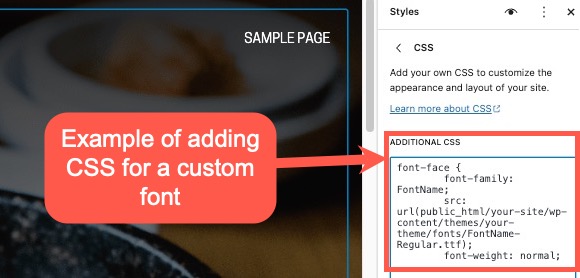
- Click on Save.
Adding CSS allows you to make style changes like fonts or colors that apply to your WordPress site.
Improved Block Pattern Insertion With New Categories
WordPress 6.2 improved the block pattern insertion interface by organizing the patterns and then making it easy to immediately add them to your post or page. Example of adding a pattern:
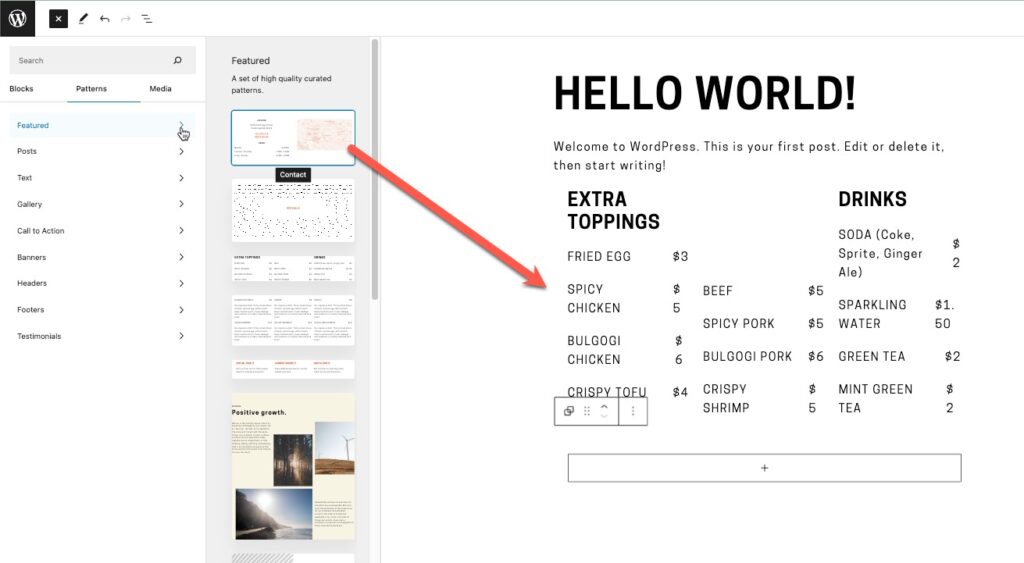
The steps for adding a pattern are simple:
- Log in to the WordPress Administrator dashboard.
- Open the page or post where the pattern will be added.
- Click on the plus sign ( + ) in the top left corner of the editor interface.
- Click on Patterns.
- Select the pattern you wish to add. It will be automatically added.
- Click on Update or Save to save your changes.
Distraction-free Mode
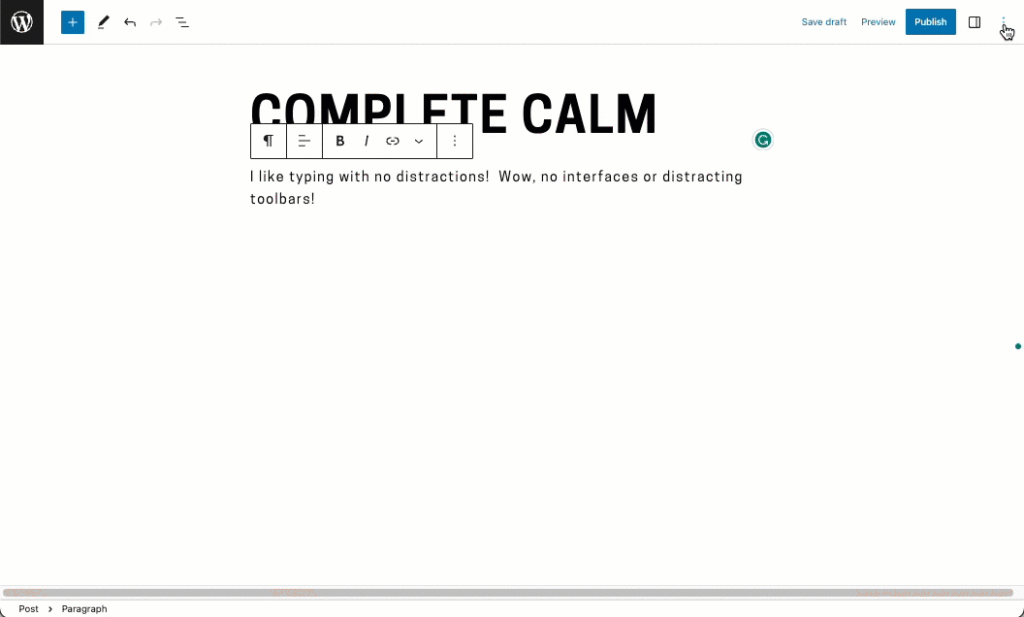
If you are a content creator who likes minimal interface distractions in your editor, then WordPress 6.2 has you covered. The new Distraction-free Mode is available in the Editor options in the top right corner. Click on it, and you can write without toolbars blocking your view!
Before, in normal mode:
After, with Distraction-free mode enabled:

Push the mouse to the top of the screen to escape distraction-free mode. Then click on the three vertical dot menu again to turn it off. Or, you can use your keyboard:
- Apple: Shift + Command + Backslash
- PC: Shift + Control + Backslash
This animated gif shows distraction-free being enabled and disabled:
Openverse Free Media Library Integration
Openverse allows you to search through a library of over 600 million free and openly licensed media, including images, photos, and audio. So, if you need a quick image, you can access the library provided directly in the WordPress editor.
The instructions start from an opened page or post where you’re adding an image:
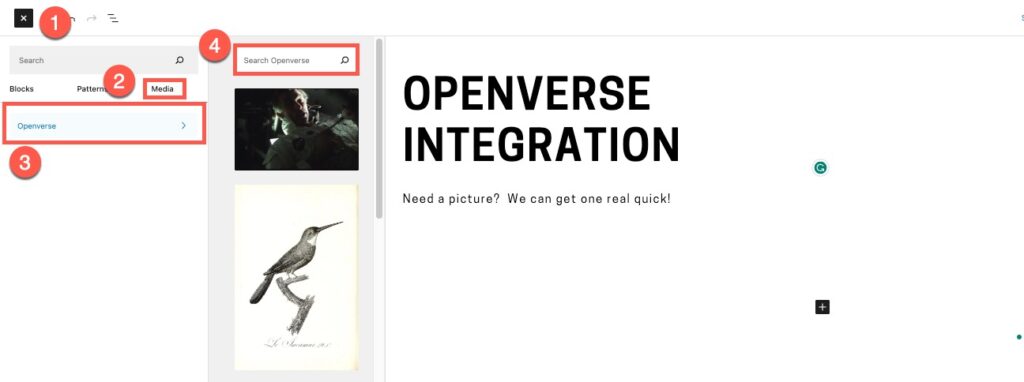
- Click on the Plus (+) sign in the top left corner of the editor.
- Click on Media.
- Click on Openverse.
- Type in what you’re looking for.
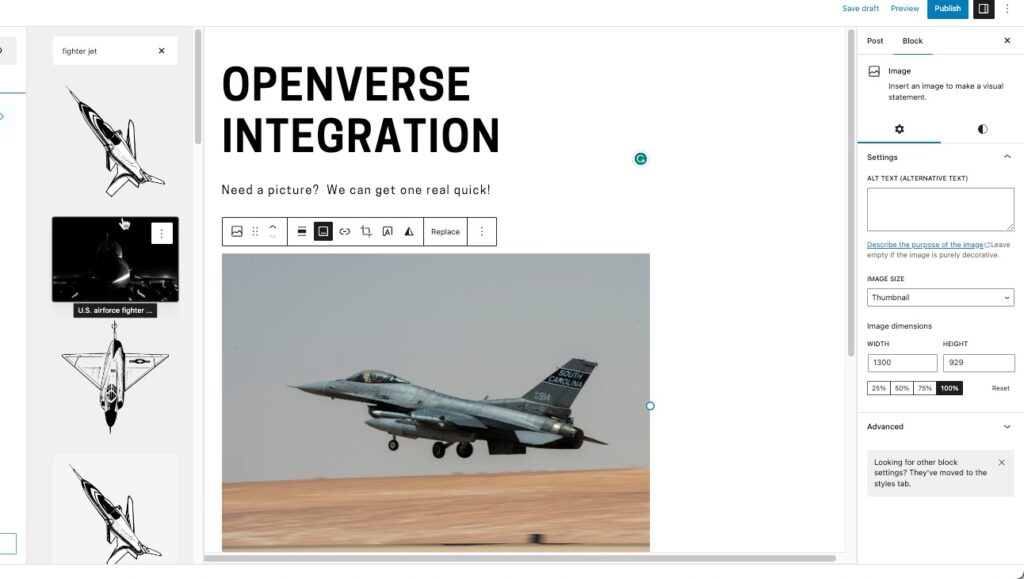
- Click on the image to use it, and it’s automatically inserted into the post.
- Save, Publish, or Update your post or page.
In this screenshot, you can see that the search is for a “fighter jet.” When you click on the image, it is added to the post or page along with the attributions of the image.
Site Editor Style Book
The site editor now has a Style Book that allows you to select styles or edit the ones used in your current theme. CSS can also be added through this interface. The style book allows you to manage styles for text, media, design, widgets, and theme.
To access the Style Book:
- Log in to the WordPress Administrator.
- Click on Appearance.
- Click on Editor.
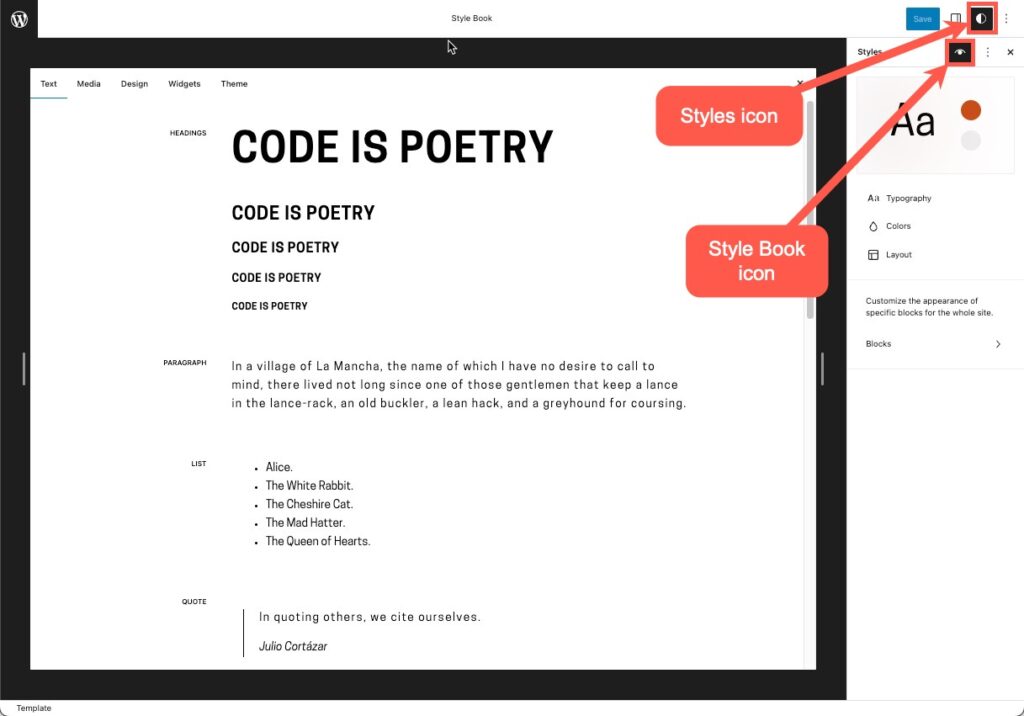
- In the top right corner, click on the half-white, half-black circular icon labeled Styles.
- You will see the Styles column open. Click on the icon that resembles an eye. This icon is labeled as Style Book.
Editing Through the Style Book
Making changes in the stylebook is done by picking an option to edit and then making changes in the sidebar.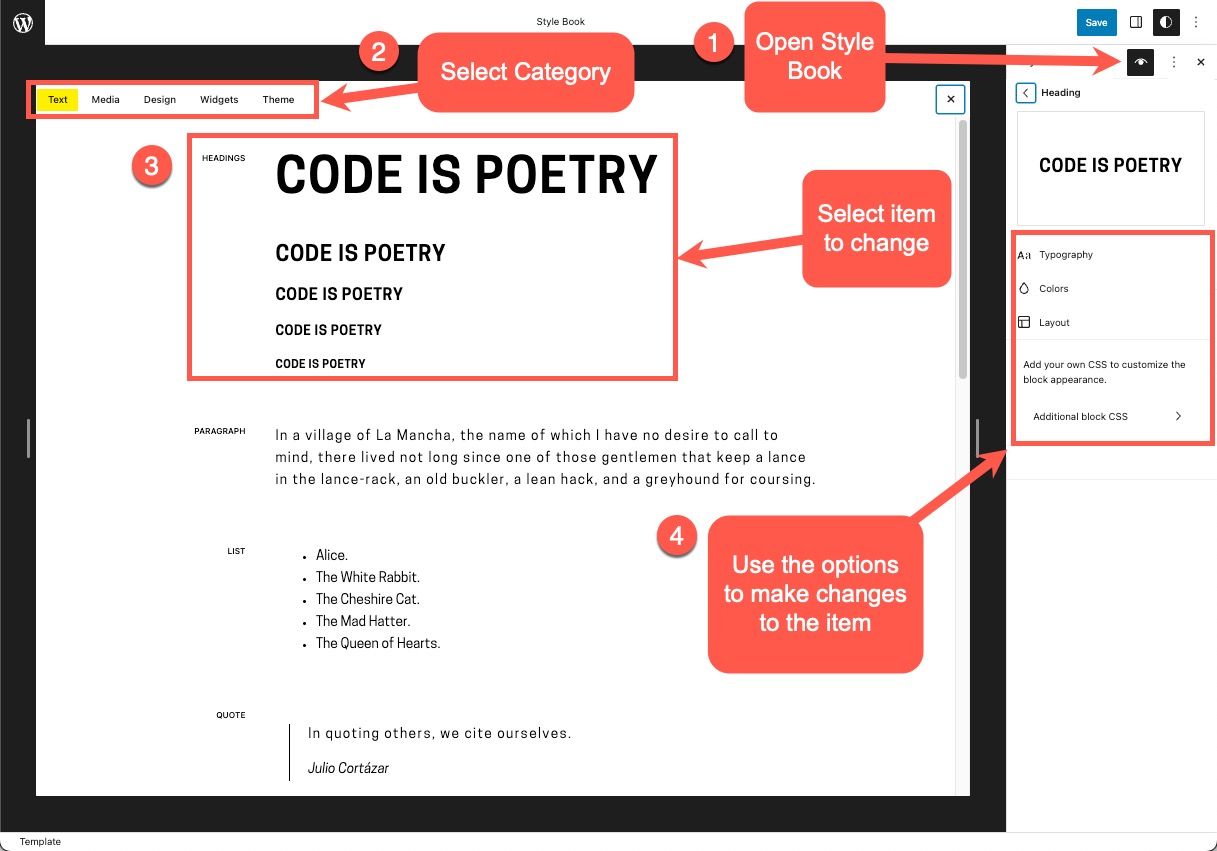
- Open the Style Book.
- Select the category you want to change.
- Click on the item in that category that you want to change.
- Use the sidebar to the right to make changes to that element.
- Click on Save.
WordPress 6.2 includes new features and many fixes that make the software a visual web development tool for all levels of users. This version also removes the beta tag from the site editor.
Integrating visual editing into WordPress is a significant milestone in the WordPress Development Roadmap. This version does not indicate the end of WordPress development, but it does bring the advantages of visual editing to the front end of WordPress. Come see for yourself the new features supplied with our WordPress Hosting on shared, vps, or dedicated.
