The W3 Total Cache plugin is a great tool to speed up your site, and your W3 Total Cache settings can help you make sure you are getting the most out of the plugin.
The settings allow you to choose cache options for the following settings:
- Page cache
- Database cache
- Object cache
- Browser cache
- Lazy load images
Once you have installed the W3 Total Cache plugin, you can enter the Setup Guide right from the main plugin page
In this article, we’ll walk you through how to access and configure your W3 Total Cache settings, as well as what options you have regarding those settings.
- How To Access W3 Total Cache Settings
- How to Purge W3 Total Cache
- W3 Total Cache Extensions
- Further Resources
How To Access W3 Total Cache Settings
Accessing your W3 Total Cache settings is simple.
On the left-hand side of your screen in WordPress, choose Performance > Setup Guide. This will walk you through how to set up W3 Total Cache. If you would rather skip the setup guide and configure your settings on your own, simply choose Performance > General Settings.
There are settings to control caching for pages, databases, objects, and browsers. W3 Total Cache also allows you to set up lazy loading for images.
Bear in mind, your website may perform differently at different times. It’s a good idea to test your site at different times or under different conditions to see how these settings affect your site once changed.
Page Cache
The first setting you will be prompted to set within your W3 Total Cache settings is the page cache storage engine. Click Test Page Cache to begin the page cache test.
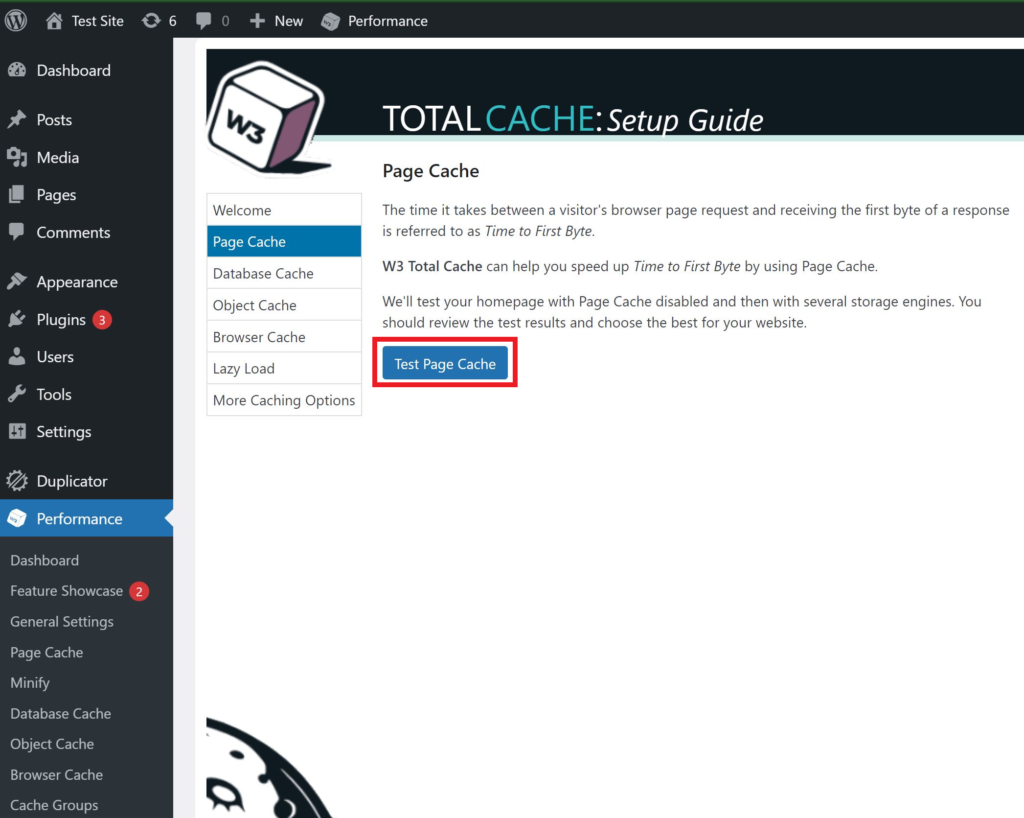
You have your choice among many different storage engines or the default disk options as follows:
- Disk: (Basic) uses a PHP script to store the page cache on disk.
- Disk: (Enhanced) uses .htaccess rewrites to store the page cache on disk.
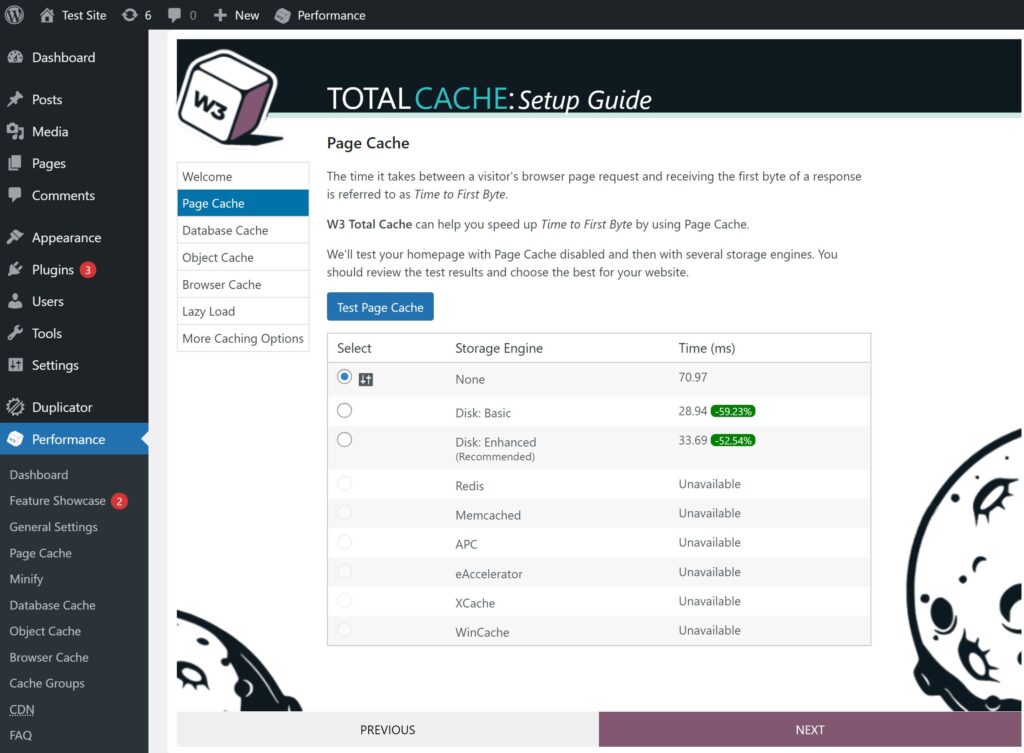
In most cases, the enhanced disk option will be preferable. That is why W3 Total Cache tells you how much each storage option affected your website. It’s best to first run the test, observe the result, and choose which one improves page speed more significantly.
Database Cache
The next option within the W3 Toal Cache settings is for database caching.
To test your database, simply click Test Database Cache.

By default, this feature is disabled. W3 Total Cache recommends using Redis or Memcached, otherwise, leave this feature disabled as the server database engine may be faster than using disk caching.
Object Cache
Object caching gives you the power to store parts of your page template that would otherwise load every time a new page is loaded. It is recommended to enable the object cache.
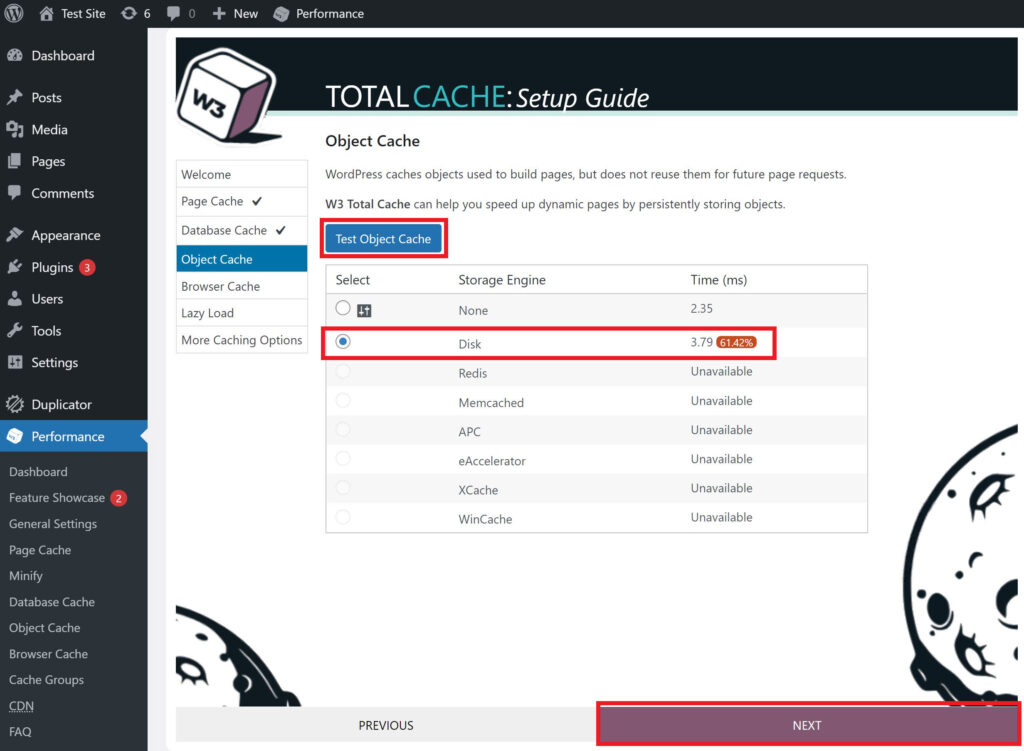
To enable object caching, click Test Object Cache.
If you do not have one of the recommended third-party storage engines installed you should still enable the disk cache by clicking the Disk radio button and choosing Next.
Browser Cache
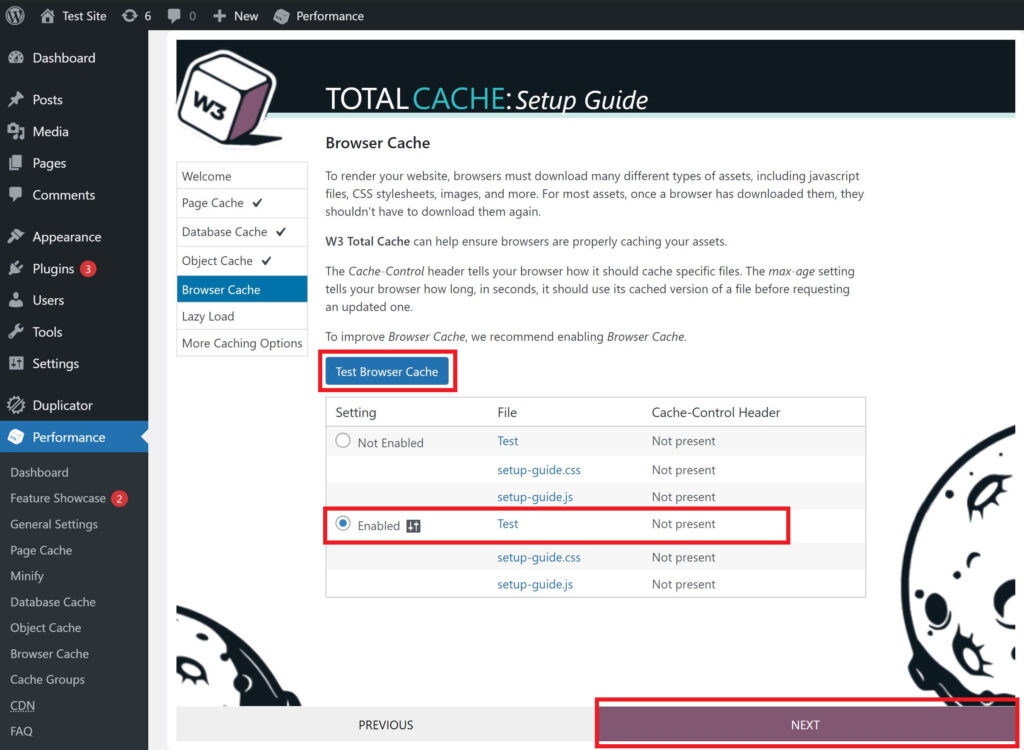
Providing cache instructions to the browser can be complicated. W3 Total Cache can do this for you. By enabling browser caching, special instructions will be given to the browser on how to store certain resources (like CSS and JavaScript) that would otherwise have to load every time a page is loaded on your site.
This means your website will load quickly and more efficiently.
Enabling browser caching should dramatically improve your site speed on repeat visits. To do this, just click Test Browser Cache.
W3 Total Cache Lazy Load Images
W3 Total Cache settings include lazy loading for images, which can greatly improve your site speed.
“Lazy loading” images means that images not yet displayed on the screen will not load. Images can cost your server quite a bit of processing power, so deferring this process to only when it is needed can save you some serious load time.
It is definitely recommended that you enable this feature.
How to Purge W3 Total Cache
There may come a time where you want to completely clear or “purge” your cache.
To do this, hover over the “Performance” tab in the admin toolbar.
There, you will see two purge options:
Purge All Caches: purge all caches at once.
Purge Modules: purge an individual cache (e.g. minified assets, page cache, object cache, etc.).
Select the option you want based on the type of purge you want to perform.
W3 Total Cache Extensions
For those looking for even more from W3 Total Cache, the plugin does offer several extensions that allow you to integrate W3 with third-party services.
Below are the W3 Total Cache extensions currently available:
- Cloudflare
- Google Feedburner
- Yoast SEO
- Fragment Cache
- AMP
- Genesis Framework
- New Relic
- Swarmify
- WPML
Further Resources
Below you will find other helpful resources from the Support Center:
If you need a new home for your WordPress site, look no further than InMotion’s WordPress Hosting solutions for secure, optimized, budget-friendly servers.
Fast & Easy Transfers
Free SSLs
Hack Protection
Affordable
