
Learn how to maximize the marketing efforts for your site with the WordPress GetResponse plugin. GetResponse is a commercial marketing tool for building, tracking, and managing contacts.
Use GetResponse to create landing pages, newsletters, auto-responders, and contact forms in order to gain leads. Then, it can help you reach out to potential customers and funnel them into sales conversions. This is critical to a successful marketing campaign and can mean the difference between success and failure for your online business.
Keep in mind that this is a commercial service and requires a monthly GetResponse subscription.
- How to Install and Setup the WordPress GetResponse Plugin
- How to Automatically Add Contacts
- Enabling GetResponse Web Event Tracking
- Adding GetResponse Landing Pages
- How to Add a GetResponse Form
Discover high-performance Managed WordPress Hosting on purpose-built cloud servers managed from one powerful dashboard: Platform InMotion.
Fully-Isolated VPS
Root Access
99.99% Uptime
Free Dedicated IP & SSL
Automatic Updates
How to Install and Setup the WordPress GetResponse Plugin
In order to connect your WordPress site to your GetResponse account, you will first need to generate an API key. That account-specific key can then be added to your WordPress Dashboard. Don’t worry, we’ll walk you through both tasks.
Generate and Copy Your API Key
- Log into your GetResponse account.
- Click the menu then the Integrations and API link.
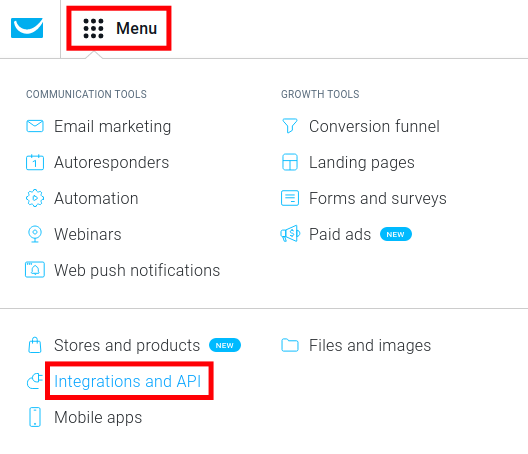
- Click the API option.

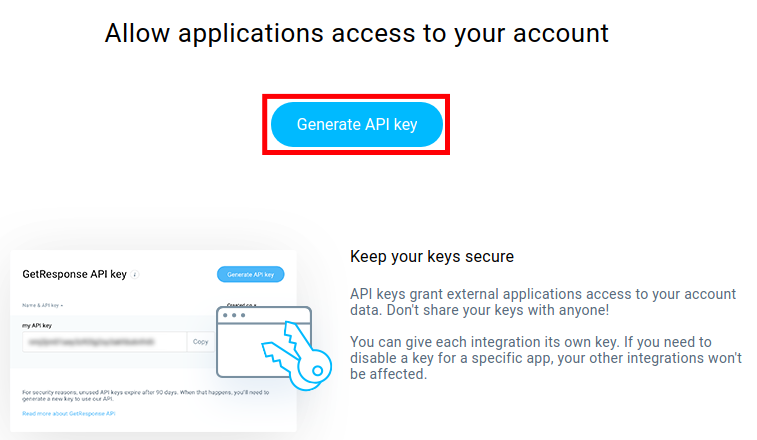
- On the next screen, click the Generate API key button.
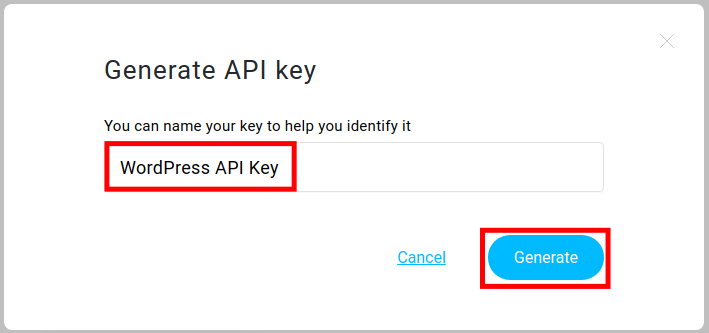
- A menu will pop up, enter a name to help identify your key then click the Generate button.
- Your GetRespose API key will then be created. Click the Copy button since you will need it to set up the plugin.
Setup the GetResponse Plugin
- Log into your WordPress Dashboard.
- Install and Activate the GetResponse plugin.
- Click the new GetResponse link in your Dashboard menu.
- Paste your API Key into the available field.
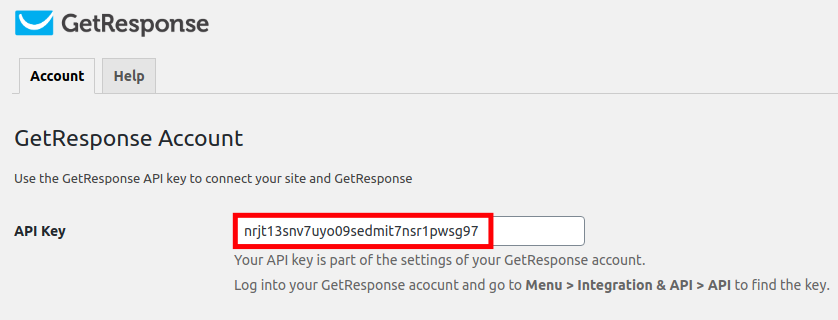
- Click the Connect button.
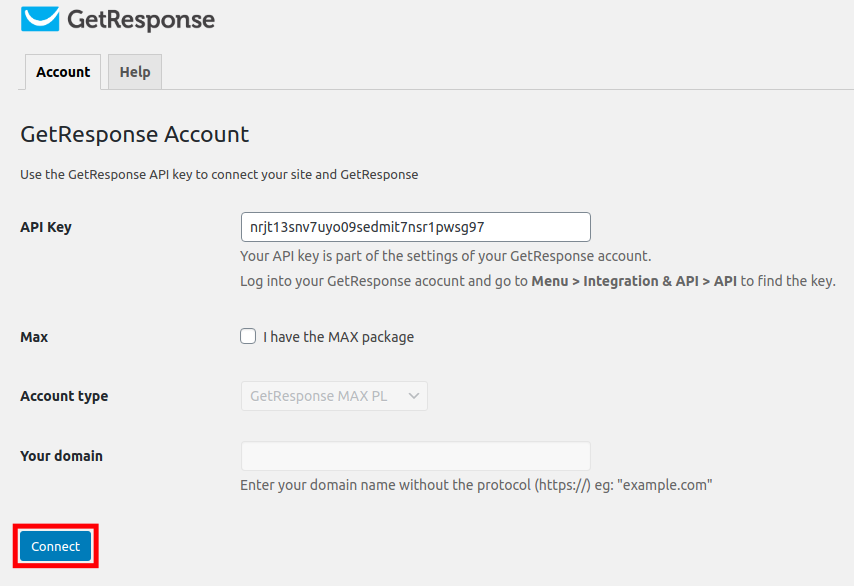
You are finished when you see a message stating “GetResponse account connected”
How to Automatically Add Contacts
Now that you have connected your WordPress site to your GetResponse account, you will have some new options available. One of these is the ability to automatically add contacts when they register or comment on your site. This will trigger an email asking them to “opt-in” to your communications. An example of a communication would be a GetResponse newsletter.
Follow along and we’ll show you how to enable this tool, so you can start collecting contacts.
You can set up a new contact list on the GetResponse website by going to Lists then clicking the Create list button.
- In your WordPress Dashboard menu, click the GetResponse link.
- Click the Adding Contacts tab.
- Scroll down to the “Add Contacts from Comment” section and click the Enabled link next to Status.
- Choose your Contact List from the drop-down menu. The contact lists are set up on the GetResponse site.

- Check the box if you want to add these contacts to the autoresponder cycle. This cycle would be set up on the GetResponse site when you create the Autoresponder.
- Edit your Opt-in text as needed.
- Check the box if you want to enable the Opt-in checkbox by default.
- Scroll down to the “Add Contacts upon Registration” section and click the Enabled option next to Status.
- Select your Contact list from the drop-down menu.
- Check the box if you want to add these contacts to the autoresponder cycle. This cycle would be set up on the GetResponse site when you create the Autoresponder.
- Edit your Opt-in text if necessary.
- If you want the “Opt-in checkbox” enabled by default, select it.
- Click the Save Changes button.
Enabling GetResponse Web Event Tracking
With GetResponse, you have the ability to track events on your WordPress site. This gives you more information about their journey through the funnel on your site and the success of your marketing efforts. This data can then be used to improve the user interface of your website. For example, if you notice people are getting to a landing page but not converting to sales, you may need to improve the wording on the page. You can update your calls to action on the landing page to see if you get better results.
We will now show you how easy it is to integrate event tracking on your website.
Keep in mind that you must set up a Workflow on the GetResponse website by going to the main menu, then Automation.
- Login to your WordPress Dashboard.
- Click the GetResponse link in your navigation menu.
- Click the Web Event Tracking tab.
- Check the box to Send web event data to GetResponse.
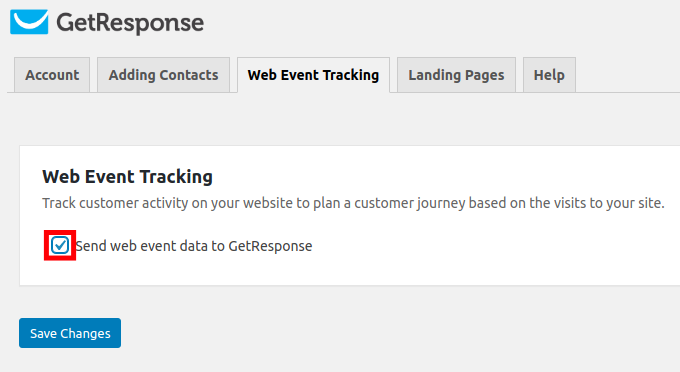
- Click the Save Changes button. You will then see a message stating “Web Event Tracking enabled.”
Adding GetResponse Landing Pages
The GetResponse site has some great templates for creating landing pages. Once they have been customized you can easily add them to your site. We’ll show you the steps below.
Before following these steps, you must create a landing page on the GetResponse site by going to the main menu, clicking Landing Pages, then the Create landing page button. You can then choose from the available templates to build your page.
- Log into your WordPress Dashboard.
- Click the GetResponse link in your navigation menu.
- Click the Landing Pages tab.
- Click the Add page button.
- Select your landing page from the drop down menu.
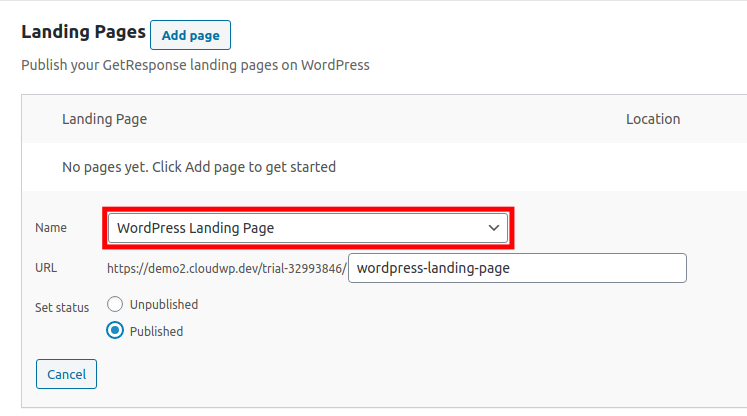
- Set the page status to Published.
- Click the Save button.
How to Add a GetResponse Form
If you have made forms or surveys on the GetResponse site, you can then add them to your WordPress site using a widget or shortcode. We will now go over the steps.
You must create a form or survey on the GetResponse site before following these steps. You can do that by clicking the main menu, then the Forms and surveys link.
Add a Form With a Widget
- Click Appearance then Widgets in your WordPress Dashboard.
- Click the GetResponse Web Form widget option.
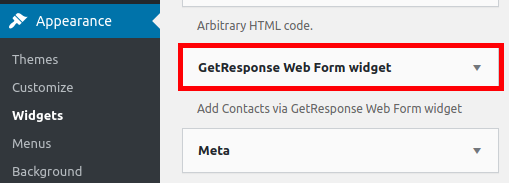
- Choose a location such as Footer from the list. Keep in mind that the available widgets area will differ based on the specific theme you are using.
- Click the Add Widget button.
- You will then see some options to the right. Enter a Title.
- Select your form from the Web Form drop down menu.
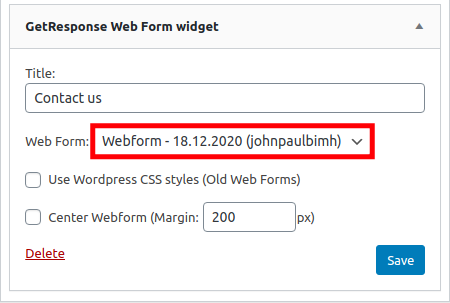
- Click the Save button.
Add a Form With a Shortcode
- Edit a Page or Post in WordPress.
- Click the plus + button to add a Gutenberg block.
- Choose the Shortcode block.
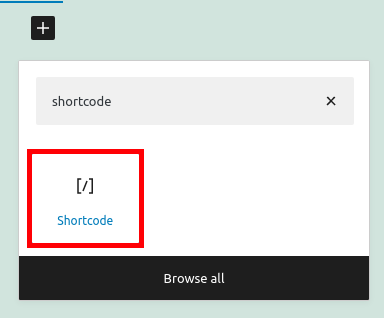
- Enter the following shortcode, but be sure to update the bold text with the URL for your GetResponse form.
[grwebform url=”WEBFORM-URL” css=”on/off” center=”on/off” center_margin=”200″/]
- Update the page or post to save it.
Now you know how to use the WordPress GetResponse plugin. You can begin collecting leads and growing your contact list in order to improve your marketing efforts.
Become a master of WordPress plugins! Protect, optimize, secure, and expand the functionality of your website easily with the help of WordPress plugins!
