This tutorial series, Joomla 3 component development, is currently in progress…
In our last tutorial, we showed you how to create the default view for the component that we are creating. The component’s name is com_helloworld, so the default view is helloworld – this is just how the “default view” works.
In this tutorial, we are going to show you how to add a new view. This new view we will call “Howdy Friends”.
To create a new view:
- Create the view’s folder: /components/helloworld/views/howdyfriendsBecause we are referring to this new view as “Howdy Friends”, we will name this view howdyfriends.
- Create the HTML version of the view: /components/helloworld/views/howdyfriends/view.html.php
<?php // No direct access to this file defined('_JEXEC') or die('Restricted access'); // import Joomla view library jimport('joomla.application.component.view'); /** * HTML View class for the HowdyFriends view */ class HelloWorldViewHowdyFriends extends JViewLegacy { // Overwriting JView display method function display($tpl = null) { // Assign data to the view $this->msg = 'Howdy Friends, welcome to component development!'; // Display the view parent::display($tpl); } } - Create the “templates” folder: /components/helloworld/views/howdyfriends/tmpl
- Create the default template file: /components/helloworld/views/howdyfriends/tmpl/default.php
<?php // No direct access to this file defined('_JEXEC') or die('Restricted access'); ?> <h1><?php echo $this->msg; ?></h1>
How to test your new view
Now that the hard part is over, let’s test our view! It can be accessed using the following url:
https://example.com/index.php?option=com_helloworld&view=howdyfriends
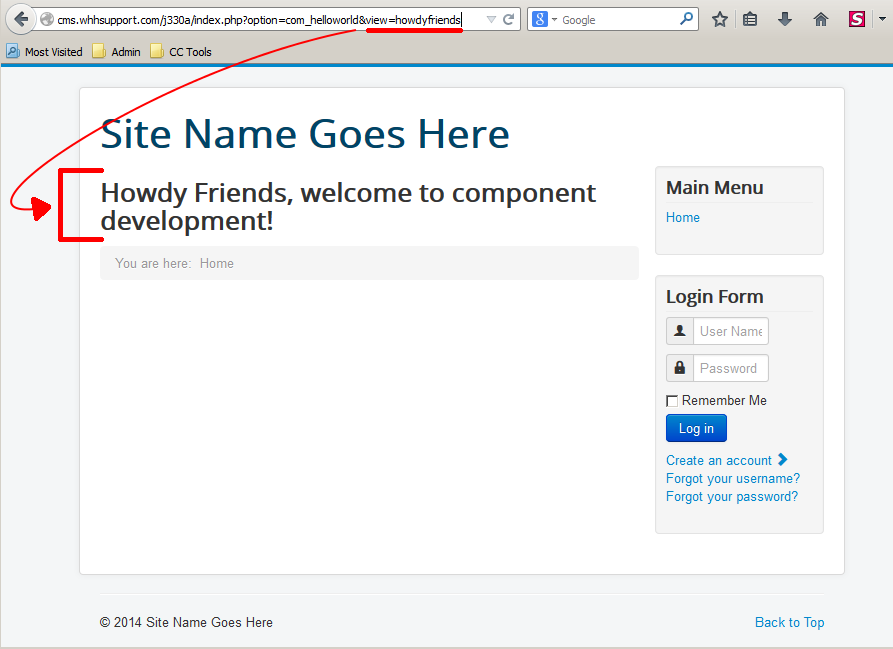
The URL above was created by defining the component we want to run – com_helloworld, and the component’s view we want to run – howdyfriends.
If you’re following along with our tutorial, when testing your new view, it should look similar to the image to the right:

Thanks, guys! This explication helped me a lot!
Shouldn’t Create a New View>Step 2 be
Create the HTML version of the view: /components/com_helloworld/views/howdyfriends/view.html.php
and not
Create the HTML version of the view: /components/helloworld/views/howdyfriends/view.html.php
I have done same as mentioned above but it is not displaying text inside view.html.php instead it displays inside components/com_helloworld/helloworld.php
Why this happening?
Hello Ashwini,
If you have made the same changes as listed in the code above, then it should be working. If you’re seeing something different, then it’s possible you have mixed up a step. If you want us to verify, we would need to have access to the backend of your Joomla installation in order to look at the changes. Please double-check your files. If require further assistance, please provide us access or more information concerning the error.
If you have any further questions or comments, please let us know.
Regards,
Arnel C.
Hi there!
Nice collection of tutorials, ive found some good stuff here for my own development
Just 1 question:
lets pretend that i have a very simple component and i need 3 views: a list, a simple form and a show. Do i have to create this structure for each view? maybe i’m missing something for switching between de default view to another
Thanks a lot for the answer!
If you’re asking if you need a separate structure for a form or list then no, you should be able to put in a form or list on any page without a dedicated structure. You do not need to create a separate structure for each one.