FileZilla not only allows you to upload and download files to your server, you can also manage them by creating, deleting, renaming and changing the permissions on the files and folders. Before you can do any of the following, you will need to connect using FileZilla.
Note! If you do not know how to connect using FileZilla, please see our article on Configuring your site in FileZilla.
The following sections will explain how to manage your files in FilesZilla.
Creating a directory or file
- Open FileZilla
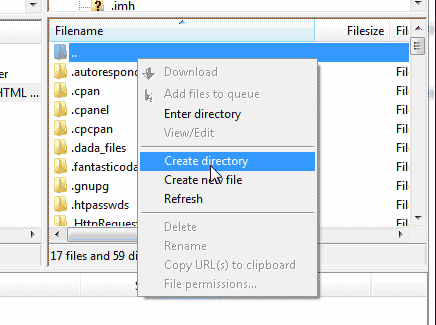
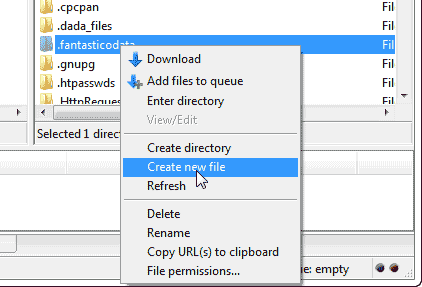
Right click in the “Filename” window underneath the “Remote Site” where you want to create a file or folder. This will open the options pop up box.
Select the Create Directory option to create a folder.
To create a file you select the Create new file option.
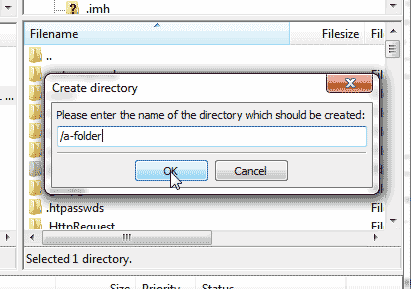
Type in the name os the file or folder and click OK.
The file or folder will show in your files on the server.
Renaming a Folder or File
- Open FileZilla
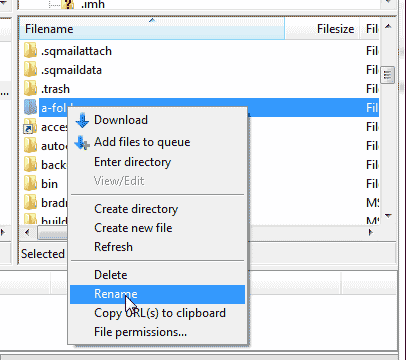
Find the file you want to rename.
Right click the file and select Rename in the options pop up box.
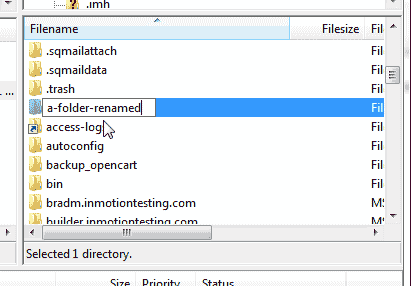
Type a new name for the file or folder and hit enter.
The file or Folder now has a new name.
Deleting a File or Folder
- Open FileZilla
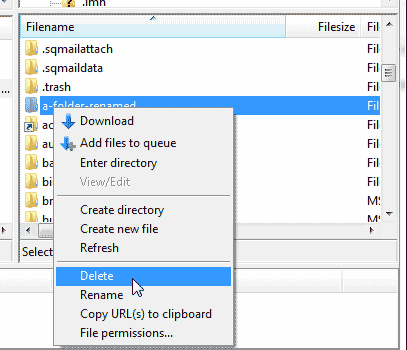
Find the file you want to delete on the server. Right click the file or folder and select Delete from the option pop up box.
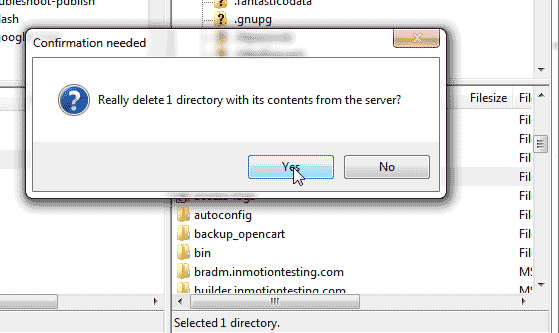
A Confirmation needed pop up box will display.
Click OK.
How to Change Permissions
- Open FileZilla
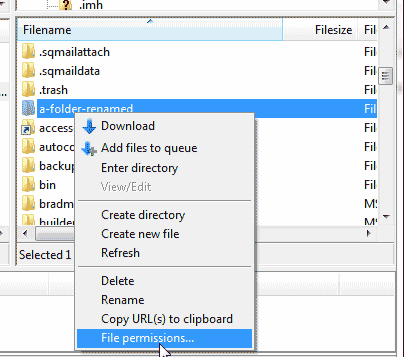
Go to the file you want to change the permissions for. Right click the file or folder and select File Permissions from the options pop up box.
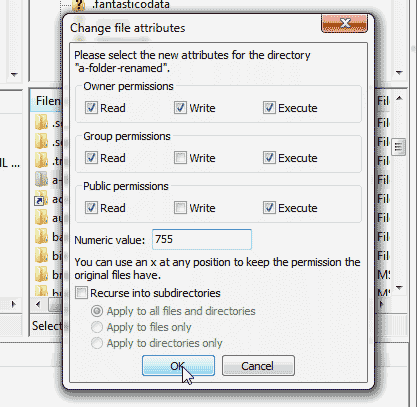
Change the permissions to whatever permission number you want. in this case we changed the permissions of the folder to 755.
Click OK.
The permissions will now be 755.
Hi – I seem to have hit a limit on the number of files that are being displayed by filezilla for my uploads folder. 7998 files are listed by filezilla, and that now never changes. The directory does contain over 8500 files, so new files are uploading successfully. Is this limit something configurable? I read something general on google about RecursionLimits but don’t know if that applies here or how I would change it.
If you have root access to your server you can increase the FTP visible limits via command line. If you are on a Shared plan it may be better to contact our Live Support team so they can check your specific account settings.