
The HTTP Headers WordPress plugin allows WordPress Hosting administrators to create and manage HTTP headers to improve security, privacy, and performance for visitors without needing to manually edit the .htaccess file. This is useful for:
- Mitigating the possibility of making syntax mistakes within the .htaccess file which render the website inaccessible with an 500 error
- Environments where you’re unable to access raw server files via cPanel, FTP, or Secure Shell (SSH)
- Learning rarely discussed methods to help improve user experience (UX)
In this article, we’ll discuss the most popular HTTP security headers available within the HTTP Headers WordPress plugin that can help you provide better security and privacy for visitors.
Install HTTP Headers WordPress Plugin
- Install and activate the HTTP Headers WordPress plugin using your WordPress dashboard or WP-CLI.
- Log into your WordPress dashboard.
- On the left, hover over Settings and click HTTP Headers to get started.
HTTP Strict Transport Security (HSTS)
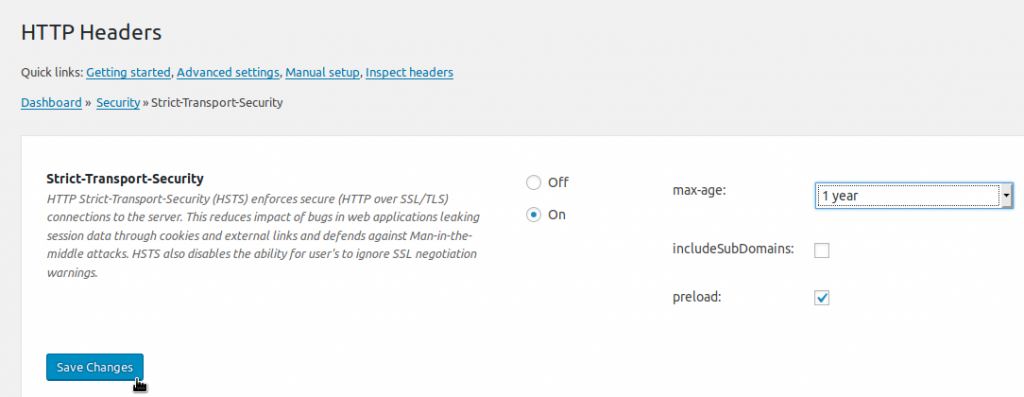
You can add HTTP Strict Transport Security (HSTS) in your .htaccess file to ensure your WordPress content is encrypted when it reaches visitors. This forces web browsers that support HSTS to only load your website using a secure (HTTPS) connection.
You must have a valid paid, or free, SSL certificate installed on your website at all times when HSTS is enabled, or your website will become inaccessible.
- On the left, hover over Settings and click HTTP Headers.
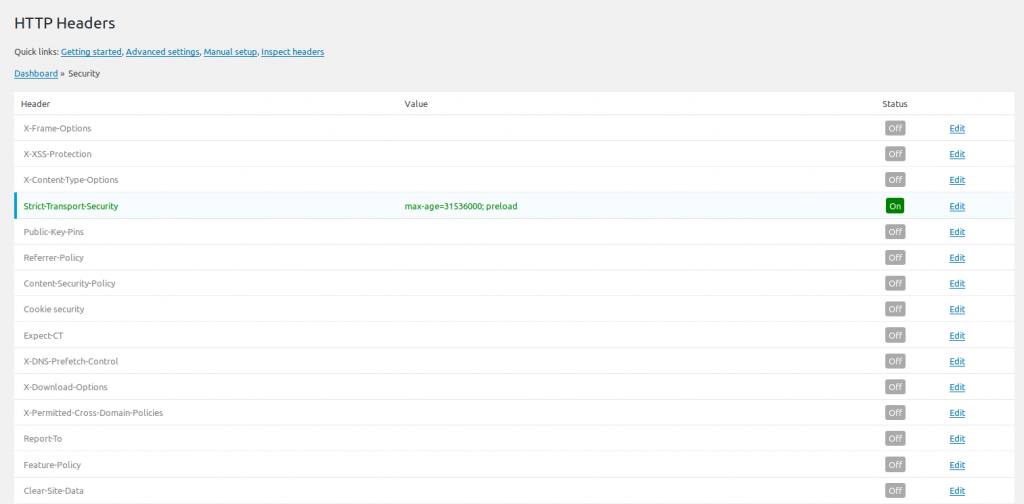
- Click the Security button.
- Beside Strict-Transport-Security, click Edit.
- Select the On radio button.
- Specify the following:
max-age – How long the header should be active
includeSubDomains – Whether to apply HSTS to subdomains
preload – Authorize preload listing (if eligible and desired) - Click Save Changes.
- Click Security at the top to return to the security options.
Cloudflare content delivery network (CDN) users can save server resources by enabling HSTS in Cloudflare.
Referrer Policy
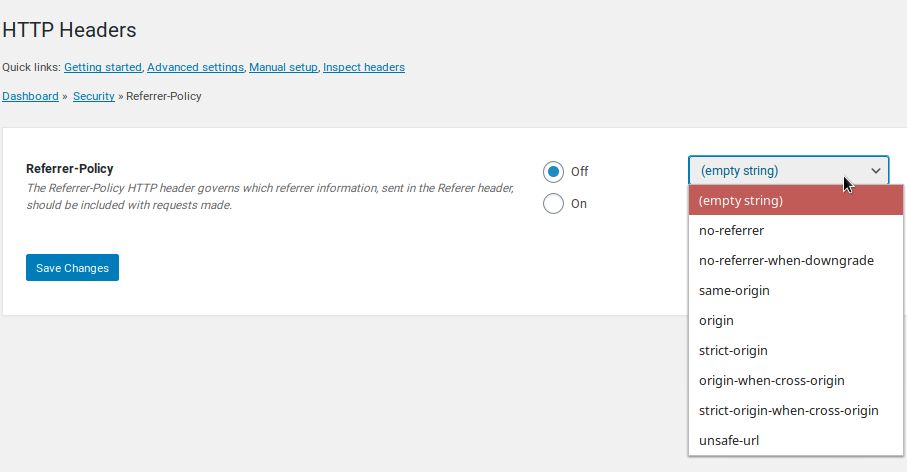
The referrer-policy header controls what information is sent through the referrer header with URI requests. This prevents URLs with sensitive information from showing up in web analytics software logs which can be intercepted for cyber attacks later. For example, clicking links on a password reset page could send user credentials within the referrer URL.
- On the left, hover over Settings and click HTTP Headers.
- Click the Security button.
- Beside Referrer-Policy, select Edit.
- Click the On button.
- Choose a policy option from the drop-down menu:
empty string – No preference
no-referrer – No referrer info sent
no-referrer-when-downgrade – Full URL sent unless leaving an HTTPS page for a HTTP page (default behavior if no policy specified)
same-origin – Only origin (root domain – e.g. example.com instead of example.com/privacy-policy) for within the same site
origin – Only origin
strict-origin – Origin only when protocol security level is the same (e.g. HTTPS to HTTPS)
origin-when-cross-origin – Full URL for within the same site, but only origin for others
strict-origin-when-cross-origin – Full URL when within site, only origin when protocol security level is the same (e.g. HTTPS to HTTPS), and no info from HTTPS to HTTP
unsafe-url – Full URL (not recommended) - Save Changes.
X-Frame-Options
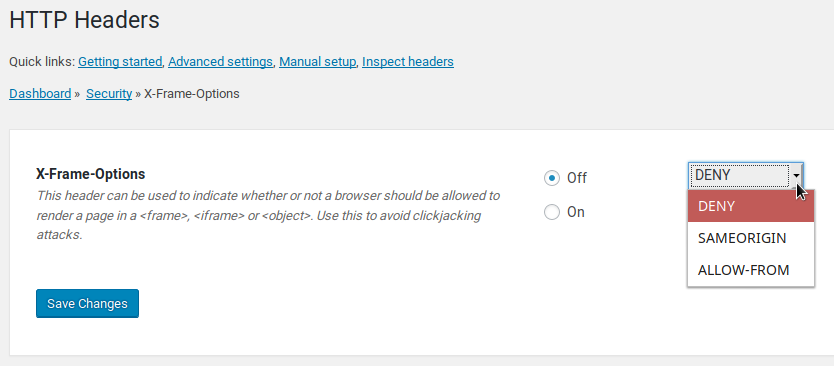
X-Frame-Options specifies whether your WordPress website can be displayed within other websites with <frame>, <iframe>, <object>, or <embed> tags. Enabling this feature will create a Header set X-Frame-Options "[OPTION]" line within your .htaccess file for security against clickjacking.
- In the WordPress dashboard, hover over Settings and click HTTP Headers.
- Click the Security button.
- Beside X-Frame-Options, click Edit.
- Click On and specify an option from the drop-down menu:
DENY – webpages cannot be displayed in a frame
SAMEORIGIN – webpages can be framed in the same webpage
ALLOW-FROM – webpages can be framed within the same URI; doesn’t work in newer browsers - Click Save Changes.
- Click Security at the top to return to the security options. You’ll see your specified option on the X-Frame-Options line.
Mozilla recommends using the superseding Content Security Policy frame-ancestors attribute instead of X-Frame-Options when possible.
Content Security Policy (CSP)
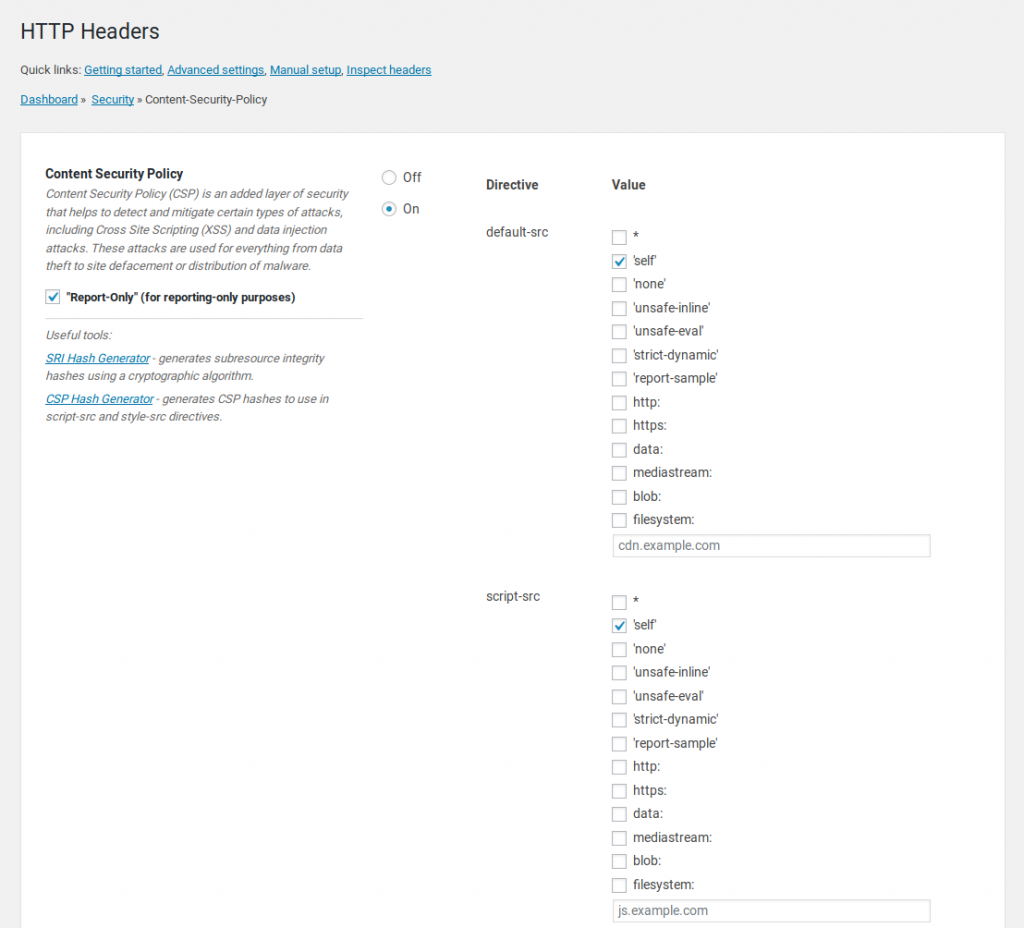
The HTTP Headers WordPress plugin makes it easier to configure content-security-policy for WordPress hardening. The Header set Content-Security-Policy line forces web browsers to only load what’s specified within it. Think of CSP as a code firewall. No matter what code is in that webpage, the browser is only allowed to load what’s specified within your CSP header.
There are two steps to success with CSP: configure Content Security Policy and enable reporting for debugging and proper implementation.
Enable CSP
- On the left, hover over Settings and click HTTP Headers.
- Click the Security button.
- Beside Content-Security-Policy, select Edit.
- Click On and specify what can be loaded on your website from where.
- Save Changes at the bottom.
CSP Report-Only
The safest way to configure Content Security Policy is to enable Report-Only from the top of the screen. This shows elements on the website that wouldn’t be loaded if CSP was enabled and enforced. You can view this in your web browser.
- Go to the Edit page for Content-Security-Policy.
- Check “Report-Only” (for reporting-only purposes) from the top of the screen.
- Check ‘self’ for any values you want to better secure.
- Save Changes at the bottom.
- View your website.
- Open your web browser’s Inspect Element feature.
- Check the Console tab to see what’s being flagged by CSP.
- Make changes as needed.
Once all errors and warnings are removed, test your site by unchecking the Report-Only option.

CSP attributes and related tools:
require-sri-for– Subresource Integrity (SRI) Manager WordPress pluginblock-all-mixed-contentandupgrade-insecure-requests– Really Simple SSL WordPress plugin
Permissions-Policy
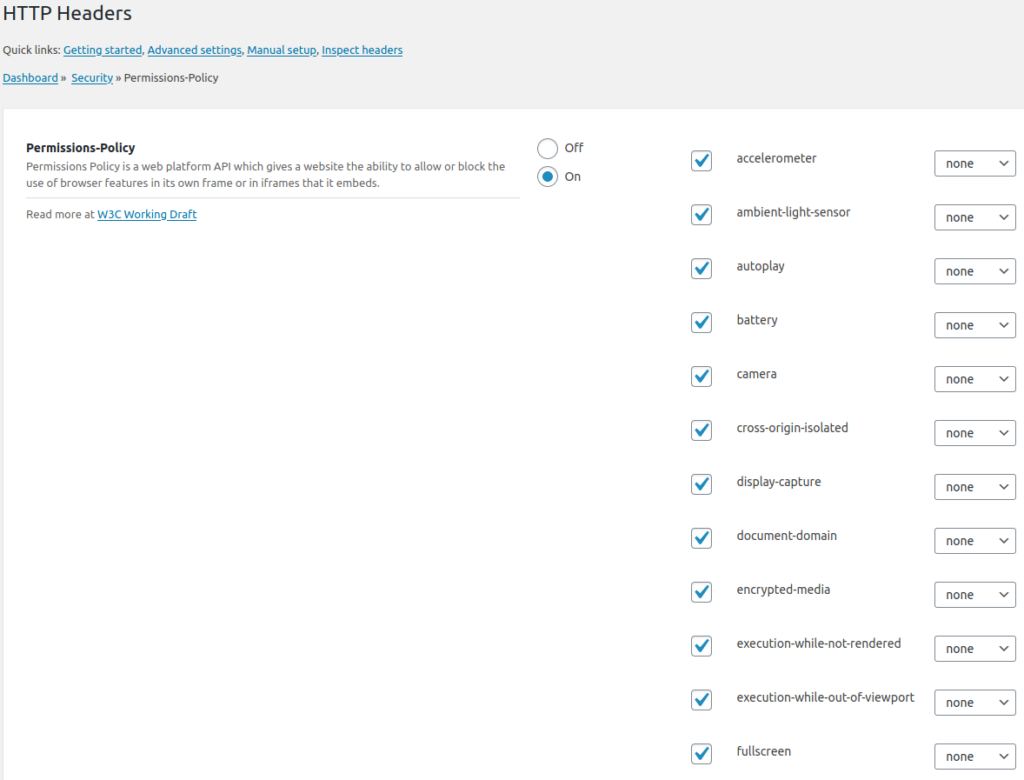
Permissions Policy, formally called Feature Policy, blocks unnecessary web browser features (e.g. video autoplay, camera, MIDI, and microphone) to enhance user privacy.
- On the left, hover over Settings and click HTTP Headers.
- Click the Security button.
- Beside Permissions-Policy, select Edit.
- Click On.
- Check the box for each feature you’ll include in the policy, the access list, and external domains as needed:
'none'– disabled
'self'– allowed only from same domain
*– allowed
origin(s)allowed only from specified domains (separated by a comma) - Click Save Changes.
WordPress Security Tips
You can test your website security with third party security scanners, including Observatory.Mozilla.org and SecurityHeaders.com.
If you’d like to keep your WordPress site minimal, you can copy the HTTP headers in your .htaccess file outside of the plugin’s configuration section. Then, you can remove the HTTP Headers plugin and keep the settings. However, you’d then need to manually edit the .htaccess file next time you need to make changes.
To further harden WordPress, install Block Bad Queries (BBQ) and a WordPress security suite such as Cerber Security or Wordfence. Then learn how to build a more secure WordPress website with these free cybersecurity tools.
Improve the performance and security of your WordPress website with our WordPress VPS Hosting plans.
Web Application Firewalls
Free SSL Certificates
Advanced Server Caching
Become a master of WordPress plugins! Protect, optimize, secure, and expand the functionality of your website easily with the help of WordPress plugins!

Hello,
I installed the plugin and tried to turn on the CSP. Despite of being turned on CSP configuration is getiing set. When i contacted wordpress support they stated “Looking this up on my end, we cannot have CSP on WordPress, as it doesn’t work well with the core features of the software itself, and our built in security measures would be enough without it”. Is it a true statement that CSP is incompatible with wordpress?
CSP is compatible with WordPress. CSP is simply a security HTTP header. It can be difficult to implement in WordPress for many reasons:
Some may argue the time required to configure it negates the benefits. But again, it is compatible.
I’ve made updates using HTTP Headers plug in, but it doesn’t seem to be updating the .htaccess file. Every test I run still says I do not have any of these headers. Can you assist?
Hi Laurie, sure thing! If you submit a verified ticket request, one of our Support agents can take a look at it and directly access the account, then check the logs to see if anything unusual is happening.
I tried it and it seemed to have a considerable negative impact on page load. Can you comment?
Hi Christine, sorry to hear that you’re running into trouble. It’s usually a conflict with another plugin, or possibly the .htaccess file needing optimization. Try using a site like GTMetrix to see if you can narrow down what scripts or plugins are causing the slowdown. That can help point you towards what specifically needs to be optimized or is causing the issue.
Thanks a bunch, I had some hard time figuring out the correct settings for the X-Frame-Options since I use Elementor for my website. It loads it into a frame, which was not working then anymore after setting the header to same origin, deny.
Thanks for asking us about this. In this case, I recommend you working on implementing a solid CSP instead. This supersedes X-Frame-Options and CSP errors in the browser console can help you adjust for Elementor.