One of the great features of HubSpot is the ability to use chat. The availability of chats gives your customers immediate access to ask questions, get answers, or provide feedback. The chat option benefits your company and your customers by giving them another way to communicate.
This tutorial will walk you through setting up a chatflow within HubSpot.
Starting the Set Up of a Chatflow in HubSpot CRM
HubSpot defines channels for chats as chatflows. A chatflow allows you to assign and organize chats by categories and your HubSpot team members. You will start the creation of a chatflow by selecting Live Chat or Bots. This tutorial uses Live Chat.
You must be logged into your WordPress Administrator Dashboard to follow the steps below.
- Click on HubSpot.
- Click on Live Chat.
- In the top right corner of the screen, click on Create chatflow
- Select a chatflow to start. For this tutorial, select Live Chat.
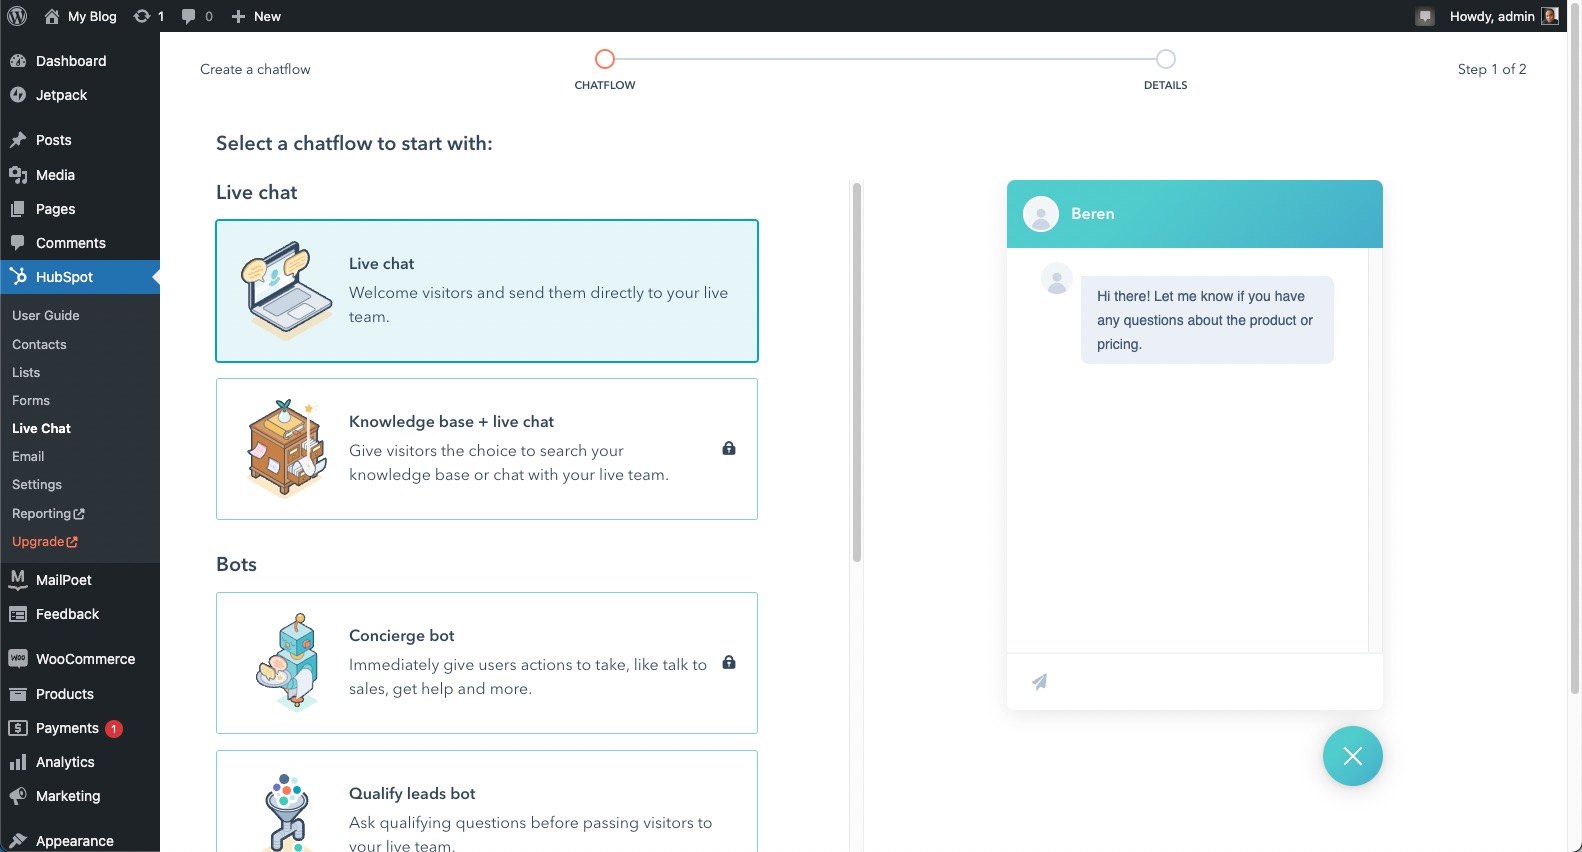
- Click Next in the bottom right corner.
- Select where your chats will arrive. The free version defaults to Inbox in the HubSpot account. You can also change the supported language.
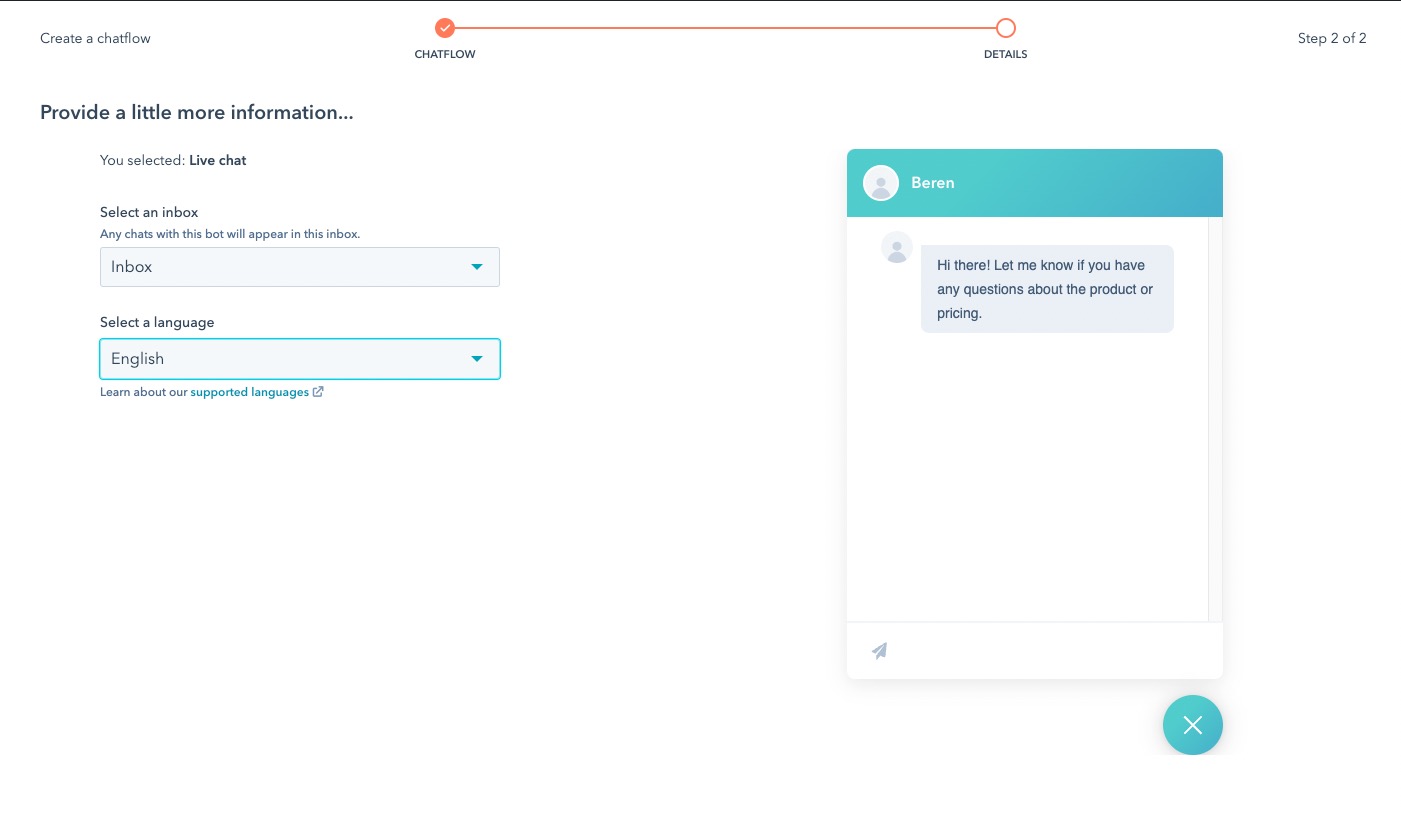
- Click on Create in the bottom right corner of the screen.
The Four stages of Creating a Chatflow
Chatflows are created in four stages: Build, Target, Display, and Options. Each section is detailed below.
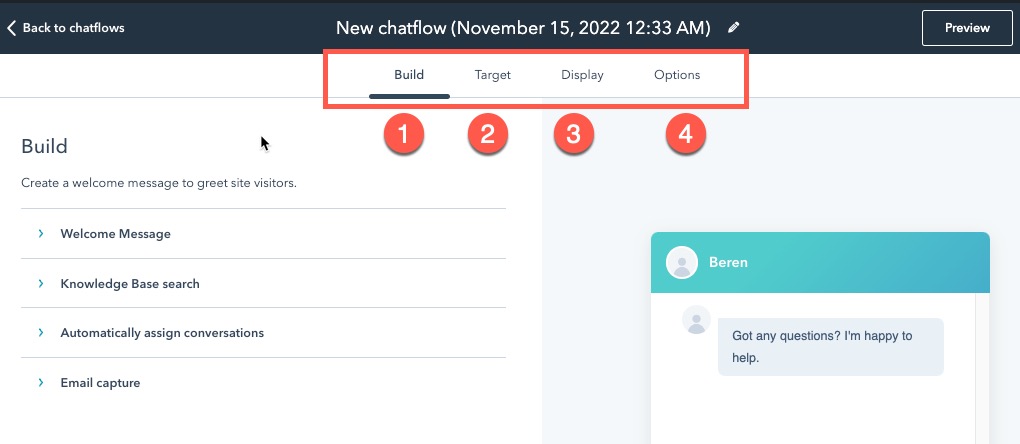
Build Stage – Welcome Message, Knowledge Base Search, Chat Ownership, and Email Capture
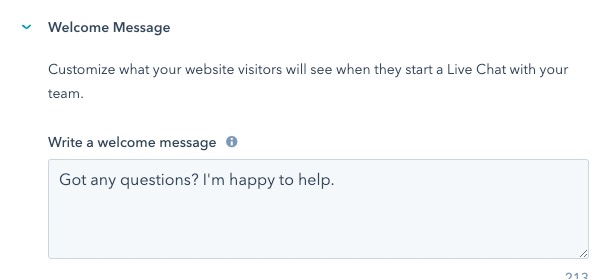
- The Build stage starts with the Welcome Message. Click on the arrow to expand the Welcome section. Type a welcome message in the text box.
- Knowledge Base search – enable the option to search the company knowledge base. This option requires an account upgrade.
- Automatically assign conversations – automatically assign new conversations to the HubSpot team members. This option requires an account upgrade.
- The next option is for Email Capture. You can ask a visitor for their email address using one of the first two settings in the drop-down menu. Select the third option to not ask for the address.
- Create an Email capture message. An example of a message might be:
Leave your email, and we’ll respond as soon as possible.
Target Stage – Select the Website Pages for Live Chat and Specify Visitors For Access
- Click on Target. Select the pages where the chat widget will appear.
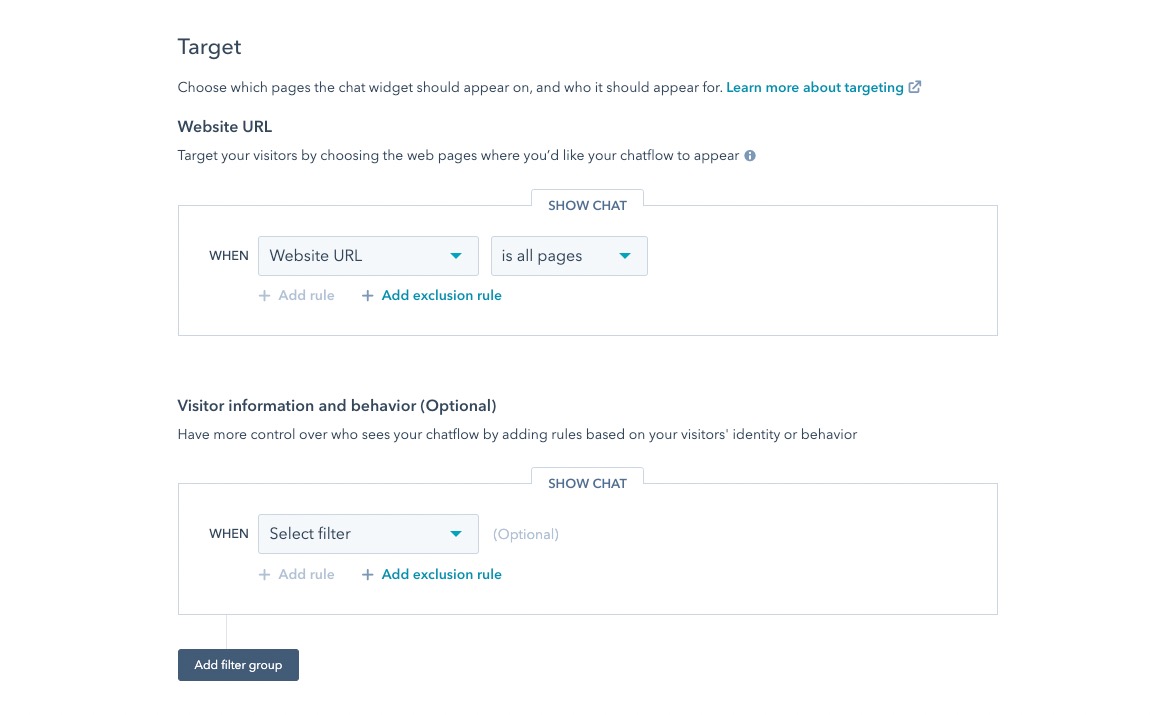
- Visitor information and behavior (optional) – You can determine who can access your chats or even set up an exclusion rule to keep people out.
Display Stage – Determine How Live Chat Appears
- Click on Display. Here you can choose a custom image or logo for your chat avatar.
- Set the chat display behavior for a desktop system. Your options include:
– Pop open the welcome message as a prompt
– Only show the chat launcher
– Show the welcome message, then pop open the chat widget when triggered. - Click on the Mobile tab to set the Chat display behavior for a mobile device:
-Pop open the welcome message as a prompt
-Only show the chat launcher - Click on the Desktop tab again. Determine when the chatflow appears to visitors:
– On exit intent
– Time on the page in seconds = (seconds)
– Percentage of the page scrolled = (50%)
Options – Language, Data Privacy, and Feedback
- Select the Options for your chatflow.
- Language – defaults to English.
- Determine the options for Data privacy & consent (use the slider to enable/disable):
– Consent to collect chat cookies
– Consent to process data
– Consent to communicate - Collect feedback from chat visitors – Ask visitors to complete a survey and provide feedback. This option requires an updated HubSpot account.
Completing the Chatflow
After completing the options stage, finish creating the chat flow In the top right corner:
- Click on Preview to see your chat.
- Click on the slider to save your chatflow settings.
- Click on Back to Chatflows (in the top left corner) to return to the Chatflows page.
The live Chat option in HubSpot is a powerful tool for your WordPress site. It helps provide better communication with your customers so that you can resolve possible problems. Live chat also gives your customers or potential customers another way to contact you or your team, giving you another advantage over competitors who may not have this option.