
Using the Contacts in HubSpot lets you record the activity between you and a client or potential client.
This information helps you make better decisions and track your interactions with a company or an individual. Better relations and understanding will help to keep your business moving forward.
This tutorial will show you how to use HubSpot to record a contact.
NOTE: HubSpot considers Contacts as more than the company or person you interact with. HubSpot also classifies contacts as deals, invoices, marketing events, and tickets. This tutorial primarily focuses on Contacts and Company contacts.
Adding a Contact
A contact is added by filling out a form with the contact information or through an import process.
Imports will require that you have an existing list in an importable file. HubSpot provides a wizard that walks you through the import process. You can also find more information in their import guide.
You must be logged into the WordPress Administrator Dashboard to follow the steps to creating a contact.
- Click on HubSpot.
- Click on Contacts. You will see a list of the existing contacts, if any are already saved.
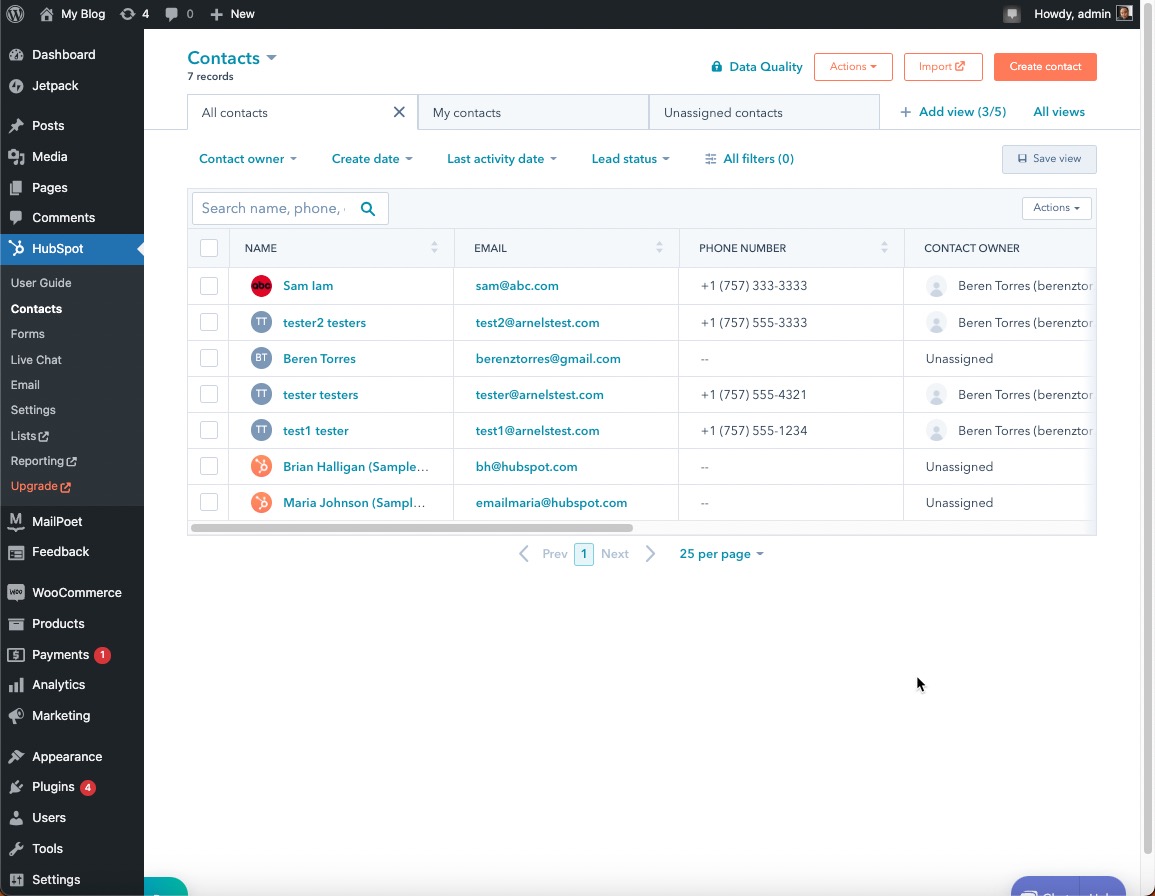
- In the top right corner, click on Create contact.
- Fill in the contact Email, First name, and Last name. After you type this in, the other fields will become active.
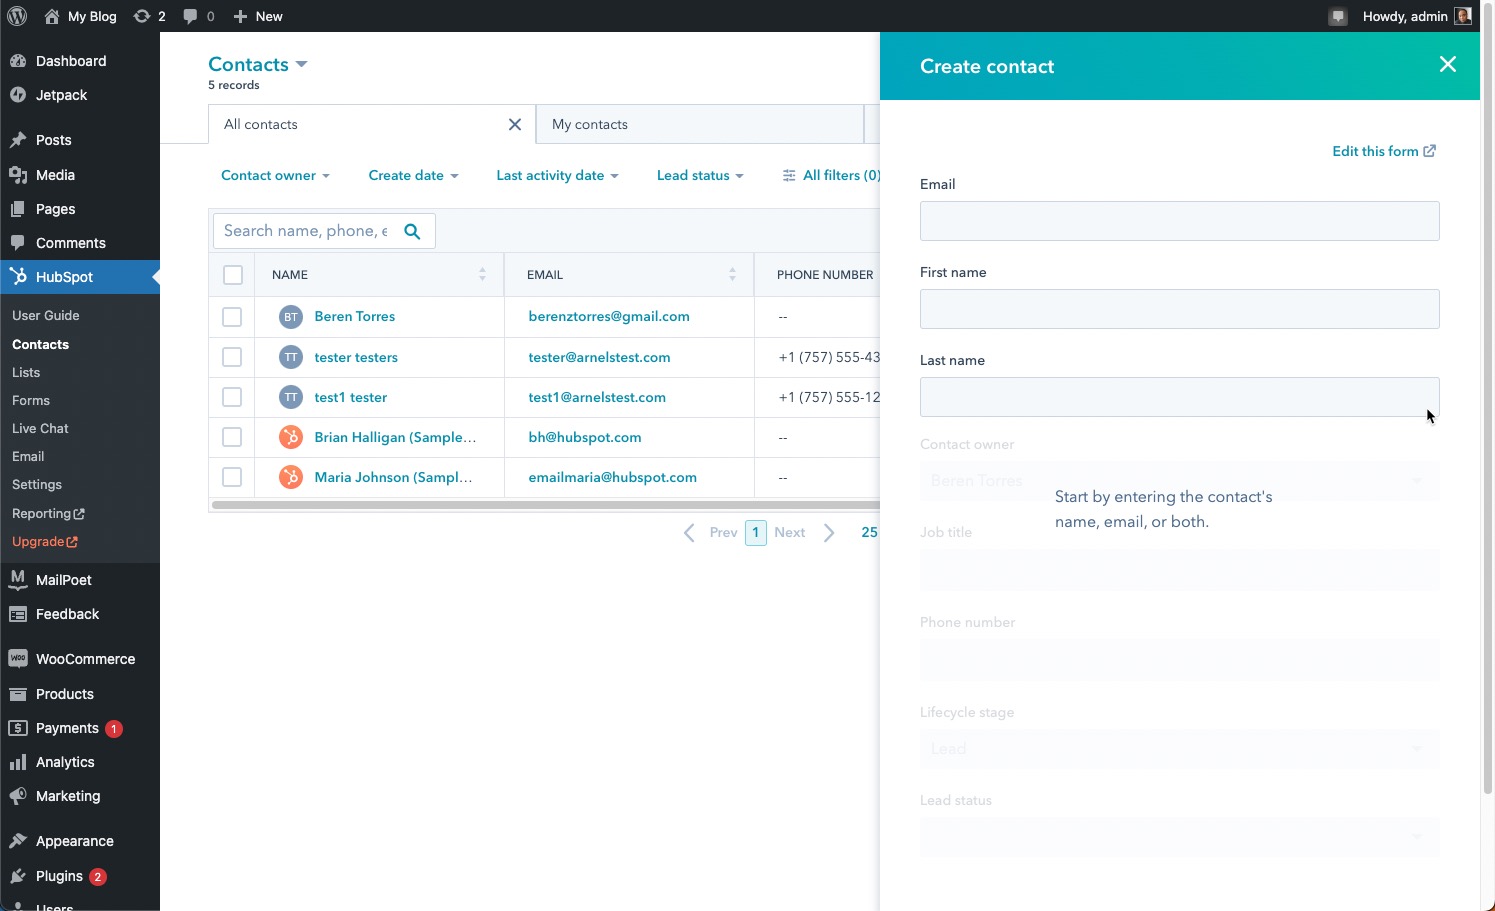
- Click on the drop-down arrow to select a Contact owner.
- Type in a Job title.
- Add a Phone number.
- Select a Lifecycle stage. You can select from the following in the drop-down menu: Lead (default), Subscriber, Marketing Qualified Lead, Sales Qualified Lead, Opportunity, Customer, Evangelist, or Other.
- The next field is Lead status. Select from New, Open, In progress, Open deal, Unqualified, Attempted to contact, Connected, or Bad Timing.
- Click Create or Create and add another to save your entries.
Company Contacts
You can also track companies with HubSpot. Recorded company contacts have the same options for logging interactions as personal contacts. The main difference is that you are recording the contact as the company instead of an individual of a company.
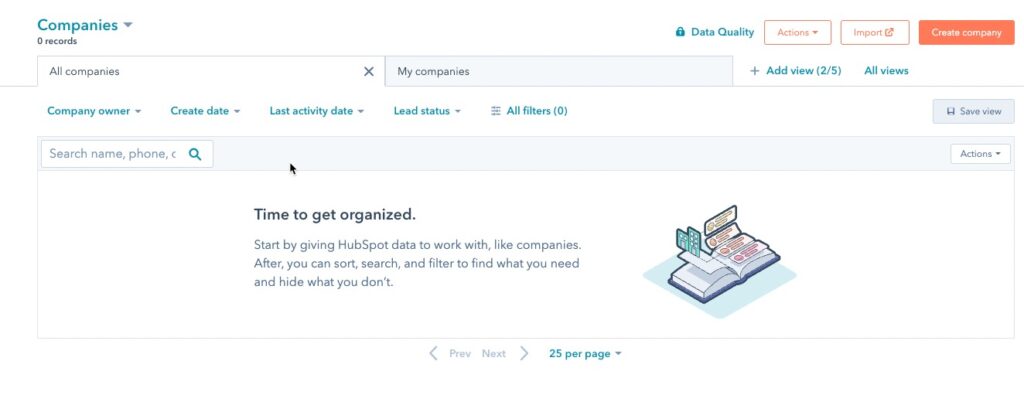
When selecting Companies, the companies page will open up. If you have any companies already registered, they will appear on a list on the Companies page.
- In the main menu, click on HubSpot.
- Click on Contacts.
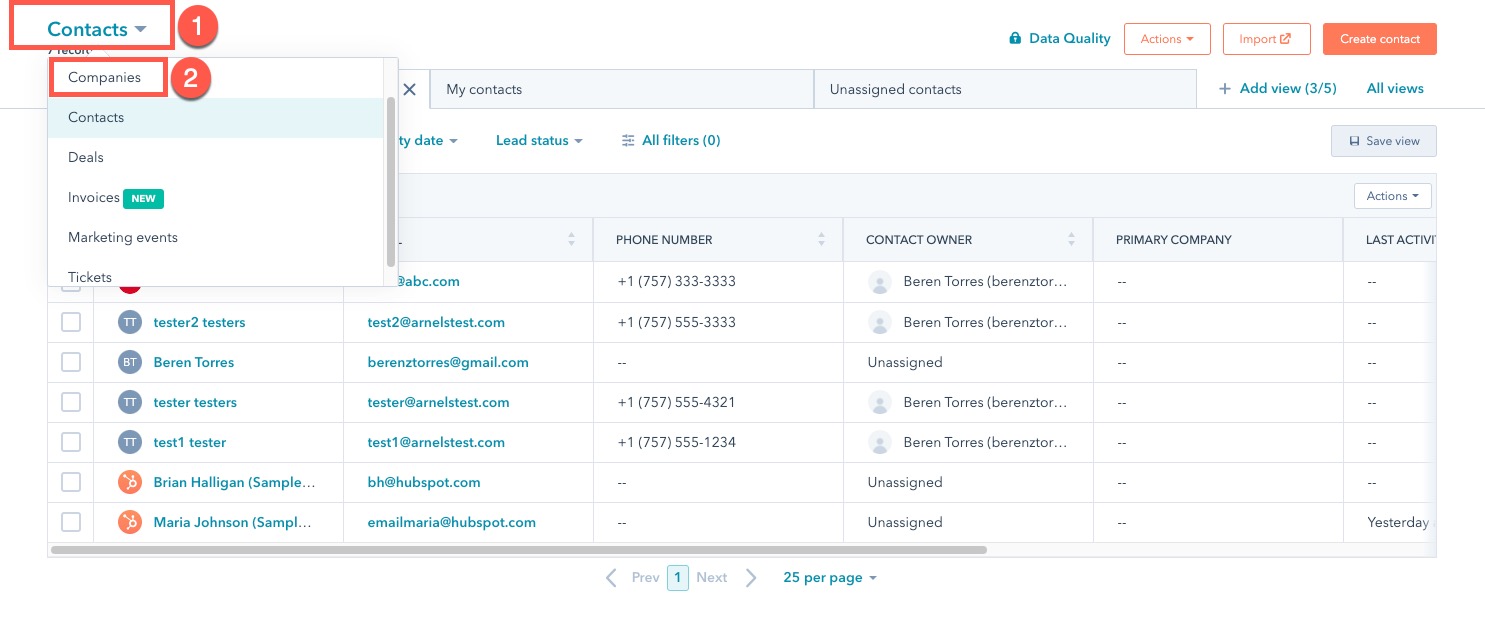
- Click on Contacts in the top left corner to open the drop-down menu.
- Scroll up to find Companies and then select it.
- To add a new company, click on Create company button in the top right.

- Type in the Company name.
- Fill in the Company domain name.
- Select a Company owner.
- Fill out additional information on the Company, such as industry type, City, State/Region, number of employees, Annual revenue, and a brief description of the company.
- Click on Create or Create and add another to save your entries.
NOTE: Some parts of the Contacts interface may be grayed out, have a lock icon next to it, or are inaccessible. These sections indicate that an upgrade to the HubSpot account is required to access those features.
HubSpot allows you to record your individual or company contacts. Use the contact information for your marketing efforts and use the interface to help record any interaction with the contact. This will help you track deals and important contact information that can improve your business revenue and customer base.