If your organization has multiple users working out of the same WordPress site, keeping track of changes can be difficult. While WordPress contains a few tools to help you keep track of changes made on pages and posts, you may find that insufficient for your purposes. If you are looking for a tool that will help keep you in the loop for a variety of changes such as plugin activation, login attempts, and widget modifications, you may find that Simple History is a good fit. In this article we will discuss some key features of the Simple History WordPress plugin and provide basic instructions for using it.
Topics Include
User Login History
One of the key features of Simple History is a complete logging of all user login attempts, including failed attempts to login. Not only does this help identify user experience issues, it can also act as a type of security measure. If someone is attempting to gain access to your WordPress dashboard via repeated login attempts, you will be able to see that through Simple History. This will allow you to take additional steps such as changing the WordPress login URL or adding a captcha to the login process.
Widget and Plugin History
Simple History also keeps track of changes made to widgets and plugins. If a widget is modified or removed, the change will be logged in the Simple History plugin. Simple History also keeps a log of all installed and activated plugins. This is useful for identifying plugin installations that conflict with existing site software, as you can easily see when it was installed and by whom.
Modifying Simple History Settings
There are a number of different settings available for Simple History, allowing you to customize how the information is displayed. Accessing the settings can be done via the WordPress dashboard:
- After logging into your WordPress dashboard, navigate to Settings > Simple History.
- On the next page there will be three tabs, Settings, Export, and Debug. Select Settings.
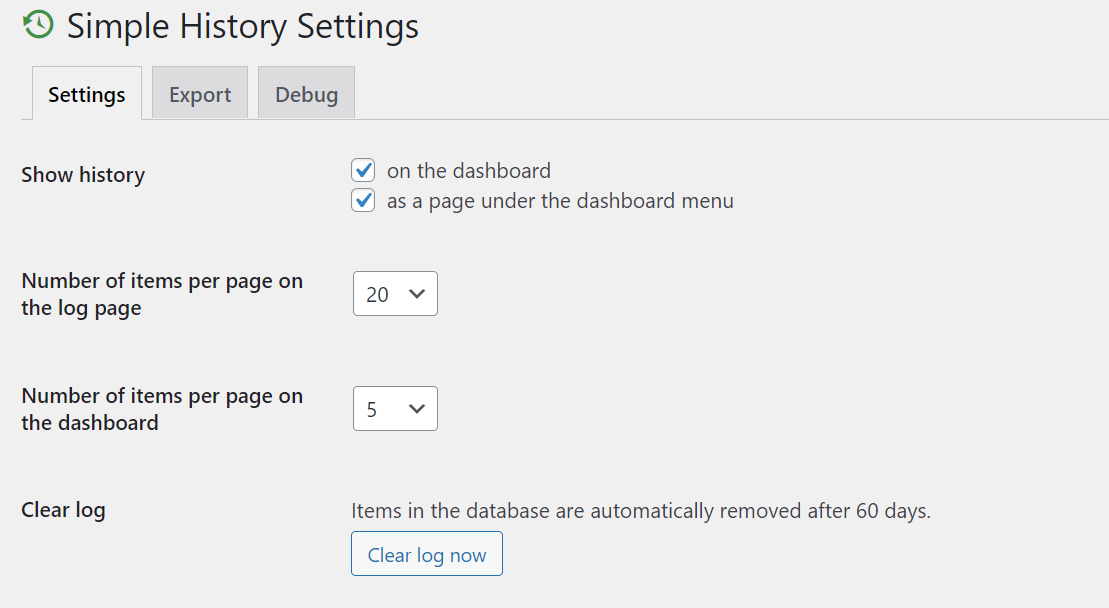
- On the Settings tab you will be provided with a number of options:
Show History: Choose where to display the Simple History log, either on the dashboard or as a separate page under the dashboard menu.
# of items per page on log page: Select how many items are displayed on the separate log page using the drop-down menu
# of items per page on dashboard: Select how many items are displayed in the dashboard view of the Simple History log using the drop-down menu.
Clear log: This option allows you to immediately clear the log. Log entries are automatically deleted after 60 days. To clear the log immediately, click Clear log now.
RSS Feed: This option allows you to enable an RSS feed that you can subscribe to. This feed will display the same information as the Simple History log, allowing you to stay informed from multiple devices. To enable RSS, click the checkbox.
- Once you have modified the settings as necessary, click Save Changes.
Congratulations, you now know how to modify your Simple History plugin settings.
Next Steps
For additional control over your WordPress collaborations, consider adding a User Role plugin to help you set role-specific permissions for your users.
Improve the performance and security of your WordPress website with our new WordPress VPS Hosting plans. Get 40x faster speeds with dedicated resources, server caching, and optimization tools.
High-Performance VPS
99.99% Uptime
Free SSL & Dedicated IP
Advanced Server Caching

