This tutorial will quickly explain how to install Zend OpCache on your dedicated server. This guide requires you to be logged into your server with the root user, and the PHP version to be 5.5 or newer.
Installation
- Log into your server as the root user.
- Run the EasyApache script./scripts/easyapache
- If you are not installing Mod RUID2 or changing Apache versions select Customize Profile.
- Select Next Step on the Apache section.
- Select Next Step on the PHP section.
- Select Exhaustive Options List when you get to the modules section.
- Scroll down below PHP 5.x continued to find Opcache. Hit your spacebar to select the module and you should see and X in the brackets. After you do this choose Next Step.
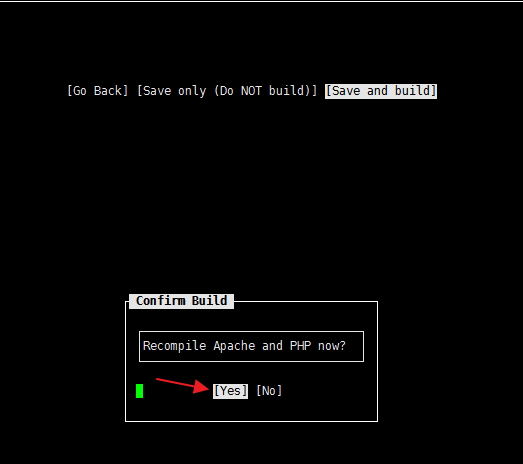
- Select Save and Build.
- You will need to confirm what you are doing by selecting Yes to rebuild apache.
- Another prompt will show up asking you to acknowledge you understand the changes being made to the server, you will need to select I Understand before the program will continue.
Configuration
- Run the following red command to confirm Opcache has been installed.
- Edit your php.ini file to add the following line at the bottom.
zend_extension=”/usr/local/lib/php/extensions/no-debug-non-zts-20121212/opcache.so”
Zend OPcache
Now your PHP scripts will get cached so they can be provided to visitors during the intial page loading. This caching engine can increase your page load speed to to 75% faster.


These steps are for EasyApache 3. I think that there should be an indication that this is for EA 3, and you should update these instructions to include directions for EA 4 as well
Wait PHP 5.5 or lower?
Or PHP 5.5 or newer?
Comment from August says lower, Tim S says, thanks we will update article, then top of article says updated Nov 16 says php 5.5 or newer.
Which is it?
thanks,
Caroline
Sorry for the confusion. Zend Opcache is included (but not enable) in the newer versions of PHP. Unfortunately, I could not locate the specific version that began including this.
If you want this enable it will require at least a VPS or Dedicated server, and Live Support can make this change for you.
Thank you,
John-Paul
I have VPS plan VPS-1000S on Inmotionhosting. Can support team install it on my VPS on my behalf?
Hello Shahid,
Yes, our support team can install it for you. Please contact the Live Support for more information.
Kindest Regards,
Scott M
Thanks for the feedback, we’ll work on updating.
Your problem is that your are using a very old version of php in shared hosting. You are now lagging behing your competitors because Siteground has enabled OPcached in sharehosting!
We newest generation of all CMS i.e. Drupa 8 request pocached enabled. VPS and Dedicate hosting cannot be used just because the customer needs OPcache.
Hello Joe,
We have all PHP versions from 5.2 all the way to 7 on our servers. Account owners can set their preferred version on an account or even folder level.
Kindest Regards,
Scott M