In this article, we will outline the process of using Git to handle versioning a repository and keeping a copy on a GitWeb provider as a backup, or for sharing.
This article assumes that you have already received a copy of the WordPress UltraStack playbook, and want to retain custom changes to the playbook by using Git. You may use any GitWeb provider you prefer, though we will use GitHub to provide an overview of this process.
NOTE: Do not push sensitive information contained in your Ansible Playbook inventory to a public repo! Be sure to remove sensitive information from files you commit!
Sign up for a GitHub account if you don’t already have one.
Backup Ansible
- Add your Ansible Control Agent SSH public key to GitHub. The following steps are an abridged outline of the official steps available at Github.com or you can follow below
- Visit https://github.com/settings/keys
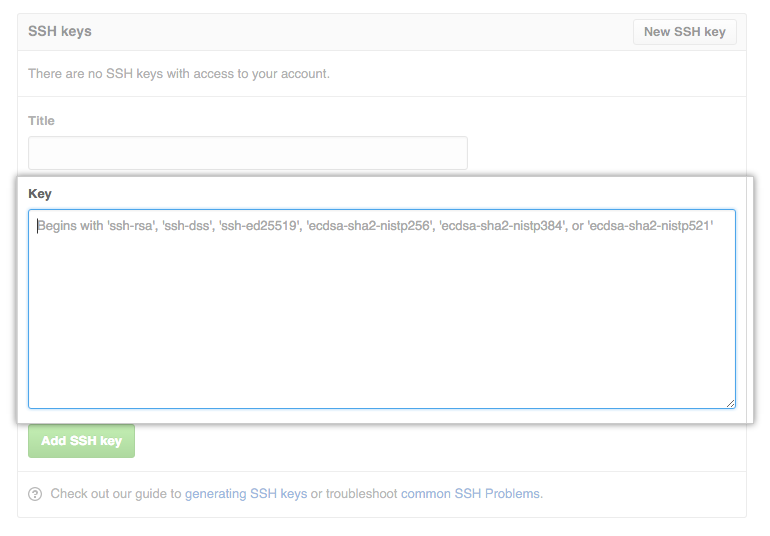
- Click New SSH key

- Add the public key to the input field:

- Click the Add SSH key button
- Visit our WordPress-UltraStack-Ansible Github page
- Click the Fork button
- On your fork, click the Clone or download button
- Choose Clone with SSH if not already selected
- Add this repo to your playbook:
git remote add my-fork <url you copied>
Feel free to replace ‘my-fork’ with any keyword, though in
future sections we will reference the repo keyword specified
here. - Review your changes to the Playbook
NOTE: Do not push sensitive information contained in your Ansible Playbook inventory to a public repo!!! Be sure to remove sensitive information from files you commit!
- Check the status of your playbook:
git status
On branch master
Your branch is up to date with ‘origin/master’.
Changes not staged for commit:
(use “git add <file>…” to update what will be committed)
(use “git checkout — <file>…” to discard changes in working directory)
modified: ansible.cfg
no changes added to commit (use “git add” and/or “git commit -a”) - Double-check what was changed in the listed file(s):
git diff
diff --git a/ansible.cfg b/ansible.cfg
index 27b30c3..e9902ee 100644
— a/ansible.cfg
+++ b/ansible.cfg
@@ -12,7 +12,7 @@ callback_whitelist = profile_tasks, timer
forks = 25
host_key_checking = False
internal_poll_interval = 0.01
-nocows = 1
+nocows = 0
stdout_callback = yaml
var_compression_level = 9
@@ -23,4 +23,4 @@ timeout = 300
[ssh_connection]pipelining = True
-retries = 1
+retries = 3
Looks good? Let’s commit! - Add and push your changes in a new commit
- Add the file(s) to a staged commit:
git add ansible.cfg
- Add a helpful commit message of what you changed:
git commit -m "ansible.cfg: enable cowsay; retry ssh 3 times"
[master 2b80016] ansible.cfg: enable cowsay; retry ssh 3 times
1 file changed, 2 insertions(+), 2 deletions(-) - Push your changes:
git push my-fork master
Counting objects: 3, done.
Delta compression using up to 8 threads.
Compressing objects: 100% (3/3), done.
Writing objects: 100% (3/3), 420 bytes | 420.00 KiB/s, done.
Total 3 (delta 1), reused 0 (delta 0)
remote: Resolving deltas: 100% (1/1), completed with 1 local object.
To github.com:<your GitHub user>/wordpress-ultrastack-ansible.git
eb1bf94..eafd54c master -> master
Discover more about IT automation in our Ansible Education Channel.
For further reading, learn How to Deploy Files With GitHub Actions for FTP and SCP.
Get our Ansible Control Node to automate deployments now with our Cloud Server Hosting.