In this tutorial:
Downloading AppPush Google API key Configuring Pushwoosh Configuring AppPush Rebuilding your app Sending push notifications
AppPresser has released push notifications for their excellent WordPress mobile app platform using the AppPush extension. With this release, AppPresser is further solidifying itself as an authority in native Android and iPhone application development. In this article, we will show you how to enable push notifications in your Android app.
What are push notifications?
Push notifications are messages that can be sent directly to your users directly from your mobile app, so that you can update them on things like specials or any other new information. Push notifications are extremely effective in keeping your users in the loop as to what is going on within your app.
Downloading the AppPush extension

First, log into your AppPresser account. You should already have an account if you have been using AppPresser. If you are not already using AppPresser for your mobile app, you may want to follow our guide on creating an app with AppPresser.

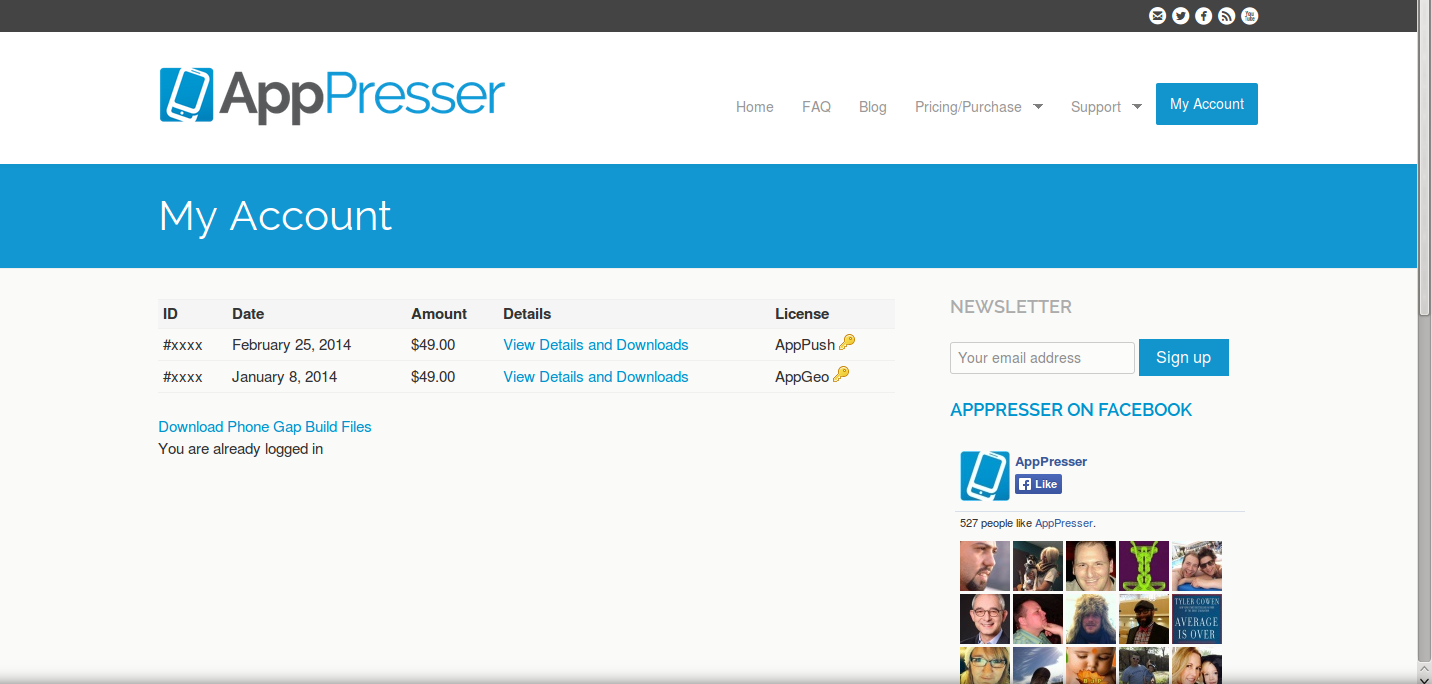
From within your AppPresser account, click on View Details and Downloads for the AppPush extension. If you do not see the AppPush extension there, you will need to purchase it from AppPresser first.

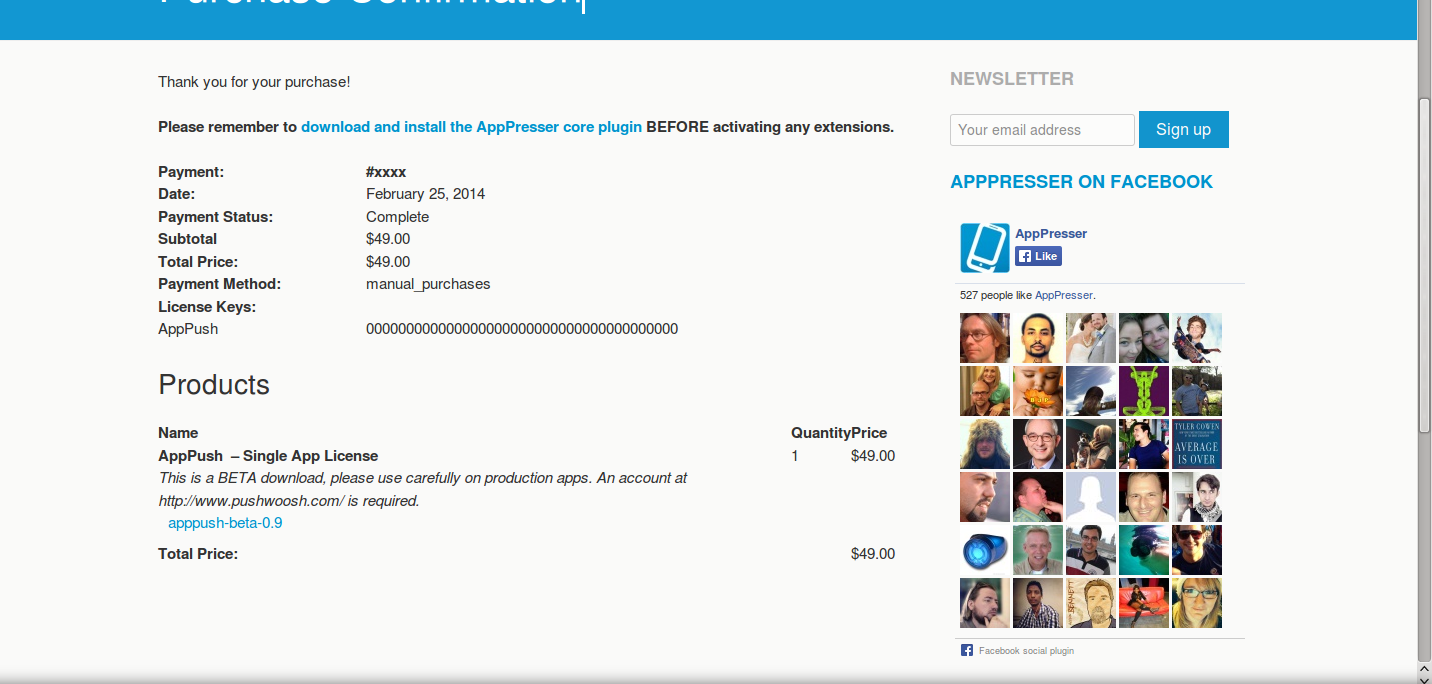
Next, scroll down to the Products section of the page and download the AppPush extension. You will then need to manually install this plugin on your WordPress site.
Getting your Google API key
To enable Android push notifications, you’ll need to connect to the Google API. In this section, we’ll show you how to do so.

First, you’ll need to visit the Google API Developer’s Console.

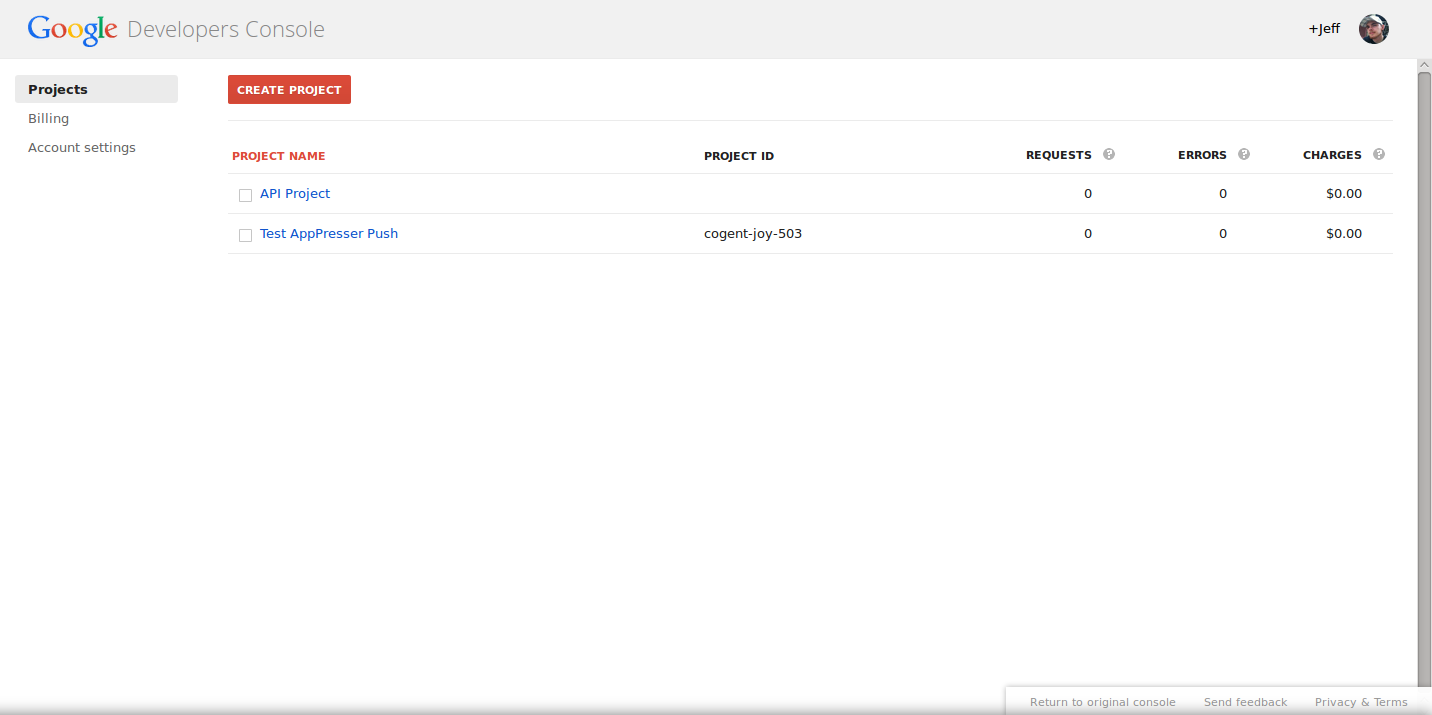
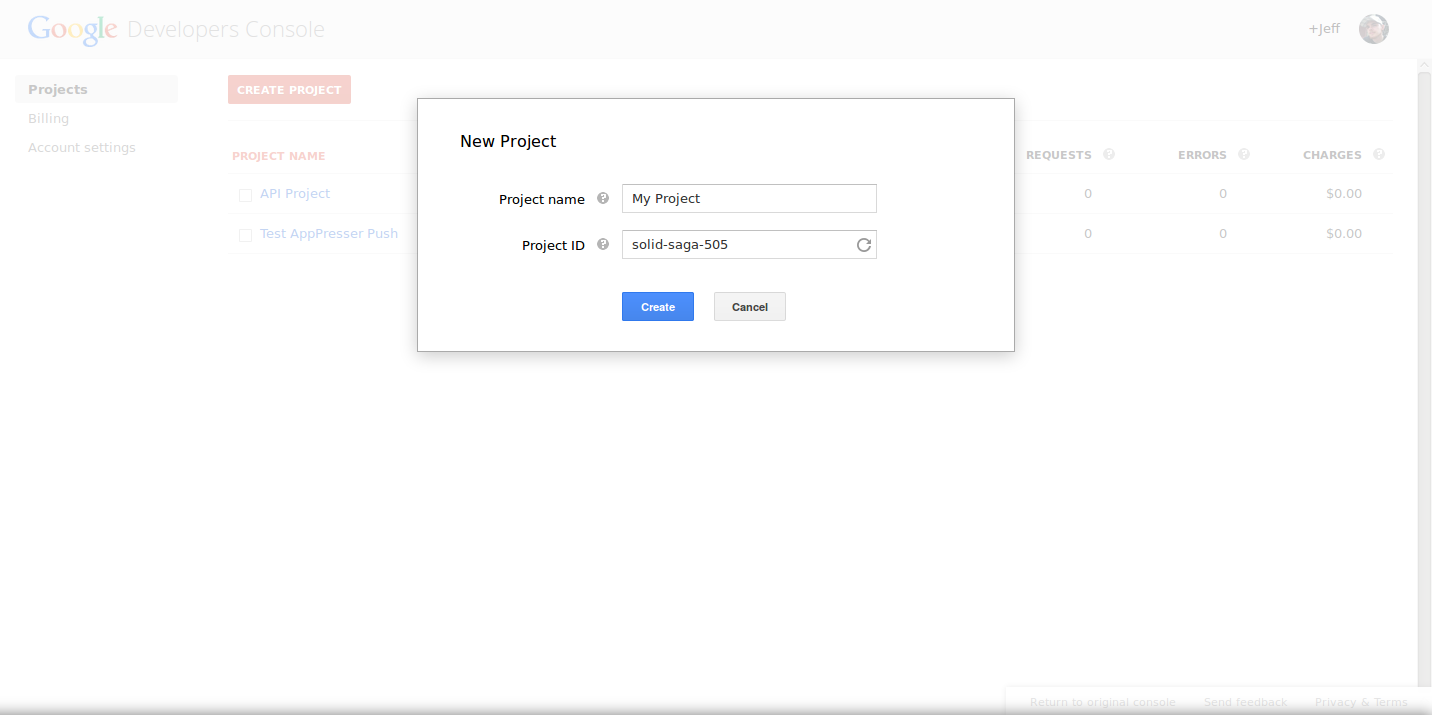
Once inside your developer’s console, create a new project by clicking the Create Project button. If you already have a project associated with the app that you are enabling push notifications on, you may click on that project to edit it.

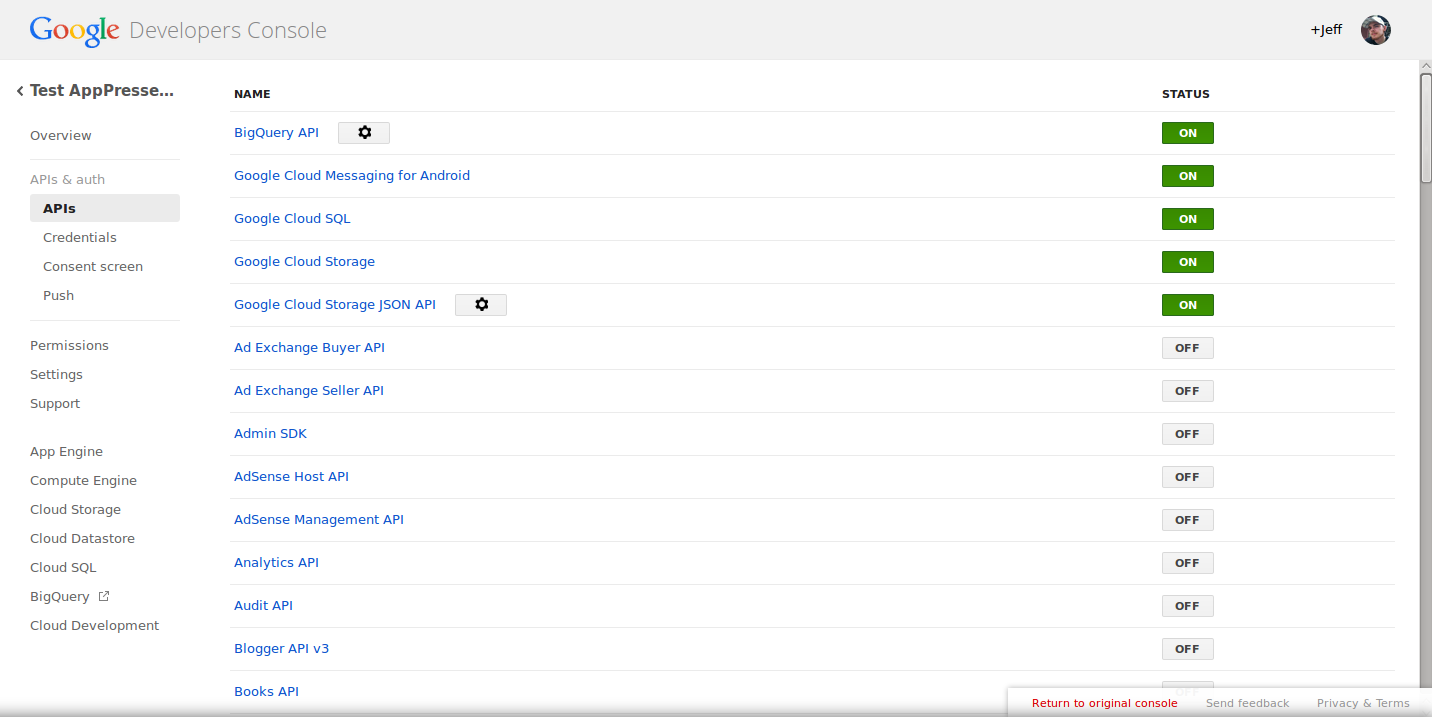
Next, click on APIs. On this page, you will scroll down to Google Cloud Messaging for Android and click the button that says Off to change it to On.

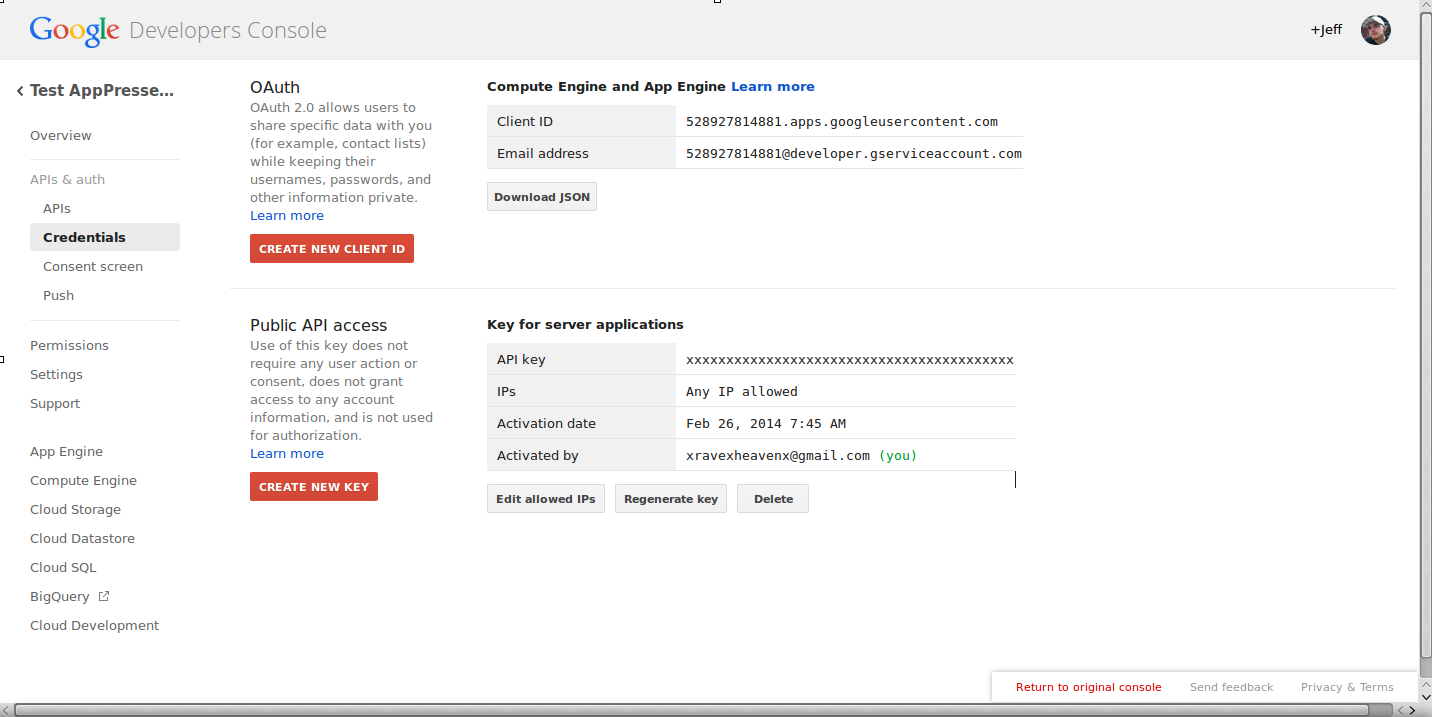
Now that you have Android cloud messaging enabled, you’ll just need an API key to access it. To do so, click on Credentials then click Create New Key under Public API access to generate your API key.
- Be sure to keep this window open as you will need information from your Google developer’s console in later steps.
Configuring Pushwoosh
To send any messages through the AppPresser AppPush extension, you will need to use the Pushwoosh service. In this section, we will show you how to configure Pushwoosh to connect using to your Google API key.

First, you will need a Pushwoosh account. You can obtain a free account on the Pushwoosh website. Once you have created your account, log into it.

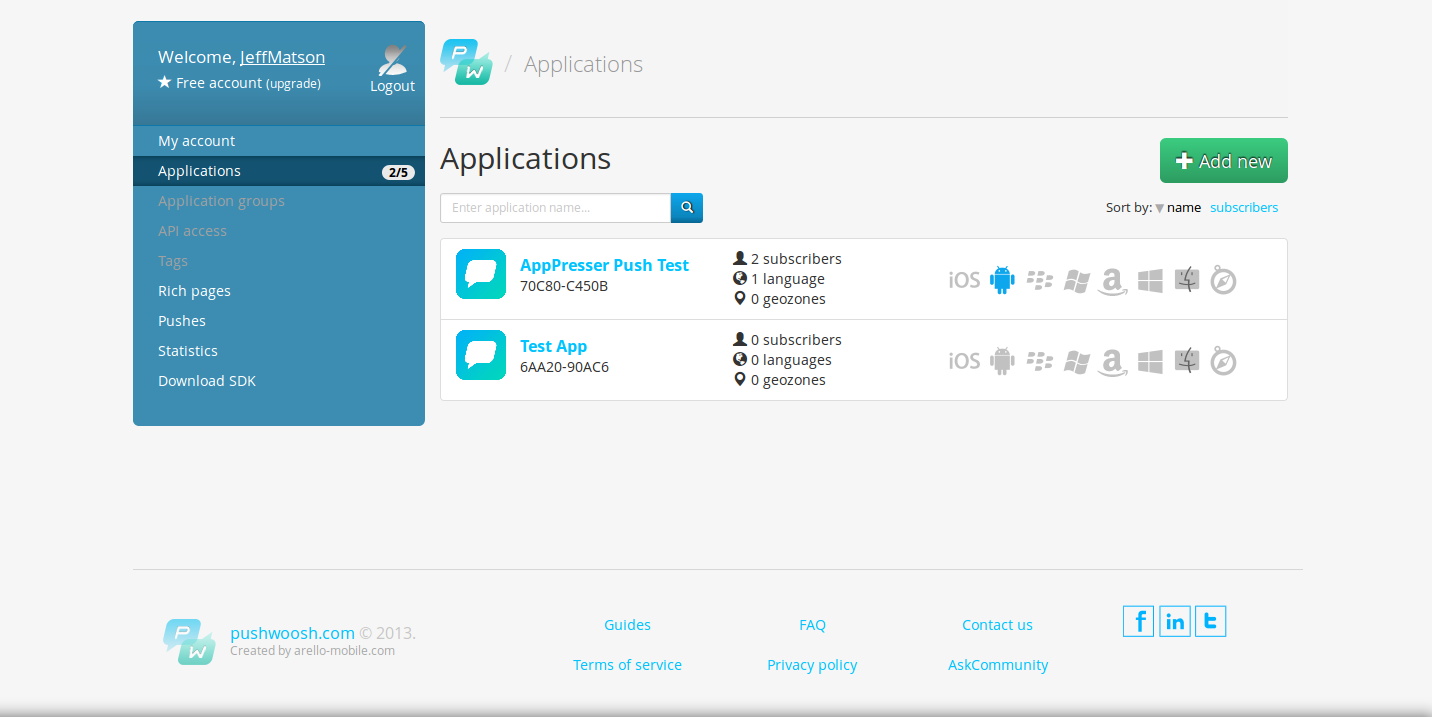
From the Pushwoosh Applications tab, click the big green Add new to create a new push notification app.

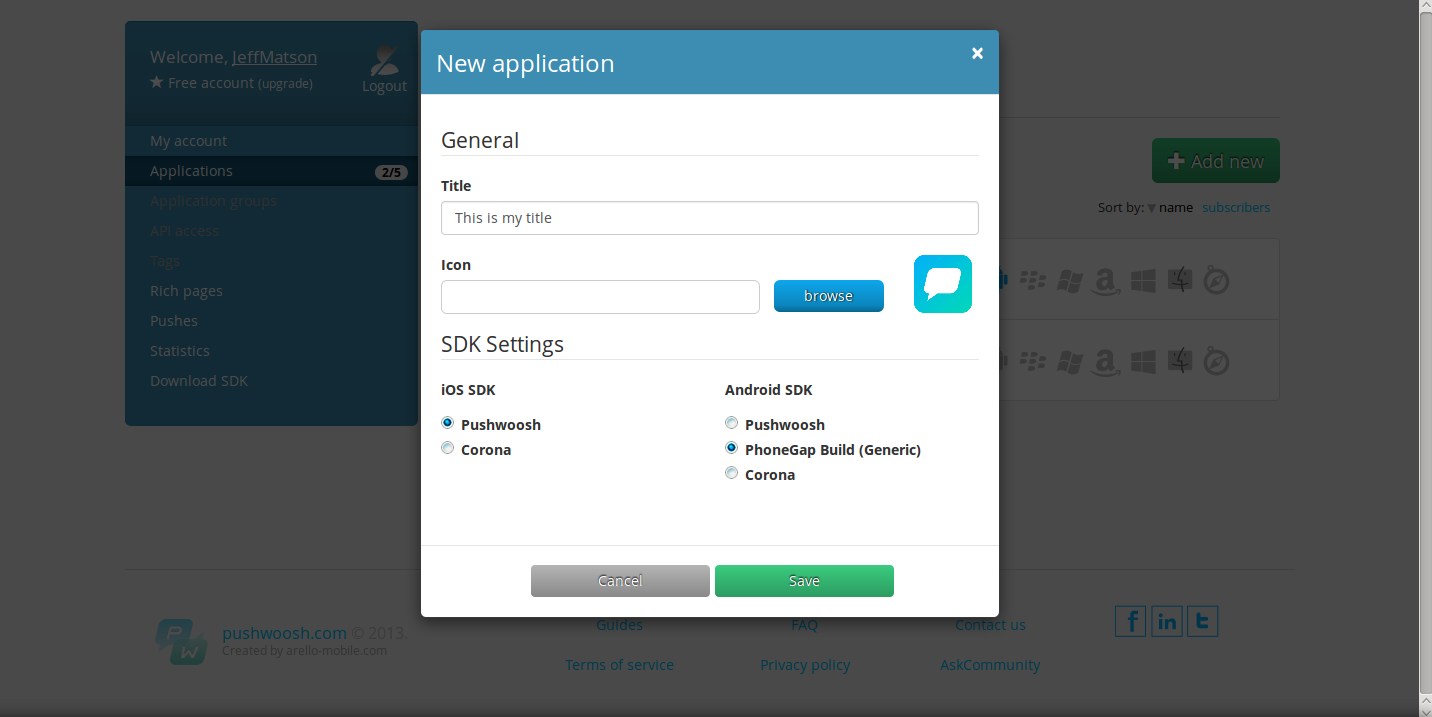
A box will open up when creating your application asking for some information. First, enter your title and a custom icon that will be displayed on your push notifications.
- In the bottom, you will see a few radio buttons to select your SDK. Under Android SDK, select PhoneGap Build (Generic). Once it is selected, click Save.

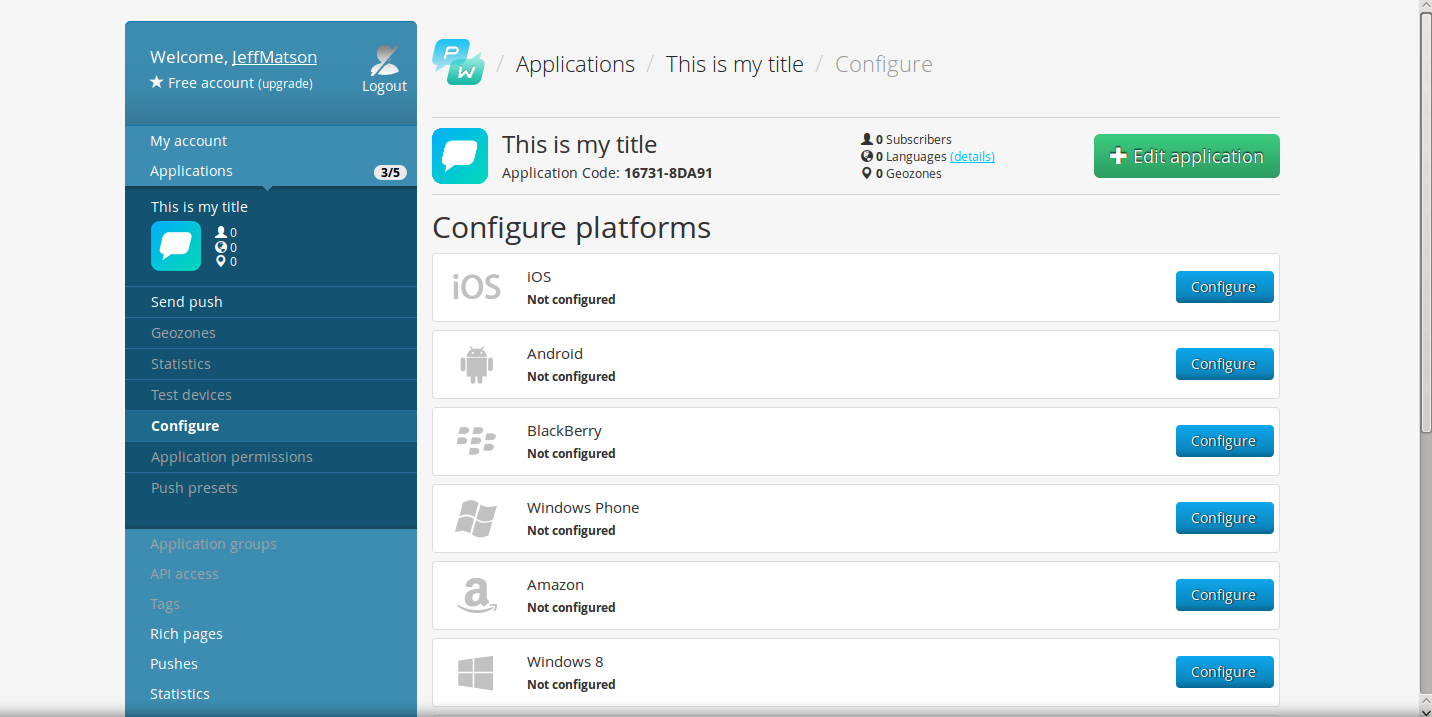
Next, click on Configure on the left side navigation menu, then click Configure next to the Android section.

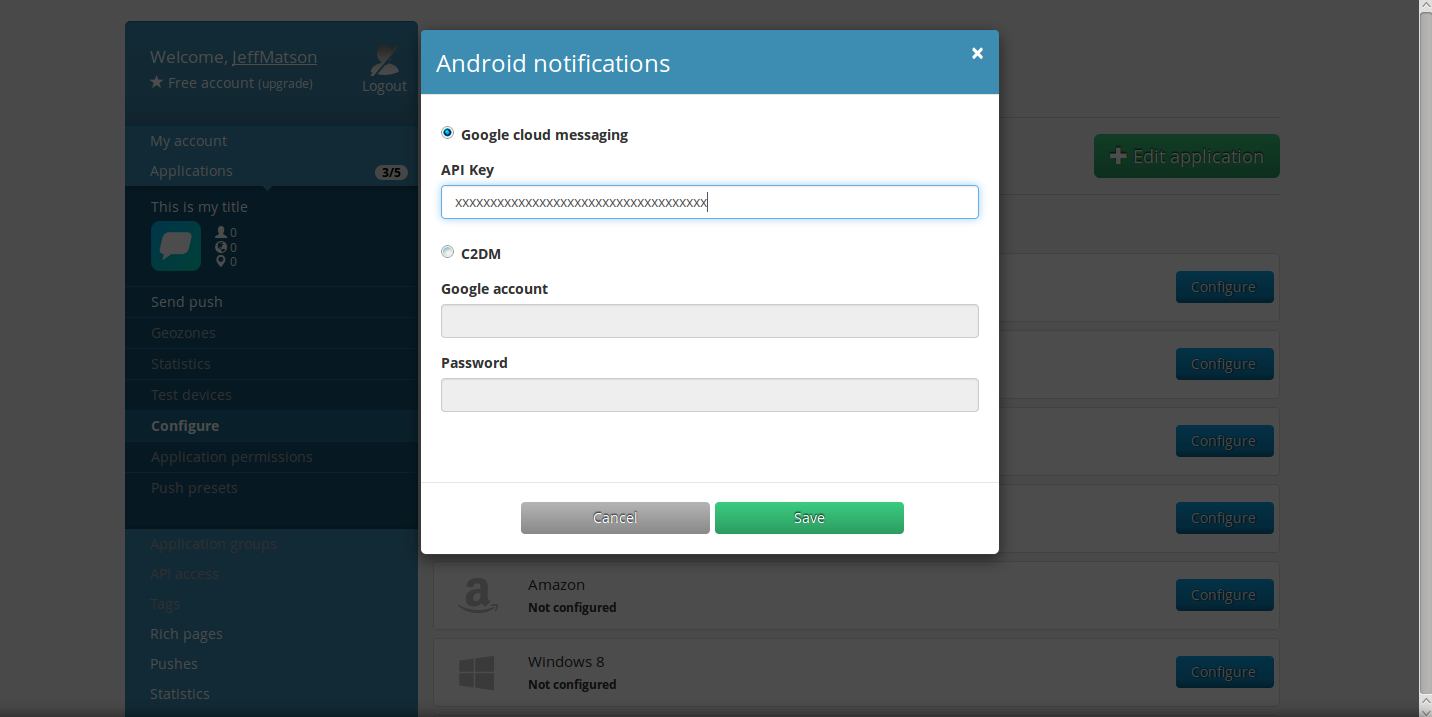
You will then be prompted to enter your API key that you got in the previous steps from the Google developers console. Just in case you don’t still have that window open, you will log into the Google developers console, click on your app, then click on Credentials. Enter your API key from this page, then click Save.
.
<gap:plugin name=”com.phonegap.plugins.pushplugin” />
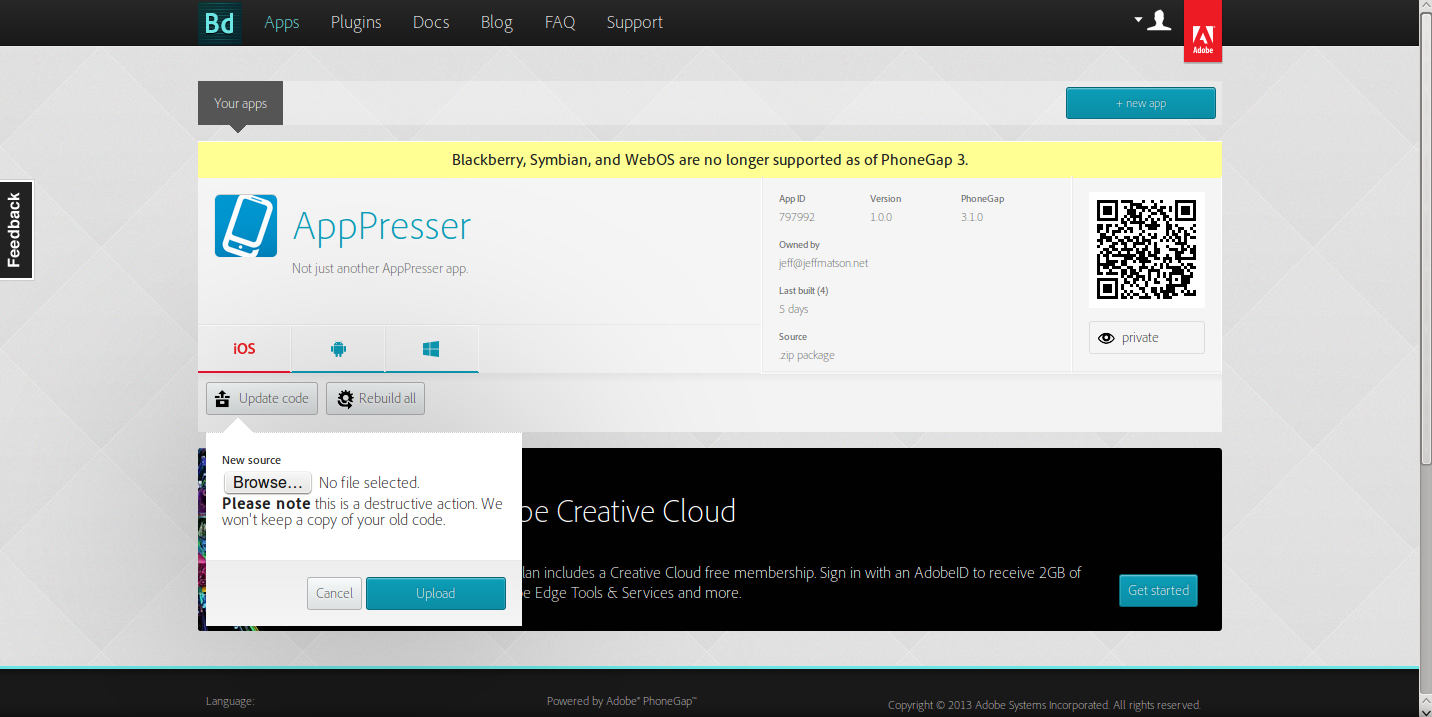
Just as any other typical PhoneGap build, create a zip file out of your PhoneGap files, then visit your app on the PhoneGap website and click the Update code button to begin rebuilding your app. If you are not familiar with building your app in PhoneGap, take a look at the Building your Android or iPhone app with AppPresser article.
Sending push notifications
Sending push notifications from WordPress
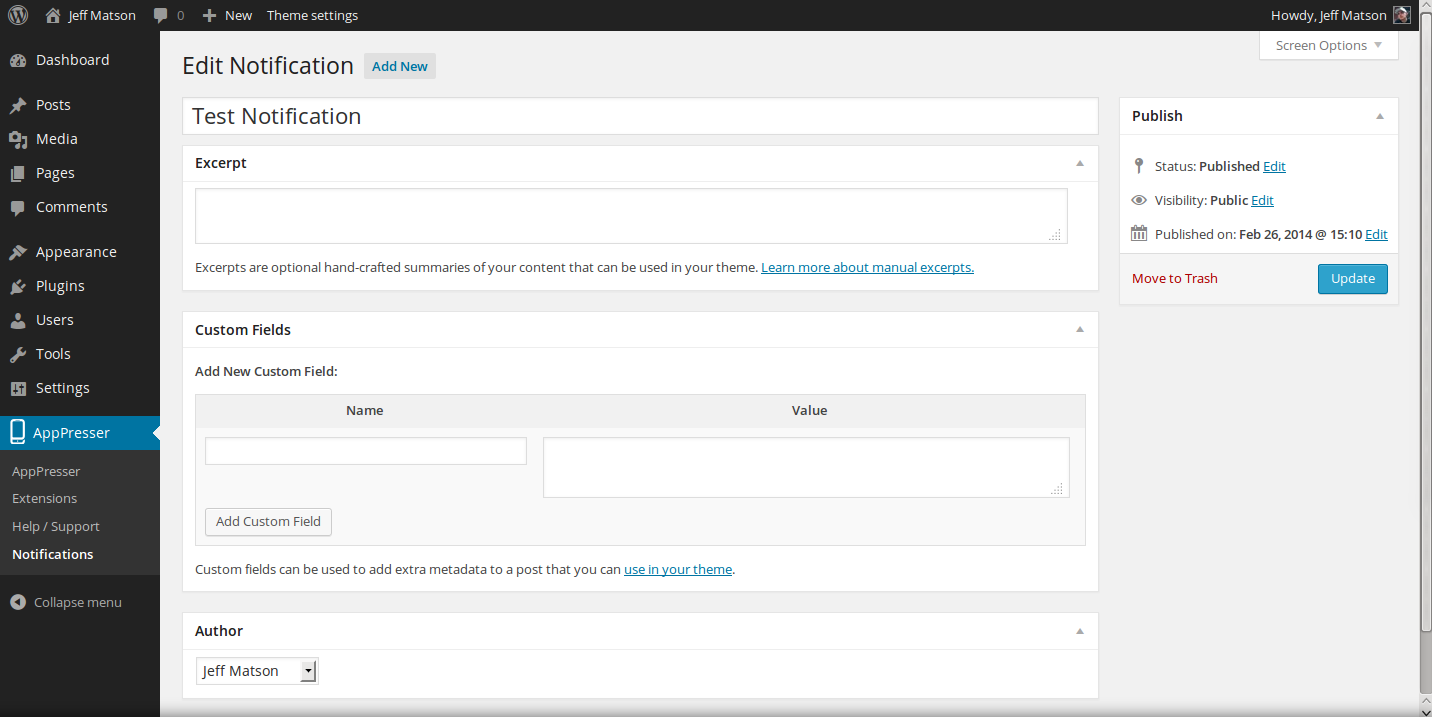
If you have a premium Pushwoosh account, you can set WordPress to automatically send push notifications, or manually send them directly from your WordPress admin dashboard. Depending on your settings in place for AppPush, you push notifications will automatically be sent when a new post or page is created. Push notifications may also be sent by hovering over AppPresser, then clicking on Notifications on the left side menu bar.
Sending push notifications from Pushwoosh
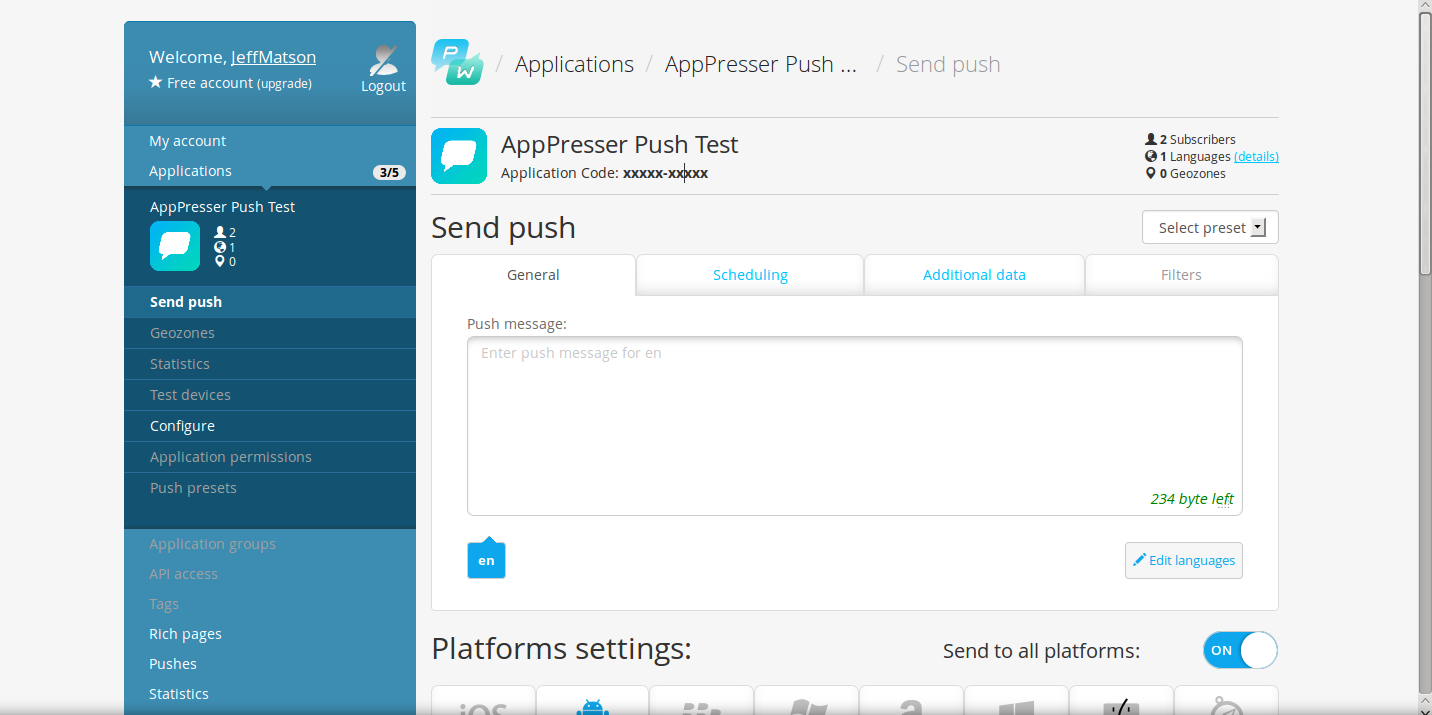
If you have a free account, your only option to send push notifications is to do so from the Pushwoosh dashboard. To do so, log into your Pushwoosh dashboard, and click on the application that you created earlier. Here, you will see a text box. Enter your text to send within your push notification, then scroll down to the bottom of the page and click on Woosh!. Your push notification will then be sent to all users of your app.
hi
thanks for your great article , i actually tested many of website to create android and iPhone app for
my WordPress blog , most of them are getting error and iPhone store rejected my apps , but
with this website https://goo.gl/ILJPsF everything thing was fine , they publish the app in google
play and iPhone store for free and their app are great , so thanks again for sharing
all this great info
hope that help you
I can’t seem to get the notification from my app. any solution? all the credentials are correct, but in my admin panel, there is a notification that says “appresser directory is not writable”.. now I already changed the chmod config in my ftp but still it doesn’t work. I cannot see this notification menu in my admin panel too. please help!!
That error is definitely specific; the directory must not have the correct permissions. In what way did you change the permissions? Are you sure they have the right user, group specifications?
Hi, I read the documentation of AppPresser and they say that works with Android 4.x.x and maybe with lower versions but they don’t give support. I tried it with Android 3.x.x and didn’t work… But instead of following this tutorial (that works fine with Android 4.x.x and iOS) I integrated Pusshwoosh like a common Phonegapbuild app, thanks to this sample: https://github.com/Pushwoosh/phonegap-3-sample-app/blob/master/www/index.html
The main difference is that I didn’t put this on the index.html:
<script type="text/javascript">window.location = 'https://www.somesite.com/?appp=1';</script>Instead of that, I put it in index.js and inside the function initPushwoosh, and it looks like this:
function initPushwoosh() {var pushNotification = window.plugins.pushNotification;if (device.platform == "Android") {registerPushwooshAndroid();}if (device.platform == "iPhone" || device.platform == "iOS") {registerPushwooshIOS();}window.location = 'https://www.somesite.com/?appp=1';}I did this because if I let the window.location in the index.html, Pushwoosh don’t initialize. And is important to mention that I have to downgrade Phonegap to 3.5.0 and Pushwoosh plugin to 3.0.2 because it was not working with Phonegap 3.6.3 and Pushwoosh 3.4.1 plugin (but is a problem that I also had with other aplication that is not using AppP resser and WordPress, it’s maybe an issue with the recent Pushwoosh update).
I don’t know if is a nice solution, but it worked in my problem of get the AppPush works on Android 3.x.x and lower. Ah!, it also work the notifications of the admin panel on WordPress. But I will keep testing.
Thanks!
Nice article, but, do you know what Android versions are supported?
Hello ramsaa,
I do believe it supports up to KitKat, though we have not tested on 4.4.4 as of yet. You may want to try the AppPresser support forums for exact version support.
Kindest Regards,
Scott M
Geozones are not possible at this time unfortunately, even though Pushwoosh allows them. It is a limitation partially due to Phonegap. We are looking into adding these, but I don’t have a timeline or anything yet.
I am wondering if I using AppPresser ,is it able to sending Geozones Location -based services notification ? I have googled and found Pushwoosh provide Geozones push notification is for platinum member. If I joining AppPresser and also joing Pushwoosh pretinum member both ?
Thanks
Cole
AppPresser licenses are completely seperate from PushWoosh so if PushWoosh requires an additional license to do so, you would need to purchase it to add the additional geozones functionality.
Hi, I have joined a company where most of the websites of clients have been built in wordpress. Like two websites have been built using wordpress plugins like woocommerce and buddypress. Now clients require native mobile app for these wordpress website. I mean to say that mobile app should be sync with app. We have googled and found apppresser. The first thing is that is is very expensive. Now I just want to know that does apppresser really convert existing wordpress website into mobile app. Please respond me soon..
AppPresser is a full framework that will allow you to create a full native app using WordPress. It can be a bit pricy but in my opinion, is completely worth it if you are creating mobile applications and would like to use WordPress to do so.
Okay, well I’ve been taking a look at https://github.com/hazemhagrass/push-parse, think I’ll give that a shot. I’m mainly interested in automated push messages using zapier etc. Thanks for the quick reply!
Would it be possible to replace the pushwoosh platform with something like parse.com its pushservices? They’ve got a free API available and pushwoosh is starting at $49/month for an api..
Unfortunately, due to how the push notifications extension is written, you would need quite a bit of code changes to be able to do so. PushWoosh does however have free accounts for up to 1,000,000 devices and 5 applications.
good morning, thank you very much for your reply, I explain in wordpress is configured correctly, and if you send the push but neither Android nor iOS gets the notification, and from Pushwoosh, apaarece all set correct, but do not reach a delivery is made.
In Pushwoosh interface, is correct, but fail or Android or iOS notifications in Pushwoosh, subscriber leaves the counter to 0.’s As if the app had no phone.
It appears that something is not correct in either your app build or within the AppPush extension. As I cannot make any changes or view your exact configuration in this plugin forum, I recommend contacting the AppPresser support for more information. The issue does appear to be somewhere within your communication between the phone/WordPress and the PushWoosh service.
Good morning, I just set everything correctly, both the config.xml, and make rebuilding my app using phonegap and still not working, you add those missing gap as follows, and still can do the costs push notifications.
I need help because I no longer know what else I can do.
Indeed very useful manual.
I await your response.
Best Regards
John.
Could you explain exactly how you are trying to send push notifications? Is it from within WordPress or from the Pushwoosh interface? Be sure that all of your API keys are appropriately set up as well.
Great response!
Thanks for taking the time to check it out! Also, your answer makes complete since. Do you recommend any developers that might be able to whip this task out shortly? Thanks again for you input.
Jon
Hello Jon,
Thanks for your response and your question. We unfortunately cannot recommend a developer to you other than the Appresser developer as a suggestion for making the change. You can write to the developers and see if they are able to accommodate your request.
Regards,
Arnel C.
Thanks for your great article! I am about to start developing my app but i was wonfering if there is an affective way to build a notification menu to turn push notification categories on and off by the app users? Would greatly appreciate any suggestions!
Hello Jonathan, and thanks for the comment.
I did some searching around and don’t see any plugins or scripts that take advantage of the ability to turn on/off notification categories for your app.
But if you are using AppPresser with the AppPush plugin as described in this article, there is the ability to use their notifications custom post type from within WordPress. You could possibly create an extra database field for all of your WordPress users with an option for push notifications to be turned on or off, then in your app allow users to modify this database setting.
Then you could either modify, or create your own plugin copy with an if statement placed right above the code that sends out the notifications to check your database entries and then only push notifications to the users that have it set to on.
The same principle could apply to maintaining other database entries such as if the user only wanted to be notified for certain categories they’ve selected or something like that.
Please let us know if you had any other questions at all!
– Jacob