When you are creating a page, often you will want to add an picture. In this tutorial we will show you how to add an Image to a page in Mambo.
- Upload the image you want to add to the page using FTP. If you are not familiar with the directory structure, I recommend reading this article: What directory should I put my files in?
- Login to the Admin Section for Mambo.
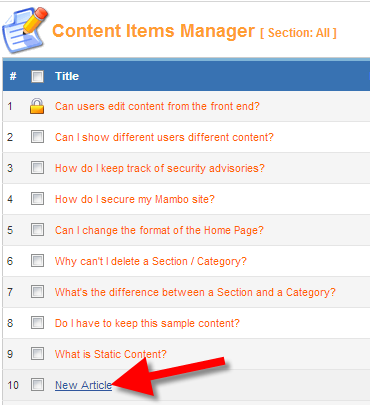
- Choose the page you want to add the image to, by rolling your mouse over Content and clicking All Content Items.
- Click the name of the article that you want to add an image to. In my tests I am choosing a page called New Article.
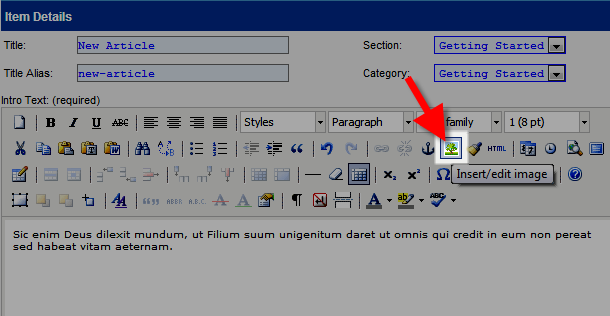
- When the article opens, click in the large field the general area where you want the image located. Then, click the Insert / edit image button.
- An Insert/edit image box will popup. In the image URL field enter the address for the image you uploaded in step 1.
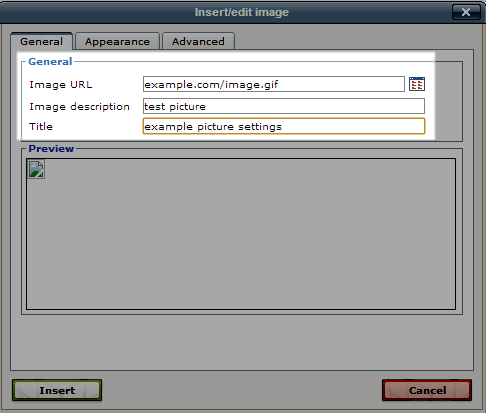
Then click the Insert button. You will then see the image in the content field. You can click the image and use the formatting tools on top if you want to center, or align right, etc.

- Click the Save button.


Congratulations, now you know how to add an image to a page in Mambo!