Instead of disabling the favicon on your Drupal 7 theme, you may choose to switch out the stock favicon with your own custom favicon. This article will show you how to do this in the Global Settings. Enabling the Drupal 7 global settings to allow you to use your custom favicon is simple to do with the following steps.
Setting up a custom favicon in Drupal 7:
- Log into your Drupal 7 Admin panel.
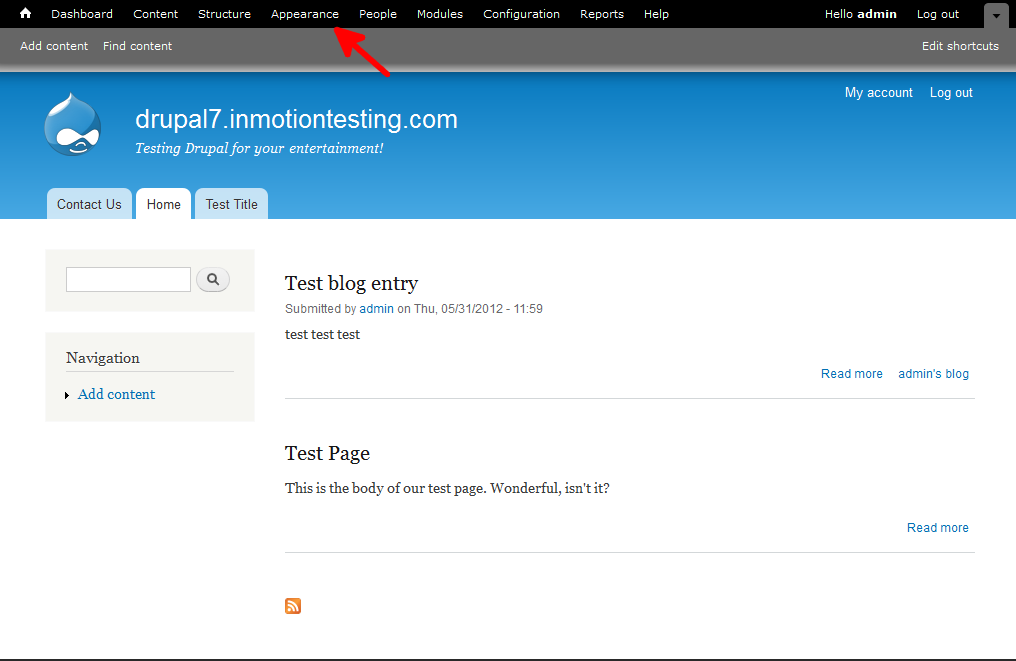
- Using the top menu area, click on the Appearance option.

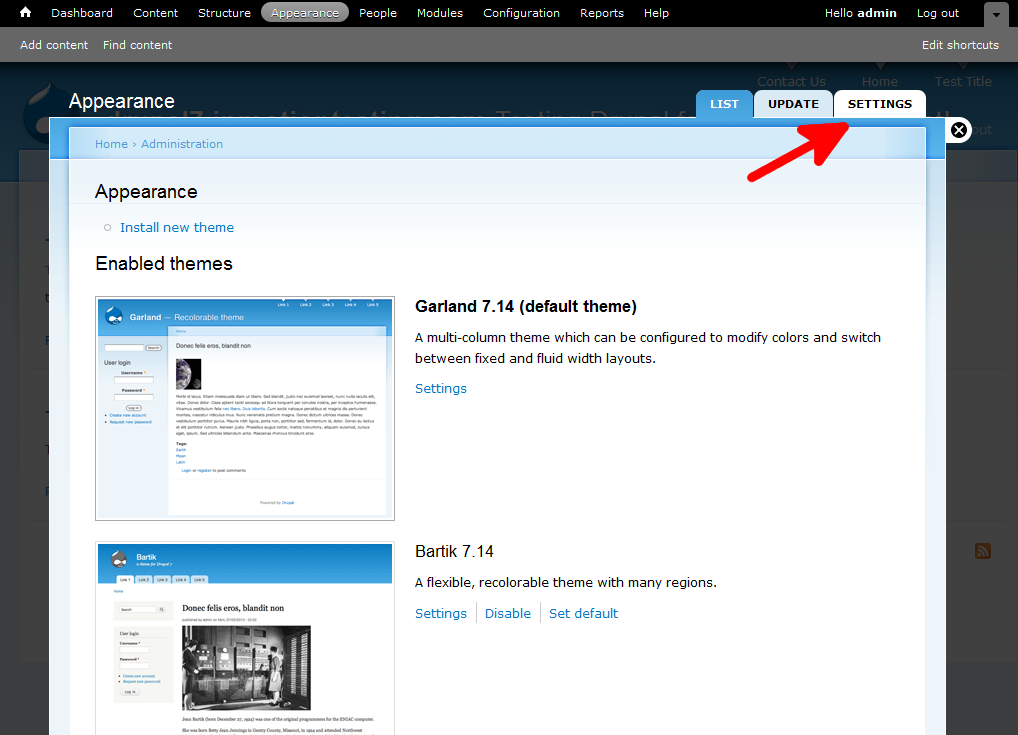
- This will bring up the themes page where it lists all themes installed within Drupal 7. Locate the Settings tab at the upper right corner of the screen and click it.

- This brings you to the main Appearance page. You will see Global Settings followed by the name of all enabled themes as a top menu bar. Be sure you are set to Global Settings by clicking on the label. You will then need to locate the Shortcut Icon settings section. Uncheck the box labeled Use the default shortcut icon and two new fields will appear. These are Path to custom icon and Upload icon. Use the Browse button and upload your favicon image. (It will appear in the Path field after saving)
Note that not all themes support the global settings. If that is the case for your theme, simply choose the theme name at the top instead of Global Settings to go to the settings for that particular theme. Then you willl be able to turn off the logo for that theme.
- Click on the Save Configuration button at the bottom of the page to save the change.
Before After 

Now you have successfully added a custom favicon in Drupal 7!


Thanks for the this!