The WooCommerce plugin for WordPress is quickly becoming one of the most popular ways to manage an eCommerce business. Due to this, we are seeing many people migrating to WooCommerce from other eCommerce platforms. In this guide, we will go over some of the best options for moving your online store over to WooCommerce.
Topics Include:
- Migrating from Shopify to WooCommerce
- Migrating from BigCommerce to WooCommerce
- Migrating from Volusion to WooCommerce
- Migrating from OpenCart to WooCommerce
- Migrating from Magento to WooCommerce
Migrating from Shopify to WooCommerce
When migrating from Shopify to WooCommerce, you can perform a manual export and import of the products or use a 3rd party plugin.
Manual Migration
With a manual migration you will need to export all your products from Shopify, then copy them into a spreadsheet that is compatible with WooCommerce. You can then import all of the products at one time. Migrating the orders and customers will be a similar process. Here are links to the official guides.
- Exporting Products from Shopify
- Importing Products in WooCommerce
- Export Shopify orders to a CSV file
- Import Orders in WooCommerce
- Exporting Customers in Shopify
- Import Customers in WooCommerce
Migration Plugin
Another option for migrating from Shopify to WooCommerce is with the popular Cart2Cart plugin. It includes a free limited demo migration or you can pay $69 to migrate everything.
Migrating from BigCommerce to WooCommerce
You can manually export your products, orders, and customers from BigCommerce, then import them into your WooCommerce Store. Another option is to use the popular Cart2Cart plugin to automatically migrate it for you.
Manual Migration
- Exporting Products in BigCommerce
- Importing Products in WooCommerce
- Exporting Orders in BigCommerce
- Import Orders in WooCommerce
- Exporting Customers in BigCommerce
- Import Customers in WooCommerce
Migration Plugin
Try a free demo migration or purchase the plugin for $69 to migrate your entire BigCommerce store.
Cart2Cart: BigCommerce to WooCommerce Migration
Migrating from Volusion to WooCommerce
Similar to the other E-commerce stores, you can manually migrate your customers, products, and orders or use a 3rd party plugin. The Cart2Cart plugin is once again the most popular option for automatically performing this migration.
Manual Migration
- Exporting All Products in Volusion
- Importing Products in WooCommerce
- Orders Export in Volusion
- Import Orders in WooCommerce
- Customers Export in Volusion
- Import Customers in WooCommerce
Migration Plugin
Migrate your whole Volusion store with the Cart2Cart plugin for just $69. You can perform a free demo migration as a test before committing.
Migrating from OpenCart to WooCommerce
In this section, we will show you how to migrate from OpenCart to WooCommerce using Cart2Cart in just a few simple steps.
Depending on the amount of content that you need to migrate, this is a paid service offered by Cart2Cart.
- You will need to have your target installation ready to go. If you do not already have WordPress and WooCommerce installed, you may follow our articles on installing WordPress and WooCommerce.
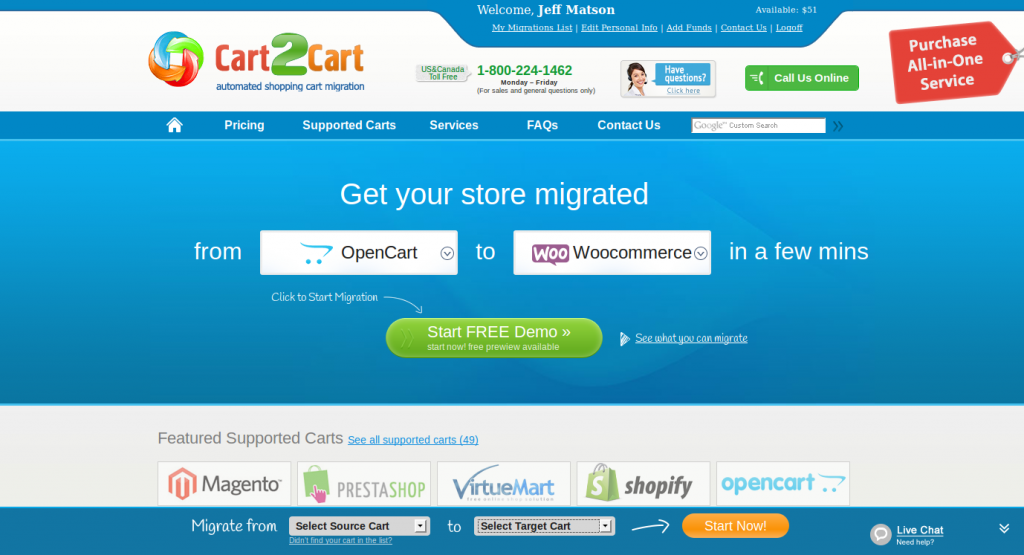
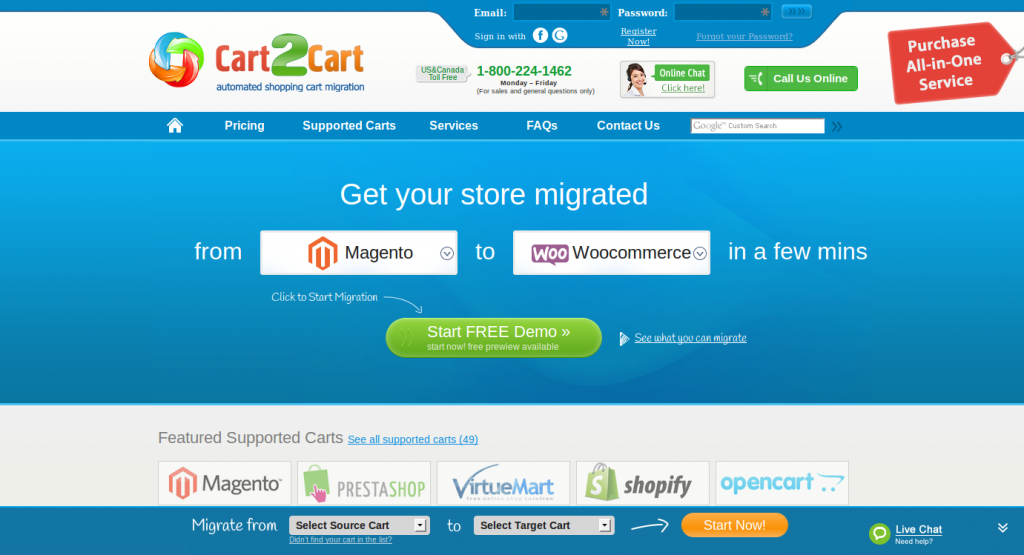
- Next, you will need to visit the Cart2Cart website. On the Cart2Cart site, select OpenCart in the first dropdown, and WooCommerce in the second dropdown. Once both are selected, click Start Free Demo.
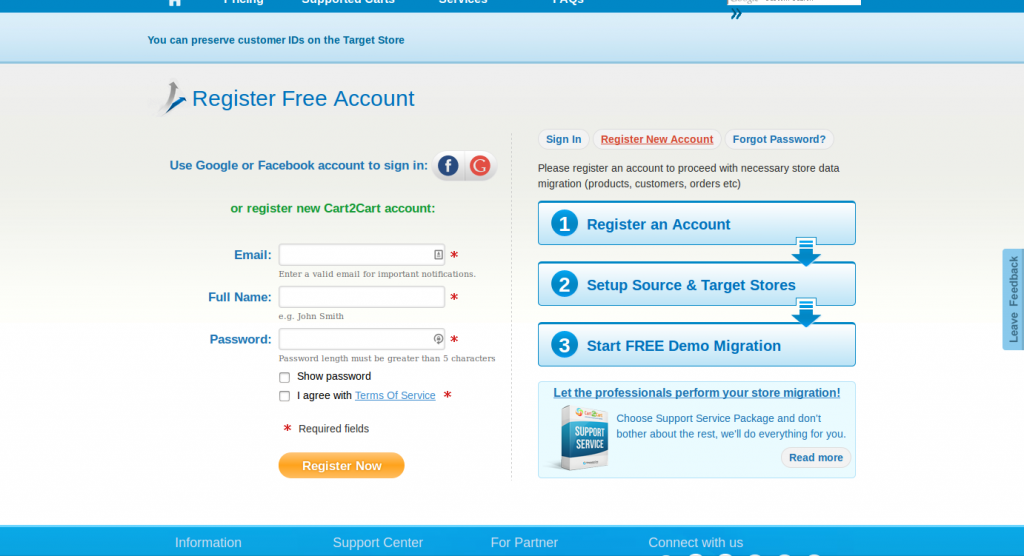
- After clicking the button on the previous page, you’ll be taken to the account registration page. Enter your email, name, and password into the required fields, then select the checkbox stating that you agree to the Terms of Service, and click Register Now.
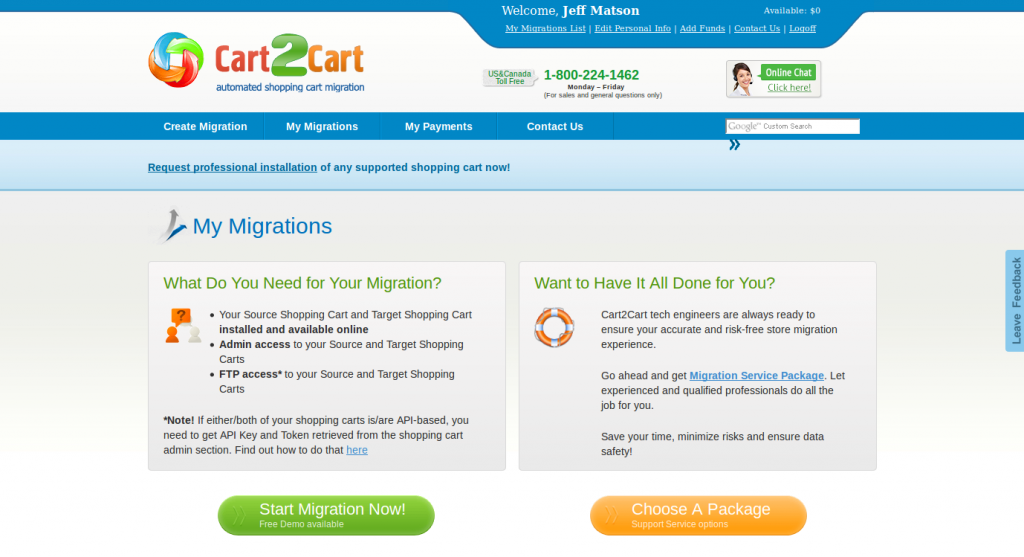
- Once your account is registered, you will be taken to the migrations page. To start your first migration, click the green button that says Start Migration Now!.
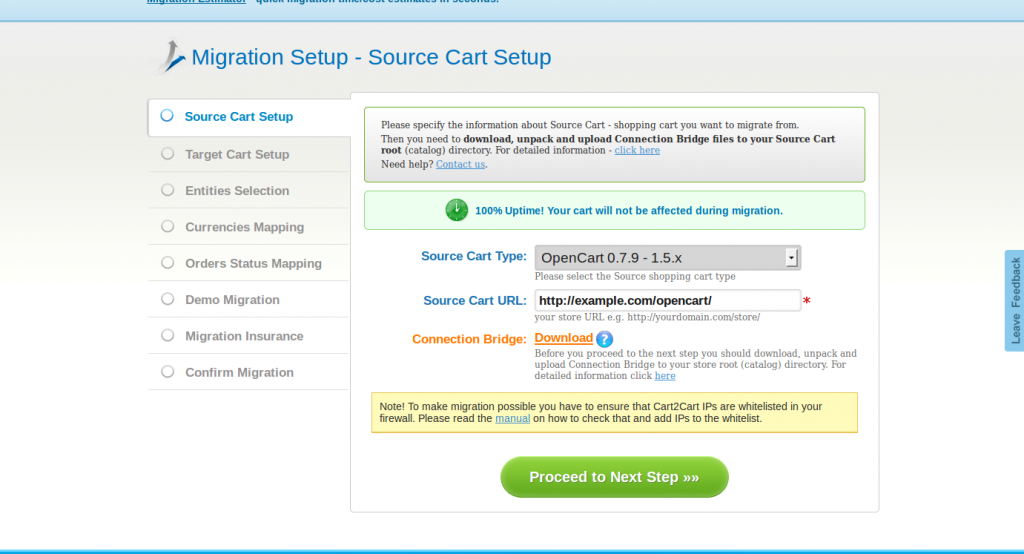
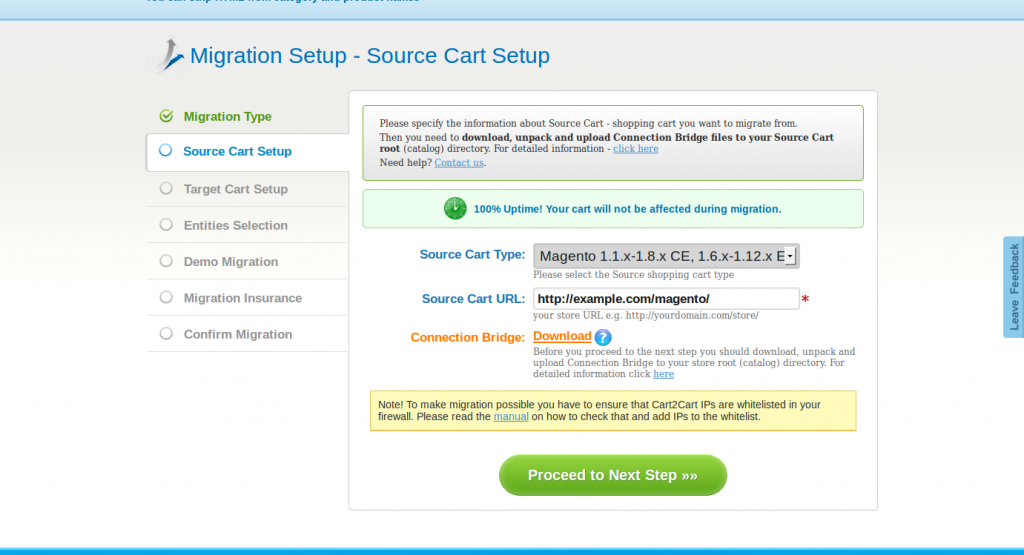
- You should now be on the Source Cart Setup page. On this page, there are a few settings to set:
Source Cart Type: In this dropdown, select OpenCart.
Source Cart URL: In this field, enter the URL of your site that is currently running OpenCart.
Before you proceed to the next step, you will also need to set up the Cart2Cart Connection Bridge. To do so, click the link labeled Download and save the zip file. Inside this zip file, there is a folder labeled bridge2cart. You will need to upload this full folder to both your OpenCart and WooCommerce root directories using FTP. - Once all of your settings for the source cart are defined and the connection bridge is installed, click the Proceed to Next Step button.
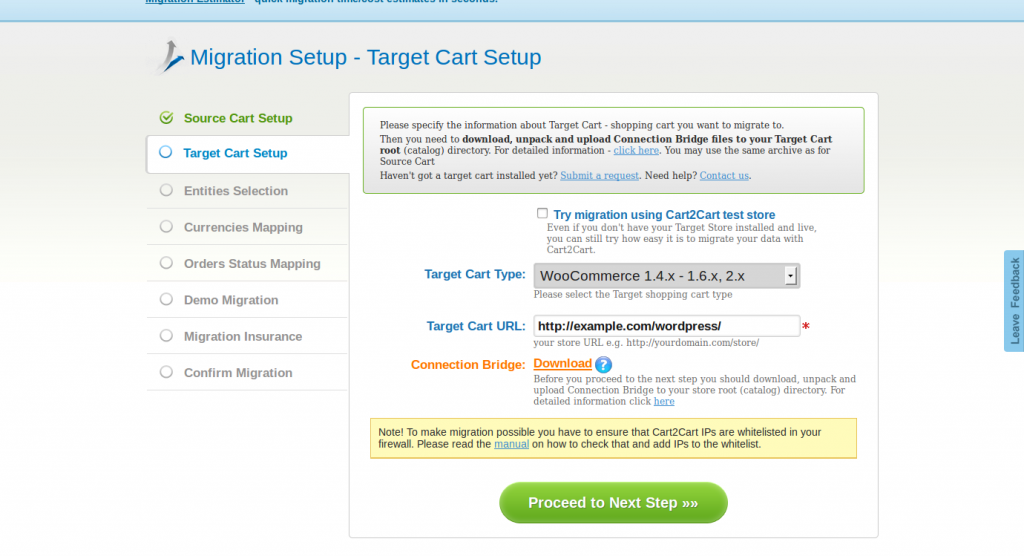
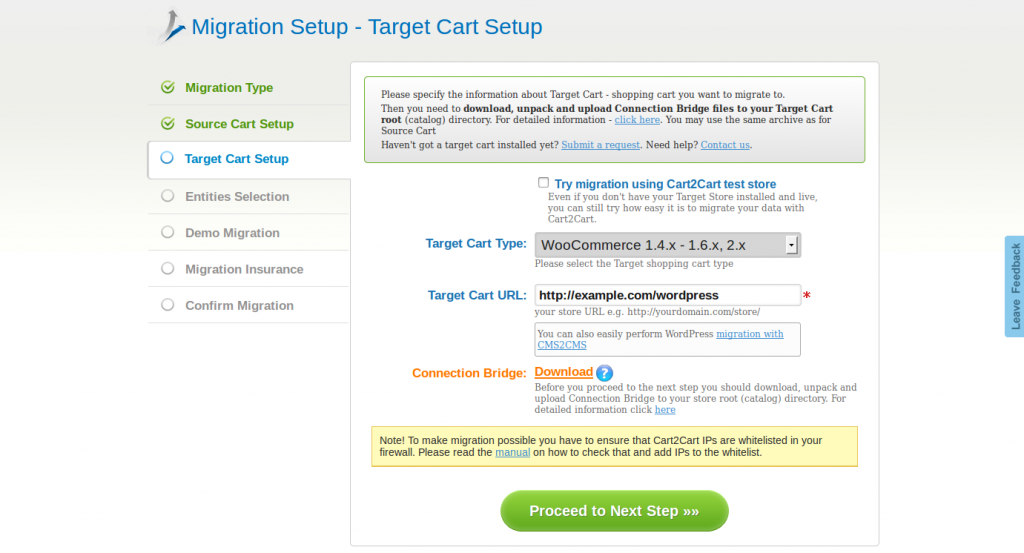
- You will now be presented with the Target Cart Setup page. On this page, enter the details for your WooCommerce cart and click on Proceed to Next Step.
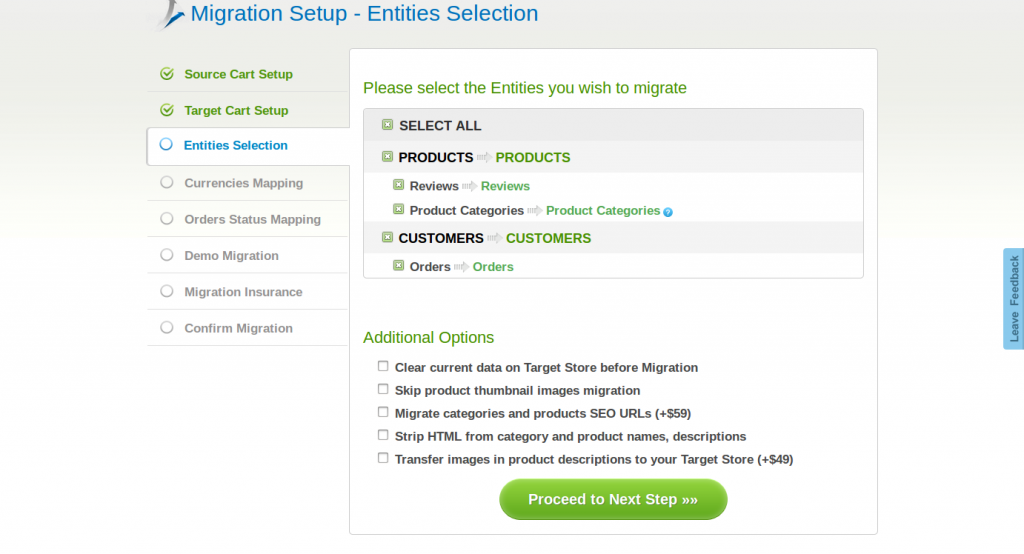
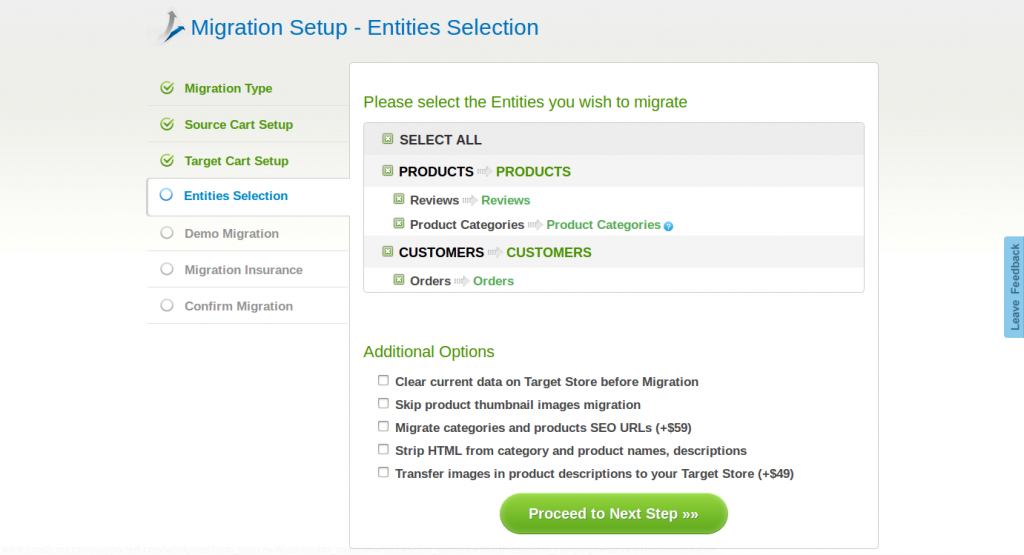
- On this next page, you will be selecting the specific data that you want migrated from OpenCart to WooCommerce. There is also an Additional Options section that will allow you to migrate additional items such as your permalinks, or additional images that may be within your product descriptions. Once complete, click the button labeled Proceed to Next Step.
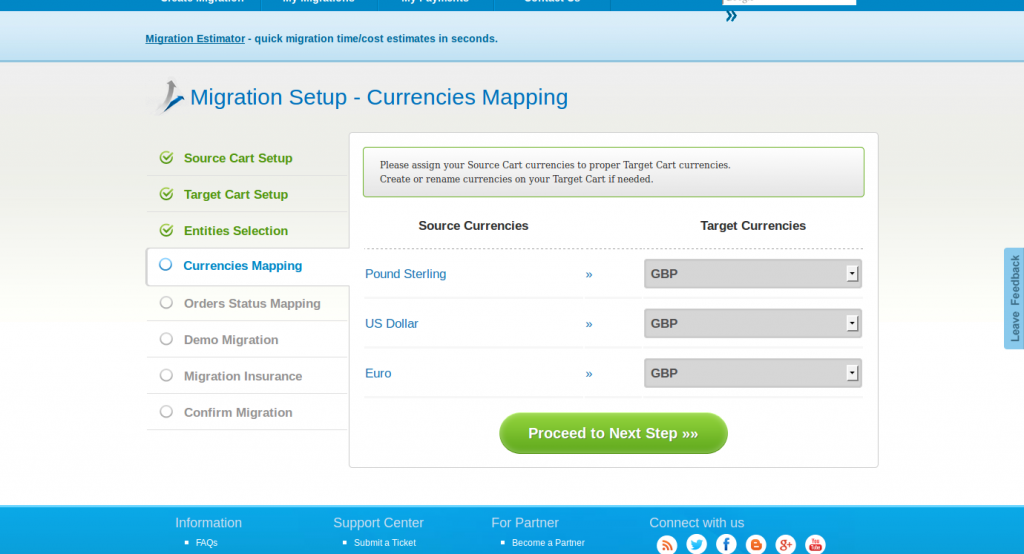
- Next, you will need to map your currencies from OpenCart to WooCommerce. On the left side, you will see currencies from your OpenCart site that you are migrating from, and on the right you will be able to select the currencies that are in use on your WooCommerce site that you are migrating to. Select your currency and click Proceed to Next Step.
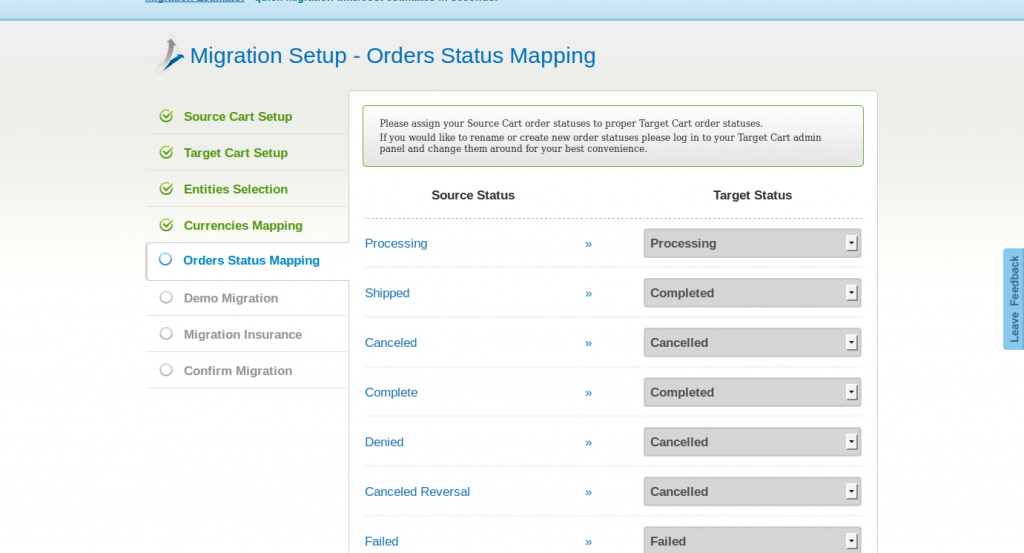
- Just as we mapped the currencies in the previous step, we will now need to map the order status of existing orders. To do so, review the order statuses that are in the list to the left and use the dropdown boxes to select the new status that they will be on your WooCommerce site once the migration has finished. Once all of your order statuses are set, click the button labeled Proceed to Next Step.
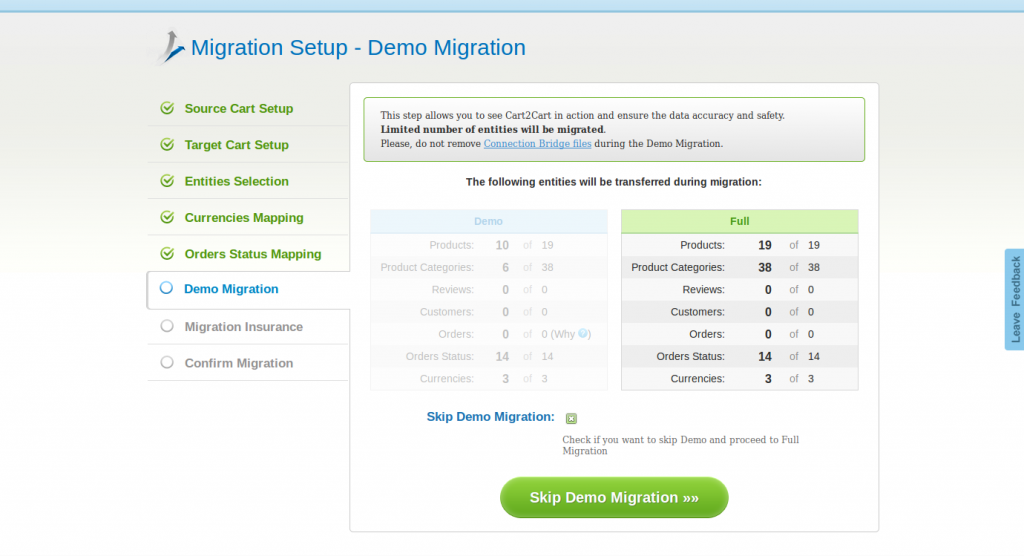
- Your OpenCart site is almost ready to migrate to WooCommerce. You should now be on the Demo Migration page in which you will be presented with the option to continue with the demo migration, or purchase a full migration of all information. As you can see, the demo migration is made solely for demonstration purposes and you will most likely need a full migration service. If you want to start the demo migration to test the Cart2Cart service and purchase the full migration at a later time, click the Start Demo Migration button. If you want to migrate the entire OpenCart installation to WooCommerce now, select the checkbox labeled Skip Demo Migration checkbox, and click Skip Demo Migration.
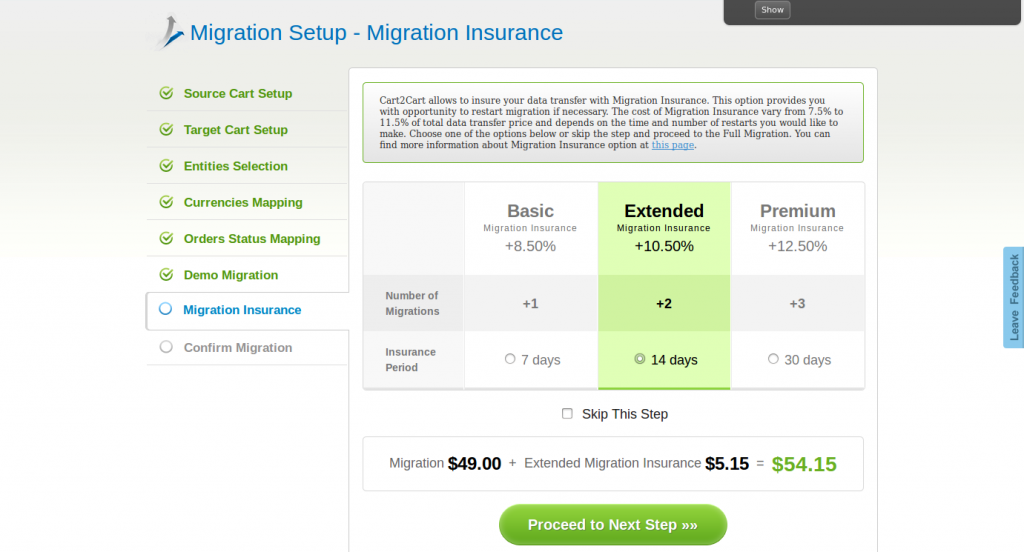
- Next, you will be asked if you want migration insurance. The migration insurance option allows you to complete the migration again at a later date if you need to. On this page, you may either select the migration insurance that you want, or skip the step, then proceed to the next step.
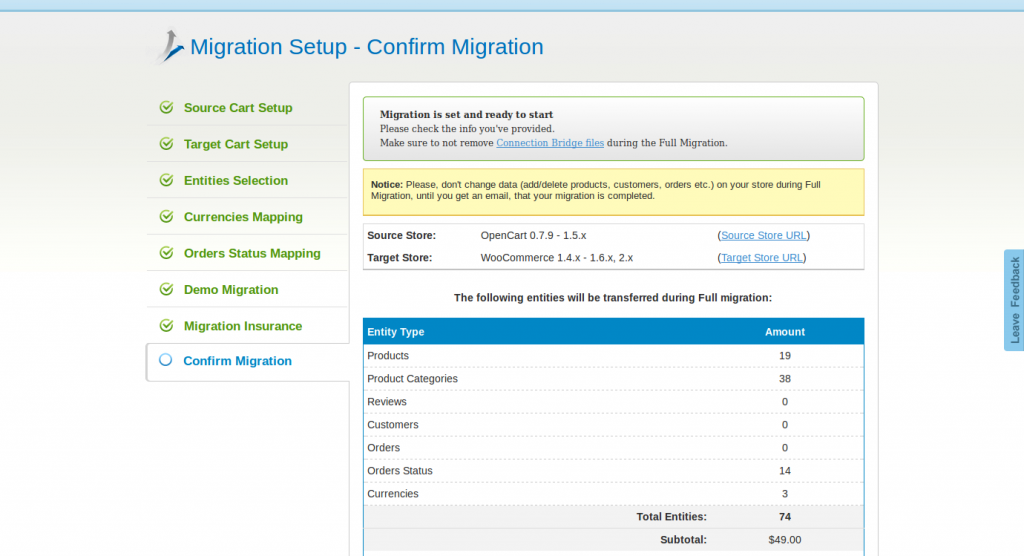
- If you are only doing a demo migration, the migration will begin now. If you are doing a full migration, you will confirm your order on this step. Simply confirm your purchase of your migration package, and continue on to the next step.
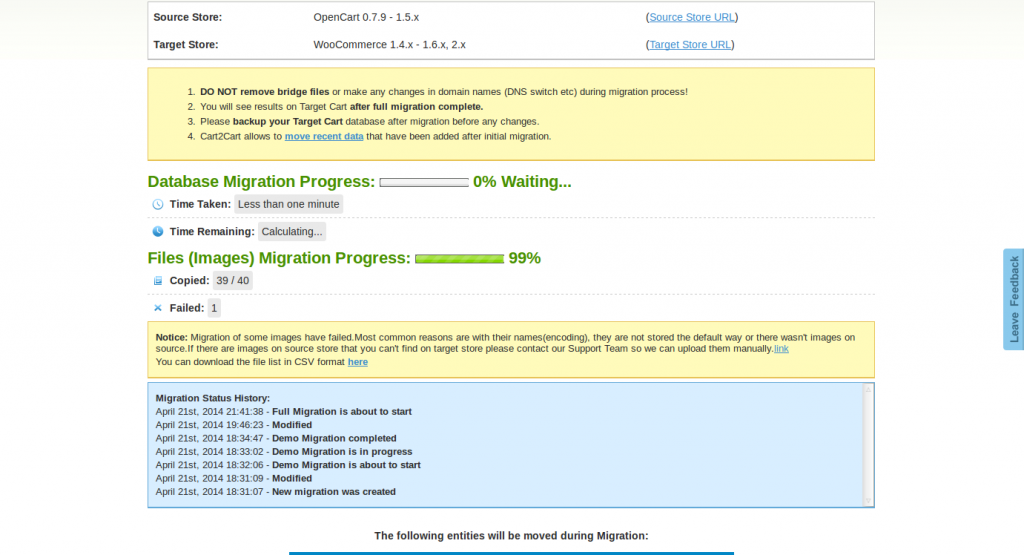
- If you purchased the full migration, your site is now being migrated from OpenCart to WooCommerce. Be sure not to make any changes to the site while the migration is being processed. Once the migration has completed, be sure to log into your WordPress/WooCommerce site to ensure that everything was migrated successfully.

Migrating from Magento to WooCommerce
Migrating from Magento Hosting to WooCommerce can be a daunting task. If done manually, it can take a significant amount of time, but in this section, we will show you how to do it within minutes using the Cart2Cart service mentioned in the previous section. Once finished with our tutorial, all of your product and order data will be seamlessly migrated from your Magento site to your new WooCommerce site.
As before, please note that this is a paid service by Cart2Cart, depending on the amount of content that you need to migrate to WooCommerce.
- You will need to be sure that your target installation of WooCommerce is installed and ready to take the data that it is given from Magento. If you need help installing WordPress or WooCommerce, you may take a look at our articles on installing WordPress and installing WooCommerce.
- To start the migration, you will need to visit the Cart2Cart website. On the Cart2Cart page, select Magento in the first dropdown, and WooCommerce in the second dropdown, then click Start Free Demo.
- Now, you will need to register for a new account. Simply fill out the fields with your email, name, password, and agree to the terms of service, then click Register Now.
- You will then be prompted to create a new migration. Click the button that says Start Migration Now!
- It’s now time to configure your source that you will be migrating from, in this case, your Magento installation. On this page, set your Source Cart Type as Magento, the Source Cart URL as the URL to your Magento installation. You will also see an option to download the Cart2Cart Connection Bridge. Click the Download link to download the zip file, and upload the bridge2cart folder inside it to the root directory of your Magento installation via FTP. While you already have the FTP connection open, upload it to the root directory of your WordPress/WooCommerce installation as well since it will be needed in the next step.
- Next, you’ll need to configure the target cart to migrate the data from Magento to WooCommerce. In this tutorial, since we are migrating from Magento to WooCommerce, we will set the Target Cart Type as WooCommerce. In the Target Cart URL field, enter the full URL to your WordPress/WooCommerce installation. If you did not already do so in the previous step, upload the Connection Bridge to your WordPress/WooCommerce root directory as you did on the Source Cart Setup page. Once complete, click the Proceed to Next Step button.
- On the next screen, you will see a list of items to migrate. Most users will want to migrate all data from Magento to WooCommerce, so click the Select All checkbox. On this page, you may also select additional options such as migrating the SEO URLs or any additional images that may be within your descriptions. Once you have selected everything that you want migrated, click the button that says Proceed to Next Step.
- In the next step you will remap all of your currencies. On the left, you will see the currency from the source site, and on the right will be a dropdown with any available currencies that you currently have set up on your WooCommerce site. Select your currency in the dropdown, and click Proceed to Next Step.
- You should now be on the Orders Status Mapping page. On this page, you will map any order statuses from Magento, to WooCommerce. On the left side, you will see order statuses from Magento, and on the right you will see dropdowns that show various order statuses for WooCommerce. Go through this list and select the appropriate order status that matches the order status on the left. Once complete, click the Proceed to Next Step button.
- On the next step, you will be able to choose whether you want to start a demo migration, or purchase a full migration. If you want to see how the service works and purchase a full migration at a later time, click the button that says Start Demo Migration. If you want to go ahead and purchase the full migration, check the box that says Skip Demo Migration. The green button will then change to say Skip Demo Migration. Click this button to continue with the full migration of your site. If you decided to continue with the demo migration instead, the demo migration will then continue.
- After you have either completed the demo migration, or chosen to continue with the full migration of your Magento site to WooCommerce, you will be prompted to purchase migration insurance from Cart2Cart. If you purchase migration insurance, you will be able to migrate your Magento site to WooCommerce again if you happen to need it in the future. If you want to skip this step, simply select the checkbox labeled Skip This Step. Once your desired option is selected, click Proceed to Next Step.
- On this step, you will be confirming your purchase of the full migration. Depending on the options you have selected and the amount of data being migrated, pricing may vary. Selecting the box that says Start Full Migration immediately after the payment will allow you to immediately continue with the migration. Once your payment is successful, your migration will continue.
- On the next page, you will see the progress of your migration. Be sure to wait for the migration of your Magento to WooCommerce to complete before making any changes to your site. Once finished, your Magento site will be fully migrated to WooCommerce.


Congratulations, you now know how to migrate your online store to WooCommerce!
Improve the performance and security of your WooCommerce site with our new WooCommerce Hosting plans. Get 40x faster speeds for your online store with dedicated resources, server caching, and optimization tools.
![]() High-Performance VPS
High-Performance VPS ![]() 99.99% Uptime
99.99% Uptime ![]() Free SSL & Dedicated IP
Free SSL & Dedicated IP ![]() Advanced Server Caching
Advanced Server Caching
For more information on using WooCommerce for your online store, please see our WooCommerce Education Channel.
