When you’re getting married, one of the tasks that may be on your list is creating a website to represent your blessed event. There are many services or templates that you can purchase to use for your site, but with a little careful planning and effort you can save a lot of money by simply doing it yourself using the Website Creator from InMotion Hosting. Even if you are only a beginner, the Website Creator offers a flexible and scalable system that you can use to create a beautiful website. Additionally, the major advantage to using the Website Creator is that it uses a system built on the WordPress platform. It is simple to use and quick learn. Due its simplicity, you can also very easily delegate the task of maintaining or building the site if needed. Anyone with access to the internet can quickly learn how to work within the proven WordPress environment. Like the planning for your wedding ceremony, some planning and forethought will go a long way in creating a successful website. This article is anyone just getting started in creating a website. The steps below are an introduction to the WordPress Creator to build your website.
Creating a Wedding Website with the Website Creator
EXPECTATIONS! The steps in this article and the following related ones are based on building a simple informational website that will have the ability to provide pages/posts and galleries for display. The Website Creator uses the BoldGrid system to help in content creation built on the WordPress application. WordPress can easily be used to provide more functionality if you wish to move beyond the scope of these tutorials.
First things first – the name of your website
Before you begin building your site you’ll need a few things. First, you need at least an idea of a name for the website. The name is important because it is what people will be using to get to your website. A domain registrar (the service that registers that name) will often a search option that allows you to find a unique name for your site. Keep your website name as succinct as possible. Remember that the website name might have to go onto a printed card with limited space. If you already have a registered website domain name, then you may prefer to simply use a subdomain such as “website.com/ourwedding.” The important thing is that you have some way to identify your website since the domain name is required for the installation of the Website Creator.
Don’t Worry About People Getting to your site
One of the primary concerns I hear from people is, “I don’t want people getting in to my website after registering the website name.” Really, don’t worry about this. First, unless your website has been indexed by a search engine, no one can find it. Also, it’s very easy to simply use a free WordPress plugin (called a maintenance mode plugin) to prevent people from seeing your incomplete site. Also, if you don’t have a hosting plan, you don’t a website yet. So, there is really no need for concern. Your website will be visible only to the people you want to see it when you’re ready.
What is Hosting?
When you have a website, it needs a few basic things – a name (which you now have) and a place for the files to be saved. The service to provide this space is called hosting. You have a wide variety of choice when it comes to selecting a domain register and a hosting service. However, since you’re stepping through this article on how to create your site, we’ll make it easy for you and provide a solution: InMotion Hosting provides a WordPress Hosting.
Worried?
You now have a domain name and a hosting service for your website and you might be getting cold feet or wondering what you’re getting yourself into. Let me reassure you that it will be okay. With some good planning you’ll find the process is easier than you might think. Also, when you subscribe to the Website Creator plan it comes with help! If you find yourself stuck, you can contact our InMotion Website design team with questions Monday-Friday, 900 AM – 600 PM.
Planning your Website
Most people like to jump right into the fray and start playing with the features of BoldGrid. However, the best thing you can do when you build a website is to carefully plan what you’re going to create for people to view. If you want inspiration, go to your favorite search engine and look for “wedding sites made with WordPress” and you’ll find thousands of examples. First, you’ll need to decide how you’re going to do your planning. Some people like the analog approach of pen/pencil and paper, or you might want to use some application. No matter your method, start with these first considerations ( I used Google Slides in the example below):
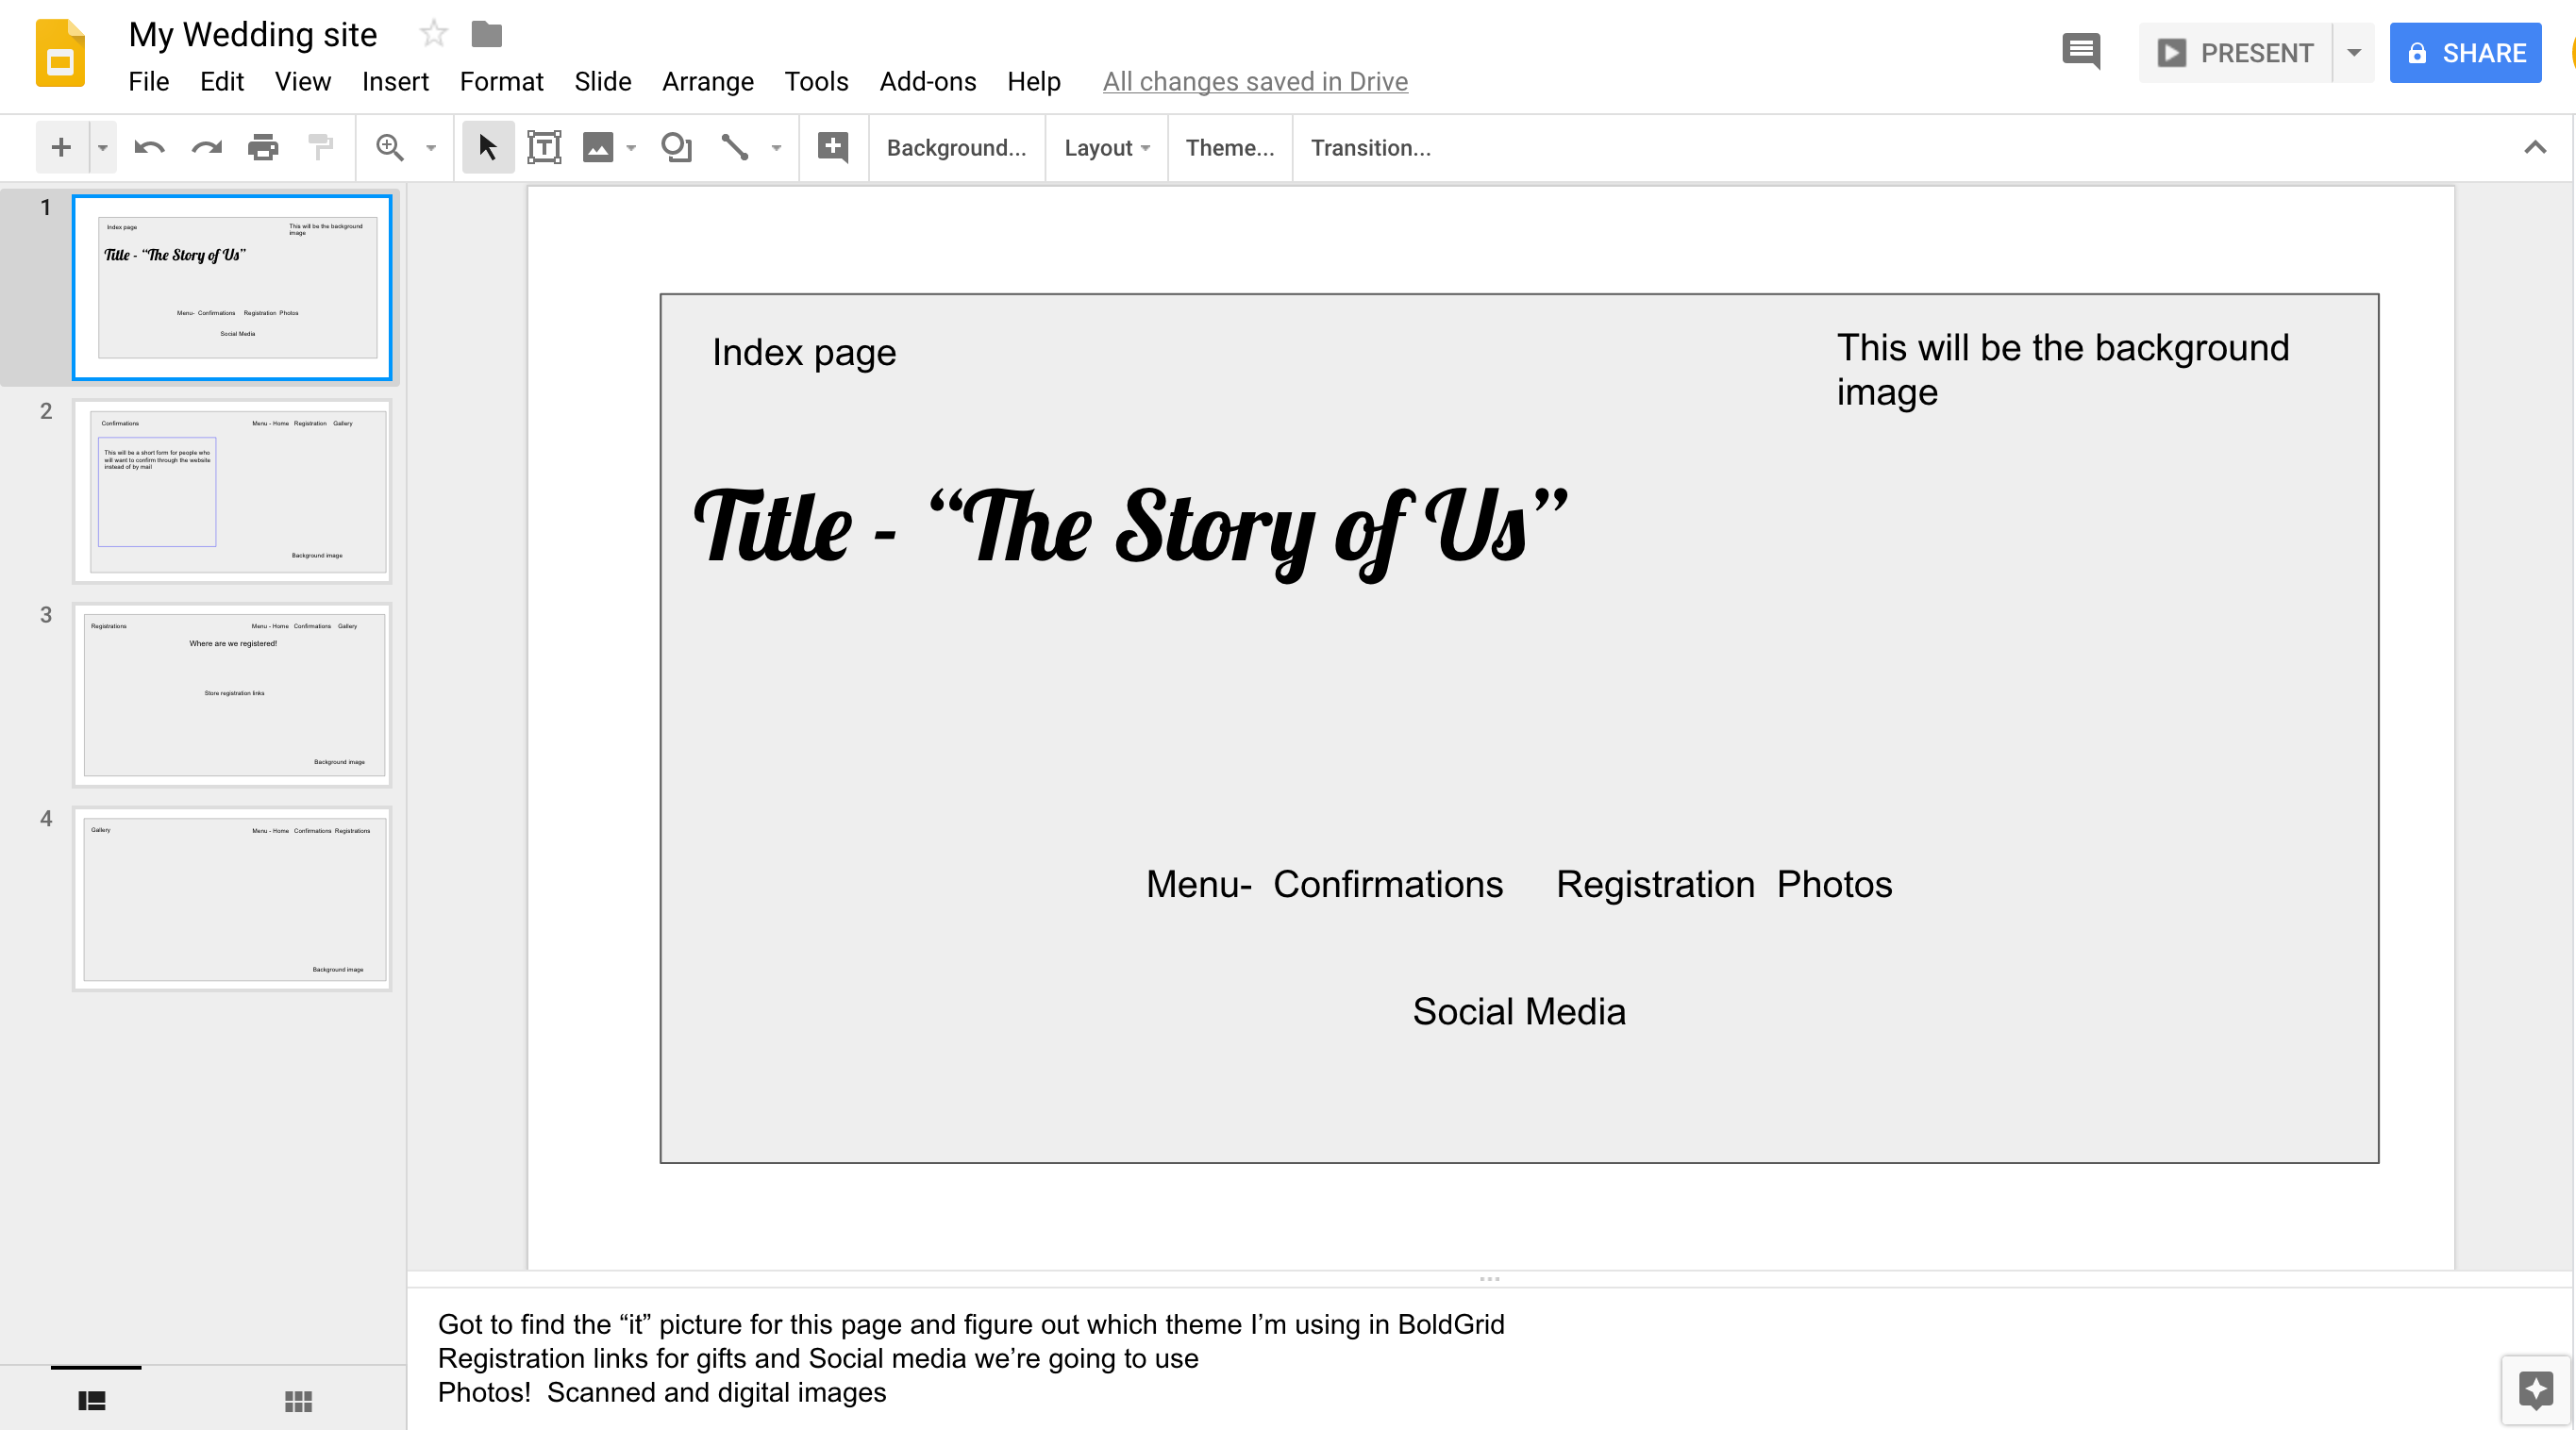 |  | 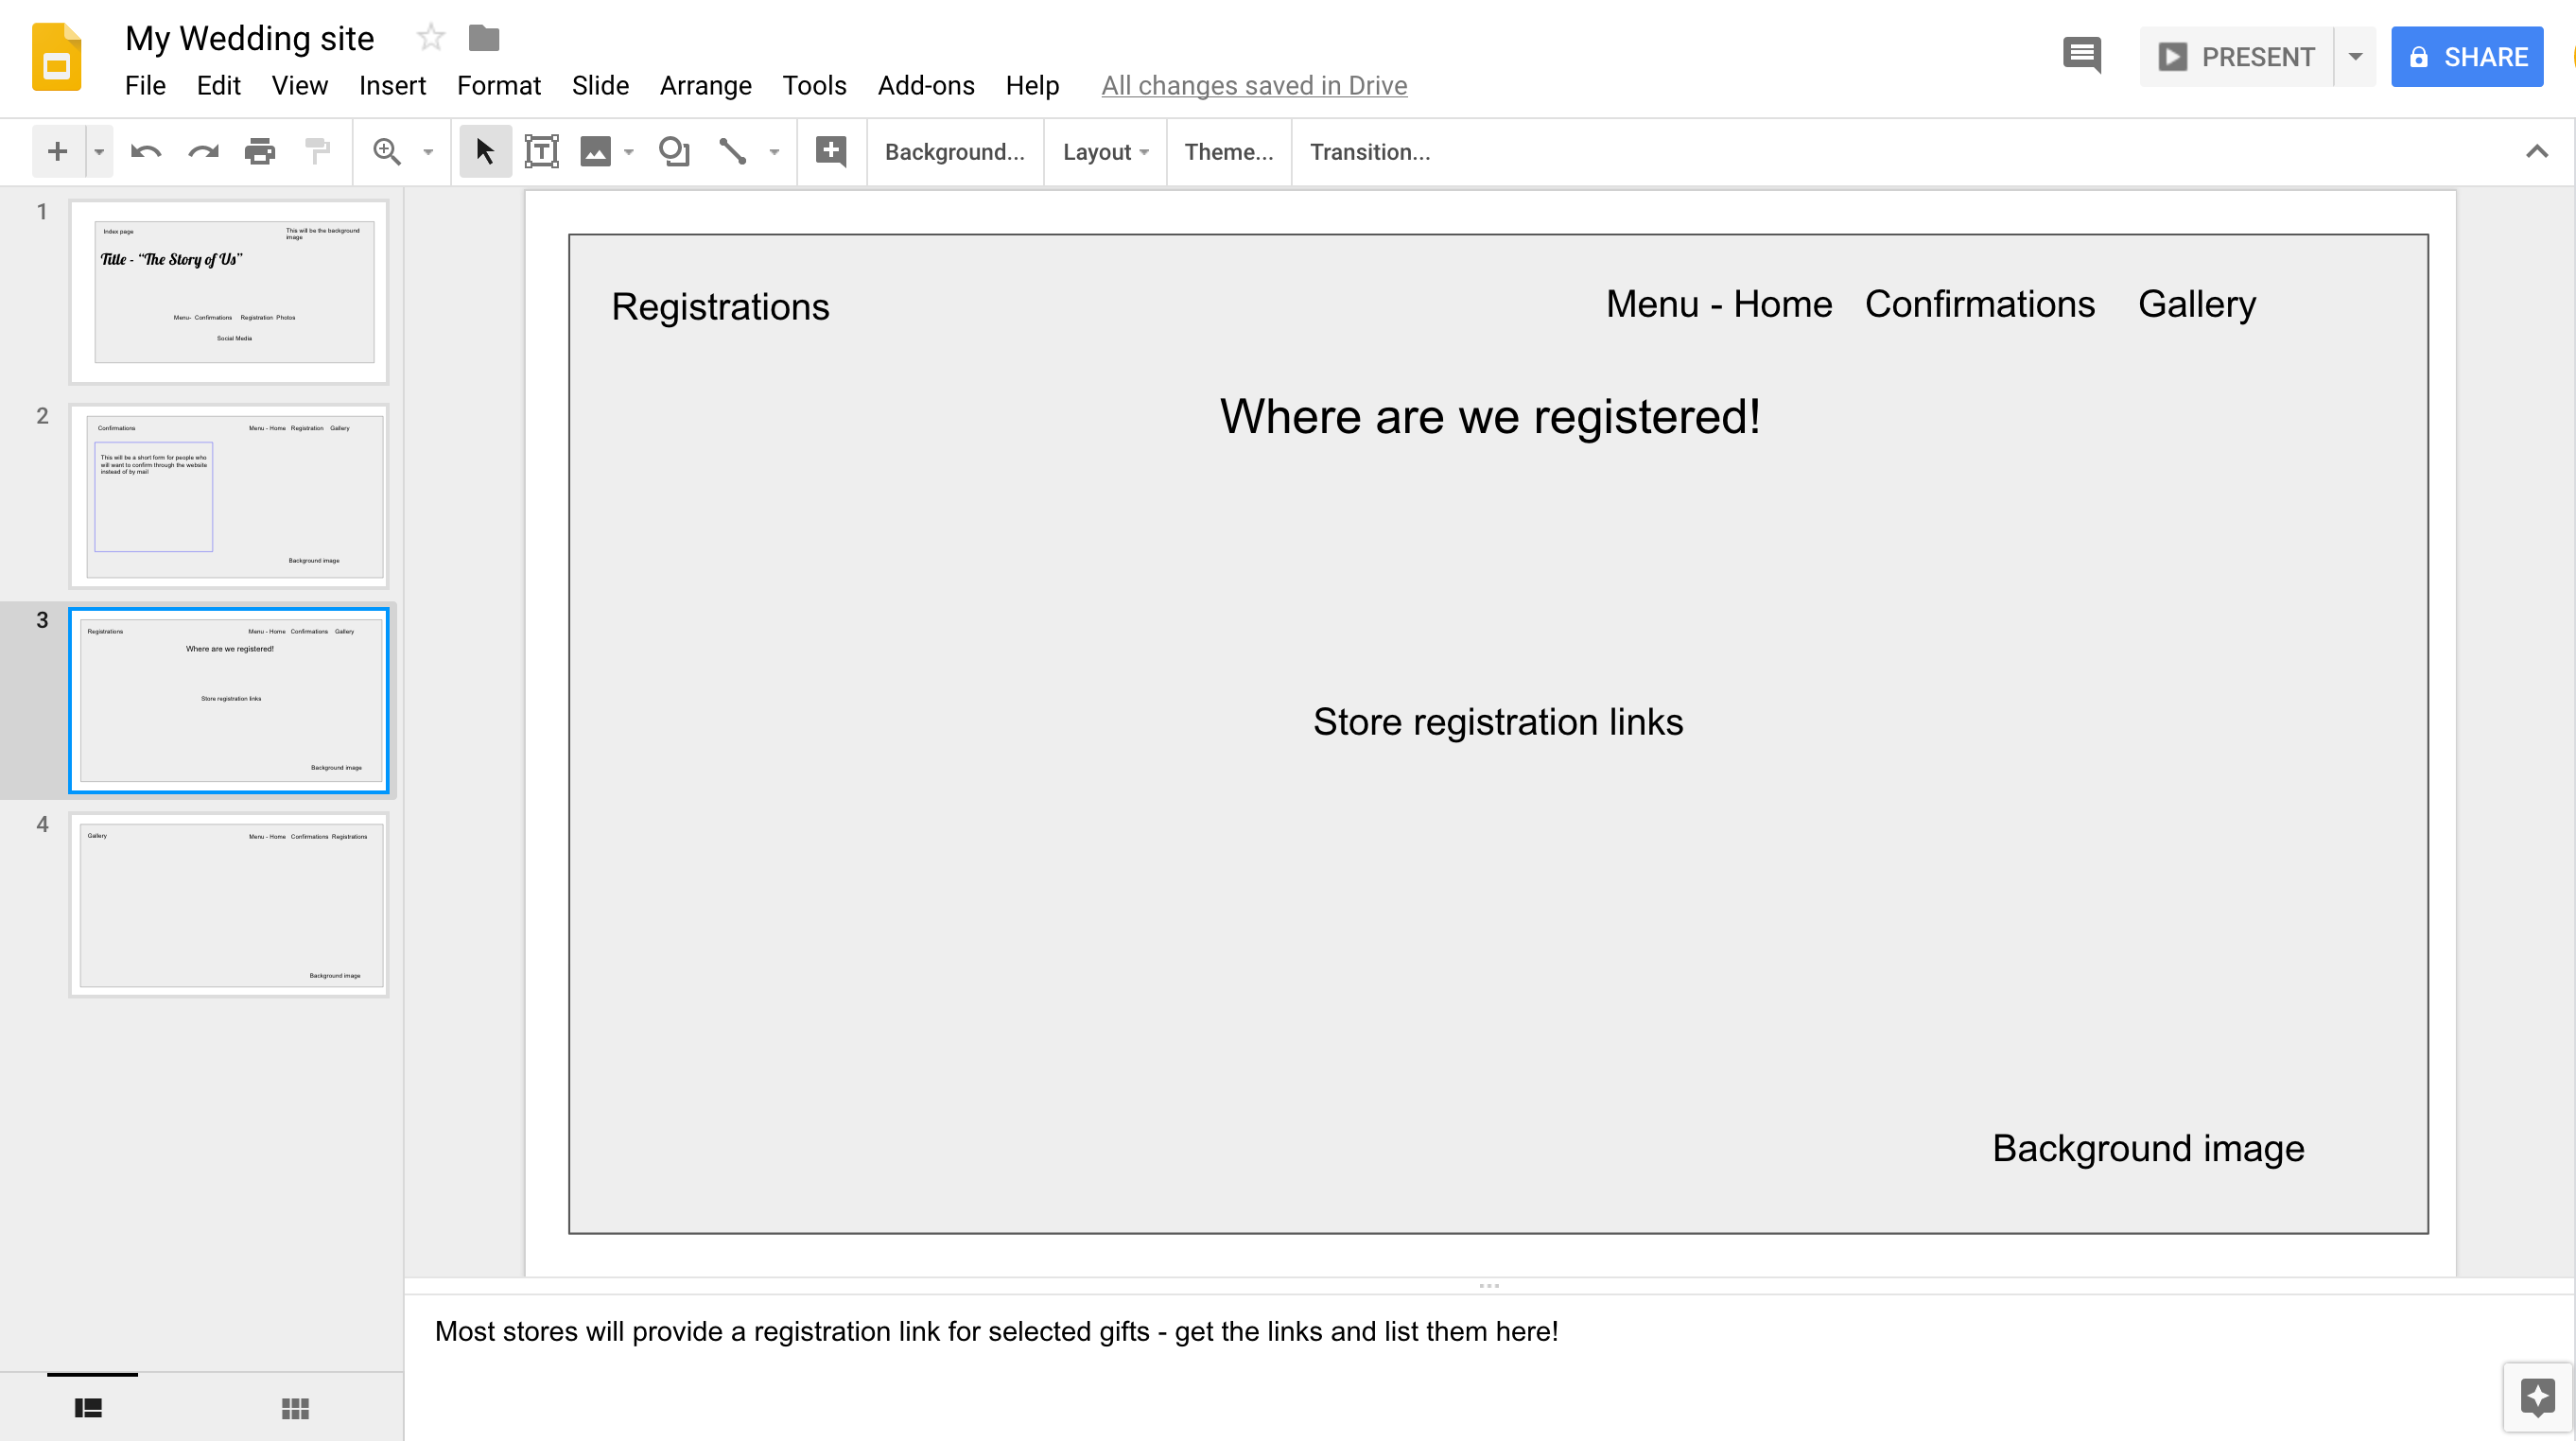 | 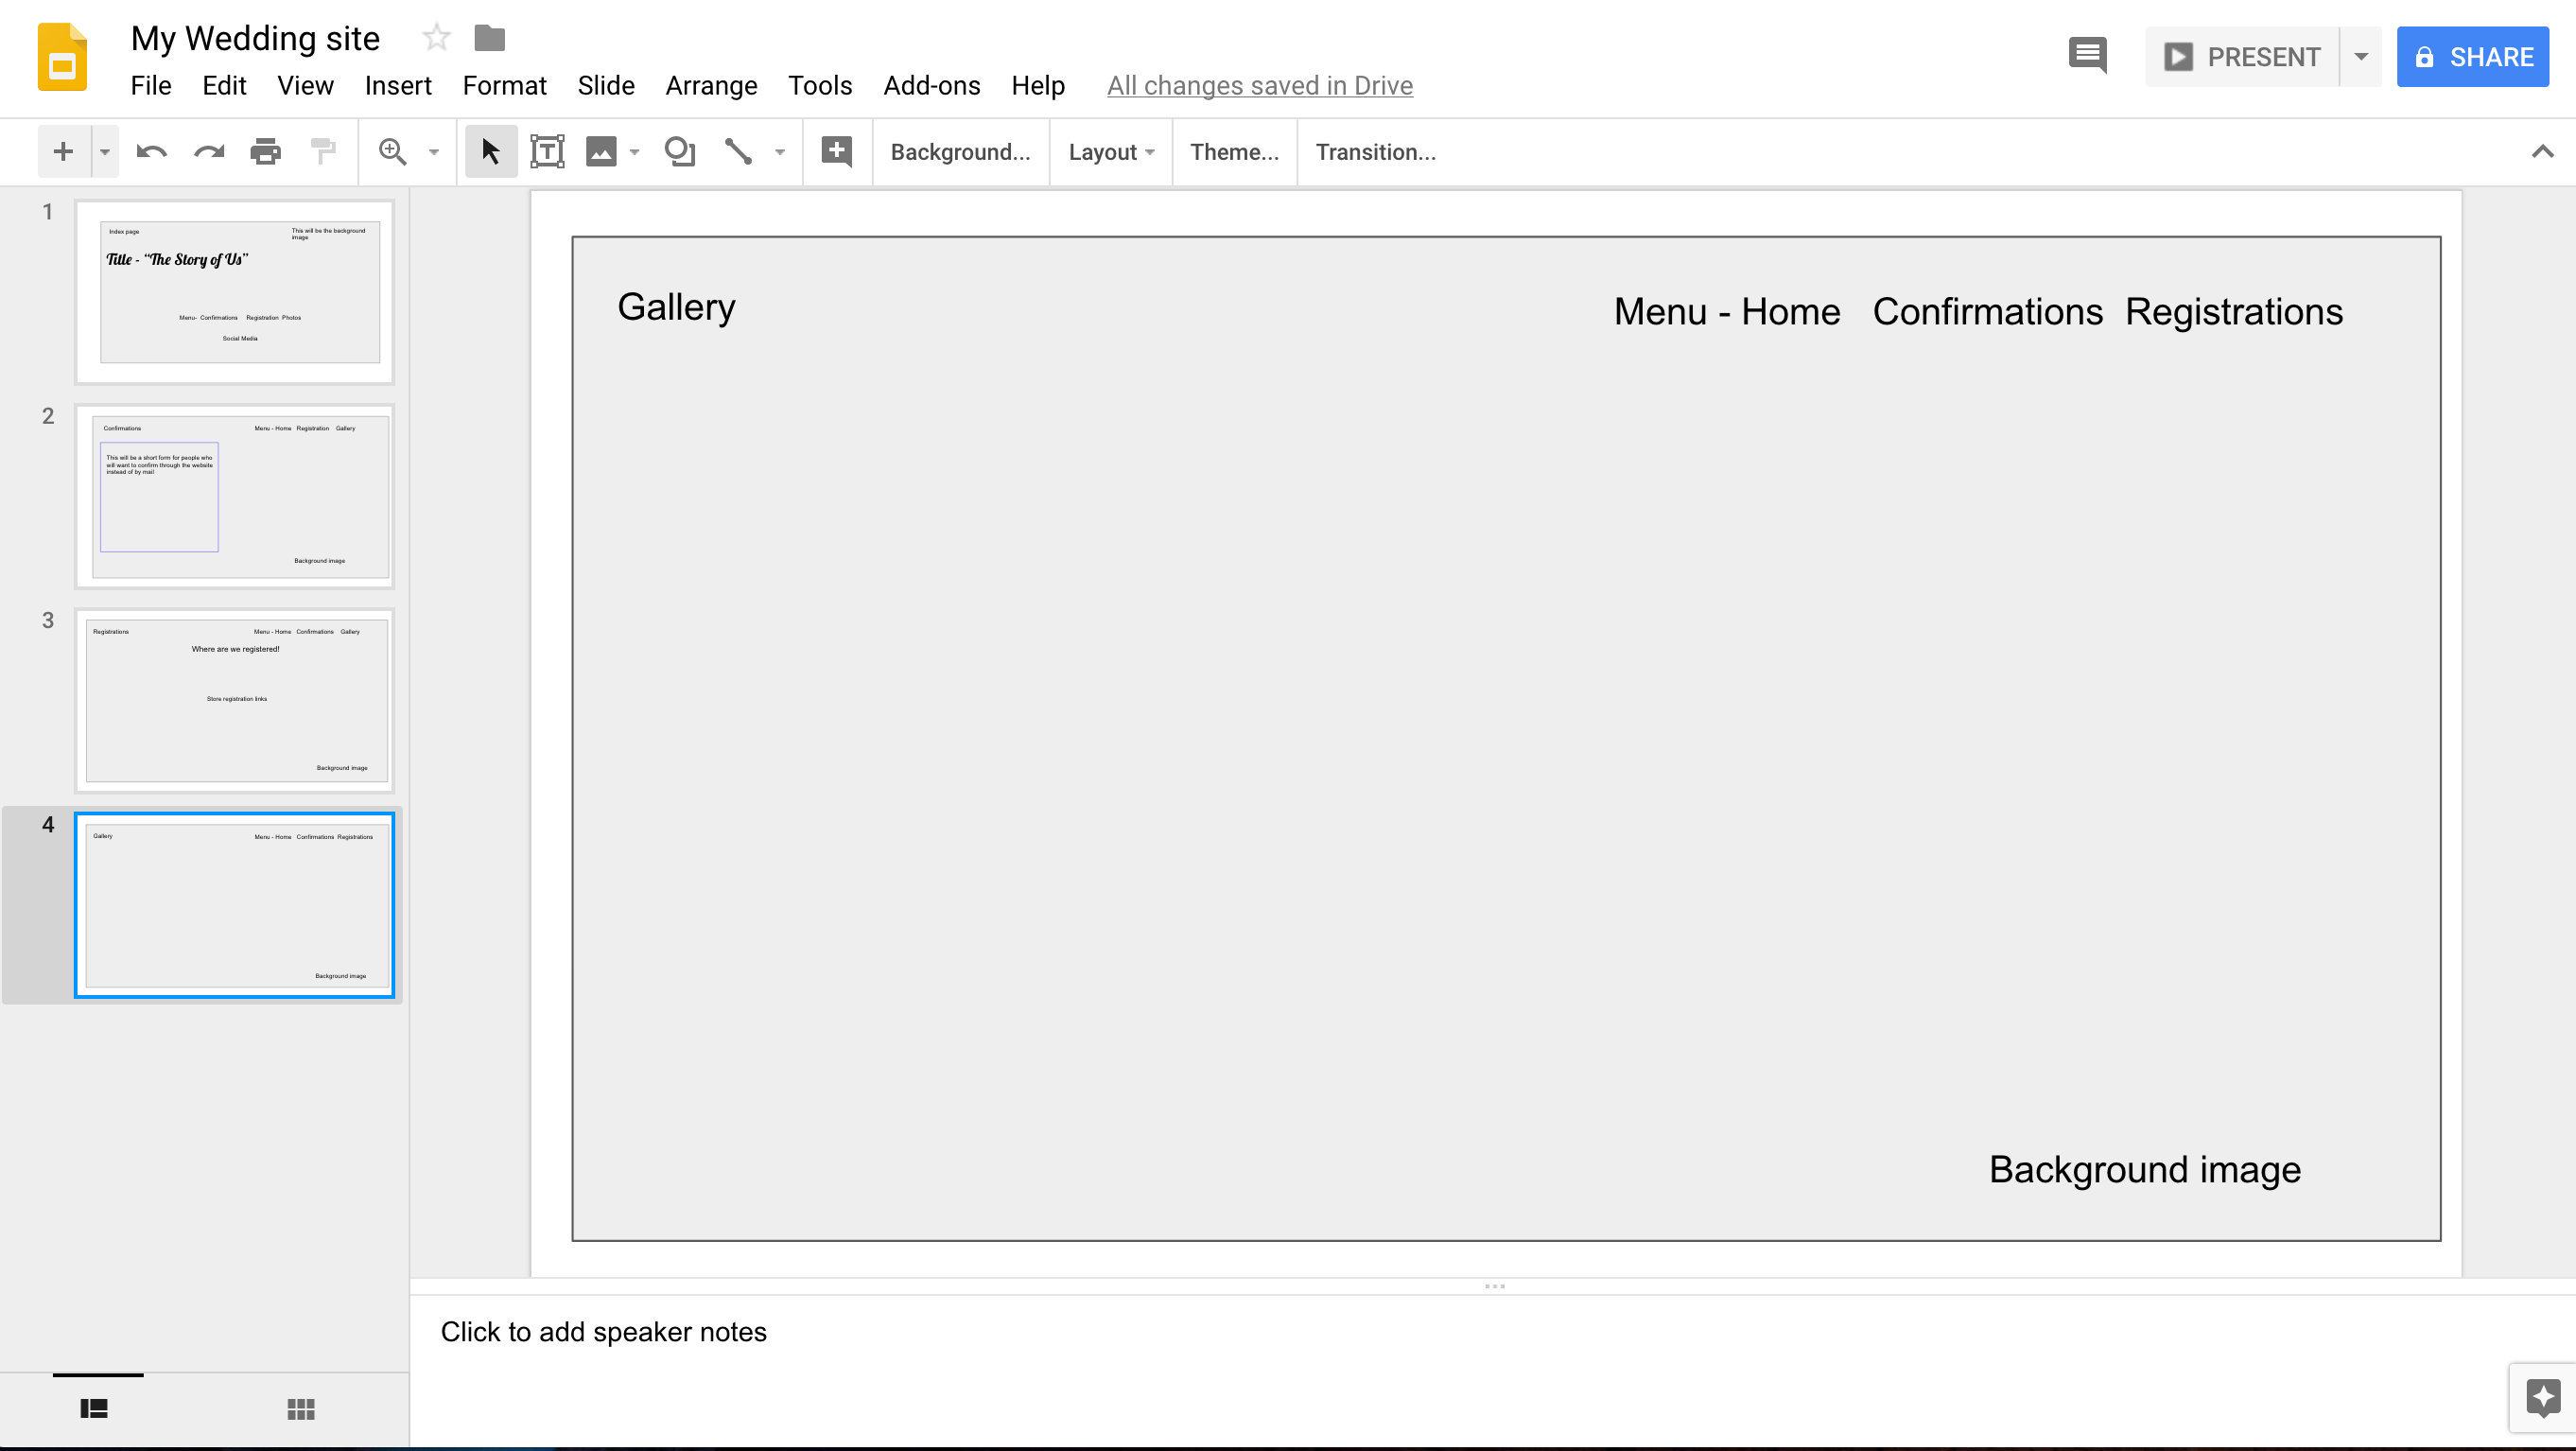 |
Determine the basics. You’ll need to find an image for your first page. Decide on the content you will share on the website. For example, your story, date and location info, registration info, pictures. Keep it simple. WordPress is very scalable – meaning that you can expand on it at any point. In your planning notes, dedicate a page for each page that you want to create. Bear in mind that the first web page -often called the index page or home page- will be where everything is linked. Typically, this is done with menus or links that BoldGrid will allow you to easily create.
Gathering your Content and Starting to Create the Structure of your Site
When you have it all planned out, then the next part will be to gather the content and begin setting up the framework for you pages. Since your website content will not be changing on a frequent basis, you will be using WordPress pages as opposed to posts.
Posts versus pages
When you create content in WordPress, it is usually in either a Post or a Page. Posts are typically updated and used with feedback. When you have several posts they are listed in reverse chronological order. A page basically doesn’t change frequently. So, for your Wedding site, if you have static information like location information, confirmation forms, a list of links, or a gallery, then you would be using Pages.
Keep Content Organized and Easy to Find
Keep your digital content organized and labeled so that you don’t crazy looking for it later. The Website Creator loads WordPress which includes a media library. You should keep your digital images, audios or videos copied to that library. To upload, simply login to the WordPress Administrator and then click on Media to add your files.
Starting up in BoldGrid
When you subscribe to the Website Creator the WordPress site with the BoldGrid plugin will be loaded for you. The BoldGrid system of plugins includes themes known as Inspirations. These are complete websites that you simply have to alter to meet your needs. Typically, it’s a matter of changing the images and text. This system allows you to quickly bring up a site with minimal effort if you use the existing structures. That said, the first thing you’ll want to do when you’re starting is to login to the BoldGrid Administrator Dashboard. Click on the Customize link and you will be sen to the BoldGrid Customization page where you can make a few quick changes:
Change the Site Title

Click on Site Title and Logo and then type in a new website title for your website. You can see it here in the screenshot at right.
Remove or Edit the Call to Action
It’s up to you to remove or edit the Call to Action which is a widget.
- If you are in the Administrator Dashboard, click on Customize and it will take you to the live Customize screen.
- Click on Widgets.
- Click on the edit icon that looks like a pencil and you will be given a screen to edit the text.
- Here you can edit the text or remove the Call to Action widget entirely. To edit the text, you simply have to click in the edit field. To remove the Call to Action, click on Remove located in the bottom left corner of the pop-up window to clear it from the page.
- Once you have completed removing or updating the widget, click on Publish in the top left corner to save your change.
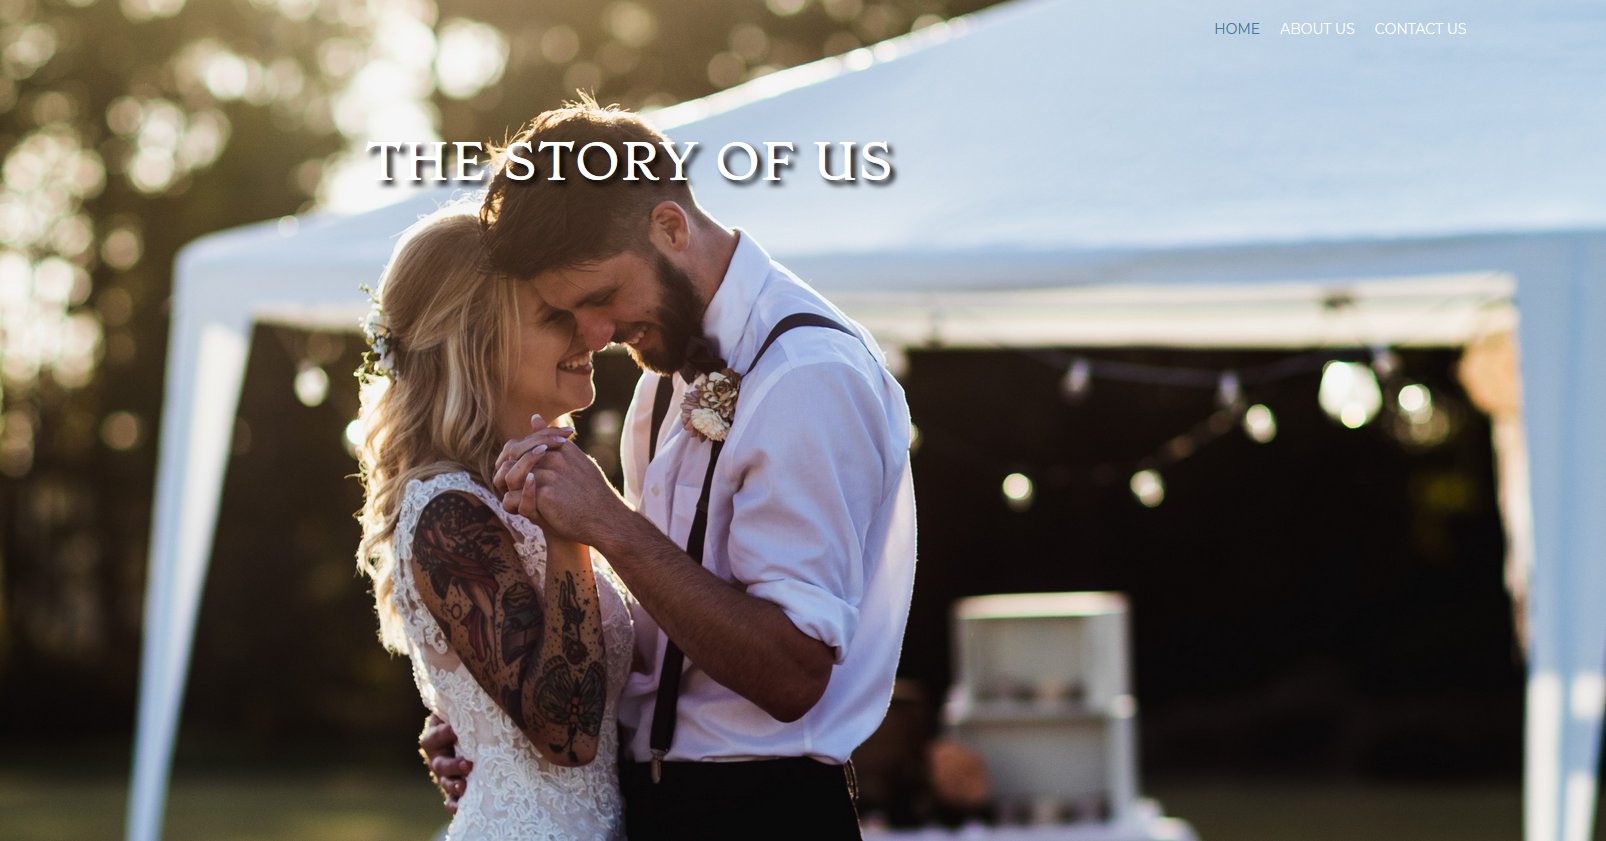
Home Page Background Image
One of the most important images that you will need to add to your site will be on your home page. This image is the first thing that people will see. The image for the theme that you’re working with can be found in the Background section of the Customizer menu. There will be a button labeled Change Image. When you click on it, the screen will jump to the Media Library and it will also list the recommended size for the image that you are replacing.
The images that are used on your site may come from a variety of sources. If you do not already have a graphics application available to you, then you may want explore the option of obtaining one. You don’t have to get an expensive one if you’re doing to simple changes or additions to your images. Even free options may meet your needs.
Once you have your home page image added, you can then concentrate on the text that you wish to add to the screen.
Build your Pages
When you have finished adding your home page content you can then concentrate on building the rest of the pages in your outline. You simply have to go to the Pages section and add a new page for each one that you have in your planning outline. If you don’t have the images or text ready, it’s okay. You can always go back and edit those pages later to add the content when you are ready. For now, simply make sure that each page is added for your content. This will help to build the menu for your site. For more information on creating pages within Website Creator, please see our tutorial on the BoldGrid Post and Page Builder.
Menus for Your Wedding Site
As you learn the menu system in Website Creator you will see that much of it is done for you. If for some reason you do not see the menu appear as you add your pages, then go to the Customizer and then click on Menus. You will be able to add a named menu as well as a Social Media menu. There will be a primary menu set up by default. Simply click on it, and the add pages.
This completes are tutorial for the basics in building a Wedding Website using the Website Creator. If you have any questions with using the Website Creator contact the InMotion Design Team via phone or email for further assistance!