Weebly makes web design easier. However, many users will advance to a level where they want more control over the code within their website(s). Many decide to migrate to the WordPress CMS (WordPress.org, not WordPress.com) for many reasons such as how easy it is to learn and its capabilities for novice and experienced users alike.
Unfortunately, Weebly doesn’t have an internal function for exporting a website. Weebly only has export functions for contacts, store order history, and product information. Much of the migration is using a third-party tool like WPBeginner’s Weebly to WordPress Importer and/or copying text and re-uploading media files. Below we cover these options in-depth.
Install WordPress
- Install WordPress manually or via Softaculous.
- Install and customize a preferred WordPress theme.
- Install any preferred and recommended plugins such as for backups, security, and optimization.
- Modify your primary menu to match your Weebly website.
Migrate Content
After installing WordPress we can migrate data from Weebly using a third-party tool or manually.
Export With WeeblytoWP.com
Created by WPBeginner, WeeblytoWP.com is a third-party tool that creates a file from your Weebly site for use with the WordPress import tool.
- Visit WeeblytoWP.com.
- Insert your Weebly website URL (starting with https:// or HTTPS://), name, and email account before clicking Export my Weebly Website.
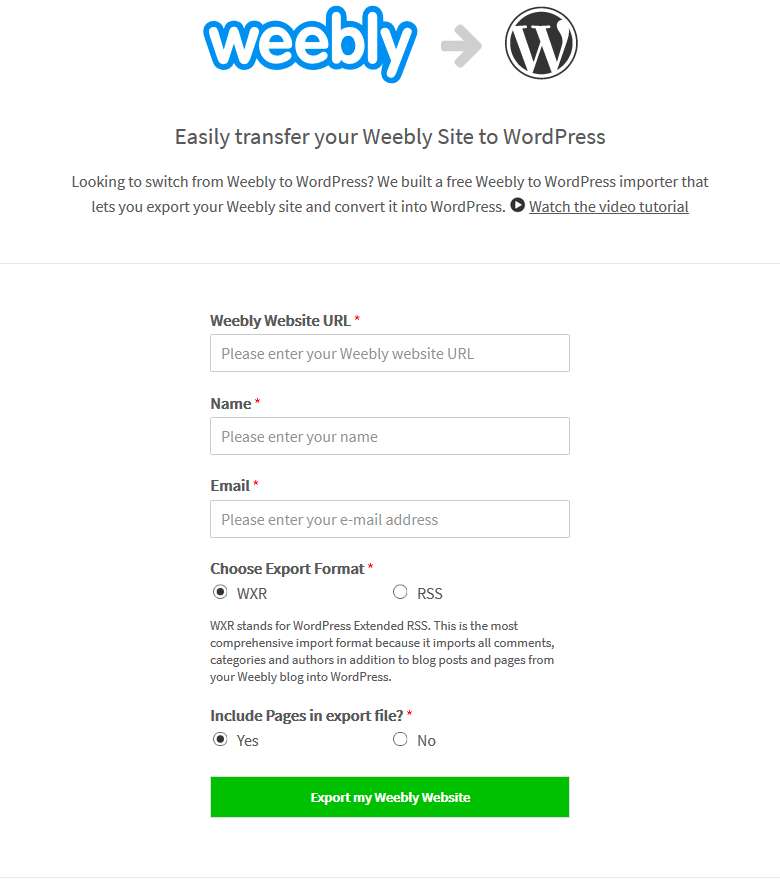
- Save the Export file.
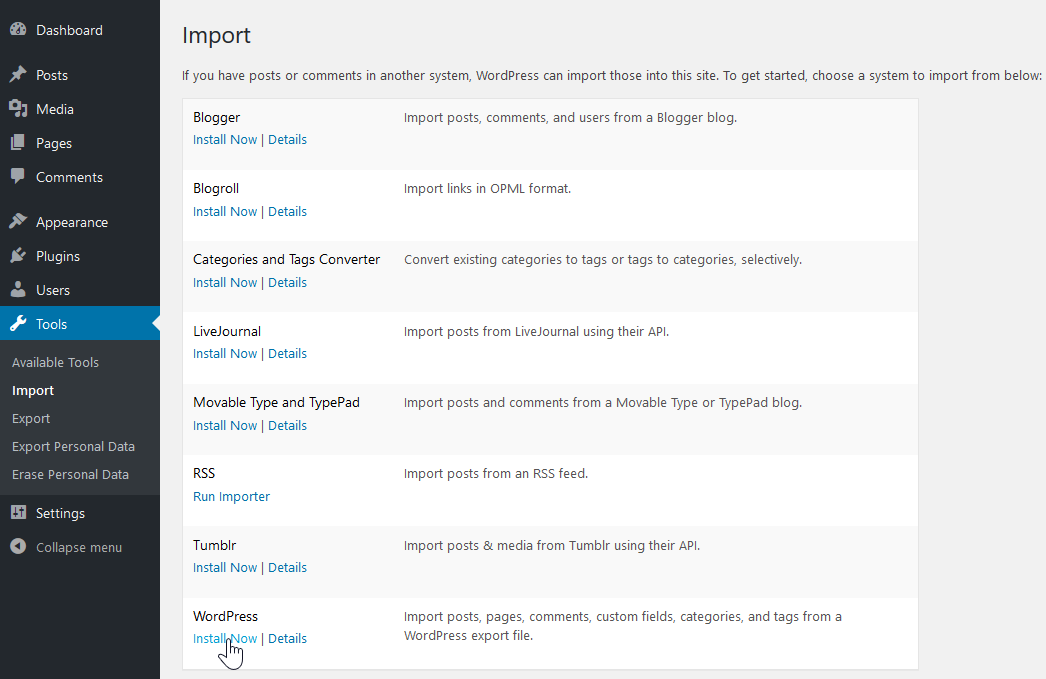
- In WordPress, after downloading your Weebly export file, select Tools and Import.
- Select WordPress to install and activate the WordPress Import Plugin.
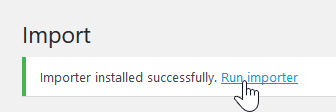
- Select Run Importer at the top of the screen.
- Browse for your RSS file before selecting Upload file and import.
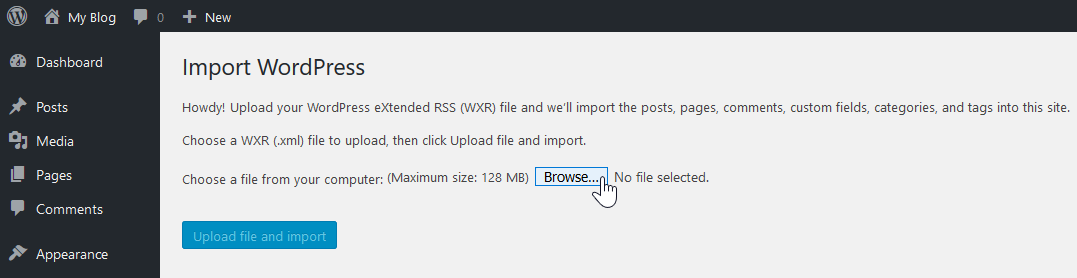
- Make any preferred changes to the Import Settings and assign an author to the imported posts. You can create an author or use an existing user.
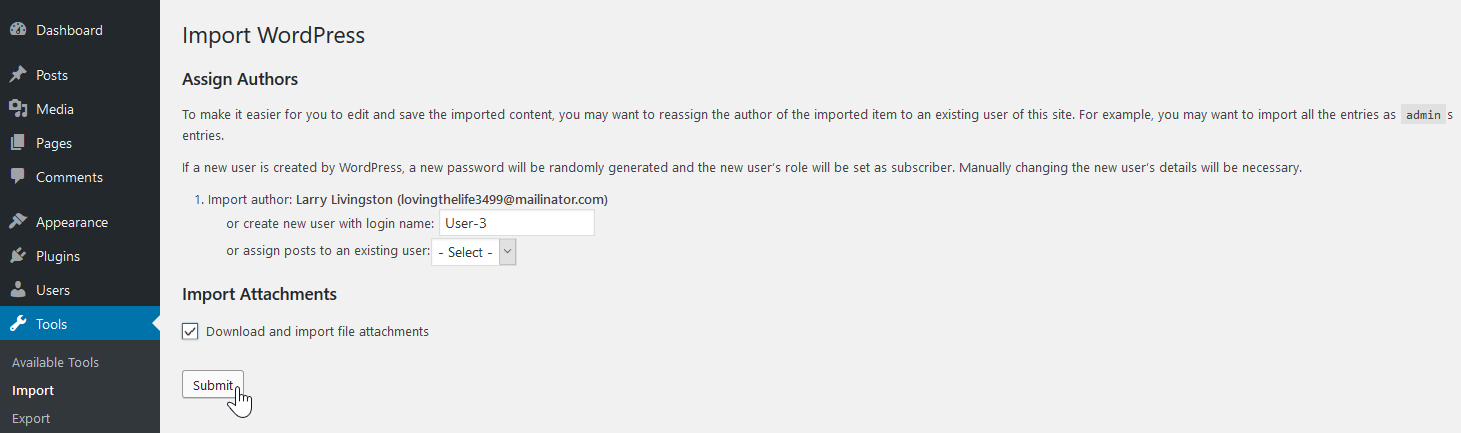
The imported content should now show in their respective sections in WordPress.
Import Content Manually
For anything the export file doesn’t import, copying text from your Weebly site to individual WordPress pages and posts will be the only option for migrating content.
- Create a new WordPress page or post.
- Copy the text from a page on your Weebly website and paste it into the WordPress visual editor.
- Edit the WordPress page or post to your preference.
- Save Draft or Publish to save your work.
Import Images
There are two ways to import images from your Weebly website:
- Use a WordPress plugin such as Save & Import Image from URL to import directly from Weebly.
The easiest way to get an image URL:
Chrome: Right-click the image and select Open image in a new tab.
Firefox: Right-click the image and select View Image.
Generic: Right-click the image and select Inspect Element to view the URL within the source code. - Download then manually upload all media files to your WordPress media library.
Note: Although you can upload images using FTP or cPanel File Manager, only media files uploaded to the WordPress media library can be selected from it.
Fix Permalinks
Permalinks determine the format of your website URL’s. You’ll likely want to change this to match the URL’s from your older website to ensure users don’t get 404 errors while trying to view any saved links. The most common options are Post name and Month and name. You can reset these settings at any time.
- While logged into your WordPress site, hover over Settings and select Permalinks.
- Here you can choose a common setting or create your own structure.
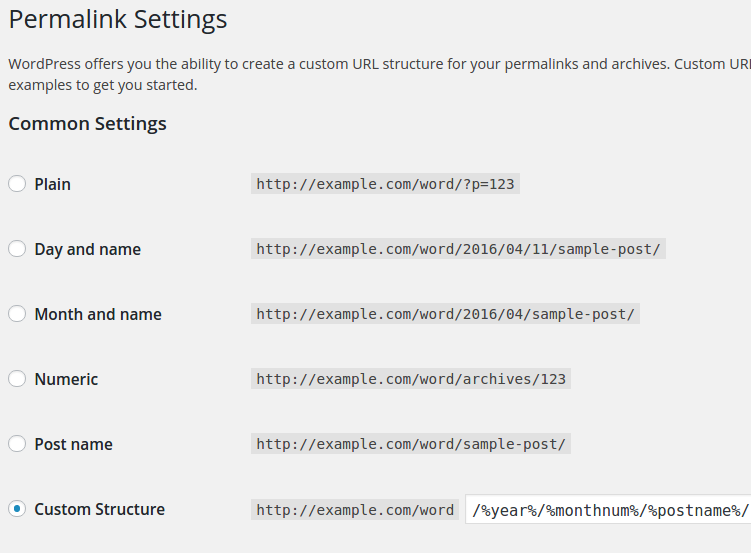
- Your changes take effect immediately after pressing Save Changes.
Change DNS Settings
After copying all data from Weebly to your WordPress site, you’ll need to update your domain settings.
Note: We recommend checking your WordPress website using a hosts file modification to ensure everything works before changing any DNS settings. Note that DNS changes may require ~4-24hrs to take effect.
If you registered a domain with Weebly, you’ll need to change the A record at Weebly.com to match your server IP shown in cPanel or the nameservers to ns1.inmotionhosting.com and ns2.inmotionhosting.com.
If you bought your domain elsewhere and pointed it to Weebly, you’ll need to change the Weebly A records to match your server IP shown in cPanel or nameservers to ns1.inmotionhosting.com and ns2.inmotionhosting.com .
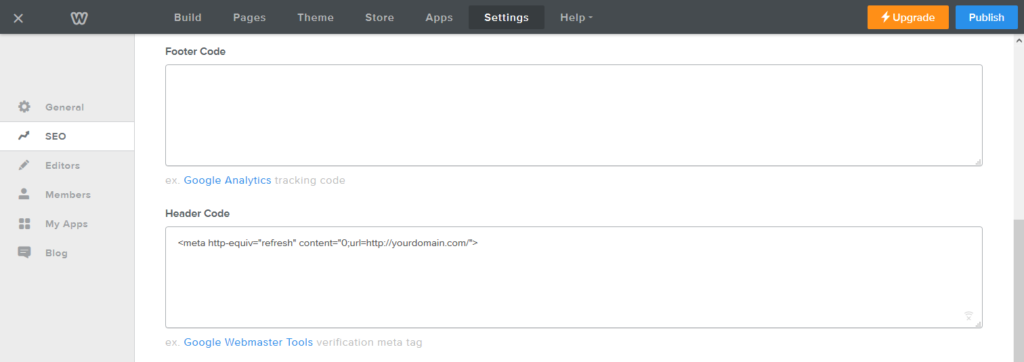
If you used a Weebly subdomain – e.g. example.weebly.com, you’ll need to purchase a domain to connect with your web hosting. In the meantime, you can use your temporary URL. Also, in the SEO section under Settings you’ll want to add the following to the header section to redirect users to the new domain:
<meta http-equiv=”refresh” content=”0;url=https://www.newdomain.com/”>
You can contact our live support 24/7 if you have issues migrating your website or implementing features similar to your Weebly site related to Secure Sock Layer (SSL), Search Engine Optimization (SEO), analytics, domain settings, and more. You can also check out our WordPress portal to learn more.